
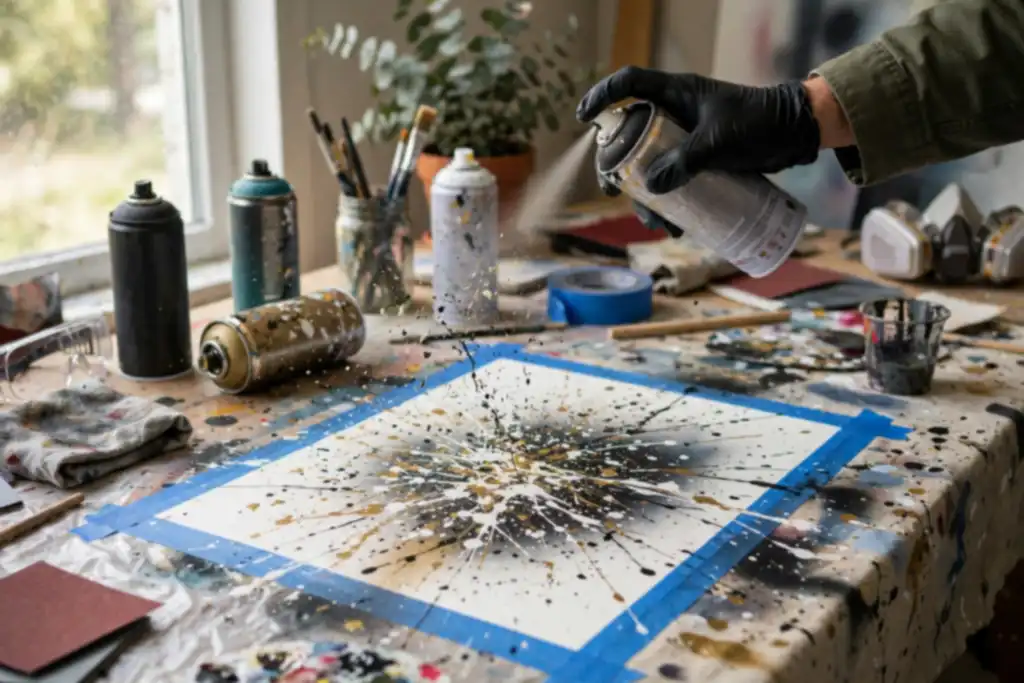
To splatter spray paint, you flick or spray paint from a controlled distance onto a masked surface, but the key is doing it safely with proper ventilation and a respirator so you avoid mistakes and get a clean, even pattern the first time.
Practice the spray paint splatter technique on a test surface before touching your project. Learn how to splatter spray paint by mastering flicking, masking, and distance control, so you avoid runs, overspray, and uneven speckles.
You will get a step-by-step method that covers safety gear, surface prep with primer, layering for depth, and drying time between coats. The goal is a controlled, repeatable splatter effect on wood, canvas, or metal, with no rework and no surprise mess.
- Test your splatter technique on a scrap surface before the real project.
- Mask off areas you want to keep clean, then apply primer for adhesion.
- Flick or spray from 8 to 12 inches for controlled speckles.
- Work in a ventilated space and wear a respirator for safety.
- Let each layer dry fully before adding the next, then seal with clear coat.
How to Splatter Spray Paint: Pick Your Splatter Size Before You Spray
Decide the splatter size first, then pick the tool that delivers it. Fine speckle comes from a can; fat drips come from a brush. Getting this wrong means sanding back and starting over.
| Your situation | What to do | Why |
|---|---|---|
| Fine speckle, under 1/4 inch | Spray straight from the can | Nozzle breaks paint into droplets |
| Fat drips, 1/2 inch and up | Flick from a loaded brush | Brush holds more paint per throw |
| Uneven or blotchy result | Shorten distance to 8 to 12 inches | Paint lands wet and blends |
| Paint runs down the surface | Back off to 14 to 18 inches | Droplets dry slightly in flight |
| Unsure how it will look | Test surface first | Cheap board saves a repaint |
| Working indoors | Ventilation plus respirator | Overspray travels farther than you think |
Recommended for this job
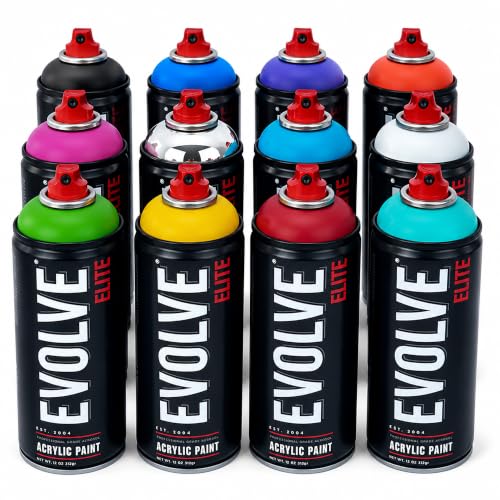
Evolve Elite
Provides assorted color cans for varied splatter effects and layered looks.

Odor/Particulate Multipurpose Respirator
Filters odor and particles while spraying to protect your breathing during splatter.

4 Rolls Premium Painters Tape
Masks edges and shapes to control where splatter lands on your project.
Flick from a Brush or Spray Straight from the Can?
Use the can for fine speckle and a brush for fat drips. A spray paint nozzle (the part that controls fluid flow) atomizes paint into dots roughly 1 to 3 mm wide at 8 to 10 inches. A loaded brush throws blobs 5 to 15 mm across.
Match the Method to the Splatter Size You Want
Load a stiff 1-inch brush, then snap your wrist toward the surface for large splats. For tighter speckle, hold the can 8 to 12 inches away and press the nozzle in 1-second bursts.
- Choose enamel for metal, acrylic for canvas and wood.
- Keep a spare nozzle on hand, since clogging ruins a pattern mid-pass.
- Practice flicking on a scrap test surface before touching the real piece.
The 5-Minute Pre-Splatter Check
Run this quick check before you flick a single drop of paint, because fixing a bad splatter job costs far more than five minutes of prep.
Is Your Surface Clean and Paintable?
Wipe it with a degreaser and let it dry fully. Oil or dust makes paint crawl. Sand glossy spots with 220-grit until dull, then prime.
Do You Have Ventilation and a Respirator?
Work in cross-flow air, indoors or out, and wear a respirator. A paper dust mask will not filter paint particles.
Is Your Paint Can Warm and Shaken?
Warm the can in tap water for 5 to 10 minutes, then shake a full 60 seconds. Warm paint sprays finer and clogs less.
Have You Tested on Scrap yet?
Mask your keep-clean zones, then test on scrap cardboard at 10 to 12 inches. Check droplet size and nozzle pattern before the real surface.
Run this quick check before you flick a single drop of paint, because fixing a bad splatter job costs far more than five minutes of prep.
Why Spray Paint Splatters the Way It Does
Nozzle Pressure, Distance, and Droplet Formation
Droplet size depends on pressure and distance. The nozzle controls fluid flow, deciding how much paint escapes and how coarse the mist is. Hold the can 8 to 10 inches away and droplets land wet and large; past 12 inches they dry mid-air into fine specks. Adjust in small steps and check each change on your test surface.
Shake the can for the full time the label lists, since thin paint spits unevenly. Keep the can moving; stopping in one spot causes runs.
Why Flicking and Spraying Give Different Speckles
Flicking throws discrete blobs; spraying delivers a mist. Flicking snaps paint off a brush or stick, giving bigger, random dots with hard edges. Spraying produces a finer, denser pattern you can build gradually. Use flicking for bold accents and spraying for even coverage. Mask off everything you want clean, since overspray travels farther than expected.
Flicking is snapping paint off a loaded brush or stick toward the surface to throw discrete blobs with hard edges.
Gear up: Paint, Primer, Masking, and Respiratory Safety
Respirator Selection for Solvent-Based Spray Paint
Solvent-based cans release VOCs, so a dust mask won’t work. Use a NIOSH-rated respirator with organic vapor cartridges and check the seal before every session.
Ventilation Setup That Actually Works
Open both ends of the space and push air across your work area. A box fan in a window pulling outward beats an open garage door alone; add a second fan for crossflow.
Primers and Paints That Splatter Well
Start with a primer on bare wood, metal, or plastic, then let it cure fully. High-solids enamel and lacquer cans fling better than thin formulas.
Masking Tape and Film for Controlled Edges
Masking keeps splatter where you want it. Tape plus plastic film protects trim, glass, and hardware; press edges down hard and pull tape while paint is still tacky.
- Match cartridges to the can’s label; replace when clogged or expired.
- Aim exhaust outward and keep a clear intake path.
- Practice on scrap material first.
- Build light coats with drying time between them.
- Cover floors and nearby surfaces; splatter travels farther than you think.
- Seal finished splatter with a compatible clear coat once dry.
- Cartridge check: Match the cartridge to the can's label and replace it when clogged or past its date.
- Fan placement: Aim exhaust outward and keep a clear intake path so fumes don't pool.
- Test surface: Practice flicking and distance on scrap material before touching the real piece.
- Layering plan: Build light coats and let drying time pass between them to avoid runs.
- Drop cloth: Cover floors and nearby surfaces; splatter travels farther than you think.
- Clear coat: Seal the finished splatter with a compatible clear coat once fully dry.
Step-by-Step: How to Splatter Spray Paint for a Controlled Speckle
Prep and Prime the Surface
Sand dull, wipe clean with degreaser. Apply primer and let cure fully, skipping it is the top reason splatter flakes off.
Mask off Keep-Clean Zones
Tape edges and cover adjacent panels with paper or plastic. Press tape edges down hard so wet paint cannot creep underneath.
Test Flick and Spray Distances on Scrap
Test on scrap first. Flick from 6-12 inches; spray from 8-10 inches to see how distance changes dot size. Adjust the nozzle until the pattern suits you.
Flick from a Brush for Fine Speckle
Load a stiff brush or toothbrush with paint and flick toward the surface. Keep wrist loose and distance consistent.
Spray Directly for Larger Splatter
Spray at close range, 8-10 inches away. Layer colors, letting each coat dry per label (typically 20-30 minutes). Finish with clear coat once fully dry.
Follow these steps in order and you will get a repeatable speckle pattern instead of a mess on your driveway.
Splatter on Canvas vs. Metal vs. Plastic: Adjust the Approach
Canvas and Porous Surfaces
Porous canvas absorbs wet paint, so seal it first with gesso or a primer coat and let it cure 24 hours. Work in thin layers, holding the nozzle 10 to 14 inches back, so the weave does not drink color unevenly.
Metal and Automotive Panels
Metal needs grip before it needs color. Scuff with 320 grit, wipe clean, apply an etching primer, then flick wider and let each pass dry 10 to 15 minutes to prevent runs. For car work, confirm your spray paint and clear coat are compatible with the existing finish.
Plastic and Low-Energy Surfaces
Plastic releases paint easily, so prep decides the outcome. Sand lightly, clean with a plastic-safe prep wipe, and prime with a plastic-rated product. Hold the can 8 to 10 inches away and flick fast, since slow passes pool quickly. Finish all three surfaces with two light clear coat passes.
Each surface grabs and holds paint differently, so match your setup to the material before you flick a single drop.
Fixing Blobs, Spiders, and Unwanted Overspray
Most splatter problems trace back to one of three things: distance, paint volume, or surface prep. Diagnose before you repaint, because a second coat over a wet mistake makes it worse.
| Problem | Likely cause | Fix |
|---|---|---|
| Blobs instead of specks | Nozzle too close or held still | Back off to a farther distance and flick quickly |
| Spider legs at edges | Too much paint per pass | Lighten the burst and add layering |
| Splatter too fine to see | Nozzle too far from surface | Move in closer and test on a scrap |
| Paint ran or sagged | Heavy coat on a slick surface | Scuff, apply primer, recoat thinner |
| Faint or uneven coverage | Skipped primer or short drying time | Prime first, respect drying time |
| Overspray on trim | Missing masking or drop cloth | Mask edges and cover the floor |
| Unwanted specks on finish | Wet clear coat or drift | Let it cure, then level and polish |
Splatter Too Big or Too Fine?
Adjust distance and burst length before touching the nozzle. Move farther for finer specks, closer for bigger drops, and always confirm on a test surface first.
Paint Ran or Sagged?
Runs mean too much paint landed too fast. Scuff the area, apply primer, and rebuild with thinner passes, giving each layer its drying time.
Drying time is the interval a coat must sit before the next layer, typically twenty to thirty minutes for most spray paints.
Removing Unwanted Splatter
Let it cure, then level carefully. Mask surrounding areas, wet sand the specks, and polish; on cured paint, solvent helps but test first.
Drying, Curing, and Keeping Your Gear Clean
Cure Times Before Handling or Clearing
Let each coat dry to the touch before adding another, typically 20 to 30 minutes for most spray paints, but check your can’s label for the exact window. Full curing takes longer, often 24 hours to a few days depending on humidity and film thickness. Handle lightly until then, and apply clear coat only after the paint has fully cured. Rushing causes wrinkling and lifting.
Cleaning Nozzles and Brushes
Clear the nozzle right after each session to prevent clogs. Invert the can and spray a few seconds until only propellant comes out, then wipe the tip with a solvent-dampened cloth. Clean brushes and tools immediately with the appropriate thinner before paint sets.
Storing Spray Cans Safely
Keep cans upright in a cool, dry spot away from heat, flames, and direct sun. Store below 120°F and out of reach of kids and pets. A sealed bin in a garage works well; label cans with the date so you use older stock first. Proper storage protects the nozzle and keeps paint usable for months.
DIY Splatter Supplies vs. Pro Finish: What It Really Costs
A DIY splatter setup usually runs $40 to $120 in supplies, while a pro shop finish can start around $150 to $600 depending on panel size and prep. The ranges below assume a small to medium project, one to two cans of color, and standard consumer products.
| Option | Upfront cost | Ongoing cost | Notes |
|---|---|---|---|
| Rattle cans (2 to 4) | $15 to $40 | Per project | Buy one extra for touch-ups |
| Primer (aerosol or quart) | $10 to $30 | Per project | Required for adhesion on bare metal |
| Clear coat (aerosol) | $10 to $25 | Per project | Two light coats minimum |
| Masking tape and film | $8 to $20 | Per project | Cheap insurance against overspray |
| Respirator and filters | $25 to $50 | Filters every few months | N95 is not enough for solvents |
| Drop cloth and gloves | $10 to $25 | Reusable | Cover everything within 10 feet |
| Pro splatter job (shop) | $150 to $600 | Not applicable | Quote depends on panel and cure time |
| Pre-made splatter wrap or panel | $60 to $300 | Not applicable | Fastest route, least control |
Costs are typical US retail ranges for a small to medium project (roughly one hood, door, or canvas up to 3 by 3 feet) using consumer-grade spray paint, primer, and clear coat. Pro rates vary by region, surface prep, and whether the shop bakes the finish. Ranges exclude surface repair and shipping.
Budget $40, $120 for a DIY splatter setup on a small to medium surface, covering spray paint, primer, clear coat, masking supplies, and a proper respirator.
DIY Supply Breakdown (Paint, Primer, Clear, Masking, Respirator)
Biggest costs: respirator ($25, $50) and paint ($15, $40). Masking and drop cloths add $18, $45; primer and clear coat run $20, $55.
- Spray paint: two to four cans, one spare for touch-ups.
- Primer: needed on bare metal and slick plastics.
- Clear coat: protects splatter from UV and handling.
- Masking: tape and film keep overspray off everything else.
- Respirator: solvent-rated cartridges, not a dust mask.
Pre-Made Splatter Finishes and Pro Shop Rates
Pro splatter jobs quote $150, $600 per panel, including prep and cure. Pre-made wraps or panels cost $60, $300 and skip the learning curve.
Choose pro for visible, valuable, or uniform surfaces; stay DIY if you can practice on a test surface and control ventilation.
How Heat, Humidity, and Cold Change Your Splatter
Humidity and Blushing
High humidity slows solvent flash-off and can leave a milky haze called blushing on fresh paint. Keep relative humidity under about 60 percent when you can, and add extra drying time between coats, often 2 to 4 hours instead of 1. A primer coat helps seal the surface so moisture has less to grab onto.
Cold Cans and Thick Droplets
Cold weather thickens paint inside the can, so droplets land heavy and lumpy instead of fine. Warm the can in your hands or a bucket of warm water for a few minutes, and keep the nozzle at the same distance you dialed in on your test surface. Too close means blobs, too far means dust.
Wind and Overspray Drift
Breeze carries overspray onto cars, siding, and neighbors’ property, so spray outdoors only on calm days or build a simple windbreak. VOC levels matter too: wear a respirator rated for organic vapors, keep ventilation strong, and follow EPA and manufacturer disposal guidance. Masking and drop cloths protect everything you are not splattering.
Seven Splatter Mistakes That Ruin the Finish
Skipping the Scrap Test
Always test the splatter technique on scrap material first. A test surface reveals how your nozzle, distance, and pressure behave before they touch the real piece.
The splatter technique is the controlled method of flicking or spraying paint from a can or brush to create a speckled pattern.
Over-Thick Coats
Heavy layers stay wet too long and sag or crack. Build thin passes and respect the manufacturer’s drying time between them.
No Masking
Masking means covering areas you want to keep clean, and it is what controls where splatter lands. Tape and paper off trim, glass, and hardware before you start flicking.
Wrong Respirator
Use a respirator rated for solvent vapors, not a dust mask. Spray in a ventilated space and keep a drop cloth down to catch overspray.
- Primer first: bare surfaces need a primer coat so paint grips and does not flake.
- Clear coat last: seal the splatter pattern once it is fully dry.
- Layering: let each pass dry before adding the next for depth.
- Test on scrap material before touching the real surface.
- Build thin coats instead of one heavy pass.
- Mask off areas you want to protect.
- Wear a solvent-rated respirator and ventilate the space.
- Apply primer to bare surfaces first.
- Seal with clear coat after full drying time.
When to Call a Pro (Automotive and High-Value Surfaces)
Clear Coat and Blend Failures on Car Panels
Stop if you plan to clear coat over splatter on a factory car finish and you have never sprayed clear coat before. Clear coat is a protective top layer, and a bad blend shows as a visible edge or haze that wet sanding will not fix. One uneven coat can mean a repaint costing several hundred to a few thousand dollars.
Large-Scale or Production Splatter Work
Call a pro when the job covers more than a small panel or when repeatable results matter. A shop can control booth conditions, drying time, and layering so each piece matches. Ask about ventilation and respirator requirements before anyone sprays indoors.
- Stop if the surface is a car panel with original or custom paint you cannot afford to ruin.
- Stop if you cannot set up ventilation and a respirator rated for solvent vapors.
- Stop if the splatter must match an existing pattern across multiple pieces.
- Stop if the surface is a high-value artwork, instrument, or collectible.
How to Splatter Spray Paint: Frequently Asked Questions
?Can I Splatter Spray Paint Without a Respirator?
No. Skip the respirator and you breathe atomized paint and solvent, which is exactly what your lungs are built to reject. Wear a NIOSH-rated respirator rated for paint vapors, and pair it with ventilation: open the garage door, set up a fan pulling air out, and keep the space moving. A dust mask is not a respirator and won't protect you from solvent vapor.
?How to Splatter Spray Paint Without Wrecking the Surface Around It?
Mask off everything you don't want speckled before the nozzle comes out. Masking means covering adjacent areas with tape and paper so paint lands only where you intend. Use a wider masking margin than you think you need, because flicking sends paint farther than spraying. Add a drop cloth below and behind the piece. Pull tape while the paint is still slightly tacky for clean edges.
?Does the Distance from the Nozzle Change How to Splatter Spray Paint?
Yes, distance controls speckle size and spread. Close in and you get tight, heavy dots; back off and the paint breaks into finer, wider-scattered specks. Pick your distance on a test surface first, then lock your wrist and repeat it. Changing distance mid-piece gives you an uneven splatter technique and a finish that looks accidental instead of designed.
?How to Splatter Spray Paint so It Actually Sticks and doesn't Flake off?
Start with primer. Primer is a preparatory coating put on the surface before paint so the topcoat bonds instead of sitting loose. Clean and scuff the surface, apply primer per its label, and let it cure fully. Then splatter, let the spray paint dry, and seal with clear coat. Skipping primer or clear coat is the fastest route to a splatter that peels within a season.
?What Causes Blobs and Spider Legs When I Splatter Spray Paint?
Too much paint in one spot, usually from a clogged or too-close nozzle. A nozzle is the device that controls fluid flow, and a partially clogged one spits instead of speckles. Clear or swap the nozzle, shake the can longer, and lighten your flick. If a blob lands anyway, let it dry and sand it back rather than wiping wet paint into a smear.
?is Layering Splatter Spray Paint Safe Over Fresh Paint?
Only after the base layer has reached its listed drying time. Layering wet-on-wet traps solvent and causes wrinkling, lifting, or a permanently soft finish. Check the can for recoat windows, many have a window before or after which recoat is safe. Build thin layers, let each one flash off, and keep ventilation running the whole time.
?When Should I Test How to Splatter Spray Paint Before Hitting the Real Piece?
Always, and on the same material as the final surface. A test surface tells you how your paint, nozzle, distance, and flick behave together before you risk a car panel or finished canvas. Run two or three passes, note the drying time, and adjust. Five minutes of testing beats sanding and repainting an entire project.
Conclusion
Getting a clean splatter comes down to control: keep the nozzle at a consistent distance, thin your paint if it clogs, and always prove the pattern on a test surface before touching the real piece. Masking, the process of covering areas you want to protect, saves you hours of cleanup, and proper ventilation plus a respirator (a device that filters the air you breathe) keeps the job safe. Layering light coats and respecting drying time between passes prevents runs and uneven speckles.
Your best next step is to set up a dedicated practice board and dial in your flicking and spray distance there first, so the final surface gets the pattern right the first time.
Sources and further reading: guidance from OSHA, EPA.