
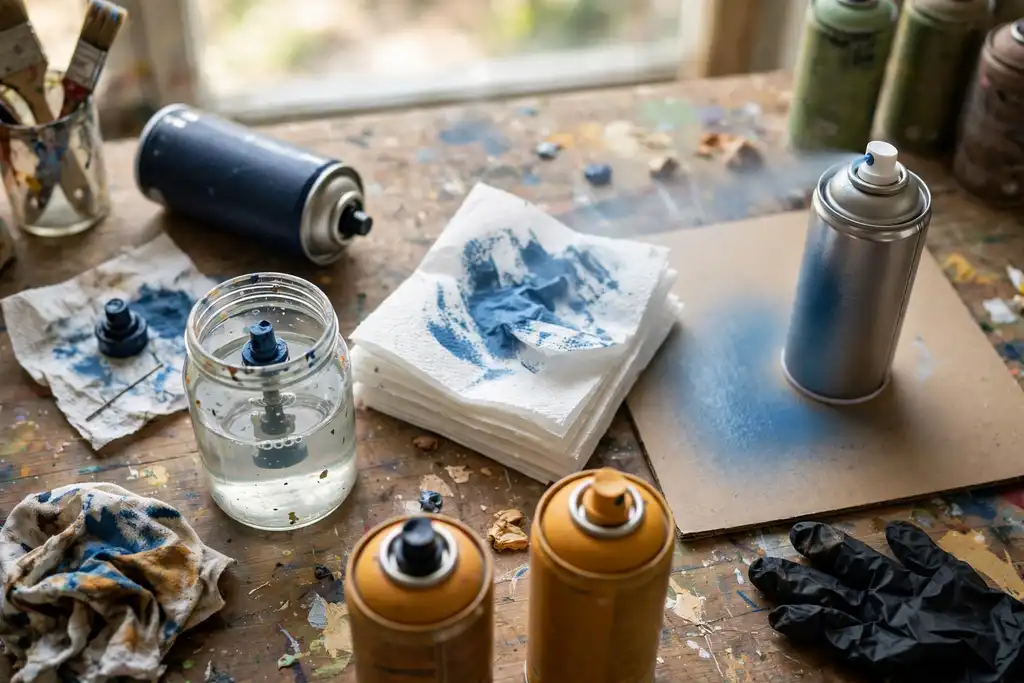
To unclog a spray paint can, clear the clogged nozzle or valve with a pin or a short soak in paint thinner, but only after you confirm the can is not pressurized and you are wearing safety glasses and gloves.
You can try to force a clogged nozzle with a pin, or you can follow a safe, step-by-step method that protects the can, the paint, and you. Learning how to unclog spray paint cans correctly means you clear the valve, dip tube, or nozzle without turning a simple blockage into a ruptured aerosol can or a face full of solvent.
This article gives you the straight procedure: how to identify where the clog sits, when to use a pin versus soaking in paint thinner or acetone, and how to rinse and dry parts so the can sprays evenly again. You will also get the safety rules that prevent the most common mistakes, from skipping ventilation to shaking a can that should be left alone.
- Confirm the can is not pressurized before removing or probing any part.
- Clear a clogged nozzle with a pin, then soak in paint thinner if needed.
- Never poke the valve or dip tube while the can is under pressure.
- Wear safety glasses and gloves, and work with strong ventilation.
- Rinse and dry parts fully, then shake and test spray on scrap.
How to Unclog Spray Paint Cans: the Quick Decision Before You Start
A blocked spray paint can is usually a nozzle problem, not a dead can. Decide what you are dealing with first, because the wrong fix wastes paint or, worse, turns a pressurized can into a hazard.
| Your situation | What to do | Why |
|---|---|---|
| Spitting or uneven spray | Clear the clogged nozzle first | Partial blockage sits at the tip |
| No spray, can feels full | Check valve and dip tube | Paint is not reaching the nozzle |
| Nozzle caked with dried paint | Soak in paint thinner, then rinse | Solvent dissolves hardened paint |
| Valve stuck or hissing | Stop and replace the can | A damaged valve cannot be fixed safely |
| Can older than a few years | Replace nozzle, test, then decide | Old paint often clogs again fast |
| Rattle ball stuck when shaking | Replace the can | Paint has likely separated for good |
Recommended for this job

Spray Can Nozzle
Replacement nozzle tips restore spray flow when original can tip clogs.
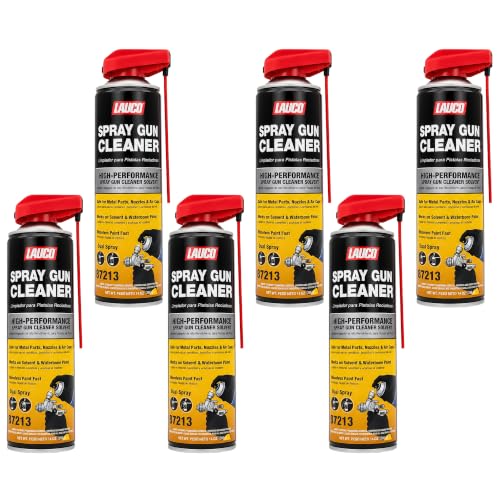

Sunnyside Pure Odorless Paint Thinner
Odorless thinner soaks and softens clogged paint residue inside spray nozzles.
Is It Worth Cleaning or Time to Replace?
Clean the can if it still has pressure and the clog sits in the clogged nozzle or dip tube, the tube that pulls paint up from the bottom. Replace it if the valve, the spring-loaded button that releases paint, leaks or will not seat. A nozzle swap costs under $5; a bad valve means the can is done.
Diagnose first: weak or spitting spray points to the nozzle. Nothing coming out of a full, heavy can points to the valve or dip tube.
Your 30-Second Safety Check
Put on safety glasses and gloves and work outside or with a fan moving air. An aerosol is paint particles suspended in gas, so one stray burst can hit your eyes before you blink.
- Reject any spray paint can that is dented, rusted at the seam, or warm to the touch.
- Point the nozzle away from your face and never push a pin into a pressurized valve.
- Keep paint thinner and acetone, a fast-evaporating solvent, away from pilot lights and flames.
5-Minute Diagnostic: Nozzle, Valve, or Dip Tube?
Test 1: Does Paint Spray at All?
Shake the spray paint can for 60 seconds, then spray a 2-second burst onto cardboard from 8 to 10 inches away. A weak sputter points to a clogged nozzle or valve; nothing at all suggests the dip tube or propellant is the problem.
Test 2: is the Nozzle Visibly Blocked?
Pop off the clogged nozzle and look through it against a light. Dried paint around the opening means soaking in paint thinner or acetone for 10 to 15 minutes will likely clear it.
Test 3: Does the Valve Depress Smoothly?
Press the valve stem once with a gloved fingertip. It should spring back instantly; a sticky or sunken valve needs solvent soaking, not force.
Test 4: is the Dip Tube Loose or Clogged?
Shake the spray paint can near your ear and listen for a rattle. No sound, or a sputter after shaking, means the dip tube is loose or clogged.
Run these four quick checks before you touch a tool, so you fix the right part of the spray paint can the first time.
How a Spray Paint Can Clogs (and Why Cleaning Works)
The Anatomy of an Aerosol Can
An aerosol is a pressurized mix of paint and propellant, pushed out through a valve and tiny nozzle. Pressing the button forces paint up the dip tube, through the valve, and out as a fine mist. Any dried paint in this small path blocks flow.
Where Clogs Form: Nozzle, Valve, and Dip Tube
Sputtering or crooked spray points to a clogged nozzle; no spray at all usually means a stuck valve or blocked dip tube. Start with the nozzle, which clears fastest.
- Nozzle: paint crusts over the exit hole.
- Valve: dried paint jams the spring-loaded stem.
- Dip tube: pigment settles and plugs the tube.
Why Solvents and Pressure Matter
Solvents dissolve cured paint and pressure flushes residue out. A paint thinner or acetone soak softens hardened paint, then propellant clears the passage. Skip the soak and poking a pin may damage the opening.
Before You Start: Tools, Safety Gear, and Ventilation
Get your gear and supplies together first. A few minutes of prep keeps paint off your skin and fumes out of your lungs.
Safety Gear and Ventilation You Actually Need
Wear safety glasses and gloves before you touch a clogged nozzle. Work outdoors or in a garage with the door open and a fan pulling air away from you.
Tools You Already Have at Home
You need a pin, a rag, and warm water for most clogs. Add paint thinner and acetone for stubborn blockages.
Using Paint Thinner or Acetone Safely
Both are strong solvents, so keep them off your skin and away from flames. Acetone, a fast-evaporating solvent, and paint thinner, a paint-dissolving solvent, belong in labeled metal containers.
- Safety glasses: wear them whenever you clear a clogged nozzle or valve, since solvent and paint can spray back.
- Gloves: nitrile gloves protect your hands from paint thinner and acetone during soaking and rinsing.
- Ventilation: work outdoors or with a fan moving air away from your face; aerosol fumes build up fast in closed rooms.
- Pin or wire: a thin pin clears the tiny hole in a clogged nozzle without enlarging it.
- Rags and warm water: use them for wiping parts and rinsing water-based paint residue.
- Paint thinner: keep a small amount in a labeled metal container for dissolving oil-based paint.
- Acetone: store it in a labeled metal can, away from heat and open flames, for tough clogs.
Step-by-Step: How to Unclog a Spray Paint Can Nozzle
Remove the Nozzle and Soak It
Pull the clogged nozzle off the can and soak it 10-15 minutes in paint thinner or acetone. Work outside or with strong ventilation; wear safety glasses and gloves.
Clear the Nozzle with a Pin or Needle
Push a pin or fine needle through the opening from outside in, wiggle gently to break up the plug, and flush with thinner. Don’t enlarge the hole or the spray pattern will be ruined.
Clean the Valve and Dip Tube
Wipe the valve with a thinner-dampened rag. Hold the can upright and give two short bursts to clear the dip tube. Never poke anything into the valve.
Rinse and Dry the Nozzle Before Reattaching
Rinse with clean water or fresh thinner, shake out excess, air dry a few minutes, then press firmly back on. A wet nozzle dilutes the first spray and can reclog.
Test Spray on Scrap Material
Shake the can a full minute and test on cardboard or scrap wood for an even fan pattern. If it sputters, repeat soaking and clearing once.
Work through these steps in order, and keep safety glasses and gloves on the whole time because trapped solvent can spray back at you.
Second Path: Replace the Nozzle or Can Instead of Cleaning
Using a Replacement Nozzle from Another Can
Any nozzle from an empty can of the same brand and spray pattern will fit, so keep dead cans for parts. Twist the old nozzle off, press the donor on, and test on cardboard first.
- Pull the nozzle straight up, never sideways, to avoid cracking the valve.
- Match the tip code to your project.
- Wear safety glasses and gloves, and work with ventilation.
When to Replace the Nozzle or Can
Replace the nozzle if soaking and a pin cannot restore flow. Replace the whole can if the valve stem is bent, cracked, or leaking paint.
A can that hisses after you release the button or drips from the rim is a hazard. Retire it and take it to a household hazardous waste site rather than puncturing it.
Warm Water and Soap Method for Water-Based Paints
Water-based paint residue dissolves in warm water and dish soap, no solvent needed. Skip acetone and paint thinner; they are for solvent-based coatings only.
- Fill a small cup with warm water and add two drops of dish soap.
- Drop the clogged nozzle in and let it soak for 10 minutes.
- Rinse, blow through the opening, and reinstall while damp.
When cleaning fails or the damage runs deeper than the tip, swap parts or the whole can rather than fight a losing battle.
Troubleshooting: Spitting, Uneven Spray, and Other Annoyances
Spitting, sputtering, and lopsided spray patterns usually trace back to a partly clogged nozzle, valve, or dip tube, not a bad can. Match the symptom to the cause before you start poking at anything.
| Problem | Likely cause | Fix |
|---|---|---|
| Spitting and sputtering | Partly clogged nozzle or valve | Clear the clogged nozzle, then shake and retest |
| Uneven fan pattern | Paint drying on the nozzle tip | Wipe the tip with paint thinner and retest |
| Weak or fading spray | Low propellant or clogged dip tube | Warm the can in your hands, then clear |
| Paint drips and blobs | Nozzle partly blocked, too close | Clear the clogged nozzle and spray farther back |
| Spray stops after a second | Valve stuck or paint settled | Shake for a full minute and clear the valve |
| Nozzle won't spray at all | Cured paint in the opening | Soak the nozzle in acetone, then rinse |
Why is My Spray Paint Spitting?
Spitting almost always means the clogged nozzle or valve is passing paint unevenly. Shake the spray paint can for a full minute, then clear the nozzle with a pin. If it still spits, the valve is partly blocked and needs a short soak.
How to Fix Uneven Spray Patterns
An uneven pattern usually comes from dried paint on the nozzle tip. Wipe the tip with paint thinner, a solvent that dissolves paint, and retest on cardboard. Keep the can upright so the dip tube stays in the paint.
Cleaning the Cap and Button
Pull the button and cap off and soak them in acetone, a strong solvent, for a few minutes. Rinse, dry, and reseat them firmly. Wear safety glasses and gloves, and work with ventilation.
How Weather and Storage Affect Clogs (and What to Do)
Cold Weather and Thick Paint
Cold thickens paint and increases clogged nozzles. Warm the can to room temperature for 1-2 hours, away from heaters or flames. Shake for a full minute once warm. If the valve sticks, soak it briefly in paint thinner to dissolve residue.
Humidity and Water-Based Paints
High humidity slows curing and lets water-based paint skin over inside the nozzle. Wipe the tip after every coat and test spray before storing. In damp seasons, keep the cap tight and store cans in a dry cabinet. Early clogs often clear with a pin and rinse.
Storing Cans Upside Down or Clean Nozzle
Store cans upside down or clean the nozzle after each project to prevent clogs. Upside-down storage lets residual paint settle away from the valve. Wear safety glasses and gloves, ensure ventilation, soak the nozzle briefly in acetone, then rinse and dry. Clear the dip tube with a pin only if the aerosol still sputters.
Doing It on a Budget: Clean, Don’t Replace
Tools You Already Have at Home
You probably own everything needed to clear a clogged nozzle without buying a rebuild kit. A pin, a toothpick, and an old jar cover most jobs. Add safety glasses and gloves before you start.
Skip the wire brush and drill bits. Puncturing the valve or scratching the nozzle seat turns a cheap fix into a replacement. Keep a rag handy for drips.
Using Paint Thinner or Acetone Safely (Without Waste)
Paint thinner is any of several solvents used to dissolve paint, and acetone is a fast-evaporating chemical compound that attacks cured paint quickly. Either works for soaking a clogged nozzle, but acetone dries out rubber seals, so limit contact time.
- Work outside or in strong ventilation, away from pilot lights and water heaters.
- Soak only the nozzle, never the whole spray paint can.
- Rinse with clean thinner, then shake and test spray on cardboard.
Cap the jar between uses. A little solvent goes far, and proper disposal matters under EPA household rules.
Cost: DIY Cleaning vs Pro Replacement
Cleaning a blocked can yourself usually costs less than a replacement, but only if the nozzle and valve are salvageable. Below are typical US ranges, stated with their conditions.
| Option | Upfront cost | Ongoing cost | Notes |
|---|---|---|---|
| Replacement nozzle | $3 to $8 | $0 | Cheapest fix if the valve still works |
| Solvent (paint thinner or acetone) | $5 to $15 | $0 | One can lasts many cleanings |
| Pin or nozzle pick | $0 to $5 | $0 | Often already on hand |
| Safety glasses and gloves | $5 to $20 | $0 | Reusable, one-time buy |
| Full DIY cleaning | $10 to $40 | $0 | Assumes solvent and tools on hand |
| Pro nozzle replacement | $15 to $40 | $0 | Shop labor, if they service it |
| New spray paint can | $6 to $15 | $0 | Replaces paint too, not just hardware |
Typical US retail and shop ranges as of 2024; assumes a standard 12 oz aerosol can, solvent bought in small quantities, and safety gear reused across jobs. Pro service pricing varies by shop and may not be offered for consumer cans.
DIY Cleaning Costs (Typical Ranges)
Expect $10 to $40 total if you buy solvent, a pin, and safety glasses. A replacement nozzle alone runs $3 to $8, and paint thinner or acetone usually costs $5 to $15 per container.
When to Replace the Nozzle or Can
Swap the nozzle first when spray is uneven but the can still hisses cleanly. Replace the whole spray paint can if the valve leaks, the dip tube is damaged, or soaking and rinsing fail twice.
Rinsing means flushing the nozzle with clean water or fresh thinner to remove loosened paint and solvent residue before drying and reattaching.
What a Pro Charges (and When It’s Worth It)
A shop may charge $15 to $40 to clear or replace a nozzle, and many won’t touch consumer cans. It’s worth it only for specialty or automotive aerosol cans where matching paint costs more.
Common Mistakes: Puncturing, Heating, and Other Dangerous Moves
What Not to Do: Drilling, Poking Valve, Heating
Never drill into a spray paint can or jam a pin down the valve opening. A pressurized aerosol is a colloid of fine liquid droplets in gas, and puncturing it can release propellant violently. Poking the valve can also bend the stem and turn a simple clogged nozzle into a scrapped can.
Heat is just as dangerous. Warm water is fine for loosening paint, but flames, ovens, and space heaters can overpressure the can and cause it to rupture.
Avoid Puncturing or Heating the Can
Stick to safe clearing methods: remove the clogged nozzle, soak it in paint thinner or acetone, then rinse and test. Keep safety glasses and gloves on, and work with ventilation.
If the valve or dip tube itself is blocked, do not force it. Replace the can or nozzle instead of risking a burst.
Disposing of Clogged Cans Safely
Take unsprayable cans to your local household hazardous waste facility, which follows EPA guidance for aerosols. Do not toss them in curbside recycling or trash, and never puncture them to empty them.
- Drilling or poking: never drill the can or jam a pin into the valve, since pressure can release violently.
- Heating hazards: skip flames, ovens, and space heaters; warm water only for loosening paint.
- Safe clearing: remove the clogged nozzle, soak it in paint thinner or acetone, rinse, and test.
- Valve problems: if the valve or dip tube is blocked, replace the can or nozzle instead of forcing it.
- Wear gear: safety glasses and gloves plus ventilation prevent splashes and fumes.
- Disposal: bring dead cans to a household hazardous waste facility per EPA guidance.
- No trash or recycling: never puncture a can to empty it or put it in curbside bins.
When to Call a Pro (or Safely Dispose of the Can)
Real Warning Signs You Shouldn’t Ignore
Stop if the can feels hot, bulges, or hisses after releasing the button, a damaged valve or blocked dip tube can build pressure. Take it outdoors, away from people, and let it sit. Call a pro or household hazardous waste facility if it’s dented, leaking, or the clogged nozzle won’t clear after one short soak. Never puncture, crush, or heat an aerosol can.
Disposing of Clogged Cans Safely
Treat an unclearable can as hazardous waste, not trash. Check county or EPA guidance for drop-off days; keep it upright, capped, and labeled. Don’t put it in curbside bins or burn it. Many municipal sites accept cans with paint if the label is readable.
Prevent Future Clogs: Clear Nozzle After Use
After every use, turn the can upside down and spray 2-3 seconds until only propellant comes out, then wipe the tip with paint thinner or acetone. Store upright, cool, and dry with the cap on.
Stop and call a professional if:
- The spray paint can is hot to the touch, bulging, or hissing after you release the button.
- Paint is spraying from a crack or seam instead of the nozzle.
- The valve is stuck open and you cannot stop the flow.
- You cannot identify the product or the label is missing, so you cannot dispose of it correctly.
How to Unclog Spray Paint Cans: Frequently Asked Questions
?Can You Unclog Spray Paint Cans Without Damaging the Valve?
Yes, you can unclog spray paint cans without damaging the valve by working only on the nozzle and dip tube and never forcing metal tools into the valve. The valve is a spring-loaded pin that seals the can, so bending or scoring it creates leaks you cannot repair. Soak the clogged nozzle in paint thinner, clear the dip tube with air or solvent, then test a short burst.
?How Long Should You Soak a Clogged Nozzle Before Deciding to Unclog Spray Paint Cans by Replacement?
Soak the clogged nozzle for about an hour in paint thinner or acetone, then test it. Soaking means leaving the part fully submerged so the solvent can dissolve the dried paint. If spray still will not pass after that, replace the nozzle. Nozzles are inexpensive and matched to the can, so a swap beats fighting a stubborn clog when you unclog spray paint cans.
?What Solvent Works Best When You Unclog Spray Paint Cans, Paint Thinner or Acetone?
Match the solvent to the paint when you unclog spray paint cans: paint thinner is a general solvent that dissolves most oil-based and enamel aerosols well, while acetone cuts lacquers and some acrylics faster. Test a drop on the nozzle first, then soak briefly. Use either solvent outdoors or with strong ventilation, and wear gloves and safety glasses throughout the job.
?Why Does a Spray Paint Can Spit After You Unclog It?
Spitting usually means solvent or loosened paint is still in the dip tube or the clogged nozzle wasn't fully cleared. Shake the spray paint can hard for a full minute, spray a few test bursts on cardboard, and re-soak the nozzle if it persists. Never clear a valve with a pin; that damages the seal and causes worse spitting.
?How Do You Unclog Spray Paint Cans When the Clog is in the Dip Tube?
Remove the nozzle, then flush the dip tube by spraying short bursts of aerosol through the valve with the can upright. If that fails, soak the nozzle and rinse it, then repeat. Do not invert the can and blast it, and never puncture or heat it. If flow stays weak, the can is done; dispose of it safely.
?is It Safe to Use a Pin on a Clogged Nozzle to Unclog Spray Paint Cans?
Yes for the nozzle, no for the valve. A pin can clear dried paint from the tiny nozzle opening, but poking the valve risks bending the pin and causing a leak or sudden spray. Wear safety glasses and gloves, work with ventilation, and keep the can upright and away from heat.
?When Should You Stop Trying to Unclog Spray Paint Cans and Dispose of the Can?
Stop when the valve leaks, the can is dented or rusted at the seam, or repeated soaking and rinsing won't restore flow. Those are failure signs, not clogs. Don't puncture or heat it. Take the spray paint can to a household hazardous waste site, and start fresh with proper shaking and storage.
Conclusion
Work on the clogged nozzle, not the valve. Soaking the nozzle in paint thinner or warm soapy water, then clearing the hole with a pin, fixes most blockages without risking the can. Poking the valve or heating the spray paint can can cause a rupture, so skip those shortcuts entirely.
Put on safety glasses and gloves, open a window for ventilation, and test the spray on cardboard before your project. If the can still sputters after a good soaking and rinsing, replace the nozzle rather than forcing anything into the valve.