
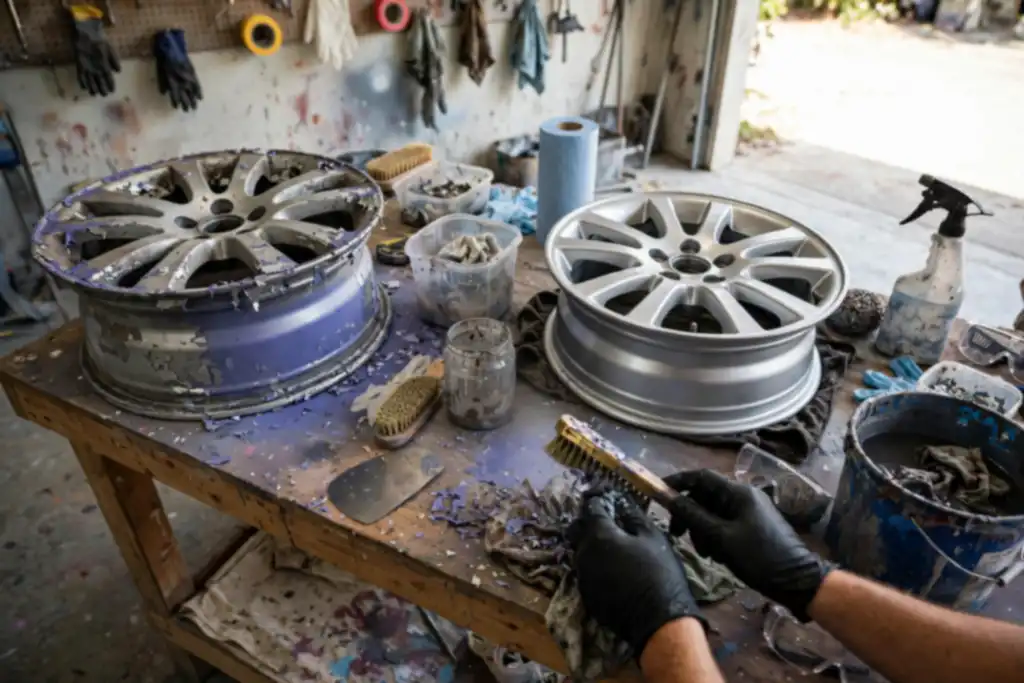
Removing spray paint from rims starts with the mildest method that works: a plastic scraper and soapy water, then moving to solvents only if needed. This prevents damaging the wheel finish and clear coat.
Here is a clear, practical look at how to remove spray paint from rims.
You can either attack the spray paint with the strongest solvent you can find, or you can start with the least aggressive method and work up. The first approach often ruins the wheel finish; the second preserves it. Learning how to remove spray paint from rims safely means understanding which chemicals and tools are safe for your specific rim type and using them in the right order.
This article gives you a step-by-step process that prioritizes safety and avoids common mistakes like using the wrong solvent or abrasive. You’ll get clear guidance on selecting the right remover, testing it safely, and applying it without harming the clear coat. By the end, you’ll know how to remove the paint correctly the first time, whether you’re dealing with a light overspray or a heavy coat.
- Start with soapy water and a plastic scraper to remove loose paint.
- Test any solvent on a hidden area to avoid damaging the finish.
- Use acetone or lacquer thinner sparingly and with proper ventilation.
- Avoid steel wool or sandpaper unless you plan to refinish the rim.
- Wear gloves and eye protection when handling chemical paint removers.
How to Remove Spray Paint from Rims: the Quick Decision Before You Start
Before you touch a solvent, make two quick calls: what your rims are finished with, and what kind of spray paint landed on them. Get those wrong and you can dull a clear coat or smear paint deeper into the surface.
| Your situation | What to do | Why |
|---|---|---|
| Factory clear-coated alloy | Start mild, then step up | Clear coat is easy to burn |
| Bare polished or machined metal | Skip harsh solvents first | Etching shows instantly |
| Powder-coated rims | Solvent test, then scrape | Coating resists most thinners |
| Unknown rattle-can brand | Test acetone on hidden spot | Formulas vary widely |
| Fresh paint, hours old | Wipe with paint thinner | Soft film lifts easily |
| Cured paint, days old | Plastic scraper, then solvent | Bond strengthens with time |
| Paint in lug recesses | Soft brush plus soapy water | Scrubbing beats soaking |
| Unsure about the finish | Test inside the barrel | Hidden area limits damage |
Recommended for this job

Sunnyside Pure Odorless Paint Thinner
Odorless thinner softens spray paint so it can be wiped from rims.
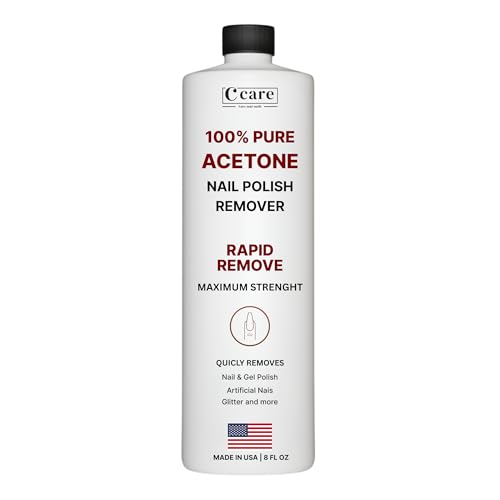
100% Pure Acetone Nail Polish Remover
Acetone dissolves fresh spray paint residue from metal rim surfaces quickly.

Max Strip Citrus Paint Stripper Gel
Citrus gel clings to rims and lifts spray paint without harsh fumes.
Two facts decide your method: the wheel finish and the paint chemistry. Check both before you buy supplies.
The wheel finish is the outer coating on a rim, such as paint, clear coat, powder coat or bare metal, that decides which cleaners are safe.
What’s Your Rim Finish?
Look for a smooth transparent layer over color, which signals a clear coat, and check the barrel for bare metal. A factory clear coat tolerates brief solvent contact but dulls under scrubbing, while bare polished aluminum etches within a few minutes of acetone contact. Powder coat is tougher but not invincible.
What Kind of Spray Paint is It?
Rattle-can paint ranges from fast-drying enamel to hard acrylic, and cure time changes everything. Fresh overspray under 24 hours wipes off with paint thinner on a microfiber cloth. Paint baked on for a week or more needs a plastic scraper first, then acetone or lacquer thinner, solvents that dissolve cured films.
The 30-Second Method Match
Test any solvent on a 1-inch spot inside the rim barrel and wait 10 minutes. If the clear coat softens or turns cloudy, stop and switch to a gentler route. A pressure washer under 1,500 psi plus a soft brush lifts loose flakes without chemicals.
5-Minute Diagnostic: What to Check Before Touching the Rim
Is the Rim Painted, Polished, Chrome, or Alloy?
Finish type decides your method. Painted and clear-coated rims tolerate solvents; polished and bare alloy can stain or etch in under a minute. Check for a factory stamp on the back of a spoke, and tap the rim with a plastic scraper to hear the difference.
How Thick is the Spray Paint?
Thickness sets your approach. Light overspray often lifts with acetone on a microfiber cloth in 2 to 3 passes; heavy coats need a plastic scraper and 10 to 15 minutes of dwell time. Press a fingernail in or use a depth gauge.
Is There Clear Coat Underneath?
Clear coat is a protective top layer, and lacquer thinner or acetone can eat through it in 30 to 60 seconds. Rub a hidden spot with a microfiber cloth and a drop of acetone. If the cloth picks up color, stop and reassess.
Test a Hidden Spot First
Always test before full application. Apply your chosen remover to the inside of a spoke, wait 10 minutes, and check for dulling or softening. If the finish changes, switch to soapy water and a soft brush.
Soapy water is a mild mix of dish soap and warm water used to lift fresh overspray and dirt without harming the rim.
Spend five minutes checking these four things before any solvent or abrasive touches the wheel.
How Spray Paint Removal Works on Rims
Chemical Softening vs. Mechanical Lifting
Removal works two ways: a solvent softens paint so it wipes away, or a tool lifts it physically. Chemical options: acetone (fast-evaporating solvent), paint thinner (dissolves paint), lacquer thinner (stronger, for lacquer coatings). Mechanical options: plastic scraper, soft brush, steel wool, or sandpaper (abrasive for smoothing).
Why the Mildest Method Wins
Start with soapy water and a microfiber cloth, fresh overspray often lifts risk-free. Step up to chemical remover only if that fails, and test on a hidden spot first. Harsh solvents can dull or strip clear coat, so mildness protects the finish.
The Role of Dwell Time and Agitation
Let solvent sit for its label’s dwell time (typically a few minutes) to soften paint before touching it. Agitate gently with a soft brush or plastic scraper, then rinse. A pressure washer speeds cleanup, but keep the nozzle moving to avoid gouging the finish.
Before You Start: Safety Gear, Supplies, and Setup
Safety First: Toxic Fumes and Skin Protection When Using Strong Solvents
Solvents like acetone, paint thinner, and lacquer thinner release fumes that irritate lungs and skin. Work outdoors or in a garage with the door open, and wear nitrile gloves plus safety glasses. Keep a fire extinguisher nearby since these chemicals are flammable.
Gather Safety Gear and Supplies
Set out everything before you touch the rims so you never stop mid-job with solvent on your hands. You need nitrile gloves, safety glasses, a respirator rated for organic vapors, and old clothes.
Protect Tires and Surrounding Areas
Mask the tires and brake components so drips do not ruin rubber or contaminate brakes. Tape plastic sheeting around each rim and lay cardboard under the wheel.
Tools and Products Recommended
Pick the mildest method first: soapy water and a microfiber cloth, then a plastic scraper, soft brush, or pressure washer for looser paint. Save acetone, lacquer thinner, steel wool, and sandpaper for stubborn spots, and keep clear coat sealer on hand for touch-ups.
- Safety gear: Nitrile gloves, safety glasses, and an organic vapor respirator protect skin, eyes, and lungs from solvent fumes.
- Ventilation: Work outdoors or with the garage door open, and keep a fire extinguisher within reach because paint thinner and acetone are flammable.
- Tire protection: Tape plastic sheeting over tires and brake parts so drips do not damage rubber or contaminate brakes.
- Ground cover: Cardboard or a drip tray under the wheel catches runoff and keeps solvent off your driveway.
- Mild tools: Soapy water, a microfiber cloth, a plastic scraper, and a soft brush handle light paint without harming the wheel finish.
- Stronger options: Acetone, lacquer thinner, steel wool, and sandpaper are for stubborn spots only, and clear coat sealer restores protection afterward.
- Pressure washer: A pressure washer blasts off loosened paint, but keep the nozzle moving to avoid gouging the finish.
Step-by-Step: How to Remove Spray Paint from Rims
Start with Soap and Water
Warm water and a soft brush remove fresh overspray and dirt. Scrub, rinse, inspect; if paint remains, use a chemical method.
Apply Chemical Paint Remover Safely
Test paint thinner on a hidden spot. Work outdoors or ventilated, wear nitrile gloves and eye protection, keep rags from ignition. Follow dwell time (a few minutes), then check if paint softens.
Try Acetone or Lacquer Thinner
Acetone and lacquer thinner cut stubborn paint but can dull clear coat. Wipe a small area with a damp microfiber cloth; stop if cloudy. Never soak or let solvent pool.
Scrape and Brush Away Loosened Paint
Plastic scrapers and soft brushes lift softened paint without gouging. Keep tools nearly flat. Use steel wool and sandpaper on bare metal only, both scratch clear coat.
Pressure Wash Tips
Hold nozzle at least 12 inches away and keep moving. Rinse with soapy water, then dry with a microfiber cloth.
Work from the mildest method to the strongest, and stop the moment the spray paint lifts, because the rim finish is easier to ruin than the paint you're removing.
After Removal: Sanding, Polishing, and Protecting the Rim
Sanding and Polishing After Removal
After removing spray paint, sand and polish the rim to restore its original finish. Use 800-grit sandpaper lightly, then polish with a microfiber cloth and metal polish.
- Sand the rim lightly with 800-grit sandpaper to smooth any scuffed clear coat.
- Polish the rim using a microfiber cloth and a dab of metal polish to restore shine.
Post-Removal Rim Care
Clean and protect the rim to prevent corrosion and keep it looking new. Wash with soapy water, dry fully, and reapply clear coat.
- Wash the rim with soapy water and a soft brush to remove all residue.
- Dry the rim completely with a clean microfiber cloth to prevent water spots.
- Apply a fresh coat of clear coat to protect the wheel finish from future damage.
Prevent Future Spray Paint Overspray
Stop overspray before it starts by masking rims during any spray painting. Use plastic sheeting and tape for full coverage.
- Cover rims with plastic sheeting and tape when spraying nearby to block overspray.
Once the paint is off, finish the job right with these sanding, care, and prevention steps.
Quick Checklist: Before You Start or Decide
Rim Finish Confirmed?
Know your rim’s material and coating first, factory clear coat, polished aluminum, and powder coat react differently to solvents.
Safety Gear Ready?
Acetone, paint thinner, and lacquer thinner require gloves, eye protection, and ventilation before opening.
Test Spot Done?
Test on a hidden barrel section first to see if the product lifts spray paint without damaging clear coat.
Waste Disposal Plan?
Used rags, solvent, and paint residue are household hazardous waste, check local rules or EPA guidance before trashing.
- Finish check: confirm bare, cleared, or powder coated rims; note curb rash.
- Paint type: fresh spray paint wipes off easier than cured coats.
- Gear: nitrile gloves, safety glasses, respirator, soapy water.
- Tools: soft brush, plastic scraper, microfiber cloth, sandpaper as last resort.
- Test patch: 5 minutes reveals finish damage early.
- Waste plan: seal rags in a metal container; call your local waste center.
Troubleshooting: When the Paint Won’t Budge
When the paint fights back, match the symptom to the fix before you reach for a harsher tool. Most damage happens from impatience, not from the paint itself.
| Problem | Likely cause | Fix |
|---|---|---|
| Paint stuck in lug nut recesses | Thick spray paint buildup | Soft brush plus paint thinner, then plastic scraper |
| Paint smeared instead of lifting | Solvent too weak or too slow | Switch to lacquer thinner, test on hidden area |
| Clear coat turning cloudy | Acetone or lacquer thinner dwelled too long | Rinse with soapy water, stop solvent use |
| Paint still tacky after wiping | Insufficient dwell time | Reapply paint thinner, wait several minutes |
| Scratches after scrubbing | Steel wool or sandpaper too coarse | Step up to finer grit, keep surface wet |
| Paint won't budge after solvents | Cured paint bonded to alloy | Plastic scraper then pressure washer at low setting |
| White residue left on rims | Solvent residue dried on finish | Wipe with microfiber cloth and soapy water |
Paint Stuck in Tight Spots?
Reach for a soft brush dipped in paint thinner before any metal tool. Work the bristles into lug recesses and spoke gaps, then lift softened paint with a plastic scraper.
Clear Coat Damaged?
Stop solvent use the moment the finish looks cloudy or dull. Rinse with soapy water, dry with a microfiber cloth, and accept that some clear coat loss may need professional repair.
Stubborn Layers?
Multiple spray paint coats need dwell time, not more force. Apply lacquer thinner, wait several minutes, then scrape gently; repeat in small sections rather than flooding the rim.
Avoid Damaging Clear Coat or Alloy
Test every chemical on a hidden section first and keep steel wool and sandpaper for bare metal only. A pressure washer at low setting removes loosened paint without gouging alloy.
How Weather and Season Affect Spray Paint Removal
Temperature and Solvent Evaporation
Evaporation accelerates with warm air, so acetone and lacquer thinner flash off faster, reducing working time. Work in shade around 60-80°F and never leave solvent-soaked rags in direct sun. Cold slows reactions, so paint thinner may need extra dwell time on chilly rims. Apply thin passes, ventilate, and follow label guidance for gloves and eye protection.
Humidity and Drying Times
High humidity lengthens drying and can leave a hazy film. After soapy-water rinsing, dry rims promptly with a microfiber cloth and inspect for residue. In damp air, allow longer per step and use a fan. Skip the pressure washer until fully dry to avoid trapped moisture.
Working Outdoors vs. Indoors
Outdoors is safer, fumes disperse and overspray drifts away. Indoors, use only a garage with cross-ventilation and no ignition sources, as many solvents are flammable. Either way, lay a drop cloth, keep soapy water ready, and rinse before residue dries.
Cost Breakdown: DIY Solvents vs. Professional Removal vs. Rim Replacement
Prices swing widely depending on whether you buy solvents or pay a shop, so plan around ranges and your rim's finish.
| Option | Upfront cost | Ongoing cost | Notes |
|---|---|---|---|
| Paint thinner, acetone, or lacquer thinner | $10 to $30 per quart | Replace as used | Ventilate; test on hidden spot |
| Soft brush, plastic scraper, microfiber cloth | $10 to $25 | Minimal | Plastic scraper protects wheel finish |
| Steel wool or sandpaper (fine grit) | $5 to $15 | Replace as worn | Use only on bare metal |
| Pressure washer (rented) | $15 to $40 per day | None | Keep nozzle off clear coat |
| Professional removal | $50 to $150 per wheel | None | Confirm they preserve finish |
| Rim replacement (single) | $100 to $400 each | Mounting and balancing | Last resort for ruined rims |
Ranges assume one to four rims, US retail prices, and DIY labor at no cost; shop quotes vary by region and finish type.
DIY Solvent and Tool Costs
Expect $30 to $70 total for solvents and tools on a typical set of rims. Buy paint thinner, acetone, or lacquer thinner, plus a soft brush, plastic scraper, and microfiber cloth. Add fine sandpaper or steel wool only if you are working on bare metal.
Professional Removal Costs
A shop typically charges $50 to $150 per wheel to strip paint safely. Ask whether they preserve the clear coat and wheel finish before you commit. This option suits expensive or delicate rims.
Rim Replacement Costs
New rims run $100 to $400 each, before mounting and balancing. Replace only when the finish is deeply damaged or corrosion has spread. Otherwise, removal is cheaper.
When DIY Makes Sense
DIY pays off on painted or powder-coated rims with light overspray. Stick to a plastic scraper, soft brush, and soapy water first, then step up to solvents. Skip DIY on polished or clear-coated rims if you are unsure.
Common Mistakes to Avoid When Removing Spray Paint from Rims
Using Too Strong a Solvent First
Start with the mildest option, not the harshest. Acetone, a chemical compound that cuts through paint fast, can dull some finishes if you reach for it too soon.
Skipping the Test Spot
Always test on an inconspicuous area first. A hidden spot on the back of the rim tells you how the finish reacts before you commit to the whole wheel.
Damaging the Clear Coat
Aggressive scrubbing strips the clear coat, the protective layer over your wheel finish. Use a plastic scraper or soft brush, and save steel wool and sandpaper, an abrasive material for smoothing, for stubborn spots only.
Improper Waste Disposal
Solvent-soaked rags and paint residue are hazardous waste. Check your local rules and follow EPA guidance for household hazardous waste, never the storm drain.
- Start with the mildest solvent: harsh chemicals like acetone can dull finishes, so work up gradually.
- Test on an inconspicuous area first: a hidden spot reveals how the rim reacts before you treat the whole wheel.
- Protect the clear coat: aggressive scrubbing or steel wool strips the protective layer and ruins the finish.
- Use a plastic scraper or soft brush: metal tools gouge rims and leave scratches that need refinishing.
- Rinse with soapy water and a microfiber cloth: leftover solvent residue can keep eating the finish.
- Dispose of paint waste properly: solvent-soaked rags and residue are hazardous waste, so follow EPA and local rules.
When to Call a Pro for Spray Paint Removal
Delicate or Rare Rim Finishes
Stop if rims have polished aluminum, chrome, powder coat, or factory tinted finish, acetone or lacquer thinner can strip protective clear coat. A pro can identify the finish and choose a safe solvent.
Extensive Paint Coverage
Call a professional when paint covers more than a small spot or has baked on for weeks. Large areas need longer solvent contact, risking etching. A shop can media-blast or chemically strip evenly and reapply clear coat.
Lack of Safe Workspace
Do not start without ventilation, a level surface, or runoff containment. Fumes build fast in closed garages, and pressure spray can spread paint. OSHA recommends reading labels and wearing gloves plus eye protection.
When to Seek Professional Help
Get a pro at the first sign of bare metal, bubbling clear coat, or paint that won’t budge after two gentle attempts. Wheel-shop stripping costs $50, $150 per rim, far less than replacing an alloy wheel.
How to Remove Spray Paint from Rims: Frequently Asked Questions
?Can I Remove Spray Paint from Rims Without Ruining the Clear Coat?
Yes, if you use the mildest method first and keep solvents off the clear coat. Clear coat is the thin protective layer over the wheel finish, and harsh products like lacquer thinner or acetone can soften it fast. Start with soapy water and a microfiber cloth, step up to paint thinner on a small test spot, and stop the moment the finish dulls.
?How Do I Remove Spray Paint from Rims When the Paint is Fully Cured?
You soften it chemically, then lift it mechanically. Cured spray paint bonds hard, so apply paint thinner or acetone to a microfiber cloth, let it sit briefly on the spot, and work it with a plastic scraper. Keep steel wool and sandpaper as a last resort on bare metal only, because both cut through clear coat and wheel finish.
?What is the Safest Solvent to Remove Spray Paint from Rims?
Paint thinner is the safest starting point for most rims. It is a solvent used to dissolve paint, and it is gentler on clear coat than acetone or lacquer thinner, which are stronger and can attack the finish. Test any solvent on a hidden spot first, work outside, and wear gloves and eye protection.
?Does a Pressure Washer Remove Spray Paint from Rims?
Sometimes on fresh overspray, rarely on cured paint. A pressure washer is a machine that sends out a strong stream of water, and it can blast away light spray paint without chemicals, but hold the nozzle back from the rim and avoid chipped edges. On cured paint, use it after softening with solvent, not instead of it.
?How to Remove Spray Paint from Rims Without Scratching the Wheel Finish?
Skip steel wool and sandpaper on finished rims and rely on a plastic scraper, a soft brush, and microfiber cloth. Those abrasives are for bare metal only, because they leave scratches that no polish will hide. Soften the spray paint with paint thinner first, then lift it gently instead of grinding it off.
?Why Does Spray Paint Stick so Hard to Rims, and How Do I Remove It from Rims Once It Sets?
Rims get hot and hold a textured surface, so spray paint grips and cures fast. Once set, you remove it by softening with acetone or lacquer thinner on a cloth, then lifting with a plastic scraper. Work in shade on a cool rim, because heat speeds curing and makes removal harder.
?When Should I Stop Trying to Remove Spray Paint from Rims and Call a Pro?
Stop when the solvent starts dulling the finish or the paint sits in tight spokes you cannot reach safely. A pro can strip and refinish the rim without wrecking the clear coat. Also call one if the rims are expensive or rare, since a bad DIY strip costs more to fix than professional removal.
Conclusion
Work from the mildest method upward and stop as soon as the spray paint lifts. Soapy water and a microfiber cloth handle fresh overspray; acetone, paint thinner, or lacquer thinner (solvents that dissolve cured paint) tackle the stubborn stuff. Test any solvent on a hidden spot first, because strong chemicals can dull the clear coat that protects your wheel finish.
Your best next step: pick one small section, apply your chosen solvent with a microfiber cloth, and give it a few minutes before reaching for a plastic scraper or pressure washer. Skip steel wool and sandpaper unless the rim is already damaged, since both cut through finish fast.