
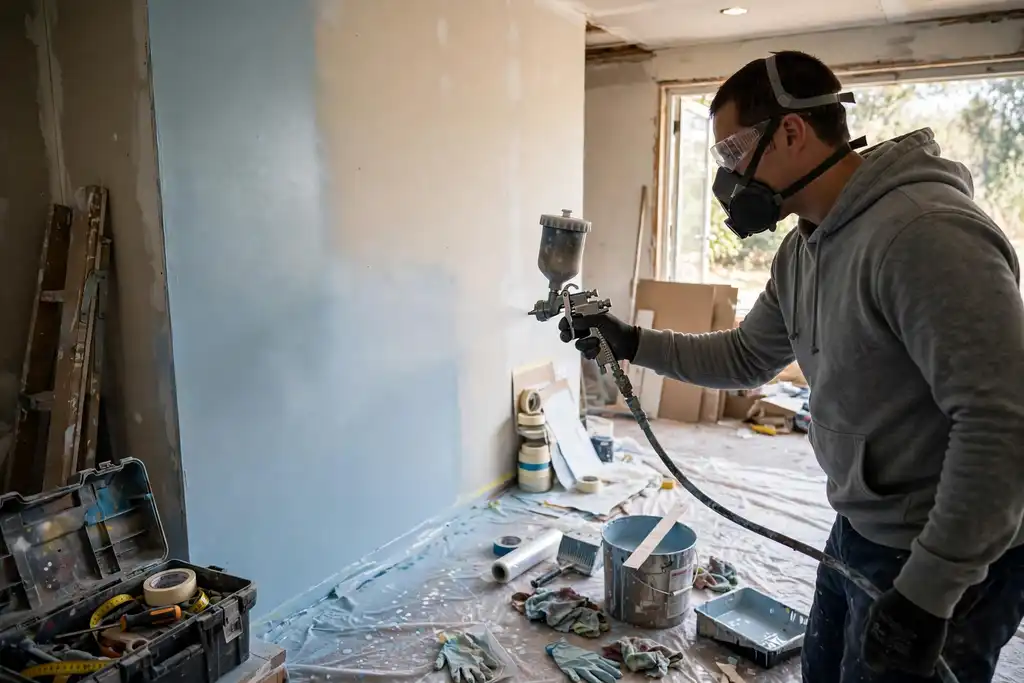
To spray paint walls with a spray gun, thin the paint to the correct viscosity, set the right air pressure and spray pattern, and use smooth overlapping strokes at a consistent distance, because proper preparation and masking are critical for a flawless finish.
Thinking you can just point and shoot is the fastest way to a botched wall. The truth is that how to spray paint walls with a spray gun starts long before you pull the trigger: surface preparation, masking, and matching paint viscosity to your equipment decide the outcome.
You will get the exact setup and technique pros use, from choosing between HVLP and airless sprayer to dialing in air pressure and overlap. Safety comes first: a proper respirator and awareness of flash point keep you out of trouble. Follow these steps once and you will avoid the common mistakes that ruin walls and waste paint.
- Mask floors, trim, and outlets before spraying; overspray travels farther than you think.
- Wear a respirator rated for solvent or waterborne paint; ventilation is mandatory.
- Thin paint to the correct viscosity for your spray gun and nozzle size.
- Keep the gun perpendicular and overlap each pass by 50 percent for even coverage.
- Clean the gun and nozzle immediately after use to prevent clogging.
How to Spray Paint Walls with a Spray Gun: the Quick Decision Before You Start
Spraying walls is fast, but the wrong setup wastes paint and puts your health at risk. Make three quick calls before you touch a spray gun: gun type, wall condition, and ventilation.
| Your situation | What to do | Why |
|---|---|---|
| Small room, trim to cut in | HVLP spray gun | Less overspray, easier control |
| Whole house, empty rooms | Airless sprayer | Faster coverage on big walls |
| Fresh drywall, bare surface | Apply primer first | Seals surface, improves adhesion |
| Glossy or dirty walls | Scuff and wash first | Paint needs a grippy base |
| Furniture still in the room | Mask and move it out | Overspray travels farther than you think |
| Watery or thick paint | Check paint viscosity | Wrong thickness clogs nozzle or sags |
| Indoor spraying, windows shut | Add cross ventilation | Fumes build fast without airflow |
Recommended for this job

ENDOZER Professional HVLP Spray Gun Set
HVLP gun with multiple nozzles gives controlled atomization for smooth wall coating.
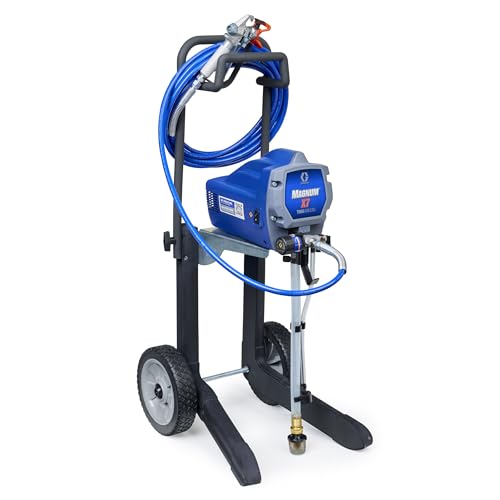
Graco Magnum X7 Cart Airless Paint
Airless cart sprayer delivers high-pressure output for fast large wall coverage.

Odor/Particulate Multipurpose Respirator
Reusable respirator filters odors and particles during interior wall spraying.
Spraying walls saves hours, but only if you pick the right tool and prep the room first. Two minutes of decisions now prevents a repaint later.
HVLP or Airless? Decide in 60 Seconds
Use an HVLP spray gun for rooms under roughly 150 square feet or any detail work; it atomizes coatings with high volume, low pressure air, so overspray stays low. Choose an airless sprayer for large, empty walls where speed matters more than finesse. Match your nozzle to the coating: a 1.3 to 1.5 mm tip handles most interior latex, while thicker primer needs 1.8 mm or larger.
Is Your Wall a Good Candidate for Spraying?
Spraying rewards smooth, sound surfaces and punishes everything else. Fill holes with lightweight spackle, sand edges to 120 grit, and apply primer to bare drywall so paint viscosity and coverage behave predictably. Thin your paint to the manufacturer’s spec, typically 10 to 20 percent water for latex, and test a 2 foot by 2 foot section first.
The One Safety Check You Must Do First
Confirm ventilation and a fitted respirator before the first pass. Check the paint’s flash point, the temperature where fumes can ignite, and kill pilot lights within 20 feet. OSHA and the EPA both treat solvent vapors as a real hazard, not a nuisance. Complete masking with 1.5 inch tape and 0.5 mil plastic before you load the gun.
The 5-Minute Diagnostic: What to Check Before Any Work
Run these four checks before you mask a single inch, and you will catch the problems that ruin spray jobs.
Wall Condition: Moisture, Cracks, and Peeling
Sound walls take paint; damp or flaking ones reject it. Press a pin-type moisture meter into three spots per wall and hold off if readings exceed 12 percent. Scrape any peeling edge back 2 to 3 inches, fill cracks with lightweight spackle, and sand smooth with 120-grit paper once cured.
Room Ventilation and Airflow Test
Overspray travels, so airflow decides how much you breathe and how much settles. Tape a sheet of newspaper across a window screen and watch it bow outward within 30 seconds. Wear an OSHA-rated respirator with organic vapor cartridges, and keep coatings at least 10 degrees below their flash point.
Power and Hose Reach: is Your Setup Practical?
A hose that will not reach forces you to drag the spray gun mid-pass. Measure your longest wall diagonal and add 10 feet of slack. Confirm your airless sprayer or HVLP unit sits within 25 feet of a dedicated 15-amp circuit or a compressor rated for 4 to 6 CFM at 40 psi.
Paint Type and Viscosity Quick Check
Wrong paint viscosity means runs or a spitting nozzle, so test before you fill. Run a viscosity cup test: 20 to 40 seconds for most latex wall paints through a No. 4 cup. Confirm your primer is compatible, set air pressure between 20 and 30 psi, and test the spray gun on scrap board.
Run these four checks before you mask a single inch, and you will catch the problems that ruin spray jobs.
How a Spray Gun Actually Works on Walls
Atomization: Turning Paint into Mist
A spray gun is a device that pushes coating through the air onto a surface. It breaks paint into fine droplets, a process called atomization, so the wall gets an even film instead of brush marks. Thinner paint atomizes easier, so check paint viscosity against the manufacturer’s spec before you load the cup.
HVLP vs Airless: Two Different Engines
HVLP atomizes with high air volume at low pressure, which cuts overspray and suits interior walls. An airless sprayer forces paint through a small nozzle at high pressure, covering large exterior areas fast. Pick based on wall size and finish: HVLP for control, airless for volume.
Why Distance and Overlap Matter More Than Pressure
Keep the gun 10 to 12 inches from the wall and move at a steady pace. Hold the nozzle perpendicular, and overlap each pass by about 50 percent so wet edges blend. Crank air pressure up and you get bounce-back and runs, not better coverage.
Before You Start: Tools, Materials, and Safety Gear
The Must-Have Safety Kit (Respirator, Goggles, Gloves)
Gear up before mixing paint. A respirator with organic vapor cartridges filters fumes; sealed goggles and nitrile gloves protect skin and eyes. Check the label’s flash point and ventilation needs, solvent-based coatings demand more protection than water-based ones.
Ventilation Setup: Fans, Windows, and Filters
Air movement is your first defense against overspray and fumes. Open windows on opposite walls, place a box fan blowing outward, and tape furnace filters over intakes to catch mist. Keep ignition sources off until fumes clear, and follow OSHA guidance for solvent vapors in enclosed rooms.
Masking and Protecting the Room: Plastic, Tape, and Drop Cloths
Cover floors with canvas drop cloths, seal trim and outlets with painter’s tape, and hang plastic sheeting with a 12-inch overlap at seams. Remove or bag furniture and mask light fixtures completely.
Paint Prep: Straining, Thinning, and Testing Viscosity
Strain paint through a mesh filter, thin it per the manufacturer’s ratio for your HVLP or airless sprayer, then test with a viscosity cup or drip test. Stir thoroughly and note your mix for touch-ups. Wash away grease and dust, patch holes with spackle, and sand smooth so primer and topcoat bond evenly.
- Safety first: a cartridge respirator, sealed goggles, and nitrile gloves protect you from fumes and overspray.
- Ventilate hard: cross-flow fans and window exhaust with filter screens keep mist and vapors moving out.
- Mask everything: drop cloths, painter's tape, and overlapped plastic sheeting shield floors, trim, and furniture.
- Strain and thin: filter the paint, thin to the maker's ratio, and confirm viscosity with a cup test.
- Prep the walls: clean, patch, and sand so primer and paint grip evenly.
- Match your setup: HVLP for fine finishes, airless sprayer for large wall areas and thicker coatings.
- Keep notes: record your thinning ratio and nozzle choice for consistent touch-ups.
Step-by-Step: How to Spray Paint Walls with a Spray Gun
1. Clean, Patch, and Sand the Walls
Wash walls with degreaser, patch holes with spackle, sand with 120-grit paper, and wipe off dust. Skipping this causes flaking or flaws.
2. Mask and Protect Everything You Don’t Want Painted
Cover floors with drop cloths, seal outlets and trim with painter’s tape, and hang plastic over doorways. Overspray travels farther than you think.
3. Thin the Paint Using the Drip Test
Use a viscosity cup: under 25 seconds is too thin; over 40 seconds, add thinner in small amounts. Stir and retest.
4. Set Air Pressure and Spray Pattern
Set pressure per manufacturer’s spec, adjust to a vertical fan pattern, and test on cardboard. Increase pressure if splotchy; decrease if overspray is heavy.
5. Apply Primer with the Spray Gun
Spray in overlapping passes, keeping the gun 10 to 12 inches away and overlapping 50%. Let primer dry 1 to 2 hours before topcoats.
Follow these steps in order, and you will avoid the common mistakes that ruin a sprayed wall finish.
Second Path: Spraying Exterior Walls and Other Surfaces
Exterior spraying adds variables interior drywall doesn’t, so treat it as a separate checklist.
- Spray only when rain is unlikely for 24 hours and temps are 50-85°F.
- Scrape, wash, patch cracks, and spot-prime bare wood or masonry with stain-blocking primer.
- Mask windows, trim, and fixtures with tape and 0.5 mil plastic.
- Thin to the manufacturer’s paint viscosity spec and test the nozzle pattern on scrap.
- Set air pressure per the HVLP or airless sprayer manual; hold 10-12 inches from the wall.
- Keep 50 percent overlap and back roll large sections while wet.
- Let the first coat flash off (30-60 minutes), then apply the second.
- Flush the spray gun with solvent immediately after.
Exterior Walls: Weather, Substrate, and Paint Choice
Success depends on dry weather and a sound substrate. Use 100 percent acrylic exterior paint and check the flash point of solvent-based products near heat sources.
Using a Spray Gun for Car Paint: Key Differences
Car paint needs a smaller nozzle, lower pressure, and a dedicated primer sealer, don’t reuse wall settings. Wear an isocyanate-approved respirator and spray in a ventilated booth or garage.
Advanced Techniques: Back Rolling and Faux Finishes
Back rolling knocks down texture and improves coverage on porous walls. For faux finishes, practice on sample boards and keep gun distance and overlap consistent.
Spraying outside or on metal and auto panels adds variables that interior drywall does not, so treat these steps as a separate checklist.
Care and Maintenance: Keeping Your Spray Gun Ready
Immediate Cleaning After Each Use
Flush the spray gun as soon as you finish, before paint skins over inside the nozzle and fluid passages. Leftover coating hardens fast and can clog the air path, so a five to ten minute rinse now saves a rebuild later. Empty the cup, add the thinner your coating calls for, and spray into a lined bucket until the output runs clear. Wipe the exterior and air cap, then check the nozzle for residue.
Deep Cleaning and Storage
After a week of heavy use, or any job involving primer, break the gun down fully. Soak metal parts in solvent matched to the paint, brush the passages, and let everything dry before reassembly. Store with a light coat of lubricant on moving parts and the cup off in a dry cabinet, since moisture attacks seals and internal passages over time.
Replacing Filters and Seals
Swap filters and worn seals on the manufacturer’s schedule, or sooner if spray turns spattery or uneven. A tired seal lets air pressure drop and ruins your overlap pattern mid-wall. Keep a spare parts kit on hand; checking the nozzle and seals before each session takes two minutes and keeps coverage consistent from the first pass.
Myths vs Facts: Spray Painting Walls
Myth: Spraying is Always Faster Than Rolling
Speed depends on setup and cleanup, not just application. Masking and surface preparation can eat 1 to 3 hours before you pull the trigger.
For a single small room, a roller often wins on total time. A spray gun pays off on large or heavily textured walls where coverage per pass matters.
Myth: You Can Spray Any Paint Without Thinning
Most paints need thinning to the right paint viscosity for your spray gun. Check the manufacturer’s spec sheet and test on cardboard first.
HVLP units usually want thinner material than an airless sprayer. Too thick and you get spitting and uneven coverage; too thin and it runs.
Myth: a Mask is Enough for Safety
A dust mask will not protect you from solvent vapors. Use a respirator rated for your coating, and confirm the product’s flash point before spraying indoors.
- Ventilate with cross-flow air and keep ignition sources out.
- Cover floors and fixtures with proper masking before the first pass.
- Follow OSHA guidance on respiratory protection for solvent-based products.
Cost: DIY Spraying vs Hiring a Pro
Spraying walls yourself usually costs a fraction of hiring a pro, but only if you buy the right gear and avoid rework. Here are typical ranges with stated assumptions.
| Option | Upfront cost | Ongoing cost | Notes |
|---|---|---|---|
| DIY with owned HVLP | $0 upfront if owned | Paint, tape, filters | Assumes you already own a spray gun and respirator |
| DIY with rented airless sprayer | $40 to $90 per day | Paint, masking, cleaning supplies | Rental rates vary by region and store |
| DIY with bought airless sprayer | $200 to $500 | Paint, masking, maintenance | Entry-level units suit occasional wall work |
| Pro painter, interior walls | $2 to $5 per sq ft | None | Includes labor and materials; varies by market |
| Pro painter, exterior walls | $3 to $6 per sq ft | None | Assumes average prep and one primer coat |
| Roller and brush DIY | $30 to $80 in tools | Paint, rollers, tape | Slower but low upfront cost |
| Spray gun consumables | Included above | $10 to $30 per project | Filters, tips, solvent, and rags |
Costs are typical US ranges for a single room or average exterior wall area. They assume standard latex paint, normal surface preparation, and no major repairs. Rental and labor rates vary by location and season.
DIY spraying costs less upfront if you rent or already own a spray gun. Buying an airless sprayer runs $200 to $500, while a pro typically charges $2 to $5 per sq ft for interior walls. Renting makes sense for one room; buying pays off after two or three projects.
DIY Costs: Gun, Paint, Safety Gear, and Time
Expect $150 to $600 total for a DIY setup. That covers a gun or rental, primer, paint, masking supplies, and a respirator. Add 4 to 8 hours for prep and spraying.
Pro Costs: Labor and Materials
Hiring a pro runs $2 to $6 per sq ft depending on interior or exterior work. Labor is most of that, and materials are usually included. You pay for speed and fewer mistakes.
Renting vs Buying a Spray Gun: Break-Even Point
Renting costs $40 to $90 per day; buying a basic unit is $200 to $500. You break even after roughly three to five rental days. Buy if you plan more than two wall projects.
Troubleshooting Common Spray Gun Problems
Most spray problems trace back to three settings: air pressure, paint viscosity, and your spray pattern. Fix those first, and half the troubleshooting list disappears before you pick up a rag.
| Problem | Likely cause | Fix |
|---|---|---|
| Uneven spray pattern | Dirty or worn nozzle | Clean or replace nozzle |
| Spitting or droplets | Paint too thick for the gun | Thin per manufacturer spec |
| Clogging and splatter | Dried paint in fluid passages | Flush gun with solvent |
| Orange peel texture | Air pressure too low | Raise pressure, thin paint |
| Paint drips and runs | Gun held too close | Move to 8 to 12 inches |
| Thin, patchy coverage | Passes moving too fast | Slow down, overlap 50 percent |
| Heavy overspray | Pressure too high | Lower pressure, adjust pattern |
Uneven Spray Pattern or Spitting
An uneven pattern or spitting usually means a dirty or worn nozzle, or paint that is too thick. Clean the nozzle and test on scrap cardboard before touching the wall.
Clogging and Splattering
Clogs and splatter come from dried paint in the fluid passages or insufficient thinning. Flush the gun with the right solvent, then check paint viscosity against the manufacturer’s spec.
Orange Peel Texture
Orange peel is a bumpy finish caused by low air pressure or paint that is too thick to atomize. Raise pressure in small steps and thin slightly until the coat lays flat.
Paint Drips and Runs
Drips and runs mean too much paint in one spot, usually from holding the gun too close or moving too slowly. Keep 8 to 12 inches away and overlap each pass about 50 percent.
Common Mistakes to Avoid When Spray Painting Walls
Skipping the Viscosity Test
Thin the paint to the viscosity your spray gun’s manual specifies, or the finish will spatter and sag. Check with a viscosity cup: if it drains too slowly, add thinner in small amounts and retest.
Spraying Too Close or Too Far
Hold the gun 10 to 12 inches from the wall and keep it perpendicular, moving your arm, not your wrist. Use a 50 percent overlap on each pass so the coating levels evenly.
Inadequate Ventilation
Solvent vapors can build fast in a closed room, so open windows and run fans before you start. Wear a respirator rated for the paint’s flash point hazards, and keep ignition sources away.
Not Back Rolling When Needed
Back rolling, following the spray with a roller while the paint is wet, evens out texture and hides lap marks. It is essential on porous drywall and when you want a faux finish.
- Viscosity test: thin paint to the gun's spec and check with a viscosity cup before loading.
- Distance and angle: keep the nozzle 10 to 12 inches out and perpendicular to the wall.
- Overlap: run each pass at 50 percent overlap to avoid stripes and thin spots.
- Ventilation: open windows, run fans, and wear a respirator rated for the coating.
- Back rolling: follow the spray with a roller while wet on porous surfaces and faux finishes.
- Masking: tape and cover trim, floors, and fixtures before the first pass.
- Cleaning: flush the gun and nozzle immediately after use so paint does not cure inside.
When to Call a Pro: Real Warning Signs
Large or High Walls
If a wall runs past roughly 10 to 12 feet high, or the room is big enough that scaffolding is needed, stop and get a quote. Falls from ladders cause serious injuries, and a pro carries the right access gear and insurance.
Lead Paint or Asbestos Concerns
Homes built before 1978 may hide lead paint, and pre-1980s textures can contain asbestos. Do not sand or spray over either. Call a certified abatement contractor, because spraying disturbs fibers and dust far more than rolling does.
HVLP or Airless Equipment Complexity
If your airless sprayer trips breakers, surges, or you cannot dial in paint viscosity and air pressure, hire out the job. A pro knows the nozzle, tip, and thinning combinations for your coating, so you avoid a ruined finish.
Regulations and Permits for Spray Painting
Some jurisdictions require permits for exterior spraying or restrict volatile coatings by flash point. Check with your local building department and the EPA rules for your area before you buy paint. If the paperwork looks confusing, a licensed painter handles it routinely.
- Stop if the wall is too high or the room needs scaffolding.
- Stop if your home predates 1978 and paint may contain lead.
- Stop if asbestos is suspected in ceilings or textured walls.
- Stop if your sprayer keeps surging or clogging.
- Stop if permits or local spray rules are unclear.
How to Spray Paint Walls with a Spray Gun: Frequently Asked Questions
?Can I Spray Paint Walls with a Spray Gun Without Masking Everything First?
No, masking is essential whenever you spray paint walls with a spray gun because overspray drifts onto every nearby surface. Cover floors, trim, outlets, and furniture you cannot move, and seal room edges with tape and plastic. A few minutes of masking prevents hours of scraping paint from windows, doors, and fixtures.
?How to Spray Paint Walls with a Spray Gun Without Getting Runs and Drips?
Keep the gun moving and overlap each pass by about half. Hold the spray gun perpendicular to the wall at a consistent distance, and trigger off at the end of each stroke instead of swinging past the edge. Thin paint to the right viscosity and apply light coats rather than one heavy coat.
?What Safety Gear Do I Need When I Spray Paint Walls with a Spray Gun?
Wear a respirator rated for paint vapors, eye protection, gloves, and long sleeves. A respirator is a device that filters the air you breathe, and it matters because sprayed paint becomes a fine mist you can inhale. Ventilate the room, keep ignition sources away, and check the paint's flash point, the temperature at which vapors can ignite.
?Why Does My Spray Gun Sputter When I Spray Paint Walls?
Usually it is a clogged nozzle, a loose connection, or the wrong paint viscosity. A nozzle is the part that controls fluid flow, so a partial clog disrupts the pattern. Clean the nozzle, strain the paint, and check air pressure against the manufacturer's spec. Fix the cause before you keep spraying or you will get blotchy coverage.
?How Does an HVLP Spray Gun Differ from an Airless Sprayer for Painting Walls?
HVLP uses high volume of air at low pressure, which means less overspray and a finer finish, but it is slower on big wall jobs. An airless sprayer pushes paint at high pressure for fast coverage on large surfaces. Choose HVLP for detail and smaller rooms, airless for whole-house wall work.
?When Should I Use Primer Before I Spray Paint Walls with a Spray Gun?
Prime whenever the surface is bare drywall, patched, stained, or previously painted in a dark color. Primer is a preparatory coating applied before paint, and it gives the topcoat something to grip while blocking stains. Skipping primer on new drywall causes uneven absorption and blotchy coverage.
?is It Worth Learning How to Spray Paint Walls with a Spray Gun for One Room?
It depends on the scope and your tolerance for prep. Learning how to spray paint walls with a spray gun pays off mainly when you have multiple rooms or large surfaces. For one small room, setup, masking, and cleaning can take longer than rolling. Weigh the time savings against the extra gear and cleanup before deciding.
Conclusion
Getting a flawless finish comes down to the prep and setup you did before the first pass. Thin the paint to the right viscosity, dial in your air pressure, and keep your overlap consistent, because skipping any of those steps is what causes runs, dry spray, and uneven coverage. Masking and surface preparation are not optional extras; they are the job.
Your best next step: before touching a wall, spray a test panel to confirm your nozzle, pressure, and stroke speed. That five-minute check saves you a full repaint.
Sources and further reading: guidance from EPA, OSHA, NPCA.