
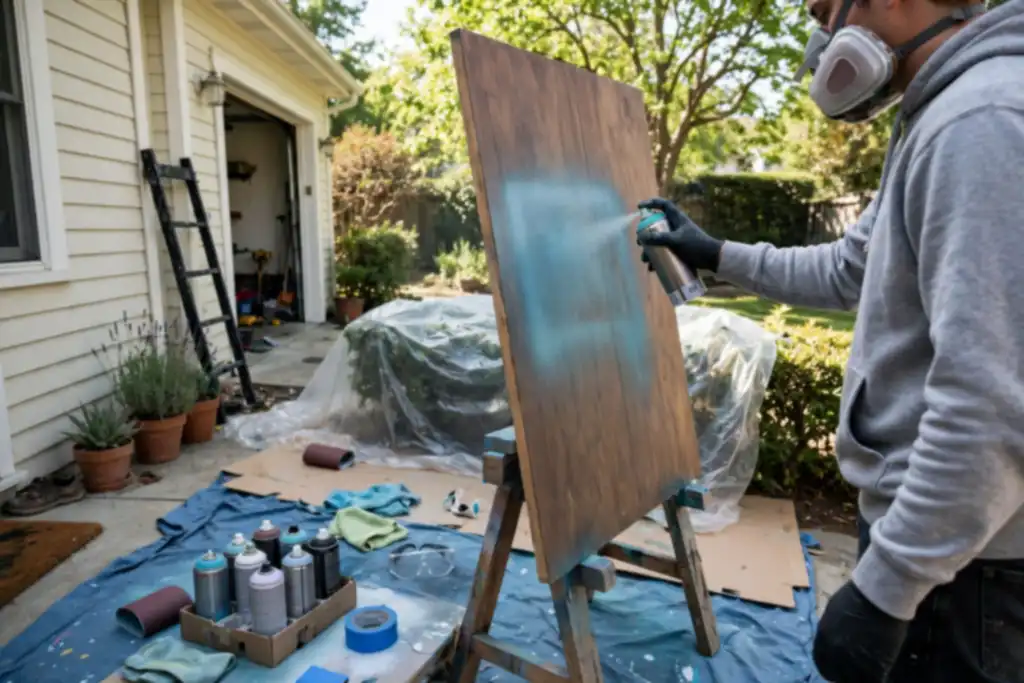

To spray paint the outside of your house safely and without mistakes, you need correct surface preparation, the right exterior paint and sprayer, and strict attention to weather, masking, and your own protection.
Getting a smooth, factory-like finish on your siding and trim with an exterior paint sprayer is entirely doable, but only if you treat how to spray paint outside of house as a sequence of controlled steps rather than a quick coat. You will learn the exact prep, safety, and technique that prevent peeling, overspray damage, and costly rework.
That means pressure washing to remove dirt, masking windows and doors with painter’s tape and plastic sheeting, applying a primer where bare wood or metal shows, and choosing an airless paint sprayer with the correct spray tip size for your material. You will also see how weather conditions, back-rolling, and a proper respirator keep the job clean and safe from start to cleanup.
- Pressure wash, scrape, and prime bare spots before any exterior paint goes on.
- Mask windows, doors, and trim with painter's tape and plastic sheeting.
- Match spray tip size to your airless paint sprayer and coating.
- Wear a respirator and spray only in calm, dry weather conditions.
- Back-roll for even coverage, then clean equipment immediately after use.
How to Spray Paint Outside of House: the Quick Decision Before You Start
Before you rent a sprayer or tape a single window, answer three quick questions. They decide whether spraying your siding is smart or a costly mistake.
| Your situation | What to do | Why |
|---|---|---|
| Wood or vinyl siding in good shape | Spray with primer first | Bare spots need a base coat |
| Peeling or chalky paint | Fix and pressure wash first | Paint won't bond to failing coats |
| Small trim-only job | Brush and roll instead | Setup time beats sprayer savings |
| One-time exterior project | Rent an airless sprayer | Buying rarely pays off once |
| Several houses or frequent work | Buy a quality airless unit | Rental fees add up fast |
| Wind above roughly 10 mph | Wait for calmer weather | Overspray drifts onto cars and neighbors |
| Old house, unknown paint era | Test for lead before sanding | EPA rules apply to pre-1978 homes |
Recommended for this job
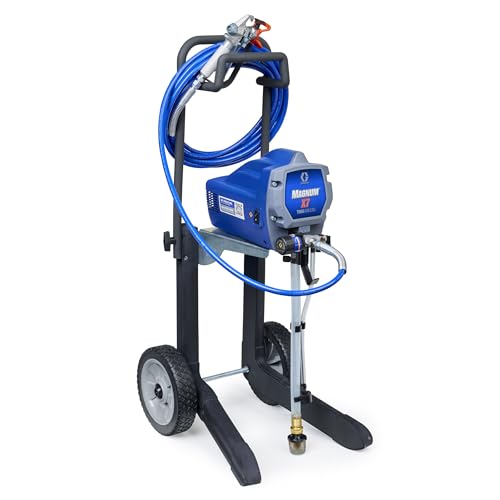
Graco Magnum X7 Cart Airless Paint
Adjustable pressure cart sprayer applies exterior coatings quickly across large house surfaces.

Fuji Spray 2202 Semi-PRO 2
HVLP system delivers controlled fine finish for exterior trim and siding with less overspray.

Odor/Particulate Multipurpose Respirator
Reusable respirator filters paint odors and particles during outdoor house spraying.
Is Your House a Candidate for Spray Painting?
Check three things before you rent anything: moisture reading under 15% on wood siding, coating adhesion that passes a cross-hatch tape pull, and no peeling within a 4 inch square. Pressure washing removes chalk and dirt the sprayer would seal in. Spot-prime bare wood with a bonding primer, a preparatory coating that gives exterior paint something to grip.
Rent, Buy, or Hire? the 3-Second Rule
Rent for one house, buy only if you will spray every season. An airless paint sprayer pushes thick exterior paint at 2,000 to 3,000 PSI; an HVLP sprayer suits thinner finishes and trim work. Match spray tip size to the coating: 0.015 to 0.019 for latex siding. A weekend airless rental runs $100 to $300; buying a capable unit costs $600 to $1,500.
The One Safety Check That Changes Everything
Test for lead paint before disturbing anything on a pre-1978 home; EPA rules govern the work, and spraying old coatings spreads dust. Wear a vapor-rated respirator, not a dust mask. Then mask with painter’s tape, removable pressure-sensitive tape, and 0.7 mil plastic sheeting over windows, lights, and HVAC intakes.
A respirator is a fitted mask that filters paint vapors and particles, protecting your lungs while you spray outside.
Weather and Back-Rolling Decide the Finish
Spray between 50 and 85 F with wind under 10 mph, or exterior paint skins before it levels. Back-rolling with a 3/8 inch nap roller right behind the gun knocks down lap marks and pushes paint into siding grain. Plan cleanup the same day: flush the airless pump with water for latex, mineral spirits for oil.
5-Minute Diagnostic: What to Check Before Any Work
Check for Lead Paint (Pre-1978 Homes)
Test any peeling or chalking exterior paint on pre-1978 homes with an EPA-recognized lead test kit (about $10 to $30 at hardware stores) before you scrape or sand. If it reads positive, federal rules apply to handling and disposal, so hire a certified contractor instead of spraying.
Assess Siding Condition and Repairs Needed
Probe siding with a screwdriver; soft or crumbling wood means rot that exterior paint will not fix. Scrape and sand bare spots, then spot-prime with a stain-blocking primer so the topcoat bonds. Budget 1 to 2 days for this on a typical single-story home.
Measure Wind and Temperature
Spray only within the label’s range, usually 50 to 85 degrees Fahrenheit, and skip days above about 10 mph wind. Masking with painter’s tape and plastic sheeting fails in gusts, and overspray drifts onto cars and windows.
Confirm Power and Water Access
An airless paint sprayer draws 15 amps, so use a dedicated outdoor outlet within cord reach, not a shared circuit. Stage a hose for cleanup and pressure washing residue; dried paint clogs tips and pumps fast.
Run these checks before you touch a spray gun, because fixing a mistake after the fact costs far more than five minutes now.
How Exterior Spray Painting Actually Works
Airless vs. HVLP: the Two Main Sprayer Types
For exterior paint on siding and trim, an airless paint sprayer is the practical choice. It pushes thick material through a hose and tip at high pressure, so you cover large walls fast. An HVLP sprayer (high volume, low pressure) works better for thinner finishes and detail work on doors or shutters.
Match the tool to the job. Whole-house siding calls for airless. Small trim projects can justify HVLP, but it will feel slow on big surfaces.
Why Back-Rolling is Often Necessary
Back-rolling means following the spray with a roller to work the paint into the surface. Spray alone can leave a thin, uneven film that fails early. Roll immediately behind the gun, section by section, while the paint is still wet.
This step also catches drips and lap marks before they set. Skipping it is one of the most common exterior mistakes.
The Role of Pressure and Tip Size
Set pressure and spray tip size to the product, not to maximum output. A larger tip (around 0.015 to 0.019 for thick exterior paint) moves material faster. Too much pressure causes bounce and overspray; too little gives a sputtering pattern.
Test on scrap material first. Adjust until you get a even fan with no runs.
Before You Start: Tools, Materials, and Safety Gear
Essential Sprayer Parts and Accessories
Match the spray tip size to the coating and use a quality airless paint sprayer for large siding jobs. A smaller HVLP sprayer suits trim and doors. Stock spare tips, filters, and a 50-foot hose so you are not stopping mid-wall.
Masking Supplies You’ll Need
Masking means covering surfaces you don’t want painted. Buy painter’s tape, a removable pressure-sensitive tape, plus plastic sheeting for windows, doors, and landscaping. Drop cloths protect walkways and shrubs.
Respirator and Protective Clothing
Wear a fitted respirator rated for paint vapors, plus goggles, gloves, and long sleeves. Over-spray travels, so keep bystanders clear and ventilate when spraying near openings.
Paint Selection: Type and Sheen
Choose 100% acrylic exterior paint for siding and trim, and pick a satin or semi-gloss sheen that sheds dirt and resists moisture. Apply a compatible primer first on bare or patched areas.
- Sprayer choice: Use an airless paint sprayer for big siding areas and an HVLP sprayer for trim and doors.
- Spray tip size: Match the tip to your coating so the finish lays out evenly without runs.
- Masking kit: Painter's tape and plastic sheeting protect windows, doors, and landscaping from over-spray.
- Respirator fit: A properly fitted respirator plus goggles, gloves, and long sleeves keeps vapors and mist off you.
- Paint type: 100% acrylic exterior paint holds up to sun and moisture on siding and trim.
- Sheen pick: Satin or semi-gloss sheds dirt and cleans up better than flat on outside walls.
- Primer first: A compatible primer on bare or patched spots helps the topcoat bond and last.
Step-by-Step: How to Spray Paint Outside of House
1. Clean and Prep Scrape, Sand, and Wash
Scrape loose paint, sand rough edges, then pressure wash at 1,500-2,500 psi. Let siding dry 24-48 hours before spraying.
2. Mask Windows, Doors, and Landscaping
Apply painter’s tape along window frames and doors, hang plastic over glass and plants, and press tape edges flat to prevent spray creep.
3. Prime Bare or Repaired Areas
Spot-prime bare wood and patched spots with a brush; skipping primer causes flashing and peeling. Let dry 2-4 hours per label.
4. Set up Sprayer and Test Spray
Use a 0.015-0.019 inch tip for latex on siding. Set airless sprayer pressure until the fan is even, then test on scrap board.
5. Spray in Consistent Passes
Hold the gun 10-12 inches away, move steadily, and overlap each pass by 50 percent. Back-roll immediately to even coverage.
Work through these five steps in order and your exterior paint job will look intentional, not patchy.
Alternative Path: Spraying Different Siding Materials and Weather Conditions
Different siding and weather demand small adjustments, and ignoring them is how runs, lap marks, and drift ruin a good job.
Spraying Wood, Vinyl, Stucco, and Brick
Match your spray tip size to the material: a 0.017 tip for thick exterior paint on brick or stucco, a 0.015 for vinyl or wood. Back-roll each section within 10 minutes so paint works into texture.
Spraying in Windy Conditions: What to Do
Stop when wind exceeds about 10 mph, because drift carries paint onto cars and windows. Mask with painter’s tape and plastic sheeting, weighting loose edges so gusts cannot lift them.
Dealing with Overspray and Drift
Inspect nearby surfaces right after each pass and wipe drift off with a solvent-damp rag before it cures. Wear a respirator rated for paint vapors and keep bystanders upwind.
Different siding and weather demand small adjustments, and ignoring them is how runs, lap marks, and drift ruin a good job.
Troubleshooting: When the Sprayer Acts up
Most sprayer problems trace back to technique, prep, or a dirty tip, not a broken machine. Fix the cause and the finish follows.
| Problem | Likely cause | Fix |
|---|---|---|
| Uneven coverage or runs | Too slow, too close, or heavy overlap | Speed up, back off, overlap 50 percent |
| Clogged tip or spitting | Dried paint or tip too small | Flush, strain paint, upsize tip |
| Overspray on windows or trim | Wind drift or thin masking | Re-mask, spray with wind, shield edges |
| Paint peeling on patches | Bare or repaired spots unprimed | Apply primer, let cure fully |
| Sags at trim edges | Excess buildup near masked lines | Light coats, back-roll edges |
| Spray pattern tails | Worn tip or low pressure | Replace tip, check settings |
| Drips on siding laps | Spraying downward into laps | Angle up, keep passes even |
Uneven Coverage or Runs
Runs mean too much paint in one spot. Keep the gun roughly 10 to 12 inches from the surface, move at a steady pace, and overlap each pass about 50 percent.
Clogged Tip or Inconsistent Spray
A spitting pattern usually signals a dirty tip or unstrained paint. Flush the airless paint sprayer, strain the exterior paint, and step up your spray tip size if the finish stays thin.
Overspray on Unwanted Areas
Drift ruins masking fast. Spray with the wind, not into it, and add plastic sheeting plus painter’s tape wherever edges sit exposed.
Adhesion Issues on Repaired Surfaces
Bare or patched spots need primer, a preparatory coating that bonds paint to the surface. Prime, let it cure, then topcoat. Skip it and peeling starts within months.
Quick Checklist: Before You Spray or Decide
Safety and Environmental Checks
Protect your lungs and eyes before anything else. A tight-fitting respirator rated for paint vapors, plus goggles and gloves, is non-negotiable when you spray exterior paint.
Homes built before 1978 may have lead paint. Test the siding before you disturb it, and follow EPA lead-safe rules if it comes back positive.
Equipment and Material Readiness
Match the sprayer to the job. An airless paint sprayer handles thick exterior paint and large siding areas; an HVLP sprayer suits trim and smaller projects.
- Spray tip size: Pick a tip the manufacturer lists for exterior paint, usually 0.015 to 0.019 for airless units.
- Primer and paint: Buy enough for two coats and keep primer on hand for bare spots.
- Masking supplies: Stock painter’s tape (removable pressure-sensitive tape) and plastic sheeting to shield windows, doors, and fixtures.
Weather and Surface Conditions
Spray when weather conditions cooperate: 50 to 85°F, low wind, and no rain forecast for at least 24 hours. Check the label for the manufacturer’s exact limits.
Weather conditions are the temperature, wind, and rain forecast that determine whether exterior paint sprays and cures properly.
Complete surface pressure washing (high-pressure water cleaning of hard surfaces) and let the siding dry fully. Damp wood or peeling paint will ruin the finish.
- Respirator and goggles: Wear a paint-rated respirator, goggles, and gloves every time you spray.
- Lead paint check: Test pre-1978 siding for lead and follow EPA rules before disturbing it.
- Right sprayer: Use an airless paint sprayer for large siding jobs and an HVLP sprayer for trim.
- Spray tip size: Confirm your tip matches the exterior paint, typically 0.015 to 0.019 for airless.
- Masking kit: Have painter's tape and plastic sheeting ready for windows, doors, and fixtures.
- Weather window: Spray at 50 to 85°F with low wind and no rain for 24 hours.
- Dry surface: Pressure wash first, then let the siding dry completely before spraying.
Myths vs. Facts About Spray Painting Exterior Surfaces
Myth: Spray Painting is Always Faster Than Brushing
Spraying wins on large, open siding, but setup, masking, and cleanup add hours, a small trim job can take longer with a sprayer. Expect 2 to 4 hours of prep for a typical single-story exterior; that prep keeps overspray off cars and shrubs.
Myth: You Don’t Need to Back-Roll If You Use a Sprayer
Back-rolling (following spray with a roller) is still required on most exterior siding; spray alone can leave a thin, uneven film that fails early. Spray a section, then roll while wet. Keep the tip about 12 inches from the wall, overlap passes by 50 percent, and move steadily.
Myth: Any Sprayer Works for Exterior Paint
An airless sprayer handles thick exterior paint; a small HVLP unit suits stains and thin finishes. Match the sprayer to the product. Check the manual for correct tip size and thin paint only as allowed. Use a respirator, proper weather, and full cleanup.
Cost: DIY vs. Professional Spray Painting
Spraying exterior paint yourself usually costs a fraction of hiring a crew, but the gap shrinks once you count rental, masking supplies, and cleanup. Typical ranges below assume a single-story home with 1,500 to 2,000 square feet of siding and trim in average condition.
| Option | Upfront cost | Ongoing cost | Notes |
|---|---|---|---|
| DIY with rented airless paint sprayer | $400 to $900 | Rental days, tips, filters | Best for large flat siding areas; rent for 1 to 3 days |
| DIY with purchased airless sprayer | $1,200 to $2,500 | Tips, filters, storage, maintenance | Pays off only across multiple projects or years |
| DIY with HVLP sprayer | $150 to $500 | Cups, needles, extra thinning | Slower on siding; fine for trim and doors |
| Masking and surface preparation supplies | $100 to $300 | Painter's tape, plastic sheeting, primer | Primer is a preparatory coating applied before paint |
| Professional spray and back-roll job | $3,000 to $7,000 | None upfront | Includes labor, material, masking, and cleanup |
| Professional full exterior repaint | $5,000 to $12,000 | None upfront | Higher end covers repairs, primer, and two coats |
| Overspray damage or cleanup | $0 to $1,500+ | Varies by incident | Wind drift onto cars, windows, or neighbors drives this |
Ranges reflect typical US DIY and contractor pricing for a single-story home with 1,500 to 2,000 square feet of siding and trim in average condition. Actual costs vary with home size, paint quality, surface preparation needs, local labor rates, and rental terms. Renting an airless paint sprayer for a weekend generally costs less than buying one unless you plan repeated projects.
Renting an airless paint sprayer for a weekend costs $100, $300; buying starts around $600 and can exceed $1,500. With exterior paint, primer, tape, plastic sheeting, and a respirator, most DIY jobs land between $400 and $900 upfront.
DIY Cost Breakdown: Paint, Rental, Masking, and More
Costs fall into four areas: exterior paint, sprayer rental or purchase, masking supplies, and surface preparation. Pressure washing is often free if you own the unit; otherwise budget a rental day. Buy extra spray tip sizes to match the tip to the coating instead of thinning paint.
Surface preparation is the cleaning, scraping, sanding, and priming done before spraying so exterior paint bonds well and lasts.
Professional Cost and What It Includes
A pro spray and back-roll job on a typical single-story home runs $3,000, $7,000; a full repaint with repairs and primer can hit $5,000, $12,000. That covers labor, materials, masking, surface prep, cleanup, and insurance.
Hidden Costs: Overspray Damage and Cleanup
Overspray is the quiet budget killer, one windy afternoon can coat a car, windows, or a neighbor’s fence, costing $0 to $1,500+ to fix. Check weather, mask aggressively, and plan for cleanup time and disposal fees.
Common Mistakes to Avoid When Spray Painting Outside
Most exterior paint failures come from skipped steps, not bad paint. Get these five right and the coating will hold.
Skipping Surface Preparation
Dirt, chalk, and loose paint prevent bonding. Pressure wash, then scrape and sand bare or flaking spots.
Using the Wrong Tip or Pressure
Match spray tip size and pressure to the coating or you’ll get runs or a pebbled finish. Check the manufacturer’s chart and test on scrap first.
Not Back-Rolling
Spray alone rarely lays an even film on rough siding. Back-rolling (following the spray with a roller while wet) works paint into texture and prevents lap marks.
Ignoring Weather Conditions
Wind, sun, and temperature swings ruin a spray job. Spray within the label range, avoid windy days, and keep surfaces out of harsh sun.
Inadequate Masking
Overspray drifts farther than you think. Tape and plastic-sheet windows, doors, fixtures, and landscaping before spraying.
- Prep first: clean, scrape, sand, prime bare spots.
- Confirm tip size and pressure against the data sheet.
- Back-roll each section while wet.
- Watch wind and temperature.
- Mask windows, doors, and plants.
- Wear a respirator and plan cleanup.
When to Call a Pro: Warning Signs and Safety First
Lead Paint or Asbestos Concerns
Homes built before 1978 likely contain lead paint, and disturbing it creates a serious health hazard. The EPA requires certified renovators for work on pre-1978 exteriors, so test first and hire a pro if lead is present.
Extensive Repairs or Rot
Soft siding, crumbling trim, or widespread rot means the surface isn’t ready for any coating. A pro can repair and prep in one scope; you’ll otherwise risk trapping moisture and redoing the job within a season.
Height or Access Challenges
If you cannot safely reach second-story trim from stable footing, stop. Ladder falls are a leading DIY injury, and scaffolding rental plus setup often costs more than the labor you’re trying to save.
Lack of Equipment or Time
An airless paint sprayer, respirator, and masking supplies add up fast. Figure 2 to 4 days for prep and spraying on a typical single-story home, plus touch-ups and cleanup.
- Stop if a lead paint test comes back positive on pre-1978 siding or trim.
- Stop if you find rot, loose siding, or failed caulk across large areas.
- Stop if the only access is a tall ladder on uneven ground.
- Stop if your schedule cannot cover cure time before rain.
Stop and call a professional if:
- Stop if you cannot rent or buy a proper airless paint sprayer and respirator.
How to Spray Paint Outside of House: Frequently Asked Questions
?Can I Spray Paint Outside of House Siding Myself, or Does It Have to Be a Pro Job?
Yes, you can spray paint outside of house siding yourself if you are willing to prep properly and rent or buy the right airless paint sprayer. The work is not complicated, but it is unforgiving of shortcuts. Surface preparation, masking, and weather conditions matter more than spraying skill. If your house is tall, heavily deteriorated, or has lead paint, hire a pro instead.
?How Do I Spray Paint Outside of House Surfaces Without Overspray Ruining Windows and Cars?
Mask everything you are not painting before the sprayer is turned on. Use painter's tape, a removable pressure-sensitive tape, on trim and glass edges, then hang plastic sheeting over windows, doors, lights, and the ground. Move or cover cars, grills, and outdoor furniture. Overspray travels farther than you think, so check the wind direction and mask a wider zone than feels necessary.
?What Weather Conditions Work Best When Learning How to Spray Paint Outside of House Exterior Paint?
Spray when temperatures stay within the label range, usually 50 to 85 degrees Fahrenheit, with low wind and no rain forecast for at least 24 hours. Avoid direct hot sun because it dries the spray before it levels. High wind causes drift and uneven coverage. Check humidity too, since exterior paint cures poorly in cold or damp conditions.
?Why Does Surface Preparation and Pressure Washing Come Before I Spray Paint Outside of House Walls?
Clean, dull, dry surfaces are the only ones exterior paint will bond to. Pressure washing, which is high-pressure water cleaning of hard surfaces, removes dirt, chalk, and mildew. Then scrape loose paint, sand edges, and spot-prime bare wood with primer, a preparatory coating applied before painting. Skip this and the finish peels within a season or two.
?What Sprayer Setup Do I Need to Spray Paint Outside of House Siding Evenly?
Use an airless paint sprayer for large exterior surfaces; it handles thick exterior paint fast. Match the spray tip size to the coating, typically a larger tip for body paint and a smaller one for trim. An HVLP sprayer, a lower-pressure gun for finer work, suits trim and doors. Thin the paint only per the manufacturer's instructions.
?is Back-Rolling Necessary When I Spray Paint Outside of House Trim and Siding?
Yes, back-rolling is worth the extra pass on siding. After spraying a section, run a roller over the wet paint to work it into the surface and even out the finish. It improves adhesion and hides lap marks. On trim and detailed areas, spray and brush out drips immediately. Keep a wet edge so sections blend.
?When Should I Stop and Call a Pro Instead of Figuring Out How to Spray Paint Outside of House Myself?
Stop if the exterior paint is pre-1978 lead paint, the siding is rotted or loose, or the house is two or more stories with steep rooflines. Those are safety and liability issues, not skill issues. Also call a pro if you cannot manage respirator use, ladder work, or masking at height. A botched spray job costs more to fix than to hire out.
Conclusion
Getting exterior house spray painting right comes down to the boring stuff: thorough surface preparation, proper masking with painter’s tape and plastic sheeting, and a quality exterior paint pushed through an airless paint sprayer at the right spray tip size. Skip the respirator or spray in bad weather and you will redo the work. Nail the prep and technique, and you get an even, lasting finish the first time.
Your next move: pressure washing is the use of a high pressure water jet for cleaning hard surfaces, so wash and let the siding dry fully, then test your spray pattern on scrap material before touching the house.
Sources and further reading: guidance from EPA, OSHA.