
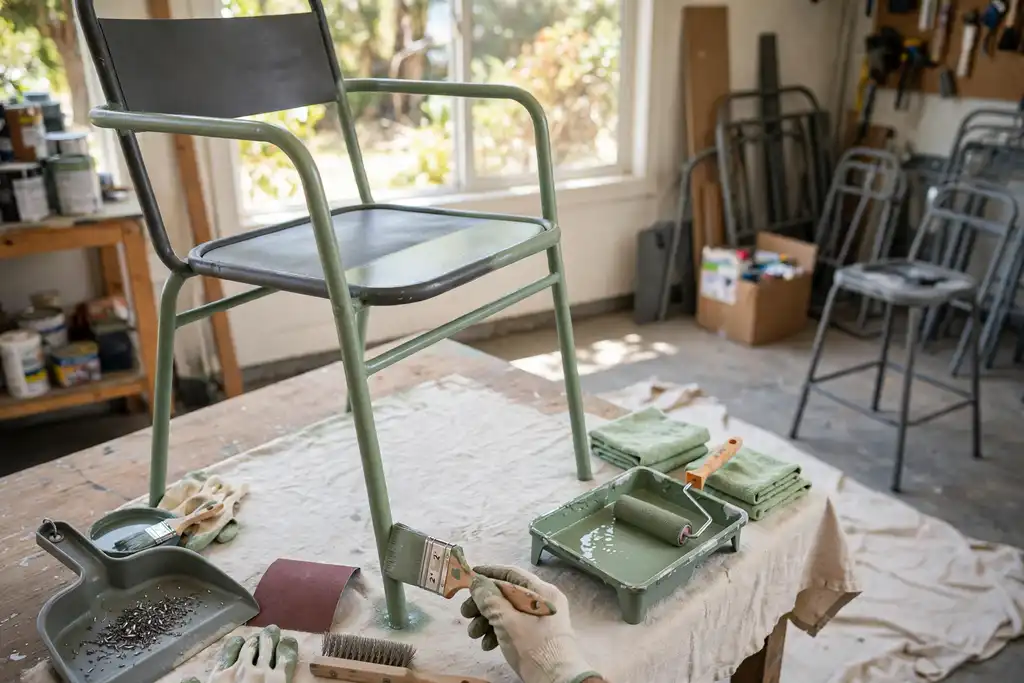
You can paint metal furniture without spray paint by sanding, degreasing, and priming first, then applying enamel paint with a brush or roller. Skip any step and the finish will peel, chip, or fail within months.
Prep work decides whether your brush-painted metal furniture lasts or fails. Learning how to paint metal furniture without spray paint comes down to four non-negotiables: remove rust and old finish with sandpaper, clean every surface with a degreaser, apply a bonding primer, and choose the right paint for metal.
Rushing any of these steps causes peeling, poor adhesion, or uneven color that no topcoat can hide. This article gives you the exact sequence, drying time between coats, and safety precautions for working with oil-based paint and solvents indoors. Follow it once and you will get a hard, even finish that holds up to daily use.
- Sand and degrease metal before primer or paint touches it.
- Use a bonding primer made for metal to lock adhesion.
- Apply enamel paint with a brush or roller in thin coats.
- Ventilate and wear gloves when using oil-based paint or degreaser.
- Let curing finish fully before use, typically 5 to 7 days.
How to Paint Metal Furniture Without Spray Paint: the Quick Decision Before You Start
Before you pick up a paintbrush, decide if brush-and-roller painting suits your metal furniture. This quick check prevents wasted paint, poor adhesion, and safety hazards.
| Your situation | What to do | Why |
|---|---|---|
| Small or detailed metal furniture | Use a paintbrush | Reaches tight spots without overspray |
| Large flat metal surfaces | Use a roller | Covers faster with fewer brush marks |
| Existing rust or peeling paint | Sand and prime first | Ensures adhesion and stops rust return |
| Greasy or oily metal | Clean with degreaser | Paint won't stick to dirty surfaces |
| Indoor furniture with latex paint | Allow 2 to 4 hours between coats | Latex needs longer drying time than enamel |
| Outdoor or high-traffic pieces | Use oil-based or enamel paint | Harder topcoat resists wear and weather |
| Tight deadline or poor ventilation | Reconsider spray paint | Brush painting needs curing time and airflow |
Recommended for this job

Pro Grade Acid Brushes
Small acid brushes reach tight metal joints and details for even paint application.

Rust-Oleum Stops Rust Brush On Protective
Brush-on enamel bonds directly to metal for a durable rust-resistant finish without spraying.

CRC Heavy Duty Pro-Strength Degreaser Spray
Degreaser removes oil and grime so brush-on paint adheres properly to metal surfaces.
Is Brush-and-Roller Painting Right for Your Piece?
Yes, if your metal furniture is small, detailed, or you lack spray equipment. A 1 to 2 inch paintbrush reaches corners and edges a roller misses, while a 4 to 6 inch foam roller flattens large flat panels quickly. Use both for the best coverage.
What Finish Can You Realistically Expect?
A smooth, even finish is achievable with 2 to 3 thin coats and 220 grit sandpaper between layers. Expect slight brush marks on flat surfaces, but a bonding primer and enamel paint minimize them. Avoid coats over 3 mils thick, which cause drips and uneven curing.
When This Method is a Bad Fit
Skip brush-and-roller painting for intricate scrollwork, tight louvered vents, or pieces with heavy rust. Those areas trap bristles and leave buildup. Also avoid latex paint on outdoor metal furniture, since it lacks the durability of oil-based enamel.
The 5-Minute Diagnostic: Check These Before You Touch a Brush
Run this five-minute inspection before you sand or open a can. Each answer changes your prep and paint choice.
How Much Rust is Actually There?
Surface rust is a thin orange film you can sand off with 120-grit sandpaper; pitting means the metal is eaten away. Probe each spot with a screwdriver tip, and treat anything deeper than a stain with a rust converter before painting.
- Rub a white cloth over the frame to check for hidden grease; wipe again with a degreaser (a solvent that cuts oil) if it picks up grime.
- Press a screwdriver tip into rust spots to gauge corrosion depth before planning a repair.
Is the Existing Finish Sound or Peeling?
A finish that grips tightly can stay; one that chips off in flakes has to go. Scrape a small edge with a putty knife, and if paint lifts easily, sand to bare metal for reliable adhesion (the bond between paint and metal).
What Metal Are You Dealing with?
Steel and aluminum need different abrasives and primers, so identify the metal first. A magnet sticks to steel but not aluminum, telling you which primer to buy.
Indoor or Outdoor Life Ahead?
Outdoor pieces need exterior-rated enamel paint and a rust-inhibiting primer; indoor pieces can take latex paint. Decide where the piece will live before buying anything.
Run this five-minute inspection before you sand or open a can, because each answer changes your prep and your paint choice.
How Non-Spray Metal Painting Actually Works
Why Adhesion Starts with Clean and Scuffed
Paint sticks to metal only when the surface is free of oil and slightly roughened. Wipe every inch with a degreaser, a solvent that cuts shop oils and fingerprints, then rinse and dry fully. Scuff the piece with 120 to 220 grit sandpaper so the coating has something to grab.
Skip the scuff and you get peeling within months, usually right where hands touch the furniture most.
The Primer-to-Topcoat Bond
Primer is a preparatory coating that seals the metal and gives your topcoat a uniform base to grip. Apply a thin, even primer coat with a paintbrush in the crevices and a roller on flat panels, then let it cure per the label, typically 2 to 4 hours.
Sand the dried primer lightly with 220 grit to knock down nibs, and wipe off the dust before you paint.
Why Thin Coats Beat Thick Ones
Two or three thin coats always outlast one heavy coat. Load your brush lightly, lay the enamel paint down in long, overlapping strokes, and keep the roller moving to avoid lap marks.
Respect drying time between coats, usually 4 to 8 hours, and let the piece cure fully for about a week before daily use. Thick coats trap solvent, stay soft, and chip fast.
Before You Start: Supplies, Paint Choice and Ventilation Setup
Gathering Supplies and Choosing the Right Paint
You need a degreaser (a solvent that strips oil and grime), sandpaper, a primer (a base coat that helps paint stick), and your topcoat. Buy a quality paintbrush and roller sized to your piece, plus rags and a drop cloth.
Oil-Based vs Water-Based for Metal
Oil-based enamel paint gives the hardest, most durable finish on metal furniture and resists rust best. Latex paint is easier to clean up and lower odor, but it can chip sooner on high-touch pieces.
Ventilation and Safety Precautions Without Spray Equipment
Work outdoors or in a garage with doors open and a fan moving air across your work area. Wear nitrile gloves, eye protection, and a respirator rated for solvent vapors when using oil-based paint or degreaser.
Brushes, Rollers and Small Tools Worth Buying
A 2-inch angled paintbrush handles edges and details, while a small foam roller covers flat panels fast. Add a paint tray, stir sticks, and painter’s tape for clean lines.
- Choose oil-based enamel paint for durability and rust resistance on metal furniture.
- Pick latex paint for easier cleanup and lower odor on low-touch pieces.
- Buy a degreaser, sandpaper, primer, paintbrush, roller, rags, and drop cloth.
- Work outdoors or in a garage with doors open and a fan for airflow.
- Wear nitrile gloves, eye protection, and a solvent-rated respirator.
- Use a 2-inch angled brush for edges and a foam roller for flat panels.
- Add a paint tray, stir sticks, and painter's tape to your supply list.
Step-by-Step: How to Paint Metal Furniture Without Spray Paint
Step 1: Clean and Degrease Every Surface
Use a solvent-based degreaser to strip oils and grime, paint won’t stick to a dirty surface. Wipe every inch, rinse with clean water, and dry completely (1-2 hours).
Step 2: Sand and Scuff for Grip
Scuff with 120-grit sandpaper to create a mechanical key for adhesion. Sand with the grain, then remove dust with a tack cloth.
Step 3: Treat Rust Spots and Let Them Dry
Sand rust to bare metal, apply a rust converter or inhibitor, and follow the label’s drying time (often 24 hours). Skipping this lets rust return under the finish.
Step 4: Apply Primer in Thin Coats
Use a metal-specific primer. Brush on two thin coats, drying 2-4 hours each, and sand lightly between coats.
Step 5: Choose Brush vs Roller by Furniture Shape
Use a brush on legs, frames, and corners; a roller on flat tabletops and panels. Load light, keep a wet edge, and lay off in one direction.
Work through these steps in order and your brushed or rolled finish will hold up as well as any aerosol job.
Follow-Up Care: Keeping the New Finish Looking Sharp
Once the final coat is on, give the finish time and routine attention.
- Let the piece sit undisturbed for 24 to 48 hours before light use.
- Wait 7 to 14 days for full hardness before heavy daily wear.
- Wipe surfaces monthly with a damp cloth and mild soap.
- Skip harsh solvents and abrasive pads that dull the topcoat.
- Touch up chips within a few days using matching enamel paint.
- Feather the chip edge with fine sandpaper before recoating.
- Keep furniture dry and away from standing water to prevent rust.
How Long Until It’s Fully Cured?
Curing hardens material into cross-linked polymer chains and takes longer than drying. Enamel paint feels dry in 6 to 24 hours but needs 7 to 14 days to fully cure. Keep weight off during that window.
Maintaining Painted Metal Furniture
Wipe monthly with a damp cloth and mild soap, then dry immediately. Avoid solvent cleaners that soften the topcoat. Check joints and edges every season for wear.
Touching up Chips Before They Spread
Address chips within a few days, before moisture reaches bare steel and starts rust. Lightly scuff with fine sandpaper, wipe away dust, and apply matching enamel paint with a small brush.
Once the last coat is on, the finish still has work to do, so give it time and a little routine attention.
Troubleshooting: Drips, Brush Marks and Stubborn Rust
Most finish failures on metal furniture trace back to three things: too much paint, contaminated substrate, or trapped moisture. Diagnose the cause before you touch a brush, because recoating over a defect just buries it.
| Problem | Likely cause | Fix |
|---|---|---|
| Runs and sags | Coats applied too heavy | Brush out thin, recoat after drying time |
| Visible brush marks | Paint too thick or dry brushing | Add leveling additive, keep a wet edge |
| Rust bleeding through | Rust not fully removed | Sand to bare metal, spot-prime with rust-inhibiting primer |
| Paint peeling in sheets | Grease or wax left on surface | Strip, wipe with degreaser, reapply primer |
| Bubbles or blisters | Moisture under the film | Let it cure fully, sand back, repaint in dry conditions |
| Sticky finish weeks later | Oil-based enamel still curing | Wait several weeks, improve airflow and warmth |
| Paint lifts when sanded | Poor adhesion to slick metal | Scuff with sandpaper, re-prime before topcoat |
Runs and sags mean too much paint, not bad luck. Brush them out while wet, or sand smooth once dry and recoat thinner.
Fixing Runs and Sags Without Repainting Everything
Sand the sag flat with fine sandpaper, feather the edges, then apply one thin coat. Two light passes beat one heavy one every time.
Smoothing Brush Marks with Additives and Technique
Stir in a leveling additive made for your paint type and keep a wet edge. Work in smaller sections so the enamel paint flows out before it sets.
What to Do When Rust Bleeds Through
Rust means the metal was not clean or sealed. Sand to bare metal, wipe with degreaser, and spot-prime with a rust-inhibiting primer before the topcoat.
Paint That Won’t Stick: Diagnosing the Cause
Peeling usually points to grease, wax, or a missed primer coat. Strip the loose film, degrease, scuff with sandpaper, and re-prime for solid adhesion.
Cost: Brush-and-Roller DIY vs Buying Spray Gear vs Hiring a Pro
Brush-and-roller work keeps your money on supplies, not gear you'll use once. Typical ranges below assume a single chair or small table, one color, and paint you already chose.
| Option | Upfront cost | Ongoing cost | Notes |
|---|---|---|---|
| Brush and roller setup | $30 to $70 | Paint and consumables | Reusable tools, no overspray |
| Primer and degreaser | $15 to $35 | Per project | Skip neither on bare or greasy metal |
| Sandpaper and tack cloths | $10 to $20 | Per project | Grits from 120 to 220 |
| Enamel paint, quart | $20 to $45 | Per recoat | Oil-based needs longer drying time |
| Latex paint, quart | $15 to $35 | Per recoat | Weaker adhesion on slick metal |
| Entry spray gun and compressor | $150 to $400 | Solvent, masking, cleanup | Overkill for one piece |
| Pro strip and repaint | $150 to $600 | None | Quote depends on prep and rust |
Ranges reflect US retail prices for a single small piece, one color, and existing tools. Pro quotes vary with size, rust, and finish.
What a Typical DIY Setup Costs
Budget $55 to $125 for a single chair or side table. That covers primer, degreaser, sandpaper, and a quart of enamel paint, with your paintbrush and roller reused later.
Cost Comparison of Brush vs Spray
A spray gun plus compressor runs $150 to $400 before you buy paint, so brushing wins on small jobs. Spray earns its cost only across many pieces or intricate frames.
When a Pro Quote Makes Sense
Heavy rust, welded joints, or a large cabinet justify a $150 to $600 quote. Ask what prep they include, since poor adhesion fails fast.
Real-Life Walkthrough: Repainting a Thrifted Metal Chair
Assessing the Chair’s Rust and Finish
Inspect every joint and weld. Light surface rust sands off, but deep pitting or flaking chrome may not hold paint. Scuff with 120-grit, then wipe with degreaser so coating bonds.
The Shopping List and Total Spend
Budget $40, $70 per chair with basic tools. You’ll need sandpaper, degreaser, rust-inhibiting primer, enamel paint, a brush for edges, and a small roller. Skip bargain primer; adhesion decides whether the job lasts.
Priming, Painting and Curing Day by Day
Plan three to five days. Day one: clean and sand. Day two: one thin primer coat, dry 2-4 hours. Day three: thin enamel passes, recoat after 8-24 hours.
The Final Result and What I’d Do Differently
Expect a hard, even finish once curing finishes over 5-7 days. I’d choose a bolder color next time, like deep teal or mustard. One regret: rushing the primer coat. Thin coats beat thick ones.
Quick Checklist Before You Start or Decide
Supplies and Safety Check
Gather everything first: a degreaser (solvent that strips oils), sandpaper (abrasive for scuffing), a primer (prep coating for adhesion), and a paintbrush or roller. Choose enamel or oil-based paint, which bond harder to metal than latex (which can peel without a bonding primer). Work outdoors or in a ventilated garage with a fan, since solvent fumes build fast. Wear nitrile gloves, safety glasses, and a solvent-rated respirator per OSHA guidance.
Surface Prep Check
Prep decides adhesion. Scuff the whole piece with medium sandpaper, then smooth bare spots and rust (iron oxide corrosion). Degrease twice, wash, rinse, wipe, so no oily film remains. Dry fully, or trapped moisture will lift the paint.
Paint and Primer Compatibility Check
Match your primer to your topcoat; confirm both labels rate for metal and for each other. Test a small hidden patch and let it cure fully. Respect drying time: recoat within the label window, typically 2-24 hours depending on product and humidity.
- Pick the paint: enamel or oil-based paint bonds harder to metal than latex paint, which can peel without a bonding primer.
- Ventilate: work outdoors or in a garage with doors open and a fan moving air, since solvent fumes build fast.
- Wear protection: nitrile gloves, safety glasses, and a respirator rated for solvent vapors, per OSHA guidance on organic solvents.
- Degrease twice: wash with a degreaser, rinse, and wipe again so no oily film remains.
- Dry fully: let the piece sit until every crevice is dry, or paint will trap moisture and lift.
- Test first: brush a small hidden patch and let it cure (harden fully) before committing.
- Respect drying time: recoat within the window on the label, typically 2 to 24 hours depending on product and humidity.
Common Mistakes That Ruin a Brush-Painted Metal Finish
Skipping Degreasing
Leftover oils and fingerprints stop paint from bonding, so clean every surface first. Wipe the metal furniture with a degreaser (a solvent that cuts grease), then rinse and let it dry fully.
Painting Over Rust
Paint will not seal rust, and the corrosion keeps spreading under the film. Sand the area down to bare metal, treat any pits, and confirm the surface is sound before you prime.
Thick Coats and Rushed Rec Oats
Heavy layers trap solvent and cause runs, wrinkles, and weak adhesion. Apply thin coats with a paintbrush or roller and respect the full drying time on the can.
Ignoring Fumes and Ventilation
Oil-based enamel paint and many degreasers release strong vapors, so work outdoors or in a space with steady airflow. Follow OSHA guidance on respirators and keep flames away during application and curing.
When to Ask for Help: Store Experts, Manufacturers and Local Pros
Questions Worth Asking at the Paint Counter
A store expert can save you a redo, so ask before you buy. Bring a photo of the piece and any rust spots you found, then ask which primer suits bare steel versus coated metal.
Get specifics on enamel paint versus latex paint for your project, and whether a roller or paintbrush fits the surface. Confirm the recoat window and full drying time printed on the label.
When the Manufacturer’s Specs Matter
Check the maker’s guidance when the piece carries a finish warranty or a factory powder coat. Ask the manufacturer which degreaser and sandpaper grit will not void coverage, and what topcoat they recommend.
Also request the safe temperature range for curing, since cold garages slow adhesion and stretch drying time.
Signs a Piece is Beyond DIY
Call a local pro when rust has eaten through joints or the frame flexes. Ask a restoration shop to assess structural welds before you invest in primer and paint.
- Ask the paint counter to match a custom color in an enamel paint and confirm the topcoat options.
- Ask the manufacturer for written prep and curing specs if the finish is under warranty.
- Ask a local pro to inspect deep rust or cracked welds before you sand anything.
How to Paint Metal Furniture Without Spray Paint: Frequently Asked Questions
?How to Paint Metal Furniture Without Spray Paint and Still Get a Smooth Finish?
Yes, you can get a smooth finish by hand. Thin the paint slightly, load your brush or roller lightly, and keep a wet edge as you work. Prep matters most: sand the surface, degrease it with a solvent that cuts oil and grime, and apply a bonding primer so paint sticks. Two or three thin coats always beat one thick coat for smoothness.
?How to Paint Metal Furniture Without Spray Paint so the Finish Actually Lasts?
Prep and topcoat decide longevity. Scuff the surface with sandpaper (an abrasive that smooths and gives paint a grip), wipe it down with a degreaser, then apply a primer made for metal. Finish with enamel paint or a compatible topcoat, and let the full curing (the hardening process) run its course before heavy use. Skipping primer is the number one reason brush-painted metal peels.
?What Paint Works Best When You Paint Metal Furniture Without Spray Paint?
Enamel paint is the usual pick for metal furniture because it dries hard and resists chipping. Oil-based paint flows out brush marks well but needs longer drying time and good ventilation. Latex paint works on properly primed metal and is easier to clean up. Whatever you choose, confirm it's labeled for metal and use a matching primer for adhesion.
?Why Does Paint Peel off Metal Furniture Without Spray Paint, and How Do I Prevent It?
Peeling almost always means poor adhesion (the bond that makes paint stick to the surface). Grease, rust, and a glossy factory finish block that bond. Sand dull, degrease, spot-prime bare or rusty spots, then coat. If you're learning how to paint metal furniture without spray paint, treat prep as the job and painting as the reward. Rushing prep guarantees a do-over.
?Does How to Paint Metal Furniture Without Spray Paint Change for Pieces with Rust?
Yes, rust needs removal first. Sand or wire-brush it down to bare metal, then apply a rust-inhibiting primer before any topcoat. Paint over loose rust and it will lift and blister within months. If pitting is deep, treat the area, let it dry fully, and spot-prime again. Solid metal underneath is what holds the new finish.
?When Should I Use a Roller Instead of a Paintbrush on Metal Furniture Without Spray Paint?
Use a roller on flat panels and large surfaces, and a paintbrush on legs, edges, and details. A small foam roller leaves fewer marks on broad areas, while a brush gets into joints a roller can't reach. Keep coats thin and watch for drips at the bottom edges. Two thin coats beat one heavy coat for both looks and drying time.
?is It Safe to Paint Metal Furniture Without Spray Paint Indoors?
It's safer than spraying, but ventilation still matters. Oil-based paint and many degreasers release strong fumes, so open windows, use a fan, and wear gloves. Keep pets and kids out until the finish is dry. Follow the label's drying time and recoat window exactly, and don't bring the piece inside until odors clear and curing is underway.
Conclusion
Get the prep right and the finish will hold. Skipping the degreaser or rushing the primer is what causes peeling and poor adhesion, so clean, sand, and prime before you open the enamel paint. Brush or roll on two thin coats, and respect the full curing window before you use the piece.
Your next step: pick one small hidden spot, such as the underside of a chair seat, and do a full test panel first. It confirms your paintbrush or roller technique and drying time before the whole piece is committed.