
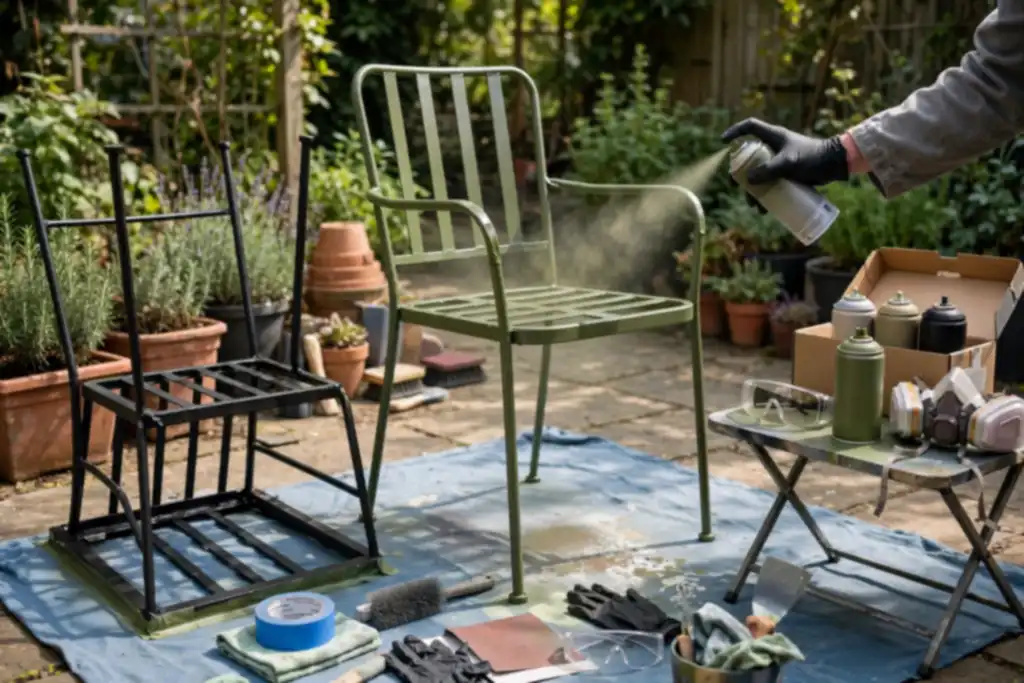
Spray painting metal garden furniture works only if you remove rust and grease first, then apply primer and thin coats. Skip prep and the paint peels within a season.
Rust never sleeps, and on metal garden furniture it starts eating through paint the moment a chip goes untreated. Learning how to spray paint metal garden furniture correctly is mostly about what happens before the can is shaken: sanding, rust removal, and cleaning decide whether the new finish lasts. You will get the exact order of steps, from primer choice to drying time between coats, plus the safety precautions that keep solvent fumes out of your lungs.
Most failed spray paint jobs trace back to skipped metal surface preparation or rushing the coats. This plan fixes that: a bare, degreased surface, a primer made for metal, and thin passes with a proper respirator and drop cloth in place. Follow it once and you will not be redoing the job next spring.
- Remove rust completely; any left under paint will spread.
- Degrease and sand so primer can bond to bare metal.
- Use a primer made for metal before spray paint.
- Apply thin coats, not one heavy coat, to avoid runs.
- Wear a respirator and lay a drop cloth before spraying.
How to Spray Paint Metal Garden Furniture: the Quick Decision Before You Start
Before you buy a single can, decide whether your piece is worth the effort and which coating will actually hold up. That thirty-second call prevents most wasted weekends.
| Your situation | What to do | Why |
|---|---|---|
| Light surface rust only | Sand it off, then prime | Rust spreads under paint |
| Deep pitting or holes | Replace or weld first | Paint will not bridge damage |
| Powder-coated finish intact | Scuff with fine grit, then paint | Smooth coats need a tooth |
| Peeling or flaking paint | Strip and sand to bare metal | New paint needs stable ground |
| Wrought iron with tight scrolls | Use spray paint, not a brush | Brushes leave runs in crevices |
| Large flat tabletop | Brush-on paint works fine | Fewer overspray headaches |
| Wind above a light breeze | Wait for a calm day | Overspray drifts and dries gritty |
| Humidity high or rain coming | Postpone the job | Moisture ruins adhesion |
Recommended for this job

Rust-Oleum Stops Rust Clean Metal Primer
Prepares bare metal with a flat white base that helps topcoat paint bond and last.

Rust-Oleum Painter's Touch 2X Ultra Cover
Provides durable flat black coverage on metal furniture with fast drying and any-angle spraying.

Rust-Oleum Stops Rust Reformer Black Spray
Converts existing rust into a paintable surface before topcoating metal garden furniture.
Budget 2 to 4 hours for prep, priming, and two coats on a standard two-seat bench. If rust has eaten through the metal or joints wobble, replacement is cheaper than a coating that fails in a season.
Is Your Furniture a Good Candidate for Spray Paint?
Yes, if the metal is solid and the damage is surface-level. Sanding with 120-grit paper and rust removal with a wire brush handle light oxidation, but pitting or holes mean the structure is compromised.
Rust removal is the process of eliminating oxidized metal from the furniture surface before painting to ensure proper adhesion.
Spray Paint vs Brush-On vs Replace: the 30-Second Rule
Choose spray paint for intricate shapes and even coverage; choose brush-on for big flat panels where overspray is a nuisance. Replace when repair costs approach the price of new furniture.
What Finish Can You Realistically Expect?
A smooth, even factory-like look is achievable with proper metal surface preparation, primer, and thin coats. Skip the prep and you get flaking, orange peel, and visible sanding scratches within months.
Common mistakes to avoid: skipping primer, spraying in wind, and rushing the drying time between coats.
The 5-Minute Diagnostic: Check Before You Spray
Five minutes of inspection tells you whether this is a scuff-and-spray job or a strip-and-rebuild job.
How Much Rust is Too Much Rust?
Surface rust you can sand away is fine. Pitting that craters metal or eats through a weld means repair before coating. Probe spots with a screwdriver; if the tip sinks in, remove rust to bare metal and use a rust converter.
The Wiggle Test for Joints and Welds
A solid frame shouldn’t move when pushed. Rock each joint; flex or a click signals a crack paint will only hide. Mark loose joints with tape and fix them first.
Is the Old Coating Flaking or Sound?
Sound factory powder coat can be scuffed and painted over. Flaking, chalky, or peeling finishes must come off or new coats will lift. Scrape a patch with a putty knife; if it chips in sheets, plan on sanding or stripping.
Will the Weather Cooperate This Week?
Spray paint needs 48 hours of dry air between 50 and 90 degrees Fahrenheit. Humidity above 70 percent slows drying and dulls the finish. Pick a calm, low-humidity window in a sheltered spot with a drop cloth.
A drop cloth is a protective sheet placed under the furniture to catch paint overspray and drips, keeping your workspace clean.
Run these five checks before you touch a can, because fixing a bad start costs more than doing it right the first time.
How Spray Painting Metal Actually Works
Why Metal Needs Primer to Hold Paint
Bare metal is slick, and spray paint alone grips it poorly. Primer is a preparatory coating applied before paint, and it gives the topcoat something to bite into while blocking rust creep. Apply primer in two thin passes, not one wet coat, or it will run and trap solvent.
Thin Coats, Mechanical Bond, and Cure Time
Spray paint bonds mechanically, meaning it locks into the scratch pattern left by sanding. Lay down three or four thin coats instead of one heavy pass, keeping the can moving and overlapping each stroke by half. Drying time between coats runs roughly 10 to 30 minutes in warm, dry weather, but check the can label for the exact re-coat window, because missing it can wrinkle the finish.
What Spray Paint Can and Can’t Fix
Paint hides color fade and light scuffs, but it will not fill deep pits, weld seams, or structural cracks. Finish rust removal and metal surface preparation first, since paint adhesion fails fast over loose flake. If the frame flexes or a joint is broken, repair it before you spray, not after.
Before You Start: Tools, Materials, and Safety Gear
Gather Materials and Tools
Have everything within reach before starting.
- Surface prep: 120 and 220 grit sandpaper, wire brush, rust remover.
- Cleaning: degreaser, clean rags, water.
- Coating: metal primer and metal-rated spray paint.
- Protection: respirator, safety glasses, nitrile gloves.
- Setup: drop cloth, painter’s tape, cardboard or stands.
Respirator and Ventilation: Non-Negotiables
Wear a respirator with organic vapor cartridges and spray outdoors or in a well-ventilated garage. Choose windless shade over direct sun. Keep kids and pets away until fully cured.
Set up a Safe Spraying Area
Lay a drop cloth and tape off unpainted parts.
- Distance: 10-15 feet from walls, cars, plants.
- Elevation: raise the piece on stands or cardboard.
- Weather: 50-90°F, low humidity.
Pick the Right Spray Paint for Metal
Use metal-labeled paint (direct-to-metal or enamel) with matching primer. Recoat in 1 to 2 hours; full cure in 5 to 7 days. Skip clear coat on bare steel unless labeled for metal.
- Gather materials and tools: sanding paper, wire brush, rust remover, degreaser, rags, primer, metal-rated spray paint, respirator, safety glasses, gloves, drop cloth, painter's tape, and stands.
- Safety precautions: fit a respirator with organic vapor cartridges and wear glasses and gloves for the whole job.
- Set up a safe spraying area: work outdoors or with full ventilation, 10 to 15 feet from walls and cars, with the piece raised on stands over a drop cloth.
- Choose the right spray paint: pick a metal-rated enamel or direct-to-metal formula and match it with a compatible primer.
- Plan recoat timing: read the can for drying time, usually 1 to 2 hours between coats and 24 hours to cure.
- Watch the weather: spray between 50 and 90°F in low humidity and out of direct sun for even coverage.
- Protect surroundings: tape off parts you are keeping unpainted and keep kids and pets away until the finish cures.
Step-by-Step: How to Spray Paint Metal Garden Furniture for a Durable Finish
1. Clean the Furniture Thoroughly
Scrub joints and crevices with degreaser and a stiff brush; rinse and dry fully.
2. Remove Rust and Old Paint
Strip to bare metal using a wire brush or 80-grit paper until only clean gray metal remains.
3. Sand the Surface
Sand the whole frame with 120-grit paper, feathering chipped edges and scuffing glossy finishes.
4. Wipe Down and Degrease
Wipe with a lint-free cloth dampened with mineral spirits; let flash off 15 minutes.
5. Apply Primer
Apply two thin coats, holding the can 8 to 10 inches away in steady passes.
Wear a respirator, work outside or in a ventilated garage, and use a drop cloth to catch overspray.
Follow these steps in order and your metal garden furniture will hold its finish through rain, sun, and seasons.
After the Paint Cures: Follow-Up Care and Preventing Future Rust
Drying time and full cure are different things. Spray paint typically feels dry in 1 to 2 hours and accepts a recoat within that window, but full hardness takes about a week in mild weather.
How Long Until It’s Truly Cured?
Give the finish 5 to 7 days of dry, mild weather before stacking chairs or dragging tables. Cool or humid conditions stretch that to two weeks.
Touch-Up Routine Each Season
Check the furniture each spring and fall for chips and scratches. Catch small damage early and the repair stays a five-minute job.
- Clean the chipped area with soap and water, then let it dry fully.
- Sand the spot to bare metal and feather the edges.
- Apply primer, then topcoat within the recoat window.
Preventing Future Rust at Joints and Feet
Joints and feet trap water, so they rust first. Elevate the legs on rubber caps or blocks and keep the pieces covered through winter.
Once the last coat is dry to the touch, your work shifts from application to upkeep, and a few habits keep the finish intact for years.
Cost: DIY Spray Painting vs Buying New vs Hiring a Pro
Refinishing costs far less than replacing, but only if you buy the right supplies once. Expect a modest upfront spend on spray paint, primer, and safety gear, and a weekend of your time.
| Option | Upfront cost | Ongoing cost | Notes |
|---|---|---|---|
| DIY spray painting | $40 to $120 in materials | Repaint every 2 to 4 years | Highest sweat equity, lowest cash outlay |
| Buying new furniture | $150 to $600 per set | Replacement every 5 to 10 years | Skip labor, lose the piece you liked |
| Hiring a pro | $150 to $500 per set | Recoating every 3 to 5 years | Price swings with prep and rust damage |
| Sandpaper and wire brushes | $10 to $25 | Replace as they wear | Cheap consumables drive adhesion |
| Primer and spray paint | $25 to $70 | Leftovers for touch-ups | Buy one brand for both |
| Respirator and drop cloth | $20 to $45 | Filters replaced periodically | Reusable across projects |
| Rust converter | $8 to $20 | Only if rust returns | Skip it and paint fails early |
Ranges assume one average patio set (two chairs plus a small table), US retail prices, and existing rust treated at home. Pro quotes vary by region, prep level, and whether the piece is disassembled.
DIY Spray Painting Cost Breakdown
Most homeowners spend $40 to $120 on materials for one set. That covers sandpaper, primer, spray paint, a respirator, and a drop cloth. Add a rust converter only if bare metal shows through.
Buying New Furniture: the Real Number
A comparable set runs $150 to $600, and the old piece still needs disposal. New metal furniture typically lasts 5 to 10 years outdoors before recoating.
Hiring a Pro: What You’re Paying for
Pro refinishing lands around $150 to $500 per set. You pay for metal surface preparation, proper primer, and controlled drying time, not just the spraying.
Troubleshooting Spray Paint Problems on Metal
Most spray paint failures on metal garden furniture trace back to prep or technique, and both are fixable once you know what you're looking at.
| Problem | Likely cause | Fix |
|---|---|---|
| Paint looks like orange peel | Coats too thick or spray too far away | Sand smooth, then apply thin coats closer in |
| Fine cracks in the finish | Topcoat went on before primer cured | Strip it, re-prime, wait full drying time |
| Bubbles or blisters | Moisture or rust trapped under the paint | Strip to bare metal, remove rust, clean, re-prime |
| Runs and drips | Holding the can too close or moving too slow | Sand the run flat and recoat in thin passes |
| Paint peels off in sheets | Oily or dirty surface killed paint adhesion | Degrease and scuff the metal, then re-prime |
| Patchy, uneven color | Uneven coats or spray distance varied | Add another thin coat and keep passes steady |
| Finish looks dull after curing | Paint dried in cold or damp air | Recoat in mild, dry weather within the recoat window |
Almost every defect below comes from skipping metal surface preparation or laying on coats too heavy. Fix the cause, not just the symptom.
Why is the Paint Orange-Peeling?
Orange peel means the paint dried before it could level out, usually from coats that were too thick or a can held too far from the surface. Sanding the texture flat and applying thinner coats at a closer distance solves it.
Cracks, Bubbles, or Runs: What Went Wrong?
Cracking points to a topcoat applied before the primer fully cured, while bubbles mean moisture or rust is trapped underneath. Runs come from holding the can too close or moving too slowly. Strip, clean, re-prime, and keep every coat thin.
Paint Won’t Stick? Here’s Why
Poor paint adhesion almost always traces back to oil, dirt, or leftover rust on the metal. Clean and degrease the surface, scuff it with sanding, remove any rust, and let the primer bond before you spray.
Dull or Patchy Finish After Drying
A dull or uneven finish usually means the paint cured in cold or damp conditions, or your passes were inconsistent. Recoat in mild, dry weather and keep the can moving at a steady pace.
A Real-Life Walkthrough: Restoring a Rusty Bistro Set
Day 1: Inspection, Cleaning, and Rust Removal
Set the bistro set on a drop cloth, a protective sheet that catches overspray and drips. Check each weld with a wobble test by hand; cracks wider than 1/16 inch need a welder before paint. Scrub joints with a stiff nylon brush and a degreaser, since wax and pollen block paint adhesion.
Remove rust with a wire brush or 80-grit paper until you hit bare gray metal, then feather edges with 120-grit. Wipe dust with a tack cloth and let the frame dry fully, typically 1 to 2 hours in sun.
Day 2: Priming and First Coats
Apply a rust-inhibiting metal primer, a preparatory coating that bonds paint to bare steel, in two thin coats 20 to 30 minutes apart. Wear an OSHA-rated respirator and work upwind. Once the primer dries, usually 1 to 2 hours, spray paint 8 to 10 inches away in overlapping passes.
Build two light coats, not one heavy pass, to avoid runs. Keep each coat under 50 microns wet thickness.
Day 3: Touch-Ups and Curing
Inspect under bright light for thin spots or drips. Sand drips flat with 400-grit, then apply a light touch-up coat. Cure 5 to 7 days indoors before outdoor placement; full hardness takes about a week.
One Season Later: How the Finish Held up
After a full summer, the set showed no peeling, just one chip on a foot from concrete scraping. Check each spring and touch up bare spots within 48 hours to stop rust.
Doing It on a Budget Without Cutting Corners
Where to Save (and Where Never to)
Save on sanding tools and drop cloths by using what you have. Never skimp on respirator or primer. A proper respirator protects your lungs from fumes and particles, and good primer is the foundation for paint adhesion.
Buy a quality drop cloth to catch overspray and protect your workspace. It is a cheap investment that saves cleanup time.
Eco-Friendly Paint Options That Still Last
Choose water-based spray paint labeled for metal. These low-VOC options meet EPA standards and still cure hard.
Check the can for outdoor durability and direct-to-metal application. Avoid bargain paints that skip UV inhibitors; they fade fast.
Cheap Primer vs Good Primer: Does It Matter?
Yes, it matters. A good primer ensures paint adhesion and blocks rust. Cheap primer may fail, causing peeling.
Apply a rust-inhibiting primer after metal surface preparation. One even coat is enough; more can cause runs.
Common Mistakes to Avoid When Spray Painting Metal Furniture
Before the can ever shakes, bad spray paint jobs usually fail. Avoid these four errors and your finish will hold up through seasons of weather.
Skipping Primer on Bare Metal
Bare metal needs a primer, a preparatory coating that bonds paint to the surface. Without it, paint adhesion weakens and chips appear fast.
Spraying Too Thick in One Pass
Heavy single coats trap solvent and cause runs, orange peel, and slow curing. Build thin coats instead and respect the listed drying time between them.
Ignoring Temperature and Humidity
Paint behaves best around 50 to 90°F with low humidity. Cold or damp air dulls the finish and stretches drying time, so check the forecast first.
Painting Over Rust Without Treating It
Rust removal must come before any coating, or corrosion spreads under the paint. Sand to bare metal, clean the dust, then prime.
- Safety first: wear a respirator rated for solvents, plus gloves and eye protection.
- Lay a drop cloth and move furniture away from cars, plants, and siding.
- Complete sanding, rust removal, and cleaning before you open the primer.
When to Call a Pro (or Replace Instead of Paint)
Structural Rust and Compromised Welds
Stop if rust has eaten through metal or a joint moves when pushed. Surface rust sands off; flaking, pitted metal and cracked welds mean the frame is failing. No coating fixes a weak joint. Grinding heavy rust throws sparks and fine dust, wear a particulate respirator, not a dust mask, and keep a fire extinguisher nearby.
Powder-Coated or Specialty Finishes
Avoid factory powder coat unless you’ll strip it completely; paint won’t bond and flakes off within a season. Chemical strippers are harsh, and blasting usually costs more than the piece is worth. Aluminum and galvanized steel need a metal-specific primer or adhesion fails fast.
When Professional Refinishing Beats DIY
Call a pro for valuable, large, or intricately detailed pieces. Media blasting and spray booths handle rust and old paint in hours, typically $150, $600 by size. DIY materials run $40, $120. Simple chairs suit spray paint; heavy tables or heirlooms justify professional refinishing.
Stop and call a professional if:
- The frame has rust holes, flaking metal, or welds that flex or crack when you push on them.
- The furniture still has an intact factory powder coat or another specialty finish you cannot fully strip.
- The piece is large, valuable, or has intricate cast details that are hard to prep by hand.
- You cannot work outdoors or in a well-ventilated space with a proper respirator.
- The metal is aluminum or galvanized steel and you cannot source a primer made for that surface.
- A professional quote is close to your DIY material cost once blasting and old paint removal are included.
How to Spray Paint Metal Garden Furniture: Frequently Asked Questions
?How to Spray Paint Metal Garden Furniture Without Removing the Old Paint First?
Yes, you can spray paint metal garden furniture without stripping it if the old coating is sound. Scuff the surface with sanding so the new primer has something to grip, then wipe off dust. Any flaking, peeling, or rust spots must come off first, because spray paint over failing paint will fail with it. Test a small hidden area before committing to the whole piece.
?How to Spray Paint Metal Garden Furniture so the Finish Actually Lasts?
Prep decides it. Do full metal surface preparation: cleaning, rust removal, sanding, then a primer made for metal. Apply two or three thin coats of spray paint instead of one heavy pass, and respect the drying time on the can between coats. Thin coats bond better and resist chipping; thick coats look fine for a month, then peel.
?Why Does Spray Paint Peel off Metal Garden Furniture?
Almost always poor adhesion from skipped prep. Grease, dust, or moisture left on the metal stops primer and paint from bonding. Sanding gives the surface a mechanical bite, and primer is the preparatory coating that bridges bare metal and paint. If you sprayed in high humidity or cold, that also weakens the bond. Strip, clean, and redo it properly.
?What Safety Precautions Do I Need When Spray Painting Metal Garden Furniture?
Spray outdoors or in a well-ventilated space, and wear a respirator rated for paint vapors, plus eye protection and gloves. A respirator is a fitted mask that filters what you breathe, not a dust mask. Lay a drop cloth to catch overspray, keep the can away from flames, and never spray near kids or pets until it's dry.
?How Many Coats of Spray Paint Does Metal Garden Furniture Need?
Two to three thin coats of color over one to two coats of primer is the standard. Wait the full drying time between coats, usually the recoat window printed on the can. More coats isn't better; past three, you risk runs, soft paint, and a finish that chips instead of flexing with the metal.
?When is It Too Cold or Too Humid to Spray Paint Metal Garden Furniture?
Follow the can's temperature and humidity range, typically 50 to 90 degrees Fahrenheit with low humidity. Cold slows curing, and moisture in the air can dull the finish or trap water under the paint, which invites rust. If conditions are off, wait. A failed finish costs more time than a delayed project.
?How to Spray Paint Metal Garden Furniture That Has Rust Without It Coming Back?
Remove every trace of rust first, down to bare metal, using sanding or a wire brush. Then clean the surface and apply a rust-inhibiting primer before your color coats. Paint over rust and it keeps spreading underneath. Also check for trapped moisture at joints and touch up chips promptly after the piece is in use.
Conclusion
Get the prep right and the finish lasts. Clean, sand, and strip rust before any spray paint touches the metal, then use a primer made for metal so the topcoat bonds. Thin coats beat heavy ones every time, and rushing the drying time between coats is the mistake that causes runs and peeling.
Your most useful next step: pick a calm, dry day with temps in the 50 to 90°F range, lay down a drop cloth, and put on your respirator before you start spraying.
Sources and further reading: guidance from EPA, OSHA.