
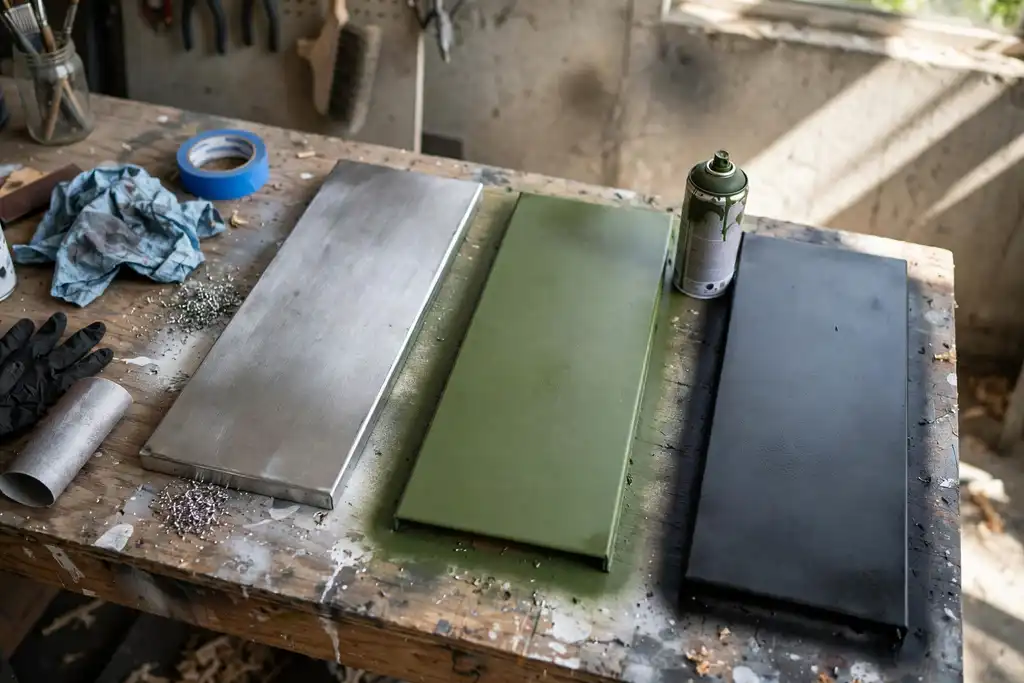
Yes, spray paint sticks to metal, but only if you remove rust, degrease, and sand the surface first; skip that prep and you get peeling, flaking, and wasted effort.
Spray paint on metal has a reputation for peeling off in sheets, but that’s usually user error, not a product flaw. The truth is that does spray paint stick to metal depends entirely on how you treat the surface before the first coat. Metal, an element or alloy that conducts heat and electricity, holds paint well when it’s clean and scuffed, and poorly when it’s slick or contaminated.
You’ll learn the exact prep sequence that makes adhesion reliable: degreasing, sanding, choosing between self-etching primer and a direct-to-metal product, and handling problem surfaces like galvanized metal and aluminum. You’ll also get drying time ranges and clear coat advice so your gate, patio furniture, car part, or art piece cures hard instead of flaking off in a season.
Does Spray Paint Stick to Metal? the Short Answer is Yes, with the Right Prep
Yes, spray paint sticks to metal, but only if you treat adhesion as a prep problem, not a paint problem. Skip the prep and you get peeling, flaking, and rust creep within months.
| Situation | What it means | What to do |
|---|---|---|
| Bare metal | Clean, oil-free surface | Degrease, sand, prime |
| Galvanized metal | Slick zinc coating resists paint | Degrease, etch with vinegar, prime |
| Aluminum | Oxide layer blocks adhesion | Sand, use self-etching primer |
| Rusty metal | Loose rust prevents bonding | Remove rust to bare metal |
| Painted metal | Old coating may lift | Sand, test, prime if needed |
| High humidity | Moisture traps under paint | Paint when humidity is low |
| Cold metal | Paint won't flow or cure | Warm surface before spraying |
Recommended for this job

Rust-Oleum Stops Rust Clean Metal Primer
Clean metal primer bonds directly to bare metal for a stable paint base.
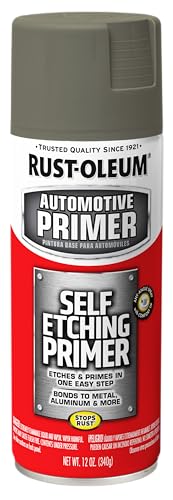
Rust-Oleum Automotive Self Etching Primer Spray
Self-etching primer chemically etches metal to maximize spray paint adhesion.

Rust-Oleum Painter's Touch 2X Ultra Cover
Oil-based spray paint adheres to metal and other surfaces with a durable finish.
Why Prep Decides Everything
Adhesion on metal, an alloy that conducts heat and electricity, fails when oil, dust, or oxidation sits between the paint and the surface. Wipe the part twice with a degreaser like isopropyl alcohol or a wax and grease remover, then scuff bare metal with 180 to 220 grit sandpaper. On galvanized metal, wash with a 50/50 white vinegar and water mix and rinse before sanding.
What “sticking” Actually Means for Durability
Real adhesion means the coating resists peeling and scratching for years, not days. Self-etching primer is the safe choice on aluminum and bare metal; rust must come off completely with a wire brush or 80 grit before any primer goes on. Apply two thin coats, keep each coat 8 to 12 inches from the surface, and wait the label’s 10 to 30 minute recoat window.
The One-Sentence Rule to Remember
Clean it, scuff it, prime it, then spray thin coats and respect drying time. That sequence, not the brand of spray paint, determines whether the finish lasts.
Clean, Scuff, Prime, Then Spray: the Adhesion Workflow
Before you shake a single can, work through these steps in order, because adhesion lives or dies in the prep.
Degrease the Surface Before You Touch It with Sandpaper
Oil and fingerprints block adhesion, and sanding drives them deeper into the metal. Clean first with a solvent-based degreaser and a lint-free rag, then let it flash off for 10 to 15 minutes.
Scuff with the Right Grit for Bare or Painted Metal
Grit depends on what you’re spraying over. Bare metal wants 180 to 220 grit until it looks uniformly dull; painted metal wants 320 to 400 grit so the old finish dulls without cutting through.
Wipe off Dust and Let It Dry Fully
Loose dust under paint means flaking later. Wipe with a tack cloth and let the surface dry fully, at least 30 minutes, before primer.
Apply Primer or a Bonding Spray in Thin Passes
Match the primer to the metal. Use self-etching primer on bare metal or aluminum, and a bonding primer on galvanized metal or sound old paint. Spray two or three thin passes from 8 to 10 inches, overlapping each pass by about half.
Build Color in Light Coats with Overlap
Thin coats beat one wet coat every time. Spray light passes with 50 percent overlap, waiting the can’s stated recoat window, typically 1 hour, between passes. Add a clear coat once color cures if the piece faces weather.
Adhesion lives or dies in the prep, so work through these steps in order before you shake a single can.
When Spray Paint Won’t Stick (and What to Do Instead)
Slick, Oily, or Silicone-Contaminated Metal
Spray paint won’t stick to slick or oily metal, even a fingerprint stops adhesion. Use wax and grease remover, then wipe dry. For silicone contamination, sand lightly and degrease twice or paint will crawl and peel.
Heavy Rust, Flaking Paint, and Mill Scale
Remove rust and loose paint or they’ll flake off under the coating. Wire-brush or sand to bare metal and treat pits with rust converter. Sand off mill scale (the dark layer on hot-rolled steel) until uniformly bright, skipping this causes common failure.
Galvanized and Aluminum Surfaces That Reject Ordinary Paint
These need special prep: clean with dedicated prep wash, scuff with a fine abrasive pad, then apply self-etching primer before topcoating. Without it, paint may peel in sheets. Let primer cure per label (30-60 minutes).
Cold, Damp, or Windy Conditions
Most aerosols want 60-80°F and low humidity. Cold metal slows curing and traps moisture; wind causes uneven coats. Bring small parts indoors to a ventilated space; for large projects, wait for a dry day and check metal isn’t sweating. Applying clear coat too soon in damp conditions can cause blushing and poor adhesion.
The Recoat-Window Trap: Spray Too Late and Watch It Wrinkle
What the Recoat-Window Actually Is
The recoat window is the timeframe printed on the can when a second coat will bond properly. Spray paint on metal typically allows another coat within about 1 hour, or after 24 to 48 hours once fully cured. Miss the early window and you must wait for full cure, not squeeze in a coat halfway.
Why a Too-Late Second Coat Lifts the First
Solvents in fresh paint soften the layer beneath so the two coats fuse. Once the first coat cures hard, those solvents attack it instead, and the film wrinkles or lifts. That failed bond is one of the most common mistakes that cause peeling later, especially on metal that flexes or heats up outdoors.
How to Test Before You Commit
Check a hidden spot first. Press a thumb into the coating: tacky means recoat now, hard means wait. Spray a small test patch on scrap metal and follow the same timing to confirm adhesion before touching your gate, furniture, or car part.
What to Do If Wrinkling Already Started
Stop spraying immediately and let the finish harden fully, often 24 to 48 hours. Sand the wrinkled area back to smooth metal, then clean and reapply with correct timing. Rushing a fix usually makes the mess bigger.
Your Metal Spray-Paint Action Plan: from Bare Steel to Topcoat
Adhesion comes down to five moves, done in order. Skip one and the coating peels, chips, or rusts from underneath.
| Action | Why it helps | How to start |
|---|---|---|
| Degrease bare steel | Removes oils that block adhesion | Wipe with a solvent, then rinse |
| Scuff glossy or painted metal | Gives the coating a mechanical bite | Use 180 to 320 grit, then wipe dust |
| Remove rust and loose paint | Stops flaking from spreading | Wire brush or sand to sound metal |
| Prime bare or galvanized metal | Seals surface and builds adhesion | Self-etching primer on bare metal |
| Spray thin coats | Prevents runs and poor bonding | Hold 8 to 12 inches, overlap passes |
| Respect the recoat window | Avoids wrinkling and lifting | Recoat within the label's stated hours |
| Add clear coat | Adds gloss and weather protection | Apply after topcoat flashes off |
Work in order, and each step builds adhesion for the next.
Step 1: Identify the Metal and Its Current Coating
Know what you are spraying before you spray. Bare metal, painted metal, galvanized metal, and aluminum each need different prep, and a magnet and a quick solvent wipe tell you which you have.
Step 2: Degrease and Rinse
Degreasing is the step most people skip and the one that causes the most failures. Wipe the surface with a solvent such as mineral spirits or a dedicated prep spray, then rinse and let it dry fully, typically 30 to 60 minutes.
Step 3: Scuff and Remove Rust or Loose Paint
Scuffing gives the coating a mechanical bite. Sand with 220 to 320 grit or wire brush rust and loose paint back to sound metal, then wipe away the dust with a tack cloth.
Step 4: Decide If Primer is Truly Required
Bare metal and galvanized metal need a primer, and self-etching primer is the safe pick for bare metal. Some bonding primers work over sound existing paint when you are unsure of the surface.
Step 5: Spray Thin Coats Within the Recoat Window
Hold the can 8 to 12 inches away and use overlapping passes. Apply 2 to 3 thin coats rather than one heavy coat, and respect the manufacturer’s recoat window, often 1 hour or after 24 to 48 hours. Finish with a clear coat for extra protection.
Three Spray-Paint-on-Metal Myths That Cause Peeling
Myth: “Paint Sticks to Any Clean Metal”, Fact: Clean Isn’t Scuffed
Yes, spray paint sticks to metal, but only after real surface preparation. A degreasing wipe removes oils, yet slick or polished metal still gives the coating nothing to grip. Scuff bare metal with 220 to 320 grit paper, then wipe the dust and degrease again. Galvanized metal and aluminum need extra attention because their surfaces resist adhesion.
Myth: “Primer is Always Required”, Fact: Bonding Paints Often Suffice
Many modern bonding paints grab bare metal without a separate coat, so primer isn’t automatic. Choose a self-etching primer for aluminum and bare steel you want chemically keyed, or a bonding primer over rust-free, sanded surfaces. Skip primer only when the can explicitly promises direct-to-metal adhesion.
Myth: “More Coats Means More Durability”, Fact: Thick Coats Trap Solvent and Fail
Thin coats beat heavy ones every time. Hold the can 8 to 12 inches away, apply light passes with 50 percent overlap, and let each coat flash off per the label, often 10 to 30 minutes. Total drying time runs 24 hours or more before clear coat. Thick films skin over, trap solvent, and peel.
Spray Paint vs. Brush-On Metal Paint: Which Bonds Better?
Where Rattle-Can Spray Wins
On complex shapes, grilles, mesh, hinges, and carved art pieces where a brush leaves streaks and drips, spray paint wins. An aerosol lays an even film with no brush marks, so thin coats build smoothly. It also reaches inside corners a bristle can’t touch.
Where Brush-On Enamel Wins
Brush-on enamel wins on flat, heavy surfaces like gates and patio tables. You can load a thick, hard film in fewer passes, and it cures tougher against scuffs and weather. On large flat panels, brushing is simply faster than shaking cans.
Coverage, Cost, and Finish Compared
Aerosol costs more per square foot. Expect roughly $8 to $15 per can covering about 10 to 15 square feet, while a quart of metal enamel runs $15 to $30 and covers far more. Spray gives a factory-smooth finish; brushed enamel shows texture but hides imperfections.
Mixing Methods on the Same Project
You can combine both if you respect the chemistry. Spray the intricate parts, brush the broad panels, and keep every layer compatible: primer first, then topcoat. Check the label for recoat windows, since drying time varies by product, and confirm the brush-on enamel accepts a spray topcoat before you commit.
Will Regular Spray Paint Adhere to a Metal Surface?
What “regular” Spray Paint Can and Can’t Do on Metal
Short answer: yes, standard aerosol paint will stick to metal, but only if the surface is clean and abraded first. Metal is an element, compound, or alloy that conducts electricity and heat well, and its slick, often oily skin fights adhesion. Skip prep and you get peeling within weeks.
What it can’t do is bond through rust, oil, or a glossy factory finish. Those layers sit between the paint and the metal, so the coating fails instead of the substrate.
When a Bonding or Direct-To-Metal Formula is Worth the Upgrade
Upgrade when you’re spraying bare metal, galvanized metal, or aluminum, where standard paint struggles most. A self-etching primer chemically bites into bare metal, while a bonding primer grips slick or previously painted surfaces.
For car parts and outdoor furniture, that primer step plus a clear coat is cheap insurance against rust and chipping.
Quick Test Patch Before Full Commitment
Spray a small hidden area and let it cure for the full drying time on the can, typically 24 to 48 hours. Then try scratching it with a fingernail. If it lifts, your surface preparation or primer choice needs work before you coat the whole piece.
When Spray Paint Works Beautifully on Metal
Clean, Scuffed Bare Steel and Iron
Aerosol paint bonds well to bare steel and iron after removing oil and giving the surface tooth. Metal holds paint through mechanical grip, so a slick, polished face gives it nothing to grab. Wipe with a degreaser, then scuff with 180 to 220 grit paper until the shine dulls evenly. Skip scuffing and you risk peeling within months. On rusty spots, sand back to sound metal or treat the rust first; paint over active rust will flake off with it.
Sound, Sanded Existing Paint
Spray paint sticks reliably to old paint that is intact and properly sanded. Feather chip edges with 220 to 320 grit, then scuff the whole panel for a consistent profile. Loose, cracked, or lifting paint must come off first, or the fresh layer will fail with it.
Warm, Dry, Low-Humidity Days
Aim for 60 to 80 degrees Fahrenheit, humidity under about 60 percent, and avoid wind or full sun. Cold or damp air slows curing and traps moisture, weakening the bond and blushing the finish.
Small, Detailed Shapes
Rattle cans shine on brackets, hinges, furniture, and small pieces where a spray gun is overkill. Light, even coats beat one heavy coat; a clear coat adds durability on handled parts. Follow the label’s 10 to 30 minute recoat time.
A Weekend Gate Refresh: Spray Painting Outdoor Metal from Start to Finish
Assessing Rust and Old Coating
Rust and flaking paint have to go before anything else happens. Wire-brush or sand the gate down to sound material, then feather the edges of remaining coating so no hard lip shows. Skip this and your new finish will lift within a season.
Washing, Degreasing, and Drying
Grease and grime block adhesion more often than people expect. Wash the whole gate with a degreaser, rinse thoroughly, and let it dry completely, typically 1 to 2 hours in mild weather. Wipe down with a clean cloth before you spray.
Scuffing and Spot-Priming Bare Metal
Bare spots need a primer made for the job. Scuff glossy areas with 220-grit, then apply self-etching primer to exposed bare metal, aluminum, and any galvanized metal, following the can’s flash time.
Spraying in Thin Coats Within the Recoat Window
Thin coats beat one heavy pass every time. Apply two or three light layers, respecting the manufacturer’s recoat window, usually 10 minutes to 1 hour, so coats bond chemically instead of sitting loose.
Curing, Reinstalling, and First Touch-Up
Let the gate cure fully, often 24 to 48 hours, before hanging it back up. Add a clear coat on high-traffic edges, then touch up chips promptly to keep rust from creeping back.
The Mistakes That Make Spray Paint Peel off Metal
Peeling usually comes from prep and technique, not the can. Five habits cause most failures.
Skipping Degreasing
Oil, fingerprints, and dust block the bond. Wipe with degreaser, rinse, and dry before sanding.
Spraying Too Far Away or Too Heavy
Distance and film thickness decide grip. Hold the can 8 to 12 inches away, use thin coats, and overlap each pass by half.
Ignoring the Recoat Window
Most aerosols specify a recoat time, often within 1 hour or after 24 hours. Spraying between windows can wrinkle the finish and kill adhesion.
Painting in Cold or Humid Weather
Cold metal and damp air slow curing and trap moisture. Work in 50 to 90 F with low humidity, and extend drying time in cool conditions.
Skipping Primer on Galvanized or Aluminum
These smooth metals resist ordinary paint. Scuff them, then apply a self-etching or galvanized-metal primer before topcoating.
- Degrease first: oils and fingerprints stop adhesion.
- Scuff bare metal for mechanical grip.
- Treat rust; never paint over it.
- Spray thin coats, not one heavy pass.
- Recoat inside the manufacturer’s window.
- Prime galvanized and aluminum with self-etching primer.
- Finish with clear coat for durability.
When to Call a Pro: Warning Signs You Shouldn’t Spray Over
Structural Rust or Pitting on Car Parts and Wheels
If rust has eaten into the metal or left deep pitting, stop. Spray paint only covers the damage, and the rust keeps spreading underneath. Have a body shop or wheel specialist assess it first.
- Rust that flakes off in layers or leaves craters deeper than a fingernail means the part needs repair, not paint.
- Wheels with cracks, bends, or corrosion around the bead seat should go to a professional before any coating.
Unknown Factory Finishes on Aluminum
You cannot trust adhesion on a finish you cannot identify. Aluminum (a lightweight metal) often carries a clear factory coating that paint will not grip.
- If you cannot confirm what is on the surface, have a body shop or powder coater identify it before you spray.
Large Outdoor Structures Needing Lasting Protection
Rattle-can paint on big gates, railings, or fences rarely lasts more than a few years outdoors. A pro can apply a tougher coating system.
- If the structure must survive weather for a decade or more, call a professional painter.
Fume and Ventilation Limits in Enclosed Spaces
Spray paint fumes build fast in garages and basements. If you cannot ventilate properly, stop.
- Call a pro when the space has no cross-ventilation or the job is too large for a respirator-rated setup.
Does Spray Paint Stick to Metal: Frequently Asked Questions
?Does Spray Paint Stick to Metal If the Surface is Dirty or Greasy?
No. Grease, oil, and fingerprints are the number one reason spray paint fails on metal, an element or alloy that conducts heat and electricity well. Solvent-based paint can't grip a slick film. Degreasing with a proper cleaner before anything else is non-negotiable. Skip it and you'll get fisheyes and peeling, no matter how good the paint is.
?Does Spray Paint Stick to Metal Without Sanding?
It can, but don't count on it lasting. Sanding or scuffing creates a mechanical profile the paint can bite into. On bare metal, a light scuff with 220-320 grit plus a wipe-down is cheap insurance. On glossy painted metal, scuffing is mandatory. Skipping this step is how careful planners end up repainting the same gate next year.
?How Does Primer Make Spray Paint Stick to Metal Better?
Primer is the bonding layer between metal and topcoat. It seals the surface, blocks rust, and gives the spray paint something to grab. Use self-etching primer on bare metal like aluminum and steel, and a direct-to-metal primer on galvanized metal after a vinegar wash. Primer is not optional on bare metal if you want durable adhesion.
?Why Does Spray Paint Peel off Metal Even After Good Prep?
Usually it's recoat timing or moisture. Spray too late in the recoat window and the solvents wrinkle the layer below; spray in high humidity and trapped moisture lifts the film. Keep coats within the label's recoat window, work in dry conditions, and let each coat flash off. Those two habits prevent most peeling.
?What Should I Know About Spray Paint and Metal Rust Before I Start?
Rust must be removed, not painted over. Sand or wire-brush it back to sound metal, then treat the area with a rust converter if pitting remains. Prime bare spots before topcoating. Spray paint over active rust traps moisture and flakes within months. If the metal is heavily pitted, consider brush-on rust-inhibiting paint instead.
?is Spray Paint on Galvanized Metal a Mistake?
Not if you prep it. Galvanized metal has a slick zinc coating that fresh paint won't stick to. Let new galvanized pieces weather for a few months, or wash them with a vinegar-and-water solution, rinse, dry, and prime with a galvanized-compatible primer. Do that and spray paint sticks fine. Skip it and the paint sheets off.
?When Does Spray Paint Stick to Metal Well Enough for a Car Part or Outdoor Furniture?
When you follow the full workflow: degrease, sand, prime with the right primer, spray thin coats inside the recoat window, and finish with clear coat on high-wear surfaces. That's the same process whether it's a patio chair or a bracket. Rattle-can paint holds up outdoors and on hobby car parts when the prep is done right.
Our Thoughts
Yes, aerosol paint bonds to metal, a material that conducts heat and electricity well, provided you remove rust, degrease, and sand first. Skip those steps and adhesion fails, so the coating peels, flakes, and wastes your money. Surface preparation is the whole job, not an optional extra.
Your next step: wipe the piece with a degreaser, sand to dull the shine, and apply a self-etching primer on bare metal, galvanized metal, or aluminum before your color coats. That primer grips where paint alone struggles. Then respect the label’s drying time and finish with a clear coat for extra durability.