
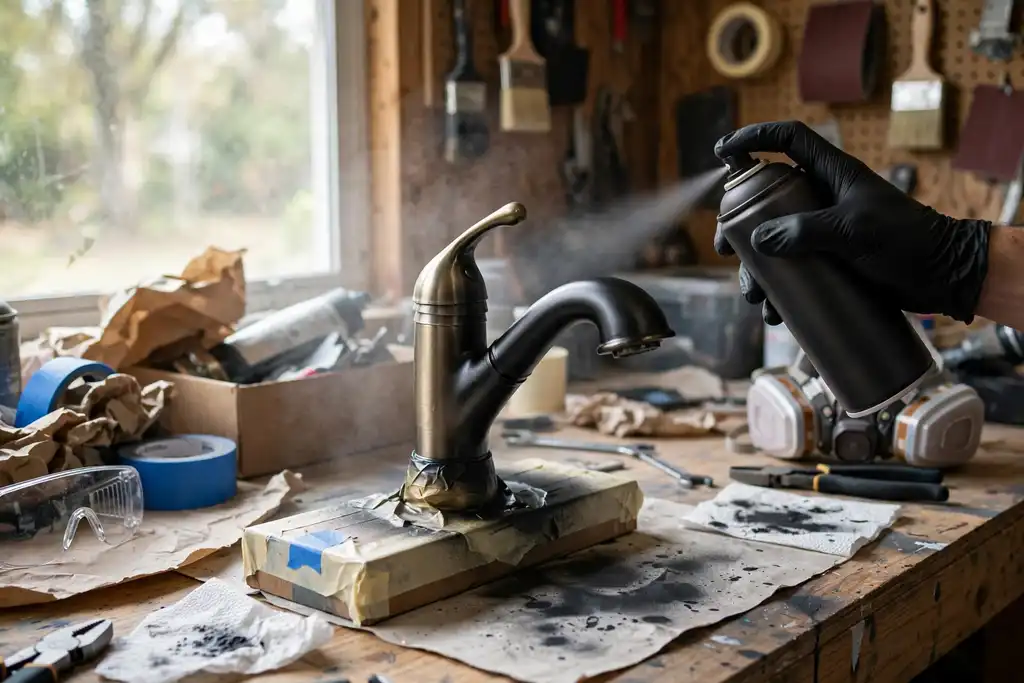
Yes, you can spray paint a faucet, but only if you prep the metal properly and choose the right paint; otherwise, the finish will peel or chip within weeks.
You want a bathroom or kitchen faucet that looks new without the cost and hassle of replacement. So can you spray paint a faucet? Yes, but the result hinges on proper prep and the right products. This article gives you the straight facts on safety and avoiding common mistakes, so you get a durable finish the first time.
We cover the essential steps: cleaning with a degreaser, sanding for adhesion, applying a suitable primer, and using spray paint made for metal. You will learn how to protect surrounding surfaces with painter’s tape, apply a clear coat for durability, and allow proper curing. Follow these steps, and your spray painted faucet can hold up to daily use in the bathroom or kitchen.
Can You Spray Paint a Faucet? Yes, with These Caveats
Yes, you can spray paint a faucet, but only when the fixture is worth the prep work and the finish can survive daily handling. Skip the shortcuts and you get a coating that peels within weeks.
| Situation | What it means | What to do |
|---|---|---|
| Solid brass or steel body | Paint bonds well after sanding | Scuff, prime, paint, clear coat |
| Chrome or polished nickel | Slick surface fights adhesion | Sand thoroughly or skip painting |
| Heavy corrosion or pitting | Surface too far gone to hold paint | Replace the faucet instead |
| Constant wet contact | Coating breaks down faster | Expect shorter durability |
| Handle and spout contact | Wear points show first | Add extra clear coat layers |
| Rental or resale home | Reversible fixes preferred | Choose paint over replacement |
| Budget under a new fixture | Paint costs a fraction | Paint if the metal is sound |
Recommended for this job

Rust-Oleum Stops Rust Clean Metal Primer
Primer bonds to clean metal faucet surfaces so topcoat spray adheres reliably.
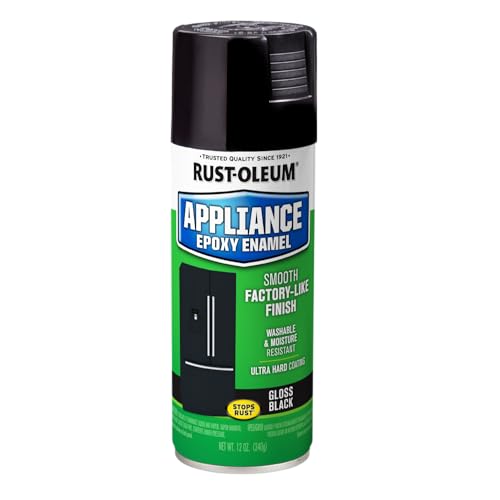
Rust-Oleum Appliance Epoxy Black Spray Paint
Epoxy spray gives faucets a washable, moisture-resistant black finish for refinishing.

Rust-Oleum Painter's Touch 2X Ultra Cover
Clear gloss topcoat seals painted faucets and adds durable indoor/outdoor protection.
The Short Answer: Sometimes, but Not Always
You can spray paint a faucet when the metal is solid and you accept the finish is cosmetic, not permanent. A valve controlling water release gets handled daily, so adhesion must be right. If the surface flakes or pits, painting wastes your time.
What the Caveats Mean for Your Faucet
Prep decides everything. Sand with 220-grit paper, wipe with a degreaser, and apply a primer made for metal so spray paint grips. Mask the aerator and handle openings with painter’s tape. Let curing run 24 to 72 hours before regular use.
A Quick Decision Rule: Paint vs. Replace
Paint when the faucet is structurally fine, the finish is worn or mismatched, and a replacement costs $60 to $150 or more. Replace if you see corrosion, leaks, or heavy pitting. A painted faucet in a bathroom or kitchen looks refreshed, but durability stays limited on high-touch spots.
Is It Possible to Paint a Metal Faucet with Spray Paint?
Which Metal Finishes Accept Paint (and Which Resist It)
Yes, you can spray paint a faucet, but the metal underneath decides how well it sticks. Bare or lightly finished metal holds spray paint and primer best, while high-polish surfaces fight adhesion, which is simply how well two surfaces stick together. A quick test: if a magnet grabs the spout, you likely have a paintable steel base.
The Role of Existing Finish: Solid Brass, Chrome, Brushed Nickel, Oil-Rubbed Bronze
Solid brass and brushed nickel are forgiving once you scuff them with 220-grit sanding, an abrasive process that removes surface imperfections and gives the coating a grip. Chrome is the tough one, because its slick, mirror-like finish resists adhesion unless you sand thoroughly and apply a bonding primer, a preparatory coating made to stick to hard surfaces. Oil-rubbed bronze usually accepts paint after a light degreasing with a citrus-based degreaser.
When a Special Finish Means Stop
Skip the project if the faucet has a factory-applied specialty coating, flaking chrome, or corrosion at the base. Those finishes fail fast, and paint over rust traps moisture and peels within months. Replace a damaged fixture instead; the durability of a fresh unit beats any cosmetic fix in a bathroom or kitchen.
Doing It on a Budget Without Cutting Corners
Where to Save: Primer and Paint Choices
Save on brand names, not on chemistry. A basic aerosol primer made for metal does the job; what matters is that it’s formulated for bare or painted metal so adhesion holds. Skip combo paint-and-primer cans for a faucet that gets handled daily.
For the topcoat, choose a spray paint labeled for metal and, ideally, for high-moisture areas. Enamel-based formulas generally hold up better in a bathroom or kitchen than general-purpose craft paint. One can usually covers a single faucet with a few thin passes.
Where Not to Skimp: Degreaser and Sandpaper
Do not bargain-hunt on degreaser or abrasive. A proper degreaser strips soap scum, oils, and mineral residue that quietly kill adhesion, and fresh wet-or-dry sandpaper in 220 to 400 grit gives the spray paint a surface to bite into.
Reusing worn paper or a weak cleaner is the most common reason a finish peels within weeks. Buy enough painter’s tape to mask the aerator, handles, and surrounding counter properly.
Cost Comparison: Painting vs. Replacing a Faucet
Painting typically runs $25 to $60 in materials: primer, spray paint, clear coat, degreaser, sandpaper, and tape. A replacement faucet usually starts around $60 to $150 for a basic model, plus tools and time if you hire help.
Budget roughly 2 to 4 hours of hands-on work plus overnight curing. Painting wins on cost; replacing wins on durability. If the existing faucet leaks or the finish is flaking badly, replace it instead.
A Real-Life Scenario: Updating a Worn Chrome Faucet
Assessing the Faucet: Finish, Wear, and Model
Start by checking what your faucet is made of and how badly the finish has failed. Solid metal with light cosmetic wear takes spray paint well; heavy pitting, peeling chrome, or flaking coatings usually mean replacement is smarter.
Look for a brand name or model stamp under the base. Cheap pot metal fixtures often chip again within months, so factor that into your plan.
Step-By-Step from Removal to Reassembly
- Shut off the water supply, then remove handles and aerator.
- Clean every surface with a degreaser, since oils from hands and tap water kill adhesion.
- Scuff the finish with fine sanding so the primer has something to bite into.
- Mask the sink and surrounding area with painter’s tape and drop cloths.
- Apply thin coats of primer, then spray paint in several light passes, keeping the can moving.
What to Expect After Curing
Plan on 5 to 7 days of curing before you touch the fixture, longer in humid weather. After that, a clear coat adds real durability, especially in a bathroom or kitchen where water and cleaners hit daily.
Reassemble gently and hand-tighten only. Expect a solid cosmetic refresh, not a factory finish, so avoid abrasive cleaners going forward.
Safety and Warranty: Fumes, Cartridge Damage, and Voiding Coverage
Ventilation and Respiratory Protection
Spray paint releases solvent vapors that can irritate your lungs and eyes, so work outdoors or in a garage with the door open and a fan pushing air out. If you must spray indoors, open windows on two sides and wear a respirator rated for organic vapors, not a dust mask.
Keep the bathroom or kitchen door closed to the rest of the house and keep kids and pets out until the smell clears, typically several hours.
Protecting Internal Parts from Paint and Solvents
Paint and solvents can gum up the cartridge, the internal valve that controls water flow, so tape off the spout opening, handle base, and any exposed threads before you start. Wrap the body tightly with painter’s tape and plastic, then trim the tape edges cleanly.
Remove the handle and cartridge first if the manufacturer allows it, since overspray finds its way into every gap.
How Painting May Affect Your Manufacturer Warranty
Most faucet warranties cover defects in materials and workmanship, and cosmetic modifications like spray paint usually void that coverage. Check your paperwork before you spray; some brands void the warranty outright once the finish is altered.
If the fixture is still under warranty, a replacement cartridge or finish claim may be worth more than the paint job.
Your Action Plan for Spray Painting a Faucet
Spray painting a faucet works, but only if you treat it like a surface-prep job, not a quick cosmetic fix. Follow this sequence and the finish will hold up in a bathroom or kitchen.
| Action | Why it helps | How to start |
|---|---|---|
| Clean with degreaser | Removes oils that block adhesion | Wipe all crevices, then rinse |
| Scuff with fine sanding | Creates a profile for the primer to grip | Light passes over metal, no bare spots |
| Tape off the fixture | Keeps spray paint off valves and handles | Wrap openings and surrounding surfaces |
| Apply metal primer | A preparatory coating that bonds paint to metal | Two thin coats, let each dry |
| Spray light coats | Prevents drips and uneven finish | Several thin passes, not one heavy coat |
| Let it cure fully | Hardening protects against wear | Wait days before reassembly, not hours |
| Seal with clear coat | Adds durability against water and handling | Two thin coats over the color |
Day 1: Prep and Prime
Removing the faucet handle and soaking parts in a degreaser, a solvent that strips soap scum and oils, comes first. Scuff the metal lightly with fine sanding so the primer can grip, then tape off anything you are not painting with painter’s tape.
Choose a primer made for metal, since adhesion depends on it, and apply two thin coats.
Day 2: Paint and Cure
Use a spray paint labeled for metal fixtures and build thin coats instead of one wet pass. Let each coat flash off, then stop handling the piece and let curing finish, which can take several days.
Ongoing: Care and Touch-Ups
Wipe gently with a soft cloth and avoid abrasive cleaners. Small chips are normal over time, so keep leftover spray paint for quick touch-ups.
When It Doesn't Work: Exceptions and Limits
Damaged or Corroded Faucets
Skip the spray paint if the faucet is pitted, rusted through, or leaking at the base. Paint hides nothing on failing metal; it just flakes off and traps moisture. Replace the fixture instead, since a corroded valve body won’t get better under a coating.
Light surface rust is different. Sand it back to bare metal, treat the area, and expect a shorter service life than a clean surface gives you.
Special Finishes That Resist Paint
Chrome, polished nickel, and PVD-coated fixtures are poor candidates because paint struggles to bond to slick, sealed surfaces. Adhesion depends on a textured substrate, and these finishes offer almost none even after sanding.
Oil-rubbed bronze and factory powder coats fall in the same category. If the existing finish is intact and you love it, leave it alone rather than gambling on a coating that may peel within months.
High-Use or Commercial Settings
Don’t paint a faucet that sees constant hands, cleaning chemicals, or heavy daily traffic. Typical spray paint and clear coat hold up best on low-touch bathroom fixtures, not kitchen workhorses or commercial settings.
For those, the durability math favors replacement. Curing takes days to weeks, and every scrub shortens the finish’s life.
Alternative Finishes: Brushed, Matte, Metallic
Achieving a Brushed Look with Spray Paint
Faking a brushed finish is possible, but only if you control the direction of the coating. Apply thin coats and keep the nozzle moving in one consistent line, letting each pass overlap slightly. Don’t sand between coats to create texture; instead, use a fine abrasive pad lightly after curing to knock down the gloss and reveal a subtle grain direction.
This works best on flat or gently curved surfaces. Tightly detailed faucet spouts and handles are harder to keep uniform, so practice on a scrap piece of metal first.
Matte and Metallic Options
Matte spray paint hides imperfections well and reads modern, while metallic finishes add shine but show every flaw. Choose matte for older bathroom or kitchen fixtures with pitting, and metallic only on smooth, well-prepped surfaces.
Metallic pigments settle fast, so shake the can longer than you think and apply light coats. Heavy passes cause runs and blotchy sheen that no top coat can fix.
Top Coats for Durability and Sheen
A clear coat locks in the look and protects the finish from water and handling. Pick the sheen that matches your goal: flat for matte, satin for brushed, gloss for metallic.
Apply two thin coats after the color has fully cured, usually 24 to 48 hours depending on humidity. Reassemble the faucet only after the clear coat is hard to the touch.
When It Works: Conditions Where Spray Painting a Faucet Holds up
Ideal Faucet Types and Finishes
Yes, you can spray paint a faucet, with caveats. Solid metal bodies with a matte, brushed, or worn finish hold paint best because the surface gives adhesion, the way dissimilar materials stick together, something to grip.
Skip chrome and polished nickel unless you scuff them thoroughly first. Those slick, mirror-like surfaces resist coating and chip fast.
- Good candidates: brushed nickel, oil-rubbed bronze, aged brass, cast iron, and matte black fixtures.
- Poor candidates: high-polish chrome, anything with peeling plating, and plastic-bodied fixtures.
Proper Prep and Product Selection
Prep decides the outcome. Clean the faucet with a degreaser (a solvent that cuts oils and grime), then rinse and dry it completely.
Next, sanding, the process of scuffing and smoothing the surface with an abrasive, creates a tooth for the coating. Use 220 to 400 grit, then wipe away dust.
Mask handles and spouts with painter’s tape, a removable tape that peels clean. Apply a metal-specific primer, a base coat that bonds paint to the surface, then thin coats of spray paint. Finish with a clear coat for extra protection.
Realistic Durability Expectations
Expect months, not years, in a busy kitchen or bathroom. Water, soap, and constant handling wear the coating, so plan on touch-ups every 6 to 12 months.
Full curing, the hardening process that builds a tough film, takes about 7 days. Keep the faucet dry and avoid scrubbing during that window. Gentle cleaning with mild soap preserves the finish and extends its life.
How to Tell If Your Faucet is a Good Candidate, and What to Do
Test the Finish
Not every faucet takes paint well. Oil-rubbed bronze and matte finishes usually hold a coating, while polished chrome and nickel often reject it unless you sand aggressively first. Plated or coated faucets can flake later, so test a hidden spot before committing.
Gather the Right Supplies
You need a degreaser, 220- and 400-grit sanding paper, painter’s tape, a metal-specific primer, spray paint for metal, and a clear coat. Skip the all-purpose paint; bathroom and kitchen moisture will eat it.
Follow the Step-By-Step Process
Clean, degrease, sand, prime, paint, and seal. Thin coats beat thick ones every time, and full curing protects your adhesion and durability.
Check these three things before you buy a can: the faucet's finish, its condition, and how much disassembly you can handle.
Common Mistakes and How to Avoid Them
Most failures trace back to prep and patience, not the can itself. Get these three steps right and your coating will hold up in a wet room.
Skipping Degreasing or Sanding
Grease and soap film kill adhesion, so clean first. Wipe the faucet with a degreaser, then scuff it lightly with fine sanding so the coating has something to grip.
Using the Wrong Primer or Paint
Bare or polished metal needs a bonding primer made for metal, not a general-purpose one. Choose a spray paint labeled for metal and wet areas, then seal it with a clear coat for durability.
Rushing Cure Time
A finish that feels dry is not cured, meaning it hasn’t fully hardened. Wait the full label time, often 24 to 48 hours, before reassembly, and mask handles and spout openings with painter’s tape first.
- Prep order: degreaser, then sanding, then a tack cloth.
- Light coats beat one heavy pass every time.
- Skip the clear coat and a bathroom or kitchen faucet dulls fast.
When to Ask for Help: Store Expert, Manufacturer, or Pro
Consulting a Paint or Hardware Store Expert
Ask a store expert when you are unsure which spray paint and primer are rated for a metal faucet in a wet bathroom or kitchen. Bring a photo of the fixture and ask for a product with strong adhesion and a finish that resists water and cleaning.
Checking with the Faucet Manufacturer
Contact the manufacturer before spraying if the faucet is under warranty or has a special coating. Ask whether painting voids coverage and whether solvent fumes could harm internal parts like the cartridge.
Hiring a Local Pro for Complex Finishes
Call a local pro when you want a factory-like finish or the faucet has intricate details you cannot sand evenly. Ask about surface prep, compatible clear coat, and proper curing conditions.
- Ask a store expert for a primer and spray paint matched to your faucet’s metal and moisture exposure.
- Ask the manufacturer in writing whether spray paint voids your warranty and if fumes threaten the cartridge.
- Ask a local pro to quote prep, coating, and curing for a durable finish you cannot achieve at home.
Can You Spray Paint a Faucet: Frequently Asked Questions
?Can You Spray Paint a Faucet Without Removing It from the Sink?
No, don't do it. You need to remove the faucet to prep it properly, and painter's tape alone won't protect the cartridge, aerator, or surrounding surfaces from overspray. Spray paint needs full access for even coverage and adhesion, and you can't degrease or sand the underside while it's still mounted. Pull the faucet, work on a bench, and reinstall after curing.
?Can You Spray Paint a Faucet, and How Do You Prep It First?
Yes, you can spray paint a faucet if you prep it properly. Clean it with a degreaser to remove soap film and oils, then scuff the surface with fine abrasive to dull the finish so the paint can grip. Rinse and dry fully, tape off the aerator, handles, and cartridge openings, then apply a metal-specific primer. Skipping any step is the fastest way to watch your finish flake off.
?Can You Spray Paint a Faucet and Have It Actually Last in a Bathroom?
Yes, but only with realistic expectations. A spray painted faucet in a bathroom faces constant moisture, soap, and handling, so durability depends on proper primer, thin coats, and a clear coat. Even done right, expect wear at the handle and spout within a year or two. It's a cosmetic refresh, not a permanent finish, so plan accordingly.
?Why Does Spray Paint Peel off a Faucet After a Few Weeks?
Poor adhesion, almost always. That means the metal wasn't fully degreased, wasn't sanded, or wasn't primed before the spray paint went on. Putting coats on too thick also traps solvent and weakens the bond. If you see peeling, strip it, redo the sanding and degreaser steps, and apply primer and thin coats with proper curing time between them.
?What Spray Paint Should You Use on a Faucet?
Use a spray paint labeled for metal, and pair it with a matching primer and clear coat from the same brand. Epoxy or enamel formulas hold up better to moisture and handling than basic craft paint. Read the can for recoat and curing windows and follow them exactly. Cheap paint on a wet, high-touch fixture is a false economy.
?is It Safe to Spray Paint a Faucet That Carries Drinking Water?
Only if you keep paint out of the water path. Tape off the aerator, spout opening, and cartridge area with painter's tape, and never paint inside the fixture. Spray paint fumes are strong, so work outdoors or in a well-ventilated space with a respirator. Let the finish fully cure before reinstalling, and flush the faucet before normal use.
?When Should You Skip Spray Paint and Replace the Faucet Instead?
Skip it if the faucet leaks, the finish is chipped down to bare metal, or it's a high-end fixture under warranty. Spray paint won't fix cartridge problems and can void coverage. Also walk away if you can't remove the faucet or commit to proper sanding, primer, and curing. Replacement is often cheaper than redoing a failed paint job twice.
Our Thoughts
Yes, a spray painted faucet can hold up, but the prep work and product choice decide everything. Skip the sanding, primer, or degreaser and the finish will peel or chip fast, especially in a wet bathroom or busy kitchen. Treat it as a cosmetic refresh, not a permanent fix.
Your best next step is to remove the faucet and clean it thoroughly before you touch a can. Scrub off grease and soap film, sand the metal for adhesion, then apply a primer made for metal. Mask off what you do not want coated with painter’s tape, and let each layer cure fully before reassembly.