
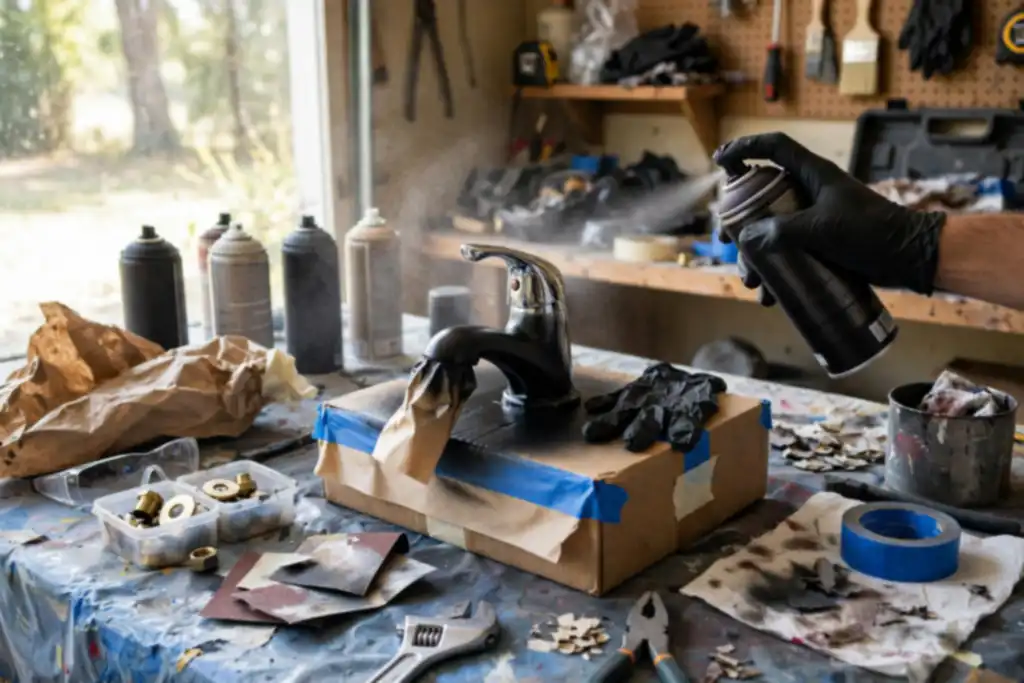

Yes, you can spray paint a bathroom faucet, but only if you prep the metal with sanding and primer and use an epoxy paint that resists water; skip those steps and the finish will peel.
Getting a factory-smooth, water-resistant finish on an old bathroom faucet is doable with spray paint, but the result lives or dies on preparation. So, can you spray paint a bathroom faucet without it flaking off in a month? Yes, if you treat it like a metal refinishing job, not a quick cosmetic touch-up.
You will learn the exact order of sanding, primer, masking, and topcoat that gives real adhesion, which paints survive daily water exposure, and the curing and drying time that most DIYers rush. Follow it once and the faucet stays put; cut corners and you will be redoing it.
Can You Spray Paint a Bathroom Faucet? Yes, but with Conditions
Yes, you can spray paint a bathroom faucet, but only when the surface and product match the job. Skip the conditions below and the finish will peel, blister, or fail at the first splash.
| Situation | What it means | What to do |
|---|---|---|
| Metal faucet in good shape | Solid base for paint | Clean, sand, prime, then spray |
| Chrome or polished surface | Slick, paint struggles to grip | Scuff thoroughly and use primer |
| Plastic or coated trim | Paint bonds more reliably | Light sanding and primer still needed |
| Constant water exposure | Wear and moisture test the film | Use epoxy paint plus clear coat |
| Heavy pitting or corrosion | Paint hides, does not repair | Replace the fixture instead |
| Indoor spraying | Fumes and overspray risk | Ventilate or spray outdoors |
Recommended for this job

Rust-Oleum Stops Rust Bright Coat Metallic
Chrome metallic spray gives faucet a shiny finish but needs clear topcoat for durability.

Rust-Oleum Appliance Epoxy White Spray Paint
Epoxy spray creates washable moisture-resistant coating suitable for refinishing faucet surfaces.
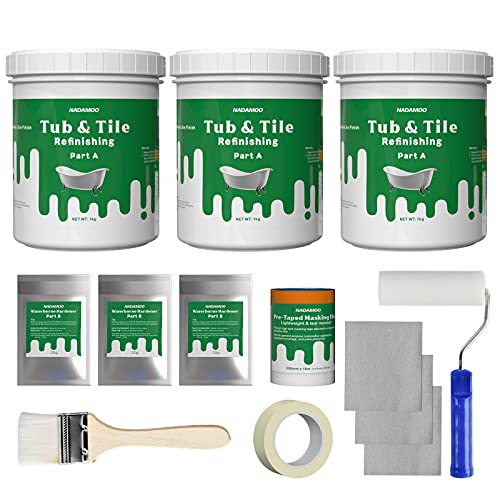
NADAMOO Tub and Tile Refinishing Kit
Tile refinishing kit provides durable semi-gloss coating alternative to spray painting faucets.
What It Means to Spray Paint a Faucet
Spray painting a bathroom faucet means coating the existing metal finish with an aerosol product instead of buying new hardware. You are adding a thin film over the surface, not changing the metal itself.
That film has to survive water, soap, and frequent wiping, so product choice and prep decide the outcome.
The Conditions That Make It Work
Success depends on solid prep and the right coating. Clean and degrease the fixture, then sand the surface so the paint has something to bite into.
Apply a primer made for metal, build thin coats, and respect the listed drying time between passes. Finish with epoxy paint and a clear coat for water resistance and durability, and let curing finish before use.
Do your masking carefully, keep ventilation strong, and work in a dust-free space.
When It’s a Bad Idea
Walk away if the faucet is pitted, leaking, or badly corroded. Paint cannot fix structural damage, and heavy wear areas will fail fast.
Skip it too if you cannot ventilate the space or accept a recoat every couple of years.
Decision Rule: When to Spray Paint vs. Replace Based on Faucet Material and Condition
Identify Your Faucet Material
Solid brass and stainless steel accept spray paint well. Zinc alloy and plastic trim are riskier because flex and moisture fight adhesion, the bond that keeps paint stuck to the surface. Check the underside of the spout or base plate for a stamp like “Brass” or “Zinc.”
Shiny chrome is the hardest case. Its slick finish needs aggressive sanding with 220-grit paper until it’s dull, or the coating will peel within months. If you cannot scuff it properly, plan on replacement instead.
Assess Wear and Tear
Light cosmetic dullness is fixable. Pitting, flaking chrome, or green corrosion at the base means the metal underneath is already failing, and paint will not stop that decay.
Test the handles and cartridge. A dripping valve keeps water sitting on your new finish, which shortens durability fast. Fix leaks before you paint, or the job is wasted effort.
The Replacement Threshold
Replace rather than paint when the body is corroded, the finish is peeling in sheets, or the faucet is a low-cost builder model. A new basic faucet often costs $40 to $120, similar to a quality epoxy paint kit plus supplies.
Expect a sprayed finish to last roughly 1 to 3 years in a wet bathroom, less with daily scrubbing. A $150 to $300 replacement lasts a decade or more, so weigh that against the effort.
Your Action Plan for Spray Painting a Bathroom Faucet
Spray painting a bathroom faucet works if you pick a coating built for wet metal and prep the surface like it matters, because it does. Skip a step and you get peeling within months, so follow this order.
| Action | Why it helps | How to start |
|---|---|---|
| Pick epoxy or enamel spray paint | Bonds to wet metal, resists water | Check label for metal and bath use |
| Clean with degreaser | Removes soap film that blocks adhesion | Scrub, rinse, dry fully |
| Sanding the surface | Gives paint a mechanical grip | Use fine grit, scuff evenly |
| Masking off the faucet | Keeps paint off aerator and handles | Tape and bag openings |
| Apply primer coat | Improves adhesion on bare metal | Two thin passes, let flash off |
| Spray light coats of paint | Prevents runs and drips | 3 to 4 coats, 10 to 15 minutes apart |
| Cure before reassembly | Full hardness takes days | Wait 24 to 72 hours, handle gently |
| Seal with clear coat | Adds durability and water resistance | Two thin coats over cured paint |
Gather Supplies and Set up
Choose an epoxy paint or enamel labeled for metal and bathroom use; standard craft spray paint will not hold up to daily water exposure. Work outdoors or in a garage with strong ventilation, and wear a respirator rated for organic vapors per OSHA guidance.
Lay down cardboard, set out your primer, sanding pads, masking tape, and plastic bags. Have everything within reach before you spray anything.
Prepare and Paint in Stages
Cleaning and sanding decide whether the finish survives. Degrease the bathroom faucet, scuff every surface with fine sanding, then wipe the dust away and let it dry completely.
Masking off the aerator, handles, and mounting threads keeps paint out of moving parts. Apply primer in thin passes for adhesion, then build color with light coats, keeping the can moving and pausing 10 to 15 minutes between passes.
Cure and Reassemble
Drying time is not curing time. Let the faucet sit 24 to 72 hours before handling, longer in cool or humid rooms, longer in cool or humid rooms, because rushing this step causes smudges and early peeling.
Finish with two thin clear coat layers for water resistance, then reassemble gently and run water only after the coating feels hard.
When Spray Painting a Faucet Doesn’t Work (and What to Do Instead)
Plastic or Chrome-Plated Faucets
Skip spray paint on plastic and most chrome-plated fixtures. Plastic resists adhesion, and chrome needs 220 to 320 grit sanding to give any coating a chance. On chrome, a chip exposes bare metal fast, and the repair rarely lasts.
Instead, replace the fixture or hire a refinisher who applies a baked-on metal finish. A new bathroom faucet runs $40 to $150 for basic models; pro refinishing often costs $75 to $200 depending on the shop.
High-Moisture or High-Traffic Bathrooms
A shared family bathroom is a poor candidate. Daily splashing, cleaning sprays, and handling break down most rattle-can coatings within 3 to 6 months. Water resistance matters more than color here.
Choose epoxy paint or a factory finish if the fixture sees heavy use. Otherwise, plan on replacement, since durability in a wet, busy room is hard to fake.
Faucets with Heavy Corrosion
Do not paint over rust or pitting. Corrosion keeps spreading under the coating, and no primer stops it once the metal is compromised. Sanding only exposes more damage.
Replace the bathroom faucet or send it out for professional refinishing. Both options beat a coating that fails in weeks.
Doing It on a Budget Without Cutting Corners
Affordable Spray Paints That Still Work
You can get solid results for $10 to $25 with a metallic spray paint made for metal, if you prep properly. Skip bargain cans with vague labels. Look for a product that names metal and states it resists moisture.
For a bathroom faucet, epoxy paint in the $20 to $40 range offers better water resistance and durability than standard enamel. One can usually covers a faucet with spares for touch-ups.
DIY vs. Professional Refinishing Costs
DIY typically runs $15 to $50 in materials; professional refinishing often lands between $75 and $200 per fixture. A new faucet plus install can easily exceed that. Your real cost is time: sanding, masking, primer, drying between coats, and curing add up to a weekend or more.
Where to Save and Where to Spend
Save on sandpaper and masking supplies, but spend on primer and clear coat. Cheap primer weakens adhesion, and a weak clear coat lets water chew through the metal finish fast.
- Spend: epoxy paint, metal-specific primer, clear coat
- Save: generic sandpaper, drop cloths, brushes
- Skip: dollar-store paint with no metal claim
Work in a well-ventilated space, ideally following OSHA ventilation guidance, and let each coat cure fully before assembly.
How to Spray Paint a Bathroom Faucet: Step-by-Step
Clean and Sand the Surface
Scrub the faucet with degreaser and an old toothbrush to remove soap scum and mineral film. Scuff with 220-grit wet/dry sandpaper until dull and even, then wipe dust with a lint-free cloth dampened with denatured alcohol; sanding gives paint grip.
Mask off Surrounding Areas
Wrap the countertop, wall, and handles in plastic sheeting, sealing edges with painter’s tape. Push tape or foam into the spout and valve openings to block overspray.
Apply Primer and Paint in Light Coats
Primer helps paint bond to bare metal, so don’t skip it. Mist on two or three thin coats, waiting 10 to 15 minutes between each. Spray color in light, sweeping passes 8 to 10 inches away, building coverage gradually.
Let It Cure and Apply Clear Coat
Dry 24 hours, then add two thin clear coats for water resistance. Curing takes 24 to 72 hours before regular use; keep water off during that window. Epoxy paint outlasts standard metal spray paint.
Follow these steps in order, and don't skip the prep work, because that's where most spray paint jobs on metal fixtures fail.
Is It Okay to Spray Paint a Bathroom Faucet?
Yes, you can spray paint a bathroom faucet, but only on a solid metal fixture in good shape; it fails on peeling, pitted, or constantly wet surfaces. Prep and product must be right.
What the Experts Say
Standard spray paint alone won’t hold up to daily water and scrubbing. Use a bonding primer and a moisture-rated topcoat; many pros recommend epoxy paint for fixtures, check for bathroom or wet-area use.
Potential Risks and How to Minimize Them
Main risks are peeling, chipping, and drips into the valve, usually from poor adhesion due to skipped prep.
- Scuff with fine sanding.
- Clean off grease and soap film; dry fully.
- Use masking tape and plastic on handles, aerator, and counter.
- Work in strong ventilation; follow OSHA respirator guidance.
- Respect drying time between coats and full curing before use.
When It’s Acceptable vs. Not
Acceptable for a cosmetic refresh on sound removable metal; add clear coat for water resistance and durability. Not acceptable on plastic faucets, corroded bodies, or leaks, replace instead.
Safety Focus: Proper Ventilation and Respiratory Protection in Small Bathrooms
Why Ventilation Matters
Before you start, you need moving air because spray paint releases solvent vapors that build up fast in a small bathroom. Open a window and run an exhaust fan, or set up a box fan pulling air out. If there’s no window, work in a garage or outdoors. Solvent vapors are heavier than air and linger near the floor and tub, so keep the fan running during the job and for at least 30 minutes after your last coat.
Choosing the Right Respirator
A dust mask won’t protect you from paint solvents. Use a respirator rated for organic vapors with replaceable cartridges, and check that it seals against your face. Activated carbon cartridges capture solvent fumes; swap them once you smell paint through the mask, meaning the filter is spent.
Setting up a Safe Workspace
Clear the counter and cover unpainted surfaces with plastic sheeting and tape to keep overspray off walls, mirrors, and tile grout. Remove the faucet if you can and spray it outside or in a garage with the door open. Keep flames, pilot lights, and space heaters away, and let the piece dry fully before reinstalling.
When Spray Painting a Bathroom Faucet Works Best
Ideal Faucet Materials
Metal faucets in solid brass or stainless steel take paint best. Those surfaces hold adhesion, the bond that keeps paint stuck to metal through daily use.
Skip plastic-bodied faucets with flaking chrome or heavy corrosion. Paint will lift there within months. If the finish peels when you scrape it with a fingernail, replace the fixture instead.
Suitable Finishes and Colors
Choose a metallic or epoxy paint made for metal, not a basic craft spray. Epoxy formulas cure harder and resist bathroom moisture far better than standard cans.
For color, pick brushed nickel, oil-rubbed bronze, or matte black. These hide water spots and wear marks that glossy chrome-style finishes expose. Apply a clear coat rated for wet areas to lock in the look.
Bathroom Environments That Tolerate It
Low-traffic bathrooms with a working exhaust fan are the safest bet. Moisture is the enemy of any coating, so airflow matters more than the paint brand.
Give the finish a full curing window, typically 5 to 7 days, before heavy use. A guest bath or powder room handles the downtime easily. A busy family bathroom shared by four people? Plan around the wait or skip the project.
Myths vs. Facts About Spray Painting Bathroom Faucets
Myth: Spray Paint Won’t Last on Faucets
It can last, but only if you prep and cure it properly. Durability depends on the coating: standard spray paint on a wet, handled surface may fail within months, while epoxy paint or a quality metal finish with clear coat can hold up for a year or more with careful use.
Water resistance is the weak point. Constant moisture and cleaning wear down edges and the aerator area first, so touch-ups are normal.
Myth: Any Spray Paint Works
No. A bathroom faucet needs a coating rated for metal and moisture, so check the label before buying.
Epoxy paint offers the best adhesion and water resistance for a handled fixture. Standard decorative sprays bond poorly to slick chrome unless you sand first, and they chip fast. Skip anything labeled only for indoor crafts.
Myth: You Can Skip Primer
Primer is a preparatory coating that gives paint something to grip, and skipping it is the most common reason a finish peels. Sanding the surface first removes the factory shine, then a metal primer builds adhesion.
After painting, follow the labeled drying time, then let curing finish for several days before daily use. Masking off the handles, aerator, and surrounding surfaces keeps paint off parts that must stay clean.
Common Mistakes to Avoid When Spray Painting a Faucet
Skipping Surface Preparation
Poor adhesion is the number one reason a painted faucet fails. Scuff every surface with fine sanding so the new coating has something to grip, then wipe away residue and let it dry fully.
Applying Heavy Coats
Thick coats trap solvent and turn soft or runny. Build thin layers instead, letting each pass flash off before the next, and keep the can moving to avoid puddles.
Ignoring Curing Times
Dry to the touch is not cured. Wait the full window before reassembly and water contact, and use a clear coat rated for moisture to protect the finish.
- No primer first: a bonding primer or epoxy paint gives the metal finish something to hold.
- Forgetting masking: protect the aerator, handles, and surrounding surfaces before you spray.
- Spraying indoors: work in a ventilated space, or outdoors, and wear a respirator.
- Testing too soon: give it 24 to 72 hours of curing before turning the water on.
- Using wall paint: only epoxy paint or a metal-rated clear coat offers real water resistance and durability.
- No primer first: a bonding primer or epoxy paint gives the metal finish something to hold.
- Forgetting masking: protect the aerator, handles, and surrounding surfaces before you spray.
- Spraying indoors: work in a ventilated space, or outdoors, and wear a respirator.
- Testing too soon: give it 24 to 72 hours of curing before turning the water on.
- Using wall paint: only epoxy paint or a metal-rated clear coat offers real water resistance and durability.
When to Ask for Help: Store Expert, Manufacturer, or Local Pro
Consulting a Paint Store Expert
Ask a paint store expert when you are unsure whether a specific spray paint bonds to your faucet’s existing metal finish. Bring the faucet model or a photo, and ask for a product rated for wet environments with strong adhesion.
Have them confirm compatibility with your planned primer and clear coat before you buy. This step also protects your warranty position.
Checking with the Faucet Manufacturer
Contact the faucet manufacturer before painting if your fixture is under warranty or has a special finish. Ask whether spray painting voids coverage and what replacement parts cost.
They can also tell you if a replacement cartridge or trim kit is cheaper than refinishing. That answer decides the project.
Hiring a Professional Refinisher
Call a local pro when the coating must survive daily scrubbing or your faucet has pitting and corrosion. Ask for epoxy paint or a baked metal finish, plus a written durability guarantee.
Get a quote against replacement cost, since a new faucet often wins.
When to ask for help:
- Get a written quote from a professional refinisher and compare it against the cost of a new faucet.
Can You Spray Paint a Bathroom Faucet: Frequently Asked Questions
?Can You Spray Paint a Bathroom Faucet Without Removing It from the Sink?
No, don't do it in place. Overspray lands on the sink, counter, mirror, and walls, and you can't reach the underside or edges of the faucet, so adhesion and coverage fail. Remove the bathroom faucet, then do your sanding, primer, and spray paint work on a stand or a wire outside. Masking off the surrounding area helps, but removal is the only way to get a clean, durable result.
?Can You Spray Paint a Bathroom Faucet and Still Use It Daily?
Yes, if you prep correctly and use the right coating. Regular decorative spray paint wears through fast in a wet, handled environment. Use an epoxy paint or a metal finish built for fixtures, apply a primer made for metal, and finish with a clear coat for water resistance. Even then, expect touch-ups; a sprayed bathroom faucet is a refresh, not a permanent factory finish.
?Can You Spray Paint a Bathroom Faucet, and How Long Should It Dry and Cure Before Water Touches It?
Yes, you can spray paint a bathroom faucet, but let it cure fully before water touches it. Most spray paint feels dry within an hour, yet curing into a hard, durable film takes days. Keep the faucet off the sink and away from water for 24 to 72 hours, then avoid harsh cleaners for about a week. Rushing this step is the leading cause of peeling and early failure.
?Why Does Spray Paint Peel off a Bathroom Faucet so Often?
Poor adhesion, usually from skipping prep. Spray paint sticks only to a clean, scuffed surface. If you don't degrease, sand with fine grit, and apply a primer, the coating sits on top of soap scum and oils and lifts. Water resistance and durability also suffer without a clear coat. Do the sanding and primer steps properly and peeling drops dramatically.
?What Should I Avoid When Spray Painting a Bathroom Faucet?
Skip these mistakes: painting over a dripping or corroded faucet, using wall paint or craft paint, spraying in a closed bathroom, and handling the piece before curing finishes. Also don't coat the aerator, valve stems, or threaded connections; tape them off. Masking those parts keeps paint out of the water path and moving parts. If the base metal is pitted or flaking, replace it instead.
?is Spray Paint on a Bathroom Faucet Safe Around Drinking Water?
Yes, once fully cured, as long as paint stays off the water contact areas. Keep spray paint away from the spout opening, aerator, and internal parts. Cure the bathroom faucet completely before reinstalling, and flush the lines. Use proper ventilation and a respirator while spraying. If you're unsure about coverage near the spout, use a fixture-rated epoxy paint or replace the faucet.
?When is Spray Painting a Bathroom Faucet a Waste of Time?
When the faucet is plastic-chrome, badly corroded, or leaking. Peeling chrome and flaking finishes won't hold primer or spray paint, and internal wear isn't fixed by a coating. If the metal is solid and clean, spray paint buys you a few years. If it's failing mechanically, put the money toward a replacement and save the sanding and curing time.
Our Thoughts
Yes, painting a bathroom faucet works, but the finish only survives if you sand the metal, apply primer for adhesion, and use epoxy paint built for water resistance. Skip any of those and the coating will peel, flake, or bubble within weeks. Work in a ventilated space and mask off the handles, aerator, and drain before you start.
Your single most useful next step: buy an epoxy spray paint rated for metal and moisture, plus a matching primer, before you touch the faucet. Budget extra drying time and a full curing window of several days before regular use, since durability depends on that hardening. A clear coat adds protection, but only over fully cured paint.
Sources and further reading: guidance from EPA, OSHA.