
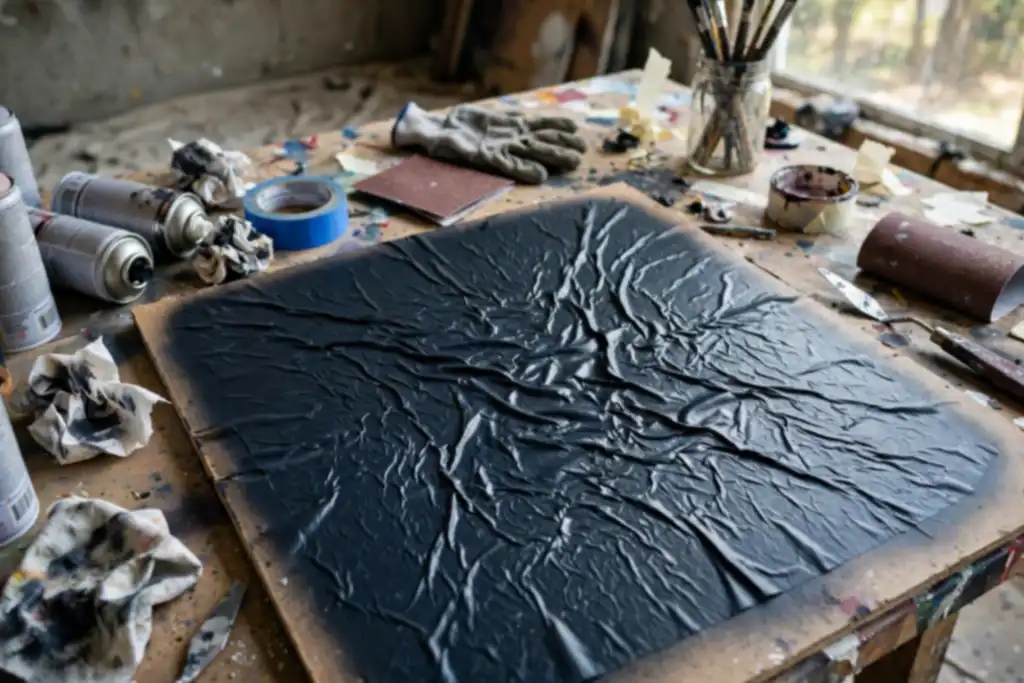

Spray paint wrinkling happens when a new coat traps solvent in the layer below, causing the film to shrivel. That means your recoat time or product compatibility was off, and you need to strip and redo it right.
Here is a clear, practical look at why is my spray paint wrinkling.
A solvent is a substance that dissolves another material, and in spray paint it flashes off during drying. If you apply a second coat before the first has fully released its solvent, the top skin forms while solvent remains trapped underneath. That trapped solvent swells and lifts the lower film, creating the shriveled texture you see. So why is my spray paint wrinkling? The usual culprits are recoating too soon, applying coats too thick, or mixing incompatible products.
Below you will find the specific causes behind wrinkling, how to test and fix a wrinkled surface, and the exact steps to prevent it on your next project. Each point ties back to recoat time, flash-off, and compatibility so you can plan your coats with confidence.
Why is My Spray Paint Wrinkling? the Short Answer Before You Sand Anything
Wrinkling is almost always a solvent or compatibility problem, not bad luck. The fix depends on which one you're dealing with, so diagnose before you touch sandpaper.
| Cause | How to spot it | Fix |
|---|---|---|
| Recoat too soon | Second coat within minutes to an hour | Wait full recoat time |
| Incompatible solvent | Wrinkles across entire coat | Strip and use matching system |
| Thick coat | Wet, heavy film that skins over | Apply thin, misting passes |
| Cold surface | Wrinkles near edges or shaded areas | Warm surface to 60 to 80°F |
| High humidity | Blushing plus wrinkling | Spray below 60% humidity |
| Wrong primer | Wrinkles only over primer | Sand back, use compatible primer |
| Trapped solvent | Wrinkles hours later | Extend flash-off between coats |
Recommended for this job

Rust-Oleum Painter's Touch 2X Ultra Cover
Its recoat window and oil-based formula help you avoid lifting wrinkling coats.

Rust-Oleum Painter's Touch 2X Ultra Cover
A compatible primer layer gives paint a stable base to prevent wrinkling.

What Wrinkling Actually is (and What It Isn’t)
Wrinkling shows up as a shriveled, prune-like texture in the paint film, usually within 1 to 4 hours of spraying. It happens when the top skin dries before the solvent underneath escapes, so the surface buckles as it cures. It is not orange peel (a pebbled texture from poor atomization) or runs (sags from too much material).
The 60-second Diagnosis: Solvent Trap vs. Incompatible Coat
Check where the wrinkles sit and when they appeared. Wrinkles across the whole panel usually mean an incompatible coat, meaning the new paint and the old layer do not mix stably. Wrinkles that show up hours later, or only on thick areas, point to trapped solvent.
Why Sanding Too Early Makes It Worse
Sanding a wrinkled film before it fully hardens smears soft paint and pushes solvent deeper. Let it cure for 3 to 7 days at 70°F, then sand back to a stable layer with 320 to 400 grit. If wrinkles reach the primer, strip the area and restart with thin coats and the label recoat time.
Your Wrinkle Rescue Plan: Decide, Fix, Prevent
Wrinkled paint is a recoat timing problem, not a death sentence. Stop, assess the depth, then either sand and recoat or strip it back. Here is the order that saves the job.
| Action | Why it helps | How to start |
|---|---|---|
| Stop spraying | Prevents solvent trapping under a skin | Let it sit 24 to 48 hours |
| Fingernail depth test | Tells soft film from hardened wrinkles | Press gently, check for give |
| Sand and recoat | Works when wrinkles are shallow | Wet sand 220 to 400 grit |
| Strip and restart | Needed when wrinkles are deep or soft | Use stripper, then sand bare |
| Match products | Compatibility stops solvent attack | Same brand primer and topcoat |
| Respect recoat time | Lets solvent flash-off fully | Follow label windows, not guesses |
| Control conditions | Temperature and humidity shift dry times | Spray 60 to 80 F, low humidity |
| Keep coats thin | Thick films trap solvent | Two light passes per coat |
Step 1: Stop Spraying and Let It Dry
Put the aerosol can down now. Adding more paint traps solvent, the liquid that dissolves and carries the pigment, under a skin and worsens the wrinkling. Give it 24 to 48 hours in 70 to 80°F air with low humidity before you touch it.
Step 2: Test the Wrinkle Depth with a Fingernail
Press a fingernail into a wrinkle. If the film feels soft or lifts, paint is still wet underneath and sanding will smear it. Hard, set wrinkles are ready for repair.
Step 3: Choose Sand-And-Recoat or Strip-And-Restart
Shallow wrinkles sand out: wet sand with 320 to 400 grit until level, then clean and recoat. Deep or soft wrinkling means strip and restart, because sanding will not reach sound paint.
Step 4: Rebuild with Compatible Products and Proper Flash-Off
Use a primer and topcoat from the same system so compatibility, how well layers mix without reacting, is guaranteed. Spray thin coats and wait the full recoat time on the label so each layer can flash-off, the solvent escaping before the next pass.
Main Causes of Spray Paint Wrinkling (and How to Spot Each One)
Recoating Too Soon: the Solvent Trap
Spraying before the first layer releases solvent traps it underneath, softening and lifting the coat into ridges. Spot it by a wet, puckered look within minutes. Fix it by letting the surface dry fully, then sanding smooth before respraying. Follow the can’s recoat time, typically 10 to 30 minutes and longer in cool weather.
Incompatible Solvents and Paint Types
The new coat’s solvent can attack the old finish. Spot it as uniform alligatoring across the panel. Test on scrap first and use a primer or sealer rated for the existing finish.
Surface Prep Mistakes: Grease, Wax, and Old Finishes
Contamination prevents bonding; trapped wax or polish can wrinkle under fresh paint. Wipe with degreaser, sand dull, and clean again. Spot it near edges and fingerprints. Strip incompatible finishes and prep from bare material.
Heat, Cold, and Humidity Extremes
Temperature and humidity control solvent escape. Avoid above 90°F, below 50°F, or heavy humidity. Spot it as wrinkling plus a hazy, slow-drying finish. Spray between 60°F and 80°F with moderate humidity and extra flash-off time.
Coats Sprayed Too Thick or Too Close
Heavy passes seal solvent in. Hold the can 8 to 12 inches away and use light coats. Fix by sanding back and reapplying thin layers.
The Pre-Spray Checklist That Prevents 90% of Wrinkles
Before you shake a can, run this five-minute check. Each item below targets a known cause of a shriveled finish, so a few honest answers now save you a full sanding job later.
Is the Surface Clean and Fully Cured?
Dirt, oil, wax, and trapped solvent under a new layer force the film to lift and pucker. Wipe with a proper prep wipe and let any primer reach full curing before you spray.
Curing is the process of hardening a material into cross-linked polymer chains.
Do You Know Your Recoat Window?
Spraying a second coat before flash-off finishes traps solvent, and that is the classic cause of wrinkling. Read the can for the recoat time and respect both ends of it.
Are Your Products Compatible?
Mixing brands or chemistries can wrinkle a finish fast, because compatibility is simply how well two substances stay stable together. Test on scrap first, especially over an unknown primer.
Is the Weather in Range?
Cold or damp air slows solvent release and stretches drying times. Check the label’s temperature and humidity limits, and spray when conditions sit inside them.
- Surface check: strip wax, oil, and dust, then confirm your primer is fully cured before the first pass.
- Recoat time: note the flash-off window on the can and stay inside it, since early coats trap solvent and cause wrinkling.
- Compatibility test: spray a scrap panel when mixing brands or chemistries, because unstable pairs lift and pucker.
- Weather range: read the label's temperature and humidity limits and spray only within them.
- Coat thickness: build thin passes instead of one heavy coat, since thick films hold solvent longer.
- Aerosol shake and distance: shake per the label and hold the recommended distance to keep the film even.
- Sanding plan: if a wrinkle appears, stop spraying, let it cure, and sand back to a sound surface.
Real-Life Walkthrough: a Dresser Top That Wrinkled Overnight
What Went Wrong on the First Coat
Too heavy a coat trapped solvent inside the film; a thick coat skins over before solvent escapes, so the top layer lifts and shrivels. Cool temperature and high humidity slowed flash-off, and the second coat landed before the first had flashed, so the layers attacked each other.
The Fingernail Test That Decided Sand vs. Strip
Press a fingernail into a hidden spot. If it dents but springs back, it is still soft and needs more curing. If it crumbles or lifts in sheets, the layers are incompatible and the film must come off. Soft but unbonded film: light 220-grit sanding levels wrinkles. Deep, gummy wrinkles mean stripping.
Rebuilding with the Right Primer and Recoat Timing
Choose a primer made for your topcoat; shellac or lacquer-based primer blocks old finish and gives the aerosol grip. Follow the can’s recoat window, apply thin coats, let each flash off fully, sand lightly between coats, work at moderate temperature and low humidity, and cure fully before heavy use.
How to Fix Wrinkled Spray Paint Without Making It Worse
Match the fix to how bad the damage is, then rebuild the film the way it should have gone on the first time.
Scuff Shallow Wrinkles and Recoat Thin
Light wrinkling that has not gone gummy usually sands out. Use 320-grit paper to scuff the surface flat, then wipe the dust with a tack cloth.
Strip Deep or Gummy Wrinkles Back to Bare Surface
If the film feels soft or lifts under your fingernail, start over. Chemical stripper or 120-grit sanding takes it down to bare metal or wood.
Neutralize and Clean Before Respraying
Residue from stripper or old solvent will wreck the next coat. Wash the area with a degreaser and let it dry fully, typically 1 to 2 hours.
Rebuild in Thin Coats with Proper Flash-Off
Thin coats and honest wait times prevent a repeat. Apply a thin primer coat, let it flash off 10 to 15 minutes, then spray light coats 8 to 12 inches away, respecting the label’s recoat time and checking temperature and humidity limits first.
Match the fix to how bad the damage is, then rebuild the film the way it should have gone on the first time.
What Causes Spray Paint to Wrinkle? a Compatibility-First Explanation
Solvent Strength vs. Underlying Film
The fresh coat’s solvent, the liquid that dissolves the paint resins, attacks the layer underneath, causing wrinkling. A hot aerosol solvent softens that older film faster than it can dry, so the surface shrivels into ridges. If the base is fully cured and compatible, the same spray lays flat.
Lacquer over enamel is the classic mismatch. The strong solvent bites into the softer enamel, and the result is instant texture. Stick to one paint family, or test a hidden spot first.
Why Some Primers and Clears Fight Each Other
Primer and clear coat can be chemically incompatible even when both say “paint.” Compatibility just means the two substances mix without changing, and many brands don’t. A clear with a different solvent blend may lift the primer instead of bonding to it.
Buy primer, color, and clear from the same system when you can. Check the aerosol can label for the recommended recoat time and follow it exactly.
The Hidden Variable: Cure Time vs. Dry Time
Dry is not cured. A film can feel dry to the touch in 30 minutes to an hour, but curing, the full hardening of the paint, takes days to weeks depending on coat thickness, temperature, and humidity.
Recoating during that window traps solvent and invites wrinkling. If it already happened, stop spraying, let it harden, then sand back to smooth and start over with thin coats.
Flash-Off and Recoat Windows: the Timing Rules Nobody Reads
Dry to Touch is Not Ready to Recoat
Touchable paint has only lost its surface solvent; underneath it is still releasing vapor and has not begun curing into a stable film. Spray a fresh coat over that soft layer and trapped vapor pushes up through it, buckling the skin into a shriveled texture. Treat dry to touch as a checkpoint, not a green light.
Reading the Can’s Recoat Window Correctly
The recoat time on the label is a range, not a suggestion, because fresh aerosol layers need a set flash-off period, the time solvents need to evaporate, before the next pass. Too soon and the layers trap each other. Wait too long past the window, typically beyond 24 hours, and the surface may need light sanding so the next coat can bite. Always confirm compatibility between your spray paint, primer, and any existing finish before you start.
Spray paint is aerosolized coating delivered from a pressurized can onto a surface in thin layers.
Why Humid Days Stretch Every Window
High humidity and cool temperature slow solvent evaporation, so every timing on the can stretches out. A 30-minute window in dry, 70°F air can easily double on a muggy afternoon. Plan around the weather, not the clock: if the air feels heavy, add extra flash-off time, keep coats thin, and let the piece sit longer before judging the finish.
Sand, Recoat, or Strip? a Depth-Based Decision Rule
Shallow Wrinkle: Sand and Recoat
If wrinkling is only in the top layer, sand it out with 320-400 grit until flat (10-20 minutes on a small panel), wipe dust, let dry fully, then apply thin coats. Respect label recoat time and keep the can at the recommended distance so each layer flashes off.
Deep or Gummy Wrinkle: Strip Completely
If the film feels soft or gummy under your fingernail, layers are incompatible, sanding won’t help. Strip to bare substrate with chemical stripper or sanding, clean and prep so new primer can grip. Work in moderate temperature and low humidity; never rush coat thickness.
Test Compatibility on a Hidden Spot First to Save Rework
Spray a test patch on a hidden area and wait a full curing window. Check labels for matching solvent systems and use one brand’s primer and topcoat where possible.
- Use primer and topcoat labeled for the same system.
- Keep coats thin and follow recoat time.
- Log temperature and humidity before spraying.
Common Mistakes That Cause Wrinkling (and Myths to Drop)
Spraying a Second Coat ‘While It’s Still Tacky’
Tacky is not dry. A second coat shot over a film that is still releasing solvent traps those vapors underneath, and the top skin shrivels into wrinkling. Follow the can’s recoat time exactly, and wait longer in cool or humid conditions.
Mixing Brands and Solvent Types Blindly
Different formulas can be chemically incompatible, meaning they won’t stay stable when layered. A hot aerosol over a slow-drying enamel often lifts and crinkles the coat below. Stick to one brand system, or test a hidden spot first.
Skipping Degreasing Before Sanding
Oil, wax, and silicones smear instead of cutting when you sand. That contaminated surface preparation keeps the primer from bonding, and the topcoat can wrinkle as it pulls away. Degrease first, then sand, then wipe clean.
Believing ‘More Coats = More Protection’
Thick films trap solvent and cure unevenly. Two or three thin passes beat one heavy soak every time. Keep coat thickness light, and let flash-off happen between passes.
- Myth: wrinkling means bad paint. Usually it’s timing or compatibility.
- Myth: heat speeds drying safely. High temperature can skin the surface before the inside dries.
- Myth: humidity doesn’t matter. Moisture slows curing and stretches recoat windows.
- Tacky is not dry: a second coat over a solvent-releasing film traps vapors and causes wrinkling, so follow the can's recoat time and add margin in cool or humid weather.
- Incompatible formulas crinkle when layered: a hot aerosol over a slow enamel can lift the coat below, so stay with one brand system or test a hidden spot first.
- Degrease before sanding: oil and wax smear under abrasives and keep primer from bonding, which lets the topcoat wrinkle as it pulls away.
- More coats is not more protection: thick films trap solvent and cure unevenly, so use two or three thin passes with proper flash-off between them.
- Myth: wrinkling means bad paint. Usually it's recoat timing or compatibility, not the product itself.
- Myth: heat speeds drying safely. High temperature can skin the surface before the inside dries, so work within the label's range.
- Myth: humidity doesn't matter. Moisture slows curing and stretches recoat windows, so plan for longer waits on damp days.
When to Call a Pro: Warning Signs You Shouldn't Ignore
Automotive Panels with Unknown Prior Finishes
Stop and get a pro if spraying a car panel with unknown paint or primer underneath. Aerosol solvents can react with old finish, causing wrinkling and lifting layers. A body shop can identify the coating and test compatibility.
Large Areas with Solvent-Sensitive Substrates
Call a professional when a large surface, like a full wall or cabinet set, wrinkles after first coats. Large areas make coat thickness and recoat time hard to control, and solvent-sensitive substrates may need a different primer. Pros have spray equipment and compatible products to fix it without stripping everything.
Ventilation or Respiratory Safety Concerns
Do not keep spraying without strong airflow or if you feel dizzy, call a pro or local safety authority. Aerosol particles and solvent vapors build up fast in garages; OSHA respiratory guidance exists for a reason. Spray canvas or paper outdoors or in a ventilated studio, never a closed bedroom.
- Stop if wrinkling appears across an automotive panel with unknown finish.
- Call a pro when a large area wrinkles and primer or coating is unconfirmed.
- Get help without safe ventilation or respiratory protection for solvent vapors.
- Stop if dizzy, lightheaded, or short of breath while spraying.
- Ask a professional before spraying canvas or paper in enclosed living spaces.
Why is My Spray Paint Wrinkling: Frequently Asked Questions
?Why is My Spray Paint Wrinkling on the Second Coat When the First Coat Looked Perfect?
Because the first coat wasn't ready for another layer. Wrinkling happens when a fresh coat of spray paint softens the coat beneath it before that lower layer has fully released its solvent and cured. If your recoat time was too short or the coat was too thick, the top skin dries fast while the bottom stays wet and lifts, so the film shrivels into wrinkles.
?Can Humidity and Temperature Cause Spray Paint Wrinkling Even When I Do Everything Else Right?
Yes, humidity and temperature can cause spray paint wrinkling even when everything else is done correctly. Temperature is how hot or cold the surface and air are, and humidity is the moisture in that air; both control how fast solvent leaves the film. Cold slows flash-off so the undercoat stays soft, and high humidity traps solvent and disrupts curing. Spray in the range on the can label and avoid damp days, or wrinkling becomes much more likely.
?Why is My Spray Paint Wrinkling, and How Do I Know If it's from Recoat Time or Incompatible Products?
Why is my spray paint wrinkling comes down to either timing or compatibility. Wrinkling from a short recoat time usually appears soon after the second coat and looks like uniform shriveling. Compatibility problems, where the solvent in one product attacks another, tend to appear patchy or concentrated and often involve a different brand, primer, or aerosol. If you mixed brands or skipped primer, suspect compatibility first.
?Why is My Spray Paint Wrinkling After I Used a Primer I Had on the Shelf?
The primer and the topcoat are probably incompatible, meaning they don't stay stable together. Primer is a preparatory coating, and an old or mismatched primer can still be soft or carry solvents your spray paint reacts to. Confirm the primer is fully cured and rated for your topcoat, and test on scrap before committing to the real surface.
?What Should I Do Right Now If My Spray Paint is Wrinkling?
Stop spraying and let it dry. Adding more paint over a wrinkled film only traps more solvent and makes it worse. Once it's hard, sand the wrinkled area back to a smooth, sound surface, clean off the dust, and recoat following the can's recoat time. If the wrinkling is deep or widespread, strip it rather than build over a bad foundation.
?Does Coat Thickness Affect Spray Paint Wrinkling, and How Thin Should Coats Be?
Yes, thickness is a major cause. A heavy coat skins over on top while solvent stays trapped underneath, and that trapped solvent lifts and wrinkles the film. Spray thin, overlapping passes and build coverage over several coats instead of one wet blanket. Thin coats flash off evenly and give you a much safer recoat window.
?When is Spray Paint Wrinkling a Sign I Should Strip Everything and Start Over?
When the wrinkles are deep, widespread, or keep returning after sanding and recoating. Shallow surface wrinkling usually sands out, but deep wrinkling means the lower layers are compromised and no topcoat will fix that. Strip to bare or sound substrate, redo surface preparation, and rebuild with a compatible primer and thin coats.
Our Thoughts
Two things usually cause it, a recoat time that came too soon or a product that isn’t compatible with what’s underneath. Compatibility just means the two products stay stable when mixed; incompatible ones react and wrinkle.
Don’t spray more paint over the damage. Let it cure (harden fully), then strip or sand the wrinkled area back to a sound surface. Before your next attempt, check the can’s recoat window, confirm your primer matches the topcoat, and keep temperature and humidity in range while each coat flash-offs. That single step is what prevents a repeat.