
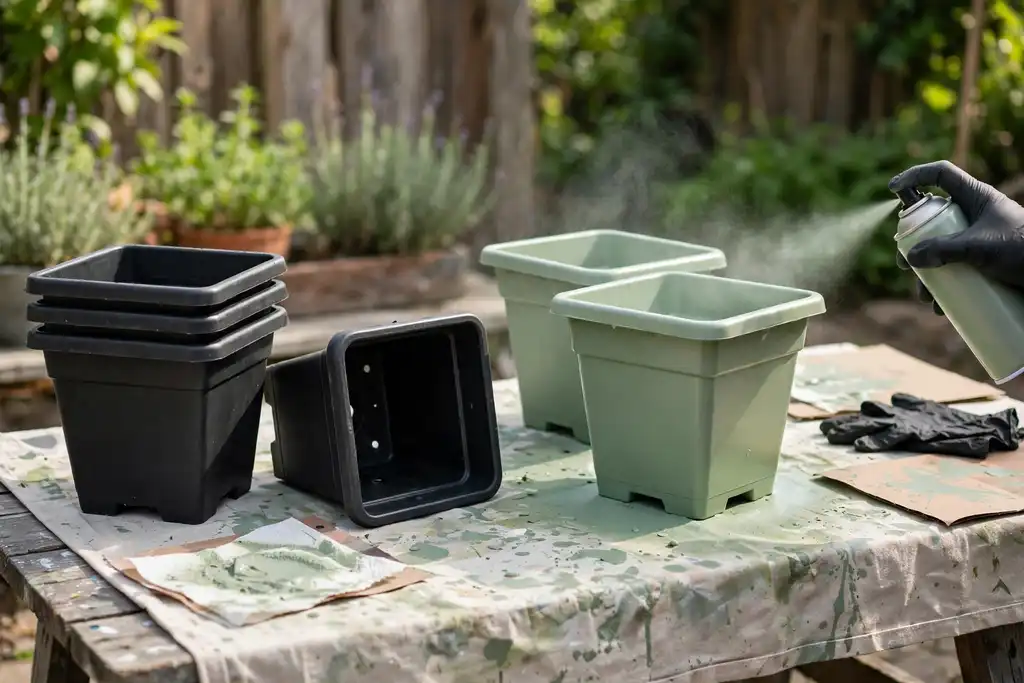

Yes, you can spray paint plastic planters, but only if you pick a paint formulated for plastic and prep the surface so the coating can bond; skip that and it will peel, flake, or fail within one season outdoors.
The most common mistake is spraying straight onto a dirty or glossy plastic planter, which almost guarantees poor adhesion and a finish that peels within weeks. So, can you spray paint plastic planters? Yes, but only if you treat prep as non-negotiable. This article gives you the exact steps to avoid melting, peeling, and wasted paint.
You will learn which spray paint and primer work on plastic, how to clean and sand without overdoing it, and how to apply light coats for a durable finish. You will also get the drying time and curing schedule that actually holds up outdoors, plus how to protect drainage holes and handle UV resistance so your planters look right the first time.
Can You Spray Paint Plastic Planters? the Straight Answer
Yes, you can spray paint a plastic planter, but only if you pick a paint made for plastic and prep the surface first. Skip either step and the finish will flake, bead up, or stay tacky for weeks.
| Situation | What it means | What to do |
|---|---|---|
| New plastic planter | Mold release agents resist paint | Wash with mild soap, rinse, dry fully |
| Faded or chalky planter | Surface is breaking down | Scuff with fine sanding, wipe clean |
| Flexible or thin plastic | Rigid paint cracks when flexed | Use a flexible plastic-bonding spray paint |
| Glossy surface | Poor adhesion without a tooth | Light sanding, then primer for plastic |
| Outdoor placement | Sun and rain break down weak coats | Choose UV resistance, seal if needed |
| Cold or humid weather | Paint won't cure properly | Spray in mild, dry conditions |
| Drainage holes | Paint clogs water flow | Cover with painter's tape before spraying |
Recommended for this job

Rust-Oleum Painter's Touch 2X Ultra Cover
Oil-based spray paint bonds to plastic planters for a durable, glossy red finish.

Rust-Oleum Painter's Touch 2X Ultra Cover
Flat white primer prepares plastic planter surfaces so topcoat paint adheres evenly.

Aleene's Spray Acrylic Sealer
Clear gloss sealer protects painted plastic planters with a non-yellowing, fast-drying topcoat.
Yes, but choose the right spray paint for plastic. Look for a can labeled for plastic, or use a bonding primer first. Standard paint for wood or metal may never grip.
What Spray Paint Actually Does to Plastic
Solvents in spray paint can soften cheap plastic, while rigid paint cracks when the planter flexes. A plastic-specific formula bites into the surface for real adhesion. Test on the bottom first, then apply light coats.
Adhesion is the bond that lets paint stick to plastic instead of flaking off.
Why Some Planters Reject Paint and Others Don’t
New planters often carry mold release agents that push paint away. Cleaning and sanding remove that barrier, and a primer adds a surface paint can grab. Wear a respirator, and respect drying time and curing before outdoor use.
When Spray Painting a Plastic Planter Works Best
Planter Types That Take Paint Well
Rigid plastic planters with a hard, smooth shell, typically high-density polyethylene or polypropylene, hold spray paint best. Flexible pots and soft grow bags flex under pressure, so the coating cracks and peels within weeks. Skip any planter that feels oily or waxy, because adhesion, the bond between paint and plastic, won’t happen there.
Test the paint on the inside rim or base and wait 24 hours. If it bubbles, wrinkles, or wipes off, switch to a bonding primer, a coating applied before color to give slick plastic something to grip. A 400-grit sanding pass first opens the surface so primer and color can lock in.
Weather and Surface Conditions That Help Adhesion
Spray outdoors or in a ventilated garage on a dry day between 50 and 90 degrees Fahrenheit, with humidity under about 60 percent. Work in shade, since hot plastic makes paint dry too fast and trap solvent. Clean the planter with a degreaser, rinse, and let it dry fully before sanding.
Tape drainage holes with painter’s tape, a removable low-tack tape, so water still escapes. Wear a respirator, a mask that filters airborne particles, and apply light coats, waiting 10 to 15 minutes between passes. Full curing, the hardening that makes the finish durable, takes 5 to 7 days before outdoor UV resistance is reliable.
Painter's tape is removable low-tack tape that masks drainage holes so water still escapes.
How to Spray Paint a Plastic Planter Step by Step
Work outside or in a ventilated garage and wear a respirator, since aerosol fumes are strong. Keep cans within the manufacturer’s temperature range for proper adhesion.
Clean the Planter Thoroughly Before Painting
Wash the plastic planter with mild soap and water and rinse well, because dirt and oils block adhesion. Let it dry fully.
Lightly Sand the Surface for Better Adhesion
Scuff the whole surface with 400-grit paper and wipe off the dust. Skip heavy pressure, which can gouge soft plastic.
Use a Primer Designed for Plastic
Apply a plastic-specific primer so the topcoat bonds instead of beading. Tape off drainage holes with painter’s tape first.
Apply Thin, Even Coats to Avoid Drips
Hold the can 8 to 10 inches away and mist on light coats. Heavy passes cause runs and soften cheap plastic.
Let Each Coat Dry Before the Next
Wait the labeled drying time, usually 10 to 15 minutes, between coats. Then let the planter cure 5 to 7 days before planting.
Follow these steps in order and your plastic planter will hold paint through sun, rain, and refills.
Dry to Touch vs Fully Cured: Why Your Planter Still Smells Like Paint
Why Full Cure Matters for Plant Safety
A dry surface is not a safe surface. Spray paint off-gasses solvents long after it feels hard, and those fumes can stress roots and leaves in a closed pot. Allow full cure time before planting, typically 5 to 7 days indoors at room temperature.
Check for smell up close before you fill it. If you still detect solvent odor, give it more time. Good airflow speeds this along, so set the planter somewhere ventilated, not sealed in a garage.
How Long Outdoor Plastic Really Needs
Plan on a longer window for planters headed outside. Cool nights and high humidity slow curing, so expect 7 to 14 days before planting, and keep the piece under cover while it hardens.
- Skip planting during rain or heavy dew.
- Confirm the film feels hard and no longer tacky.
- Protect fresh paint from direct sun for the first few days.
Rushing this stage is the most common cause of peeling later, so let it sit.
Your Weekend Spray Painting Action Plan
Spray paint bonds to plastic planters permanently when the surface is prepped and the weather cooperates. Skip either step and you get peeling, bubbling, or a finish that chalks out by midsummer.
| Action | Why it helps | How to start |
|---|---|---|
| Cleaning the planter | Removes dirt, oils, and mold release so paint grips | Scrub with mild soap, rinse, dry fully |
| Sanding the surface | Roughens slick plastic for real adhesion | Scuff with fine grit, wipe dust off |
| Applying primer | Preparatory coating that gives spray paint a bondable base | Two thin coats on bare or faded plastic |
| Taping drainage holes | Keeps paint out of drainage holes | Press painter's tape over each hole |
| Spraying light coats | Prevents runs, drips, and solvent damage to plastic | Several thin passes, not one wet coat |
| Respecting drying time | Wet paint traps solvent and wrinkles | Wait the label interval between coats |
| Full curing before planting | Hardening into a durable, chip-resistant film | Let it sit several days before soil goes in |
| Checking the weather | High humidity or extreme heat ruins adhesion and finish | Paint in mild, dry conditions, not full sun |
Split the job into two sessions so nothing gets rushed. Prep day is cleaning, sanding, and taping; paint day is primer and color. Work when humidity stays under 60% and temps sit between 50 and 90°F, since high humidity or extreme heat ruins adhesion and leaves a blistered finish.
Prep Day vs Paint Day
Prep day decides whether your spray paint holds. Scrub the plastic planter with dish soap and water, then sand the surface with 220-grit paper to dull the shine. Wipe off all dust, tape the drainage holes with painter’s tape, and wear a respirator once spraying starts outdoors or in an open garage.
A Simple Checklist from Bare Planter to Planted
- Clean, sand, and dry the planter completely.
- Apply primer in two thin coats, letting each flash off.
- Spray paint in light coats, waiting the label’s drying time between passes.
- Let curing finish for 5 to 7 days before adding soil.
- Confirm UV resistance on the label for outdoor durability.
Is It Safe to Spray Paint Plastic Pots?
Safe for You While Spraying
As long as you spray outdoors or in a garage with the door open, yes. Aerosol paint puts fine particles and solvent vapors in the air, so wear a respirator, which is a device that filters what you breathe, and keep the area ventilated. Skip it in windy or rainy conditions, and let the planter dry away from kids and pets.
Safe for Plants and Soil Once Cured
Fully cured paint will not harm your plants or soil. Curing, the process of the coating hardening, takes longer than simple drying time, often several days to a week depending on temperature and humidity. Paint only the outside surfaces, keep the inside unpainted, and leave drainage holes clear. If you paint the inside, let it cure completely before adding soil.
When to Replace Instead of Repaint
Replace any planter with deep cracks, a crumbling rim, or a soft, chalky feel that sanding cannot fix. Those are signs the plastic itself is failing, and fresh paint will not hold. For sturdy, faded planters, proper cleaning, sanding, and primer will give you solid adhesion and outdoor durability.
Keeping Painted Plastic Planters Looking Good
Sealing with a Clear Topcoat for Outdoor Use
Finish outdoor pieces with a clear topcoat made for plastics. It adds UV resistance, which slows sun fading, and shields the color from rain and grit. Apply two thin coats once the color coat has fully cured.
Check the label for plastic compatibility first; some clears contain solvents that attack certain plastics. Keep coats light and let each one flash off per the can. A proper topcoat protects adhesion and extends outdoor durability by seasons, not weeks.
Touch-Ups, Cleaning and Winter Care
Wipe planters with mild soap and water, skip harsh solvents, and touch up chips early before moisture creeps under the film. Small nicks take minutes to fix and stop peeling from spreading.
- Recheck drainage holes after painting so water still flows freely.
- Before freezing weather, move pots under cover or empty them to reduce cracking stress.
- Store leftover spray paint indoors; cold cans spray poorly.
Follow the manufacturer’s recoat window for touch-ups, and wear a respirator whenever you respray.
Best Spray Paint Brands for Plastic Planters
What to Look for on the Label
Check that the can states it bonds to plastic, not just “for use on most surfaces.” A paint formulated for plastic contains solvents that bite into the surface for real adhesion, the bond between paint and plastic that keeps it from flaking.
Look for UV resistance on outdoor cans. Sun exposure breaks down cheap paint fast, and a faded planter is exactly what you are trying to fix. A separate primer made for plastic is worth the extra step if the label does not promise built-in bonding.
Budget vs Premium Cans
Spend a few more dollars per can. Budget paints often need more coats, which means more passes and a higher chance of drips or runs. Premium plastic-bonding cans typically cover in 2 to 3 light coats.
Expect roughly $6 to $12 per can for budget options and $12 to $20 for premium. One can usually covers a medium planter, but textured surfaces drink more paint. Two cans for a large planter is a safe bet.
When Spray Painting Plastic Planters Isn't Worth It
Cracked or UV-damaged Planters
Skip it if the plastic is cracked, brittle, or chalky from sun damage. Paint adds no structural strength, and a failing shell will keep splitting under the new coating. Test by pressing a thumbnail into the side: if it dents easily, the plastic has degraded and no amount of primer will fix adhesion.
Flexible or Heavily Textured Plastic
Thin, bendy pots and deep-textured surfaces fight you the whole way. Flexible plastic flexes under foot traffic and weather, so the film cracks at stress points. Heavily textured plastic also hides poor adhesion until it flakes off in sheets, usually within one season outdoors.
Terracotta and Ceramic Caveats
Yes, you can spray paint terracotta or ceramic planters too, but only glazed or sealed surfaces hold up well. Raw terracotta is porous and wicks moisture, which pushes paint off from behind. Seal it first, or accept that an exterior paint may blister within a few months.
Spray Painting on a Budget Without Cutting Corners
Cheap vs Cheap-Looking Paint
Buy the least expensive can that names plastic on the label. A $6 to $10 can of a major brand usually beats a $3 generic that sprays unevenly and fades in a season.
Check that the formula lists UV resistance, meaning it resists sun damage, and bonds to plastic. Skip enamel made for metal; it can stay tacky or flake off a flexible planter.
When Repainting Beats Buying New Planters
Repainting wins almost every time a planter is structurally sound. One can of spray paint plus primer typically runs $18 to $32 total and covers a couple of medium pots, while comparable new planters often cost $20 to $60 each.
Add your time: cleaning, sanding, and light coats take an afternoon, plus drying time and full curing. Replace the pot instead if the plastic is cracked, brittle, or sun-bleached to the point of crumbling.
Common Mistakes When Spray Painting Plastic
Rushing Coats and Skipping Primer
Thin layers are the rule. One heavy coat traps solvent and can craze or melt the plastic. A primer, a preparatory coating that helps paint bond, gives the spray something to grip.
Sand lightly first to create a texture, then clean off dust. Wait the full drying time between coats, typically 10 to 30 minutes, before adding more.
Painting in Bad Weather
Humidity and cold ruin finishes. Spray when it is 50 to 90°F and dry; damp air causes dull, hazy results.
Wind carries overspray onto cars and siding, so move indoors or shield the area. Wear a respirator, a device that filters the air you breathe, and tape off the rim and drainage holes with painter’s tape.
Fixing Peeling or Uneven Spray Paint
Peeling means adhesion failed, so strip it back rather than painting over the mess. Sand the loose edges smooth, clean the surface, and reapply primer before respraying.
Uneven texture usually comes from holding the can too close or moving too fast. Sand it flat, then use steady passes. Full curing, the hardening that makes the finish durable, takes about 5 to 7 days, so avoid watering until then.
- Rushing coats and skipping primer: thin layers plus a primer coat prevent melting and poor grip.
- Painting in bad weather: spray in 50 to 90°F dry conditions to avoid hazy finishes.
- Fixing peeling or uneven spray paint: sand back the defect, clean, reprime, and respray evenly.
- Drying and curing times: recoat after 10 to 30 minutes, but wait 5 to 7 days before watering.
- Protect drainage holes and rims with painter's tape before spraying.
- Wear a respirator and spray away from wind to avoid overspray damage.
When to Ask a Store Expert or Local Pro
Questions Worth Asking at the Paint Counter
Bring the planter or a photo and ask the staff to confirm which spray paint bonds to your specific plastic. They can check the label for plastic compatibility and point you to a matching primer.
Ask whether a brush-on paint is the safer route for your piece. If you want to paint a plastic planter without spray paint, a store expert can recommend a bonding primer and exterior acrylic, plus the right brush for textured surfaces.
- Ask the manufacturer directly if your planter is polypropylene or polyethylene, since many aerosols won’t stick to those plastics without a specialty primer.
- Ask a pro painter for a quote if the planter is large, detailed or valuable, and request exterior-grade products with UV resistance.
When a Pro Painter Makes Sense
Hire help when the surface is complex or the finish has to last. A local pro can also handle prep and spraying in a ventilated space, which matters if you lack a safe work area.
Ask for adhesion testing on a hidden spot, the products they’ll use, and a curing schedule before anything gets planted.
When to ask for help:
- Ask the paint counter staff to confirm which spray paint bonds to your specific plastic and which primer matches it.
- Ask a store expert for a brush-on primer and exterior acrylic recommendation if you want to avoid spraying.
Can You Spray Paint Plastic Planters: Frequently Asked Questions
?Can You Spray Paint Plastic Planters Without Sanding Them First?
Yes, but only if the surface is already dull and clean. Sanding is the process of scuffing the surface with an abrasive so the spray paint can grip. On slick or glossy plastic planters, skip sanding and the paint will flake. Lightly scuff with fine grit, then wipe clean before you spray.
?How Do You Get Spray Paint to Stick to Plastic Planters?
Use a primer made for plastic, then apply light coats. Primer is a preparatory coating that gives the paint a surface to bond to. Adhesion, the way the paint sticks to the plastic, depends on a clean, scuffed surface and thin layers. Heavy coats trap solvent and cause peeling, so build up slowly.
?Can You Spray Paint Plastic Planters That Stay Outside All Year?
Yes, if you pick paint with UV resistance and let it fully cure. UV resistance means the coating resists sun damage and fading. Outdoor durability also depends on curing, the process of the paint hardening over time, which can take days longer than dry-to-touch. Bring planters in during extreme weather and recheck drainage holes.
?Why Does Spray Paint Peel off Plastic Planters?
Peeling usually means poor prep or too-heavy coats. Dirt, oils, or mold release left on the plastic block adhesion, so cleaning comes first. Wet, thick layers trap solvent and lift later. Sanding lightly, priming, and spraying several thin coats with proper drying time between them prevents most peeling.
?What Safety Gear Do You Need When You Spray Paint Plastic Planters?
Wear a respirator and work outside or in a well-ventilated space. A respirator is a device that filters the air you breathe, and spray paint mist is not something to inhale. Add gloves and eye protection, mask off areas you don't want painted with painter's tape, a removable tape that peels off cleanly, and keep kids and pets away until it cures.
?Can You Spray Paint Plastic Planters That Already Have Plants in Them?
No, remove the plants and soil first. Paint mist drifts, and solvent near roots and leaves does damage you can't undo. Empty the planter, clean it, and cover the drainage holes from the inside with painter's tape so paint doesn't clog them. Replant only after the coating is fully cured and odor-free.
?When Should You Not Spray Paint Plastic Planters?
Skip it when the plastic is cracked, flexible, or very cold to the touch. Some plastics resist paint no matter how well you prep, and cold weather stops proper curing. If the planter flexes when you squeeze it, paint will crack. In those cases, replace the planter or use a paint made specifically for flexible plastic.
Our Thoughts
Spray paint does work on a plastic planter, provided you choose a product labeled for plastic and do the prep work first. Primer is a preparatory coating that gives the color something to grip, and sanding (scuffing the surface with an abrasive) plus cleaning remove the slick finish and grime that block adhesion, the way two surfaces stick together. Light coats beat heavy ones, since a wet, thick layer can soften or melt some plastics.
Your most useful next step is a spot test on the planter’s bottom or inside rim, where mistakes hide. Spray a thin coat, let it sit through the full drying time, then check how it holds after curing, the process where the coating hardens into a tough film. If it wrinkles or lifts, switch to a plastic-specific primer before touching the visible sides.
Sources and further reading: guidance from EPA, OSHA.