
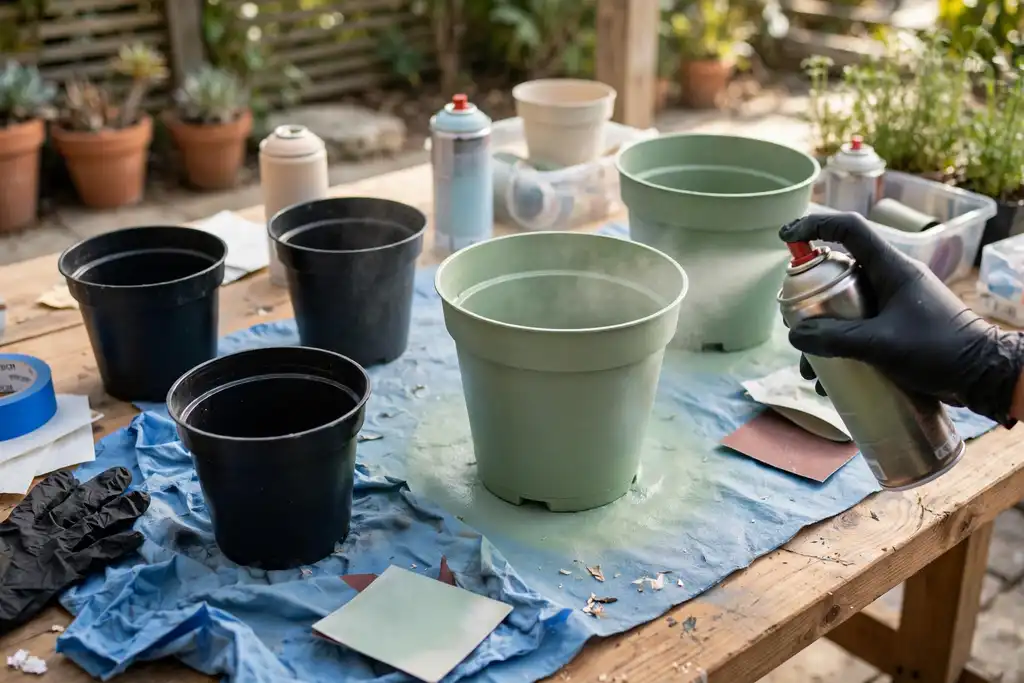

Yes, you can spray paint a plastic flower pot, but only if you match the paint to the plastic type and prep the surface properly, because poor adhesion is the main reason coatings peel.
Yes, spray painting plastic flower pots works, but only with the right plastic and prep. Can you spray paint plastic flower pots without peeling? Only if you identify the plastic, clean and sand it, and use a primer made for plastics.
You will learn how to avoid the common failures: paint that beads up, flakes off, or fades in sunlight. The steps cover surface preparation, primer selection, coats, drying time, curing, and weather resistance so your pots look good and last.
Can You Spray Paint Plastic Flower Pots? the Straight Answer
Yes, you can spray paint a plastic flower pot, but only if the plastic, the paint, and your prep work agree with each other. Skip a step and the finish will peel, flake, or fade within a season.
| Situation | What it means | What to do |
|---|---|---|
| Rigid pot, unknown plastic | Paint may bead or peel | Scuff, clean, use bonding primer |
| Flexible or soft plastic | Paint cracks when pot flexes | Choose a flexible paint made for plastic |
| Shiny, slick surface | Weak adhesion | Sanding to a dull finish first |
| Outdoor placement | Sun and rain break down paint | UV protection and weather resistance matter |
| Freshly painted pot put to use | Soft finish smudges | Allow full curing, not just drying time |
| Spraying indoors | Fumes build up fast | Work outside or with strong ventilation |
Recommended for this job

Rust-Oleum Painter's Touch 2X Ultra Cover
Bonds to plastic flower pots with a durable gloss finish and fast dry.

Rust-Oleum Painter's Touch 2X Ultra Cover
Prepares plastic pot surfaces for paint, improving adhesion and coverage.

AirGearPro G-500 Reusable Respirator Mask
Filters vapor and dust while spray painting plastic pots safely.
What Actually Happens When Spray Paint Meets Plastic
Plastic resists paint because its surface is smooth and non-porous, so adhesion, the way two dissimilar surfaces stick together, depends entirely on your prep. Most pots are polyethylene or polypropylene, which are notoriously hard to bond. Without sanding and cleaning, paint sits on top and lifts off in sheets.
The Short Answer: Usually Yes, with the Right Prep
Standard spray paint made for plastic works on most pots when you scuff the surface with medium grit, wash off dust and oils, and apply a bonding primer first, a preparatory coating that gives paint something to grip. Then build thin coats and let the pot cure, the process of hardening fully, for about 5 to 7 days before planting.
When the Plastic Type Changes Everything
Soft, flexible pots flex under pressure, and rigid paint cracks with them. Check the pot’s recycling code or test a hidden spot; if the paint scratches off easily, switch to a flexible plastic paint or skip painting. For outdoor pots, pick a formula with UV protection so sunlight does not chalk the finish.
When Spray Painting Plastic Pots Doesn't Work
Flexible or Soft Plastic Pots
Skip spray paint on soft, bendy plastic. It flexes under the paint film and cracks it, so adhesion fails fast. Thin nursery pots are the classic offender. If the pot dents easily under thumb pressure, buy a rigid replacement instead of painting it.
Silicone and Rubber-Like Planters
These won’t hold paint at all. Silicone repels coatings by design, so even a bonding primer can’t grip. No surface preparation fixes that. Clean the planter and leave it unpainted, or choose a hard plastic pot for your color project.
Surface preparation means cleaning, sanding, and priming the plastic pot so the paint can bond instead of peeling.
Pots with a Waxy or Oily Surface
Mold release agents and oily residues block adhesion. Cleaning alone often won’t cut through them. Wipe with a degreaser, rinse, and let it dry completely. If water still beads up, paint will too, and you should pick a different pot.
Heavily Textured or Weathered Pots
Deep texture and chalky, sun-baked plastic are poor candidates. Sanding can’t reach the valleys, and old plastic sheds layers under new coats. Expect flaking within a season or two. For longevity, plan on light sanding, a fresh topcoat every year or so, and accept that painted pots fade without UV protection.
Is It Okay to Spray Paint Plastic Plant Pots?
Okay for the Plant? Okay for the Pot?
Yes, you can spray paint a plastic flower pot, but only if the paint is formulated for plastics and you prep the surface. Most nursery pots are polypropylene or polyethylene, which resist ordinary paint, so use a spray paint labeled for plastic or a bonding primer made for plastics. Without that, adhesion fails and the finish peels within one season.
Food-Safe and Plant-Safe Considerations
Painted pots are not food-safe, so keep them away from herbs and vegetables you plan to eat. For ornamentals, let the paint fully cure, which takes 5 to 7 days, before planting; that is longer than the 1 to 2 hour drying time on most cans. Work outside or in a well-ventilated garage with a solvent-rated respirator, nitrile gloves, and eye protection, and keep pets and kids clear until dry.
What the Manufacturer Usually Says
The can label is your authority, so read it before buying. Manufacturers list compatible plastics, recoat windows (often 1 hour or after 48 hours), and full curing times; ignoring them voids a lasting finish. Prep matters as much as product: clean off dust and oils, sand lightly with 220-grit to dull the gloss, then apply 2 to 3 thin coats. Add a UV-protective topcoat for outdoor weather resistance.
Weather resistance is how well the painted finish withstands sun, rain, and temperature changes without fading or flaking.
Prime or Paint-and-Primer-in-One: Decide by Plastic Type
When a Dedicated Primer is Worth It
Use a primer, a preparatory coating applied before paint, when your plastic flower pot feels slick or waxy. Polypropylene and polyethylene pots often reject paint unless you build that bonding layer first. A primer also gives you a uniform base so topcoats hide better.
Choose a primer labeled for plastics, not general-purpose wall primer. Check the can for the plastic types it bonds to before buying.
When Paint-and-Primer-in-One is Enough
Skip the separate step when the pot is rigid PVC or a labeled paintable plastic and you pick a spray paint formulated for plastic. These combined products save time and reduce coat count. Read the can: if it lists plastic as a substrate, you can usually go straight to color.
Two to three light coats, spaced per the label’s drying time, typically cover a standard pot.
How to Test Adhesion Before Committing
Test on the bottom or inside rim first. Clean the surface, spray a small patch, let it cure fully (about 5 to 7 days), then press tape over it and pull. Paint lifting with the tape means poor adhesion; sand lightly, reclean, and add primer.
- Scuff glossy areas with fine sanding before testing.
- Work in ventilated space and follow OSHA-safe practices for solvent sprays.
- Top with UV protection if the pot lives outdoors.
Keeping Painted Pots Looking Good Season After Season
Cleaning Without Stripping the Paint
Wash each plastic flower pot with a soft cloth, 1 teaspoon of mild dish soap per quart of warm water, then rinse and air-dry 30 minutes. Skip abrasive pads and solvents like acetone, which cut through paint and weaken adhesion, the bond that keeps coating stuck to plastic. A soft nylon brush handles stubborn grime.
Touch-Ups and Recoating
Sand chips with 220-grit paper, clean the spot, then apply two thin coats of the same spray paint, feathering edges to blend. Recoat faded pots every 12 to 24 months in full-sun spots. Follow the can’s recoat window, typically within 1 hour or after 48 hours.
Sealing for Extra Durability
Apply one or two coats of clear UV-resistant topcoat over fully cured paint, which takes 5 to 7 days, to boost weather resistance and UV protection, the shield against sun fading. Seal only in 50 to 90°F weather with ventilation. Let it cure before planting.
- Bring pots inside below 32°F.
- Empty saucers after rain.
- Keep drainage holes clear.
A Real Pot, Start to Finish: Upcycling a Faded Plastic Planter
Assessing the Pot and Choosing Paint
Check the plastic first: flexible pots (polyethylene) hold paint poorly, while rigid ones (polypropylene) take it well. Scuff a hidden spot with sandpaper; if it powders easily, expect weak adhesion. Pick a spray paint labeled for plastic and add a primer made for plastics.
Prep, Prime, and Spray
Wash the pot with mild soap and water, rinse, and let it dry fully. Light sanding with 220-grit creates a tooth for the primer, then wipe away dust. Work outdoors or with strong ventilation and wear a respirator.
- Apply one thin primer coat; dry 30 to 60 minutes.
- Spray two or three light coats, 10 to 15 minutes apart.
- Let the pot air-dry 1 to 2 hours before handling.
Curing, Planting, and First Season Results
Full curing takes about 5 to 7 days at 70°F, so wait before planting. A topcoat with UV protection slows fading on sunny porches. Fill with soil, and expect minor chips only where pots scrape concrete.
How to Spray Paint a Plastic Flower Pot Step by Step
Clean the pot with a degreaser and water, then sand it with 220-grit paper to dull the shine. Wipe off sanding dust with a tack cloth before any coating.
Prime for Better Adhesion
Apply a thin coat of primer made for plastic if the pot is slick or flexible, then let it dry for 1 to 2 hours.
Spray in Thin Coats
Shake the spray paint can for one minute, then spray in thin coats from 10 to 12 inches away. Let each coat flash off for 10 to 15 minutes before adding the next, aiming for 2 to 3 coats total.
Cure Before Use
Allow the painted pot to cure for about 5 to 7 days in a warm, ventilated area before planting. Check for full adhesion by pressing a piece of tape on a hidden spot and pulling it off after curing.
Follow these steps in order to get a durable, even finish on your plastic flower pot.
When Spray Painting Plastic Pots Works Best
Rigid Pots with a Matte or Slightly Rough Surface
Rigid pots with a matte or lightly textured finish give the best odds of success. Glossy plastic resists adhesion, so scuff it first. Light sanding with fine grit creates a tooth for the paint to grab; then wipe away dust before spraying.
Warm, Dry Weather and Good Ventilation
Warm, dry air and strong ventilation make spray paint behave predictably. Aim for roughly 50 to 90°F and low humidity. Thin coats may feel dry in 15 to 30 minutes when warm, but cool or humid days stretch that to an hour or more; full curing usually takes several days. Spray outdoors or in an open garage, follow the manufacturer’s ventilation and safety guidance, and keep a respirator handy, consistent with OSHA recommendations.
Pots You Can Empty Before Painting
Empty pots coat evenly and dry without soil or plants in the way. Remove the plant, knock out loose soil, and let the pot dry completely. Paint the inside rim only if using a primer, since roots and moisture can lift an unsealed coating. Add a clear UV-protective topcoat for direct sun, and plan two to three thin coats for even weather resistance.
Your Action Plan Before You Buy the Can
Before you spend a dime on spray paint, run this quick pre-flight check. It separates a finish that sticks from one that peels by next season.
| Action | Why it helps | How to start |
|---|---|---|
| Check the recycling symbol | Tells you the plastic type | Look for a number 1 to 7 |
| Scratch-test a hidden area | Reveals if paint will bite | Sand a small spot, spray, wait |
| Wash with mild soap | Removes mold release agents | Scrub, rinse, dry fully |
| Sand lightly with fine grit | Creates a mechanical key for adhesion | Use 220 to 400 grit |
| Wipe with a tack cloth | Lifts dust before primer | Wipe, then prime within an hour |
| Set up ventilation and PPE | Keeps fumes and overspray off you | Outdoors or open garage, mask and gloves |
| Price primer, paint, and topcoat | Shows the real cost per pot | Add cans needed for 2 to 3 coats |
| Compare to a new pot | Sometimes replacement wins | Check local garden center prices |
Most plastic flower pots are polypropylene (code 5) or polyethylene (code 2), both requiring a plastic-specific primer for adhesion so paint sticks instead of flaking.
Identify the Plastic and Test a Hidden Spot
Check the recycling symbol: code 5 or 2 needs plastic-bonding primer; code 1 (PET) may not hold paint well. Test a hidden area first, sand lightly, spray a thin coat, and wait full drying time.
Budget the Paint and Compare to New Pots
Include primer, color coats, and UV-protective clear topcoat. For an 8-12 inch pot, expect $15, $30 in materials; compare to a new pot before committing.
Gather Prep Supplies and Safety Gear
Prep is where most jobs fail. You’ll need mild soap, water, fine sanding pads, tack cloth, plastic primer, color, clear topcoat, plus an organic-vapor respirator, gloves, and eye protection.
- Work outdoors or in a cross-ventilated garage; follow manufacturer and OSHA guidance on solvent vapors.
- Keep the pot dust-free between coats and let each coat flash off per the can.
- Full curing takes days, not hours, handle gently.
Spray Painting Pots with Plants Still in Them
Masking Soil and Foliage
Spraying a pot with the plant still in it is possible, but seal the soil and shield the leaves first. Slide a plastic bag over the foliage and tie it at the base, then tape newspaper across the soil line so overspray can’t settle into the dirt.
Work outdoors or in a garage with the door open. Spray paint fumes are strong, so keep air moving and wear a respirator rated for organic vapors, not just a dust mask. OSHA treats solvent-based aerosols as a ventilation concern for good reason.
Working in Sections Without Disturbing Roots
Paint in narrow bands and rotate the pot rather than reaching across the plant. Two thin coats beat one heavy pass, and each coat needs roughly 10 to 15 minutes of flash time depending on humidity and temperature.
Keep the nozzle 8 to 12 inches from the surface and shield exposed roots with a damp cloth if the rim is chipped. Full curing takes about 5 to 7 days before the pot is safe to water heavily again.
When to Repot Instead
Skip in-place painting if the plant is rootbound, the pot is cracked, or you need full coverage down to the base. Slip the root ball out, paint the empty pot, and repot once curing is complete.
That route allows proper surface preparation, sanding, and cleaning, which is what real adhesion depends on. A primer made for plastics plus a UV protection topcoat will outlast any rushed touch-up.
Common Mistakes That Ruin Spray-Painted Plastic Pots
Skipping the Clean and Sand
Dirt, grease, and a glossy finish are the top reasons paint fails. Wash the pot with a degreaser, rinse, and let it dry completely, then scuff the surface with fine sanding so the coating has something to grip.
Spraying Too Thick and Too Close
Heavy passes cause runs, pooling, and poor adhesion. Hold the can 8 to 12 inches away and apply two or three thin coats, letting each flash off before the next.
Painting in Humid or Cold Weather
Humidity and cold slow drying time and can leave a dull, tacky finish. Spray when it is roughly 50 to 90 degrees Fahrenheit with low humidity, and allow extra drying time in cooler conditions.
Ignoring Old Paint and Peeling Layers
Old flaking paint must come off first or the new coat will lift with it. Scrape or sand loose layers down to bare plastic, then apply a primer made for plastic to lock in adhesion.
- Clean and sand first: skip it and the paint peels.
- Thin coats only: heavy passes cause runs and weak adhesion.
- Watch the weather: cold or humid air stretches drying time.
- Remove old paint: peeling layers sabotage the new finish.
- Use plastic primer: it improves adhesion on slick surfaces.
- Add UV protection: clear topcoat keeps color from fading.
- Ventilate and wear a respirator: safety first indoors or out.
- Clean and sand first: skip it and the paint peels.
- Thin coats only: heavy passes cause runs and weak adhesion.
- Watch the weather: cold or humid air stretches drying time.
- Remove old paint: peeling layers sabotage the new finish.
- Use plastic primer: it improves adhesion on slick surfaces.
- Add UV protection: clear topcoat keeps color from fading.
- Ventilate and wear a respirator: safety first indoors or out.
When to Ask a Store Expert, the Manufacturer, or a Local Pro
Unusual or Unlabeled Plastics
If a plastic flower pot has no recycling symbol or feels waxy and slick, ask a store expert before you buy spray paint. Some plastics resist adhesion no matter how well you prep them. Bring the pot or a photo and ask which primer and paint line they recommend for that plastic.
Large or Valuable Planters
For oversized or expensive planters, check with the manufacturer first. Ask whether the plastic is UV-stabilized and which spray paint system they approve, since a failed coat on a costly piece is hard to undo. A local pro can also quote a refinish if you want a warranty-friendly result.
Indoor Spraying with Poor Ventilation
Skip indoor spraying when ventilation is poor, and ask a pro about safer options. OSHA treats aerosol solvents as a real exposure concern, so ask a store expert for low-VOC or eco-friendly spray paint options and whether the job should move outside or into a spray booth.
- Ask the manufacturer for the pot’s plastic type and any approved primer before you commit to a full repaint.
- Ask a store expert which eco-friendly spray paint options actually bond to your specific plastic.
- Ask a local pro to handle large or valuable planters when you want a guaranteed, weather-resistant finish.
- Ask about ventilation and safety gear before spraying indoors, and move the job outside if airflow is limited.
Can You Spray Paint Plastic Flower Pots: Frequently Asked Questions
?Can You Spray Paint Plastic Flower Pots Without Sanding Them First?
Yes, but only if the pot is already dull and clean. Skipping sanding on a glossy plastic flower pot is the fastest way to get peeling paint, because sanding creates the microscopic scratches that give spray paint something to grab onto. Scuff the surface lightly with fine grit, wipe off the dust, and your adhesion will be far better.
?Can You Spray Paint Plastic Flower Pots That Already Have a Clear Finish or Gloss?
Not reliably, no. A clear finish or high gloss blocks adhesion, so spray paint sits on top and flakes off within a season. You need to cut that sheen with light sanding until the surface looks dull, then clean off the residue. If the finish is a hard factory coating you can't dull, pick a different plastic flower pot.
?Can You Spray Paint Plastic Flower Pots, and How Many Coats Do They Need?
Yes, you can spray paint plastic flower pots, and they typically need two to three thin coats rather than one heavy pass. Thin coats dry faster, bond better, and resist running or pooling in the pot's ridges. Wait the full drying time printed on the can between coats, then let the piece cure for several days before planting. Rushing the coats is the most common reason spray paint on a plastic flower pot fails.
?Why Does Spray Paint Peel off Plastic Flower Pots?
Usually it's poor surface preparation or the wrong paint for the plastic. Mold-release agents left from manufacturing, dirt, and moisture all block adhesion, and some plastics resist standard spray paint entirely. Clean and sand first, use a primer made for plastic, and test on the pot's bottom before committing to the whole plastic flower pot.
?What Primer Should You Use on a Plastic Flower Pot Before Spray Paint?
Use a primer specifically labeled for plastic, because a primer is a preparatory coating that helps paint stick to slick surfaces. General-purpose primer may not bond to the plastic flower pot and can lift later. Apply a thin coat, let it cure per the label, then topcoat with spray paint. This step is what separates a lasting finish from a peeling one.
?is Spray Paint on Plastic Flower Pots Safe for Plants?
Yes, once it's fully cured. Curing is the process of the paint hardening completely, and during that window it can off-gas. Paint the pot empty, let it cure for several days in a well-ventilated area, then plant. Don't spray paint a plastic flower pot with plants still inside, and keep ventilation strong while you work.
?When Should You Skip Spray Painting a Plastic Flower Pot and Buy New Instead?
Skip it when the pot is cracked, brittle from UV damage, or made of a plastic that rejects paint no matter how you prep it. Also skip it if the pot sits in constant full sun and you can't add UV protection, since the finish will chalk and fade. A cheap new pot often beats hours of prep on a failing plastic flower pot.
Our Thoughts
Yes, you can spray paint a plastic flower pot, and it will hold up when the plastic type and paint match and you do the prep work first. Adhesion, the bond that makes coatings stick to a surface, is what keeps the finish from peeling later. Skip the prep and even a good product will fail.
Your best next step is a small test on the pot’s bottom or inside rim. Clean it, sand it lightly, apply primer, then one coat and check adhesion after the full drying time and curing. If it sticks, proceed in thin coats with ventilation and safety gear.