
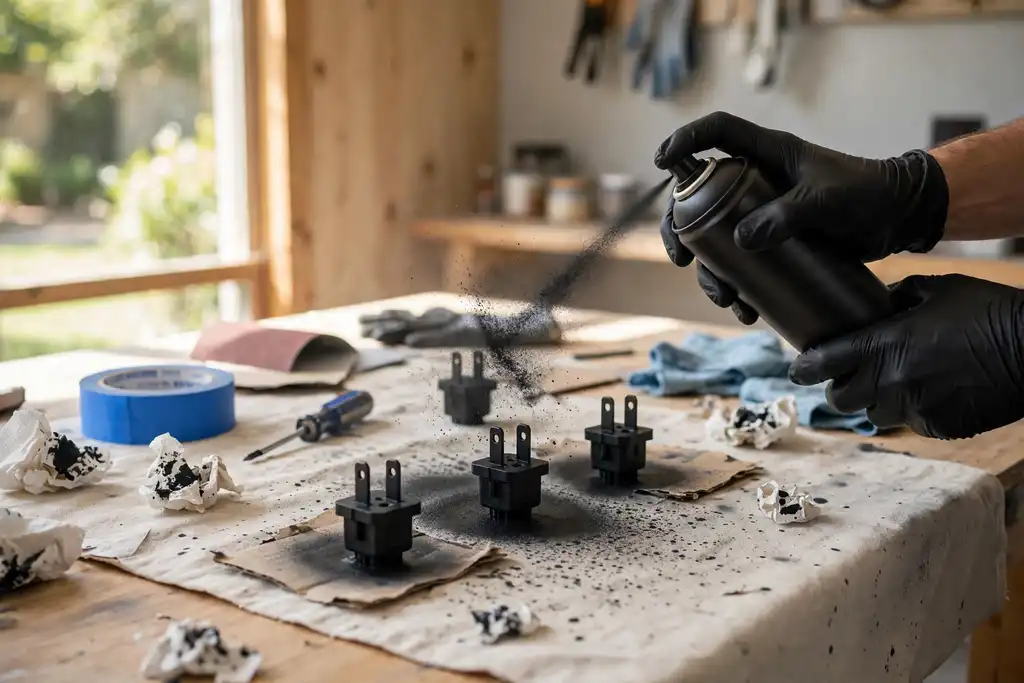

Yes, you can spray paint outlet plugs, but only if you kill the power at the breaker first and use a primer made for plastic, or the paint will peel and could create a fire hazard.
Getting color-matched outlet plugs and wall plates that blend into your wall is doable with spray paint, and the result can look factory-fresh if you treat electrical safety as the first step, not an afterthought. So, can you spray paint outlet plugs? Yes, but only when the circuit is dead and the cover plate is removed, because spraying a live receptacle invites shock and a code violation.
You will learn the exact order of operations: power off at the breaker, test for voltage, remove the cover plate, clean and sand the plastic, apply a plastic-friendly primer, then spray 2 to 3 thin coats and let each one dry. You will also see which mistakes cause peeling, clogged slots, or a fire hazard, and how to avoid them so you only do this job once.
Can You Spray Paint Outlet Plugs? the Straight Answer
Yes, you can spray paint outlet plugs, but only the cover plate, never the receptacle itself. Get that distinction wrong and you are mixing paint with live wiring.
| Situation | What it means | What to do |
|---|---|---|
| Painting the receptacle | Paint on live electrical contacts | Do not do it |
| Painting the cover plate | Safe when removed and prepped | Power off, then paint |
| Skipping the power off | Shock risk at the screws | Cut the breaker first |
| No primer or sanding | Paint flakes off the plate | Sand, prime, then spray |
| Spraying in place | Overspray hits the slots | Remove the wall plate |
| Thick coats | Drips and poor paint adhesion | Use 2 to 3 thin coats |
| Painting over a cracked plate | Fire hazard if it fails | Replace the wall plate |
Recommended for this job

Rust-Oleum Painter's Touch 2X Ultra Cover
Oil-based spray clings to plastic outlet plugs for a durable, glossy red finish.

ENERLITES Outlet Covers Wall Plate
Glossy polycarbonate plates accept paint well and protect outlets during spraying.

4 Rolls Premium Painters Tape
Masking tape shields outlet slots and edges while spray painting surrounding plugs.
Yes, but Only If You Follow Strict Safety Rules
You can color a wall plate, and that is the only part paint should touch. Turn the power off at the breaker before you remove anything, because electrical safety starts before the spray can opens. Keep paint off the slots and screw holes where contacts sit.
What ‘Outlet Plugs’ Means in This Context
People say outlet plugs when they mean the receptacle, the fixed connector in the wall, or its wall plate. Only the plate is a painting candidate. The receptacle carries current and must stay bare.
The Difference Between Painting the Receptacle and the Cover Plate
Painting the cover plate only is the safe path: remove it, sand it lightly with 220-grit paper, apply a bonding primer, then spray paint in two thin coats. Painting the receptacle itself is a fire hazard and a code violation, so skip it. Let the plate dry fully, typically 24 to 48 hours, before reinstalling.
A Real-Life Scenario: Painting a Bedroom Outlet Step by Step
Assessing the Outlet and Planning the Project
Decide first whether you are spraying only the cover plate or the receptacle face. Painting the wall plate is low risk and easy to redo; painting the receptacle itself risks paint bridging the slots and creating a fire hazard. Check the plate for cracks and note the finish so your primer and spray paint can bond.
Turning off Power and Testing for Safety
Electrical safety starts at the breaker, not the switch. Turn off power to the circuit at the panel, then test the receptacle slots with a non-contact voltage tester before touching anything. If the tester lights up, you have the wrong breaker, so keep looking.
Cleaning, Masking, and Painting the Cover Plate
Remove the cover plate and wash off grease and dust, then scuff it lightly with 220-grit sanding so the paint has something to grip. Masking the socket holes with painter’s tape keeps spray out of the slots. Apply a thin coat of primer, let it dry 30 to 60 minutes, then spray two light passes.
Drying, Reinstalling, and Checking the Result
Give the paint the full drying time on the label, typically 24 to 48 hours for a hard cure. Reinstall the cover plate snugly but don’t overtighten, then restore power and test the outlet. If the paint feels tacky, wait longer before reassembly.
Is It Safe to Spray Paint Electrical Outlets?
Safety Hazards: Paint in the Contacts, Fire Risk, and Code Violations
Spraying the receptacle itself is risky because wet paint can seep into the slots and coat the metal contacts. Once dried, that film can block a solid connection, cause arcing, and create a real fire hazard. Most local electrical codes also treat a painted receptacle as a modified device, which can fail inspection.
An electrical code is the set of local rules governing safe installation and use of wiring and devices, which a painted receptacle can violate.
When It’s Safe to Paint the Cover Plate Only
Painting just the cover plate (the wall plate) is generally safe if you remove it first and keep all spray away from the receptacle. Take the plate off, clean it, and lightly scuff it with fine sanding so the paint adhesion holds. A thin coat of primer helps, then apply light passes of spray paint and respect the drying time on the can, usually 24 to 48 hours before reinstalling.
When It’s Never Safe to Paint the Receptacle
Never paint the receptacle body, the slots, or the screw terminals. Before any work near the device, power off the circuit at the breaker and confirm it’s dead. Masking the surrounding wall protects finishes, but no amount of careful masking makes painting the contacts acceptable. Electrical safety comes first: replace a discolored receptacle instead of coating it.
Choosing the Right Spray Paint for Outlet Plugs
Look for Spray Paint Formulated for Plastic and Metal
Choose paint labeled for plastic and metal, since outlet plugs and wall plates are usually a mix of both. General-purpose craft paint often flakes off hard plastic within weeks. Check the label for plastic, metal, or multi-surface; if it only lists wood or drywall, put it back.
Avoid Paints That Conduct Electricity or Degrade Under Heat
Skip metallic and conductive coatings on the receptacle itself, and avoid any paint that softens when warm, outlets can warm under load, and a coating that breaks down becomes a fire hazard. Paint the cover plate, not the receptacle face, whenever you can. If you must coat it, use a non-conductive paint rated for heat.
Consider Primer and Topcoat for Durability
Use a primer to help adhesion on slick plastic, then finish with a clear topcoat. Lightly scuff, wipe clean, prime, then paint. Plan on a full cure of several days before reinstalling, and keep the power off until everything is fully dry.
Your Action Plan: Paint or Replace?
Decide first whether your outlet plugs are safe to paint at all, then pick the cheaper path that fits the job. Painting is fine for cover plates and plugs in good shape; damaged or non-compliant receptacles should be replaced instead.
| Action | Why it helps | How to start |
|---|---|---|
| Inspect for cracks or heat marks | Flags a fire hazard before painting | Power off, then check each receptacle |
| Confirm code compliance | Keeps your work legal and insurable | Compare against local electrical code |
| Paint vs. replace decision | Prevents wasting money on bad units | Replace if damaged or discolored |
| Gather tools and materials | Saves repeat trips mid-project | List primer, spray paint, masking tape |
| Sand and prime plates | Improves paint adhesion on plastic | Scuff lightly, then apply primer |
| Mask the receptacle openings | Keeps paint out of live contacts | Tape over slots and screw holes |
| Allow proper drying time | Prevents smears and rework | Wait the label's full cure window |
| Test before final reinstall | Confirms power off and safe fit | Restore breaker, test with a lamp |
Start with the outlet plugs themselves: power off the circuit, then inspect for cracks, scorch marks, or loose fit. Anything damaged gets replaced, not painted, since a fire hazard is not worth a color match.
For sound units, compare cost: spray paint and primer run a few dollars to roughly twenty, while new receptacles and wall plates typically cost a few dollars each up to about fifteen. Gather sanding pads, masking tape, primer, and spray paint before you begin.
Electrical Code and Insurance: What You Must Know
Local Codes Often Prohibit Painting Receptacles
Most jurisdictions treat a painted receptacle as a violation because the paint can interfere with the device and hide damage. The National Electrical Code requires receptacles to be installed and used per their listing, and coating one usually voids that listing. Check with your local building department before you touch a can of spray paint.
Insurance May Deny Claims If a Fire is Traced to a Painted Outlet
A claims adjuster will look for any unapproved modification when investigating a fire. Paint blocking contact points or trapping heat creates a real fire hazard, and insurers can point to that as negligence. You could lose coverage on a claim you assumed was protected.
Legal Implications for DIY Electrical Work
Many states require a permit or licensed electrician for work beyond swapping a cover plate. Painting the receptacle itself can count as unpermitted alteration if the device is compromised. Keep records, and if you are unsure, hire a licensed electrician to replace the outlet with a colored one instead.
Pre-Start Checklist: Are You Ready to Spray Paint Outlet Plugs?
Before you buy paint or tape anything off, run this quick check to avoid shock risk or a repaint.
Power is off and Tested
Kill the circuit at the breaker and confirm with a non-contact voltage tester at the receptacle. Flipping the switch is not enough.
Proper Paint and Tools Are on Hand
Use spray paint for plastic or metal, bonding primer, fine sanding pads, masking tape, and a screwdriver. Primer improves adhesion on slick wall plates.
Ventilation and Protective Gear Are Set
Spray outdoors or in a garage with the door open. Wear a solvent-rated respirator and eye protection.
Outlet is in Good Condition (No Cracks, Not Loose)
Inspect for cracks, scorch marks, or wobble. Replace damaged parts; a loose or cracked outlet is a fire hazard.
- Power off and tested: breaker off, tester confirms no voltage.
- Primer and spray paint: bonding primer plus paint for plastic or metal.
- Sanding pads: fine grit to scuff the surface.
- Masking supplies: tape and paper to shield the opening.
- Respirator and eye protection: rated for solvent-based spray paint.
- Drying time: 24 to 48 hours typical before reinstalling.
- Code check: confirm local code allows painted wall plates.
- Power off and tested: breaker off, tester confirms no voltage at the receptacle.
- Primer and spray paint: bonding primer plus paint labeled for plastic or metal.
- Sanding pads: fine grit to scuff the surface for better paint adhesion.
- Masking supplies: tape and paper to shield the receptacle opening.
- Respirator and eye protection: rated for solvent-based spray paint.
- Drying time: 24 to 48 hours typical before reinstalling, depending on humidity.
- Electrical code check: confirm local rules allow painted wall plates before starting.
When Spray Painting Outlet Plugs Works Best
Cover Plates That Are in Good Condition and Properly Prepped
Painting the cover plate only is safe, no paint touches live wiring. Skip cracked, warped, or painted-over plates. Clean with degreaser, scuff lightly, and apply a plastic primer for adhesion.
Using the Right Paint for Plastic or Metal
Use spray paint labeled for plastic or metal, ideally paint-and-primer combo. Avoid craft sprays (soft, scratch easily) and high-heat/industrial paints unless rated for plastic.
Aesthetic Upgrades Where Code Allows
Color changes are fine if the plate fits flush and covers the receptacle fully. Code cares about protection, not color. Never paint the receptacle face.
Low-Risk Situations Like Rentals or Temporary Fixes
Great for rentals, painted plates swap back in minutes. Keep the original plate. Always power off at the breaker and test before touching anything.
When It Doesn't Work: Exceptions and Limits
Damaged or Outdated Outlets
Skip the spray paint if the outlet plug itself is cracked, loose, or discolored from heat. Painting over damage hides a problem instead of fixing it. Replace the receptacle first, then color a new cover plate if you still want a custom look.
Outlets That Require Grounding or Special Protection (GFCI, USB)
Don’t paint GFCI or USB outlets. These devices have test buttons, indicator lights, and sensor slots that paint can clog, and a coated face can interfere with the ground fault circuit that protects you near water. Swap the wall plate for a colored one instead.
High-Moisture or High-Heat Locations
Keep paint away from bathroom, kitchen, laundry, and garage outlets exposed to steam, splashes, or heat. Moisture and heat break down paint adhesion, and flaking film around live parts is an electrical safety problem. Use a factory-finished plate rated for the location.
Local Codes That Explicitly Forbid Painting
Some jurisdictions treat painted receptacles as a code violation because the coating can obscure ratings and markings. Check with your local building department before you start. If painting is banned, a colored cover plate keeps you compliant and still changes the look.
How to Spray Paint Outlet Plugs Safely: Step-by-Step
Turn off Power at the Breaker and Verify with a Tester
Kill the circuit at the breaker before anything else. Touch a voltage tester to the slots to confirm zero power, then tape the breaker off so nobody flips it mid-job.
Remove the Cover Plate and Mask the Receptacle
Back out the plate screws and set them in a cup so they don’t vanish. Tape over the receptacle openings, pressing the edges flat so paint can’t creep into the slots.
Clean and Sand the Surface for Better Adhesion
Wipe the plate with a degreaser to strip hand oils. Sanding with 220-grit paper scuffs the plastic so primer and paint grip instead of peeling later.
Apply Primer and Spray Paint in Thin Coats
A plastic-bonding primer is the preparatory coating that makes color stick. Spray paint 8 to 10 inches away in light passes, building 2 to 3 coats with 15 minutes between them.
Let Dry Completely Before Reinstalling
Give the plate 24 to 48 hours to cure, since rush jobs smudge and stick. Reinstall it, restore power, and test the outlet with a lamp before calling it done.
Follow these steps in order, and you'll get a clean color change without compromising electrical safety.
Common Mistakes to Avoid When Spray Painting Outlet Plugs
A handful of avoidable errors account for most outlet painting failures. Get these five right and you will not be redoing the job in a month.
Not Turning off Power
Cut the circuit at the breaker before you touch anything. Confirm with a tester, then remove the wall plate; working live risks shock and is never worth the convenience.
Skipping Surface Preparation
Paint will not stick to glossy plastic without a scuff. Light sanding with fine grit, a wipe-down, and a bonding primer coat solve most paint adhesion issues before they start.
Using the Wrong Type of Paint
Standard wall paint flakes off plastic and can soften under heat. Choose a spray paint labeled for plastic, and check it is rated for the temperatures an outlet area sees.
Painting the Receptacle Itself
Never spray into the slots or the face of the receptacle. Paint inside the contacts creates a fire hazard and can violate electrical code; paint the cover plate only.
Not Allowing Proper Drying Time
Rushing reassembly smears the finish and traps solvent. Give thin coats the full label drying time, typically 24 to 48 hours, before reinstalling the plate.
- Not turning off power: Kill the breaker and verify with a tester before removing the wall plate.
- Skipping surface preparation: Scuff glossy plastic with fine sanding, clean it, then apply primer for paint adhesion.
- Using the wrong type of paint: Use spray paint made for plastic; wall paint flakes and may soften with heat.
- Painting the receptacle itself: Keep paint out of the slots and contacts to avoid a fire hazard and code issues.
- Not allowing proper drying time: Wait the full label time, usually 24 to 48 hours, before reinstalling the cover plate.
When to Call a Pro for Outlet Upgrades
If the Outlet is Damaged, Loose, or Shows Burn Marks
Stop and call a licensed electrician. A loose receptacle, scorch marks, or a melted wall plate point to arcing or overheating that spray paint will never fix. Replacing the device is the only safe move.
If You Need to Install a New Outlet or Change Amperage
New circuits and amperage changes belong to a pro. Pulling permits and matching wire gauge to the breaker is beyond a cosmetic repaint. Electrical code and fire safety depend on that work being correct.
If Local Codes Require a Licensed Electrician
Check your city or county rules before touching anything beyond the wall plate. Many jurisdictions require a licensed electrician for receptacle replacement, and unpermitted work can void insurance coverage.
If You’re Unsure About Safety or Compliance
Trust that instinct and hire out. Guessing on electrical safety is how small projects turn into fire hazard calls.
Stop and call a professional if:
- Stop and call a licensed electrician if the outlet is loose, cracked, or shows burn marks.
- Call a pro if you need a new outlet installed or the amperage changed.
- Check local electrical code rules before replacing any receptacle, since many areas require a licensed electrician.
- Hire a licensed electrician if unpermitted work could affect your homeowner's insurance coverage.
- Stop and get professional help if you are unsure about safety or code compliance.
Can You Spray Paint Outlet Plugs: Frequently Asked Questions
?Can You Spray Paint Outlet Plugs Without Removing the Cover Plate?
No. Always remove the cover plate before you spray paint outlet plugs. Painting over the plate edge glues it to the wall and traps paint in the seam. Pull the plate, then mask the exposed receptacle with tape so overspray stays off the contacts. Reinstall only after the paint is fully dry, or the plate will stick and peel.
?Does Spray Paint on Outlet Plugs Create a Fire Hazard?
Only if paint gets inside the receptacle. Dry paint on a cover plate is not a fire hazard, but spray that bridges contacts or coats the plug slots can cause arcing, overheating, and a real fire hazard. Keep the nozzle aimed at the plate, mask the receptacle opening, and never spray a plugged-in device.
?How Do You Get Spray Paint to Stick to Outlet Plugs?
Prep is everything. Scuff the cover plate with light sanding so the surface has bite, wipe off dust, then apply a primer made for plastic, a preparatory coating that gives spray paint something to grip. Skipping primer is the top cause of paint adhesion failure, where paint chips off the first time you wipe the plate.
?Can You Spray Paint Outlet Plugs While they're Still Live?
No, power off the circuit at the breaker first. Electrical safety means cutting the supply before you touch anything near a receptacle, even if you're only painting the cover plate. Confirm the outlet is dead with a tester, then spray. Working live around wet paint and metal tools is how avoidable shocks happen.
?What Kind of Spray Paint Works Best on Outlet Plugs?
A spray paint labeled for plastic or a bonding primer plus topcoat gives the best paint adhesion. Avoid metallic or textured finishes that build thick layers and can interfere with the cover plate seating flush. Light coats beat heavy ones, heavy coats stay soft, gum up the plate edges, and take far longer to cure.
?Can You Spray Paint Outlet Plugs to Match a Wall Color?
Yes, and it's a common DIY move, but match the wall plate, not the receptacle itself. Painting the actual outlet plugs (the receptacle face) is risky and often violates electrical code; replacing them with a colored receptacle is the correct fix. Paint the cover plate, leave the receptacle alone, and the look stays clean and legal.
?Why Does Spray Paint Peel off Outlet Plugs After a Few Weeks?
Because the plate wasn't prepped. Paint adhesion fails on smooth, glossy plastic when you skip sanding and primer, and handling plus cleaning speeds the peel. Scuff, prime, apply thin coats, and respect the full drying time on the can before you reinstall the plate. Do that once and it holds.
Our Thoughts
So yes, spray paint on outlet plugs is doable, and the opening answer holds: cut the power at the breaker, use a plastic-specific primer, and you avoid peeling paint and a real fire risk. Skip the primer and you are gambling with paint adhesion on a surface that flexes and warms.
Your best next step is prep before color: remove the cover plate, do light sanding so the primer bites, and mask the receptacle openings so no paint reaches the contacts. Let each coat hit its full drying time, then check the wall plate sits flush. If the outlet feels loose or damaged, replace it, since electrical code and electrical safety come first.
Sources and further reading: guidance from UL, NEC.