
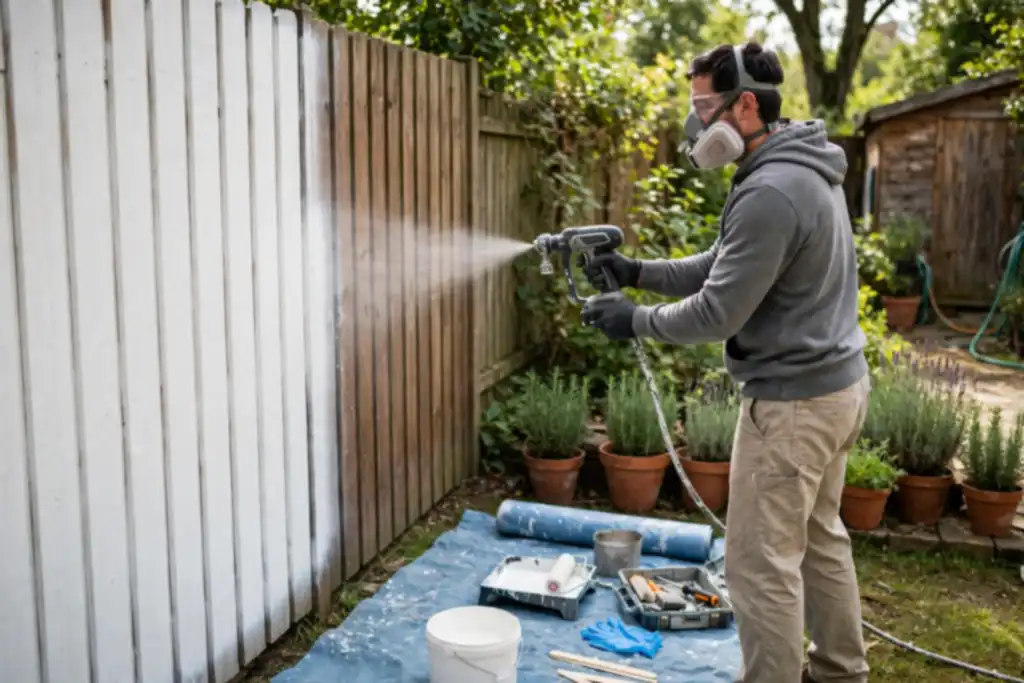
To paint a fence with a paint sprayer, first clean and repair the surface, thin the paint per the sprayer manual, then use a fine mist at the correct pressure while back-brushing for even coverage, because proper prep and technique prevent overspray and peeling.
Worried about overspray drifting onto your neighbor’s car or your own siding? Learning how to paint a fence with a paint sprayer the right way starts with surface preparation and masking, not the spray gun. You’ll get a fast, even coat on your wood fence without the common mistakes that force a do-over.
Here are the exact steps: choosing between an airless paint sprayer and an HVLP sprayer, thinning fence paint with paint thinner, setting the spray tip and pressure setting, and using back-brushing for penetration. You’ll also see how primer fits in, how to control overspray, and how to handle cleanup so your equipment lasts.
- Prep and mask first: overspray travels far and ruins nearby surfaces.
- Thin fence paint only per manufacturer specs; too much thinner weakens the coat.
- Use a spray tip sized for fence paint and test pressure on scrap wood.
- Back-brush immediately after spraying to work paint into the wood grain.
- Wear a respirator and eye protection; spray vapors are harmful.
How to Paint a Fence with a Paint Sprayer: the Quick Decision Before You Start
Before you load a sprayer, decide whether spraying is the right call for your fence. The wrong pick costs you more in paint, masking time, and cleanup than brushing ever would.
| Your situation | What to do | Why |
|---|---|---|
| Long, flat privacy fence | Airless paint sprayer with fine tip | Covers fast, even coat |
| Short fence under about 50 feet | Brush or roller | Setup time eats the savings |
| Lots of lattice or tight slats | HVLP sprayer plus back-brushing | Reaches gaps a roller misses |
| Windy day or close neighbors | Mask and tarp, or brush | Overspray drifts far |
| Weathered wood fence | Prime first, then spray | Primer seals bare grain |
| Renting once for a big job | Rent airless, buy tips | Cheaper than owning |
| Small touch-ups later | Keep brush and roller handy | Sprayer overkill for patches |
Recommended for this job
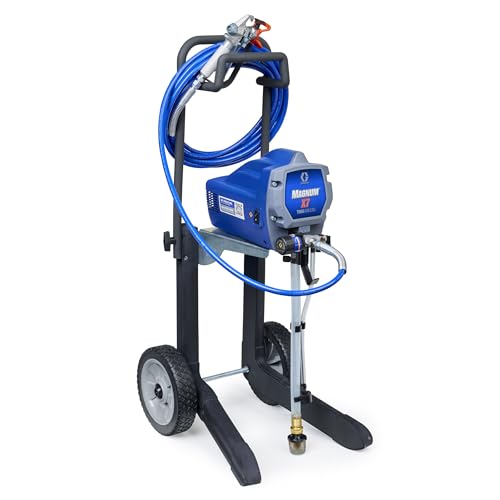
Graco Magnum X7 Cart Airless Paint
Adjustable pressure and cart design make spraying long fence runs steady and quick.

Fuji Spray 2202 Semi-PRO 2
HVLP system delivers smooth, controlled finish for fence boards without heavy overspray.

Gardner Black Beauty Fence Post Paint
Dedicated fence post paint pairs with sprayers for even coverage on posts and rails.
Spraying wins on long runs of flat boards. On a short or fussy fence, setup and masking can take longer than brushing.
Is Spraying Actually Faster Than Brushing Your Fence?
Usually yes on long, flat runs, but only after surface preparation and masking are done. Count setup time, not just spray time.
The Fence-Length and Complexity Rule of Thumb
Past roughly 100 to 150 feet of flat boards, an airless paint sprayer pays off in time. Below that, or with heavy lattice, brushing often ties it.
When a Brush or Roller Still Wins
Short fences, tight spaces, and windy days favor a brush or roller. No overspray, no thinning guesswork, no cleanup marathon.
Cleanup means flushing the sprayer, tip, and filter with the right solvent right after spraying so dried paint does not clog them.
The 5-Minute Fence Check Before You Spray
Run this five-minute check before you fill the cup or hopper, because a missed defect here costs hours of rework.
- Poke each picket with a screwdriver handle; soft wood that dents easily won’t hold fence paint and needs replacing first.
- Press a moisture meter against three or four boards; readings above 15% mean wait a dry day or two.
- Scrape a 1-inch patch with a putty knife to confirm old coating is tight, not flaking.
- Walk the full run and list every window, downspout, and parked car within 20 feet.
- Check the forecast: gusts under 10 mph and no rain for 24 hours.
Is the Surface Sound, Dry and Clean?
Sound, dry, clean wood holds paint; anything less fails within a season. Scrub chalking and dirt with a stiff brush, then let damp boards dry a full day before spraying.
How Much Masking Will This Fence Really Need?
Plan for more than you expect, since overspray (airborne paint landing where you didn’t aim) drifts 10 to 20 feet on a breezy day. Tape windows and trim with masking tape, and lay drop cloths along both sides of the wood fence.
A drop cloth is a protective sheet laid over plants, walkways, and cars to catch paint overspray and drips.
Masking tape is a removable paper tape used to cover windows, trim, and hardware so overspray does not stick to them.
What’s the Weather Doing for the Next 24 Hours?
Spray only when gusts stay under 10 mph and no rain is forecast for 24 hours, or the finish will streak or wash off. Confirm 50 to 85°F holds through drying time.
Run this quick diagnostic before you load the sprayer, because five minutes of checking now saves hours of fixing later.
How a Paint Sprayer Actually Coats a Fence
Airless vs. HVLP: What Each Does to Fence Paint
An airless sprayer pushes paint through a small opening at high pressure, laying thick coats fast on long runs. HVLP uses low pressure and high air volume, giving less bounce-back and finer control on details and tight corners.
For most wood fences, pick airless for speed and coverage. Choose HVLP for small fences, thin paint, or tighter control over overspray.
Why Fence Boards Need Penetration, Not Just a Top Film
Wood fence boards are porous, so a coating that only sits on top will peel as wood swells and shrinks. The first coat should soak in and seal the grain, then build a protective film.
Stain penetrates best and often needs no primer. Paint needs a primer to bond to bare wood and block tannin bleed. Thin fence paint only as far as the manufacturer allows, or you lose the protective film.
Gear up: Sprayer, Paint, Masking and Safety Before You Pull the Trigger
Sprayer, Tip and Hose Checklist
Thick fence paint is typically handled by an airless paint sprayer with a 0.015 to 0.019 inch spray tip; an HVLP sprayer suits thinner stains and smaller jobs. Cross-check your spray tip against the manufacturer’s chart, then inspect the hose, gun, and filters for dried paint before filling the cup.
Masking and Protecting Surrounding Areas
Overspray, airborne paint landing where you don’t want it, can drift 10 to 20 feet on a breezy day. Run masking tape along hardware and window trim, and stake drop cloths over plants, walkways, and parked cars within 20 feet.
Safety Gear and Ventilation When Spraying
Wear a respirator rated for paint vapors, sealed safety glasses, nitrile gloves, and long sleeves. Keep kids and pets behind a 30 foot line until the fence paint is dry to the touch, typically 2 to 4 hours.
Choosing the Best Paint Type for Fences
Buy an exterior-rated fence paint or stain, not interior wall paint. A primer, a preparatory coating applied before painting, seals bare wood; thin only with paint thinner matching the label ratio, usually under 10 percent.
- Match sprayer to product: airless paint sprayer for thick fence paint, HVLP sprayer for thin stains
- Check spray tip size against the manufacturer chart before loading
- Inspect hose, gun, and filters for clogs and cracks
- Tape hardware and windows with masking tape; cover plants and walkways with a drop cloth
- Wear safety glasses, respirator, gloves, and long sleeves
- Spray in open airflow and keep pets and kids away until dry
- Choose exterior fence paint or stain, and seal bare wood with primer
- Thin only per the label using paint thinner
Step-by-Step: Spraying Your Fence the Right Way
Step 1: Prep and Clean the Fence Surface
Wash the fence, let it dry 24-48 hours. Scrape loose paint, sand rough spots, and spot-prime bare wood with primer.
Step 2: Mask and Protect Surrounding Areas
Tape off hardware and walls with masking tape. Lay a drop cloth and cover plants, overspray travels far. Spray on a calm day with no rain for 24 hours.
Step 3: Thin the Paint for Sprayer Use
Check the fence paint label and sprayer manual for the thinning ratio. Add paint thinner or water gradually, stir, and test with a viscosity cup.
Step 4: Set Sprayer Pressure and Tip Size
Use a 515 tip for most exterior fence paint; thinner stains need smaller. Start pressure low and raise until the pattern is even.
Step 5: Spray with Even, Overlapping Passes
Hold the gun 10 to 12 inches away, overlap passes 50 percent, and back-brush immediately for penetration and a uniform finish. Keep the gun moving to avoid buildup.
Follow these five steps in order and you'll get an even coat without the overspray mess or thin spots that ruin a fence job.
After the Last Pass: Cleanup, Storage and Fence Care
Once the final coat is down, handle the sprayer and fresh finish with the same care as prep.
Cleaning and Storing the Sprayer After Use
Clean immediately, dried fence paint clogs tips and pumps fast. Flush with water for latex or paint thinner for oil-based products until spray runs clear.
- Flush the airless sprayer with correct solvent until clear.
- Clean tip and gun filter with a soft brush; store tip in labeled case.
- Run light oil through the pump before storing.
- Rinse HVLP cup and nozzle; dry fully to prevent rust.
Spraying Different Fence Materials: Wood, Vinyl and Metal
Match product and pressure to surface: wood drinks paint; vinyl and metal need a thin coat. Rough-sawn wood takes primer and a wider tip. Vinyl and metal need less pressure and lighter passes. Keep the gun moving; overlap strokes about 50 percent.
Maintaining the Fence Finish Over Time
A sprayed finish lasts 3 to 5 years on sun-exposed wood, longer on vinyl and metal. Check drips and overspray within 30 minutes; smooth with a brush.
- Wait the recoat window (typically 24-48 hours) before touching up.
- Inspect wood yearly for peeling; recoat every 3-5 years.
- Wipe vinyl and metal twice yearly with a damp cloth.
Once the final coat is down, the job is only half done, so handle the sprayer and the fresh finish with the same care you gave the prep.
Weather, Season and Climate: When Spraying Works Best
Temperature and Humidity Windows for Fence Paint
Spray when air and surface temps sit between 50 and 85 F and humidity stays under about 70 percent. Outside that window, fence paint can skin over too fast or fail to cure hard. Check the label on your primer and topcoat before you load the gun.
Wind, Overspray Drift and Neighbors
Keep wind under 10 mph or skip spraying, because overspray (airborne paint landing where you did not aim) will drift onto cars, siding and plants. Mask nearby surfaces with masking tape and drop cloth, and warn neighbors before you start. Calm early mornings usually beat breezy afternoons.
How Climate Affects Drying and Recoating
Drying and recoating times shift with heat, humidity and sun exposure, so trust the product label over a fixed schedule. Typical exterior recoat windows run 2 to 4 hours in dry, mild weather and stretch to 24 hours in cool, damp air. Test a small spot with a light touch before the second pass.
Spraying a Fence on a Budget Without Cutting Corners
Renting vs. Buying a Paint Sprayer
Rent an airless paint sprayer for a one-time fence job; a weekend rental typically runs $70 to $150, far less than a $250 to $700 purchase. Buy only if you will spray siding, decks, or furniture again within a year.
Compare that against brush and roller costs: a few $10 to $25 tools plus slower labor. Spraying saves hours on long runs, so renting usually wins on a single project.
Cutting Overspray Waste Instead of Cutting Prep
Thin fence paint only to the manufacturer’s spec and match the spray tip to the product; a mismatched tip wastes gallons as overspray, the airborne paint that lands where you did not aim. Skipping surface preparation costs more later, since peeling paint means a full redo.
Cheap Masking That Still Protects
Use masking tape and plastic sheeting from a hardware store, plus drop cloths over plants and hardscape; this protects neighbors’ property and your own. Secure edges well, because wind pushes overspray under loose cover.
What It Costs: Sprayer vs. Brush vs. Roller, DIY vs. Pro
Spraying a fence is usually the cheapest DIY route once you already own the sprayer. If you have to buy or rent one, the math shifts fast, so budget for waste and setup time, not just paint.
| Option | Upfront cost | Ongoing cost | Notes |
|---|---|---|---|
| Brush only | $15 to $40 in tools | Paint plus 10 to 20% extra | Slowest method, most back-brushing |
| Roller plus brush | $20 to $60 in tools | Paint plus 10 to 15% extra | Good middle ground on flat boards |
| Airless paint sprayer, owned | $0 if already owned | Paint plus 15 to 25% overspray waste | Fastest coverage, needs masking |
| Airless sprayer purchase | $250 to $700 | Tips, filters, paint thinner | Pays off over several large jobs |
| Airless sprayer rental | $70 to $150 per day | Paint plus 15 to 25% waste | Best for one-time projects |
| HVLP sprayer purchase | $100 to $300 | Paint thinner, spare cups | Slower, less overspray than airless |
| Pro spray quote | $1.50 to $3.50 per linear foot | Included in quote | Assumes cleared, prepped fence |
Ranges assume a typical 150 to 200 linear foot wood fence, exterior fence paint or stain, and DIY labor. Pro quotes vary by region, fence height, condition, and whether surface preparation and primer are included. Overspray waste is higher on windy days and with thin products.
DIY Cost Breakdown with Overspray Waste Included
Expect paint plus 15 to 25% extra for overspray when spraying, versus 10 to 15% with a roller. Add masking tape, drop cloth, and paint thinner for cleanup.
Sprayer Rental vs. Purchase Math
Rent if you have one fence and no future projects. Buy an airless paint sprayer only when you will spray several large jobs, since tips and filters add ongoing cost.
Typical Pro Quotes and What They Assume
Pro quotes usually run $1.50 to $3.50 per linear foot and assume a cleared fence with surface preparation and primer included. Confirm that in writing before you compare.
Troubleshooting Clogs, Spits and Uneven Spray
Most spray problems trace back to thickness, pressure or a worn tip, and you can fix all three without a service call. Work through these checks before you touch the gun again.
| Problem | Likely cause | Fix |
|---|---|---|
| Sprayer clogs | Dried paint in tip or filter | Flush with thinner, clean tip |
| Spitting and spatter | Loose tip or low fluid | Tighten tip, refill, reprime |
| Uneven fan pattern | Worn or wrong-size tip | Replace tip, match to product |
| Thick, pebbly finish | Paint too thick | Thin per label, retest on scrap |
| Thin, runny coat | Pressure too high | Lower pressure, slow your pass |
| Drips and sags | Passes too slow or too close | Speed up, hold 10 to 12 inches back |
| Lap marks | Overlapping wet edges | Keep a wet edge, work in sections |
Sprayer Clogs and Uneven Spray
Clogs usually mean dried material in the tip or filter, not a dead pump. Flush the gun with paint thinner (a solvent that dissolves paint), clean the filter, and confirm the spray tip matches your product.
Paint Too Thick or Pressure Too Low?
Thick fence paint and primer may need thinning to flow through an airless paint sprayer. Add thinner in small amounts, stir, and test on scrap wood before coating the fence.
Fixing Drips, Sags and Lap Marks
Sags come from moving too slow or holding the gun too close. Keep passes even, overlap about half the fan, and follow with back-brushing on rough wood fence boards to spread heavy spots.
Common Fence-Spraying Mistakes and How to Fix Them
Most fence-spraying failures come from four habits. Fix them before the first pass to avoid repainting an entire run.
Skipping Back-Brushing and Paying for It Later
Spraying lays paint on the surface, not into the grain. Back-brushing, working wet coating in with a brush right after spraying, pushes product into pores and evens the finish.
Over-Thinning Paint to ‘Make It Spray’
Thin only as much as the manufacturer allows, measured with a viscosity cup. Extra thinner weakens the film and shortens its life.
Ignoring Overspray Until the Car is Speckled
Overspray travels farther than you think. Mask with tape and drop cloth, and spray on calm days below 10 mph wind.
Spraying Stain Like Paint (or Paint Like Stain)
Stain needs a thin coat worked into wood; paint needs a primer first. Match spray tip, pressure, and technique to the product.
- Back-brush every sprayed section while wet.
- Thin per label only; test on scrap wood.
- Mask and tarp everything downwind.
- Check wind and temperature forecasts.
- Use a larger tip for stain, smaller for paint.
- Flush the sprayer and clean up the same day.
When to Ask a Store Expert, the Manufacturer or a Local Pro
Questions Worth Asking at the Paint Counter
Staff at a paint or hardware store can match the right product to your wood fence and your sprayer. Ask which fence paint or stain sprays best through your tip size, and whether the label calls for a primer first. They can also confirm the correct paint thinner for your product.
When a Pro Sprayer Setup Makes More Sense
Call the manufacturer or a local pro when your fence is large, tall, or hard to reach safely. Ask whether your airless paint sprayer or HVLP sprayer handles the coating’s thickness, and what spray tip and pressure setting they recommend. A pro can also quote masking and cleanup time.
The pressure setting controls how hard the sprayer pushes paint, so you start low and raise it until the spray pattern is even.
Environmental Regulations for Paint Disposal
Check your local household hazardous waste rules before you dump leftover fence paint or rinse water. The EPA and your city or county waste office can tell you what is accepted and where. Ask the manufacturer for the safety data sheet too.
When to ask for help:
- Ask the paint counter staff which fence paint, primer and paint thinner suit your sprayer and surface.
- Ask the sprayer manufacturer whether your airless paint sprayer or HVLP sprayer handles your chosen coating and which spray tip and pressure setting to use.
- Ask a local pro for a quote when your fence is large, tall or hard to reach safely.
- Ask your city or county waste office or the EPA how to dispose of leftover paint and rinse water.
How to Paint a Fence with a Paint Sprayer: Frequently Asked Questions
?How to Paint a Fence with a Paint Sprayer Without Masking Everything First?
You should not skip masking when you paint a fence with a paint sprayer. Overspray, which is airborne paint landing where you didn't aim it, will drift onto siding, plants, cars, and windows. Mask adjacent surfaces with masking tape and cover the ground with a drop cloth before you start. Skipping this step is the fastest way to turn a clean job into a repair job.
?How to Paint a Fence with a Paint Sprayer Without Thinning the Paint Too Much?
Follow the manufacturer's thinning ratio and check with a test pass on scrap wood. Thin fence paint only as much as the sprayer needs to atomize it properly, using the recommended paint thinner. Over-thinning causes runs, poor coverage, and premature failure. If the coat looks watery, stop and add unthinned paint back in.
?How to Paint a Fence with a Paint Sprayer: What Spray Tip and Pressure Setting Should I Use?
Use a tip sized for your coating, typically a wider tip for fence paint and stain, and start at the lower end of the pressure range. Raise pressure only until the spray pattern is fully atomized with no tails. Too much pressure wastes paint and increases overspray; too little leaves a spitting, uneven pattern when you paint a fence with a paint sprayer.
?Does a Wood Fence Need Primer Before I Paint It with a Paint Sprayer?
Yes, bare or weathered wood should get a primer, a preparatory coating applied before paint to seal the surface and help adhesion. Spray the primer in thin, even passes, then let it cure per the label. Skipping primer on a wood fence leads to peeling, blotchy color, and shorter coating life.
?How Do I Avoid Overspray and Wind Problems When I Paint a Fence with a Paint Sprayer?
Spray on a calm day and keep the gun close and perpendicular to the surface. Wind carries overspray onto anything nearby, so check the forecast and tarp sensitive areas. Work in overlapping passes and use back-brushing, which means running a brush over sprayed paint to work it in, on rough boards.
?When Should I Back-Brush After I Paint a Fence with a Paint Sprayer?
Back-brush immediately after each sprayed section, while the fence paint is still wet. Rough-sawn and weathered boards don't take spray evenly, so a quick brush pass pushes paint into cracks and grain for full coverage. On smooth boards, back-brushing is optional but still improves penetration and finish.
?is Cleanup After Spraying a Fence as Important as the Painting Itself?
Yes. Flush the sprayer with the correct solvent, water or paint thinner, right after the last pass, and clean the spray tip and filter. Leftover fence paint hardens inside the gun and ruins the next job. Store the sprayer dry, and inspect the fence for missed spots before the coating fully cures.
Conclusion
Prep work and technique are what separate a clean, even coat from drips, overspray, and peeling paint a season later. Clean and repair the wood fence first, thin the fence paint exactly as the manufacturer’s manual specifies, and mask off anything you don’t want coated with masking tape and a drop cloth. Back-brushing while you spray pushes product into the grain for a finish that lasts.
Before you load a full batch, test your spray tip and pressure setting on scrap wood or cardboard to dial in a fine, even mist. That five-minute check catches spitting, runs, and overspray before they hit your fence, so you get it right the first time.