
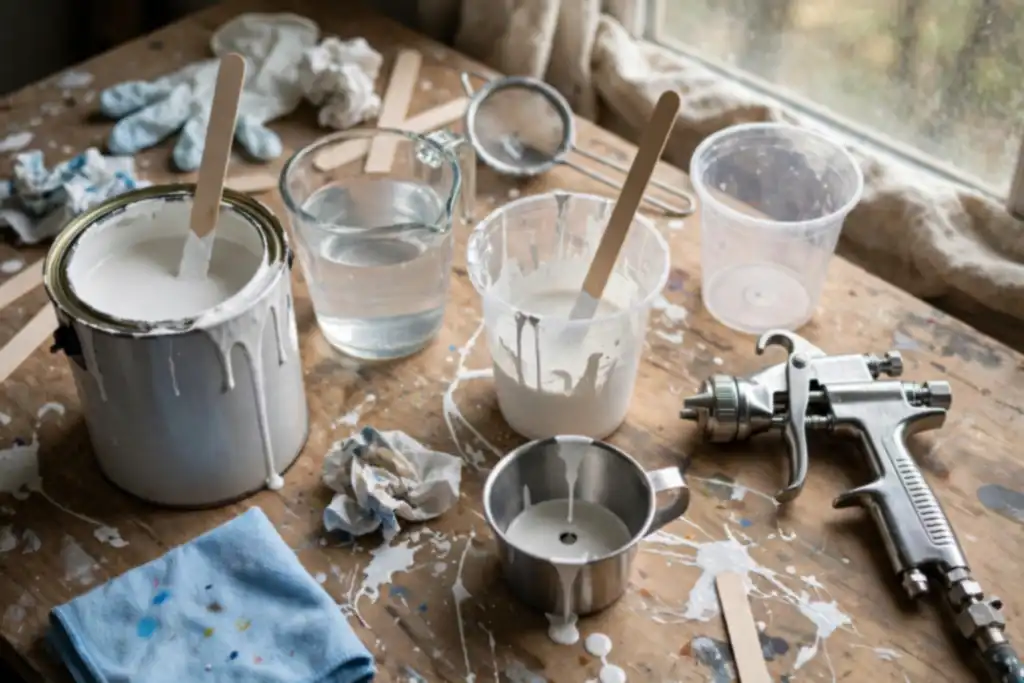
To dilute paint for spraying, add the correct thinner or water in small increments until it passes the viscosity cup test for your spray gun's nozzle size. Follow the manufacturer's dilution ratio and always test spray before committing.
How to dilute paint for spraying is a controlled process, not a guessing game. The goal is to lower viscosity so the spray gun can atomize the paint into a fine mist, but too much thinner causes runs, poor coverage, and safety hazards.
You’ll learn the exact steps to thin house paint, artist acrylics, or automotive coatings safely. This includes choosing the right thinner or water, measuring dilution ratio, using a viscosity cup, and testing on scrap material. We also cover common mistakes like over-thinning, skipping straining, and ignoring temperature and humidity, plus how to avoid them.
- Use the manufacturer's recommended thinner or water for your paint type.
- Measure dilution ratio precisely; add thinner in small increments.
- Test viscosity with a viscosity cup to match your spray gun's nozzle size.
- Strain paint before spraying to prevent clogs and uneven finish.
- Always wear respiratory protection and spray in a well-ventilated area.
How to Dilute Paint for Spraying: the Quick Decision Before You Start
Thinning is a controlled adjustment, not a guess. Get the sequence right and you protect the finish, the spray gun, and your weekend.
| Your situation | What to do | Why |
|---|---|---|
| Water-based house or artist paint | Add water in small increments | Water lowers viscosity fast |
| Solvent or automotive paint | Use the specified thinner | Wrong thinner ruins the coat |
| Thin paint still clogs the nozzle | Step up one nozzle size | Atomization needs a bigger orifice |
| No viscosity cup on hand | Borrow or buy one first | Eyeballing leads to rework |
| Humidity is high or rising | Thin less, test more often | Moisture changes how paint flows |
| Paint has sat for months | Strain it before thinning | Skim and lumps block the gun |
| Unsure of the ratio | Follow manufacturer instructions | Over-thinning weakens the film |
Recommended for this job

BAOSHISHAN No.2 Zahn Viscosity Cup
Measures paint viscosity so you know exactly when dilution is correct for spraying.

TCP Global
Strains diluted paint to remove lumps before spraying for a smoother finish.

Flood Floetrol Latex Paint Additive & Conditioner
Improves paint flow and leveling, reducing need for excess thinning before spraying.
Can This Paint Even Be Thinned?
Read the label first. Many latex paints accept up to 8 oz of water per gallon, while most automotive basecoats specify a reducer by name and a 1:1 or 4:1:1 dilution ratio. Adding the wrong thinner can curdle the paint or kill adhesion, and no amount of mixing fixes that.
Thin the Paint or Change the Nozzle?
Reach for thinner only when the paint is genuinely too thick for your spray gun. If a 1.4 mm nozzle sputters on unthinned product, switch to a 1.8 mm tip before adding anything. Over-thinning to force a small nozzle gives you runs, poor coverage, and a weaker film.
The 30-second Answer
Strain the paint through a 190-micron filter, add thinner or water in small increments of about 5-10% of paint volume, stir for a full minute, and check with a viscosity cup. Aim for 20 to 30 seconds drain time for most gun setups. Run a test spray on scrap, log your dilution ratio, and recheck when temperature and humidity shift.
The 5-Minute Check: Read the Can, Match the Thinner, Test the Cup
What Does the Label Actually Say?
Start with the can’s dilution ratio, typically up to 8 oz of water per gallon for many latex house paints, but confirm the exact figure. Note the specified nozzle size, often 1.3 to 1.8 mm for automotive, and check the temperature and humidity range, such as 65 to 80°F and 40 to 60 percent relative humidity.
Which Thinner Family Are You in?
Match the thinner to the paint chemistry: water or flow improver for water-based, solvent thinner for oil-based, and a matched reducer for automotive. Using the wrong family can cause curdling or poor adhesion, so verify the base before pouring.
Does It Pass the Viscosity Cup Test?
A viscosity cup measures drain time in seconds, indicating whether atomization will work. Fill the cup, time the drain with a stopwatch, and compare to the manufacturer’s target, often 20 to 30 seconds. Add thinner in small increments, strain, then test spray on scrap.
Run these three checks before you open a single can, because five minutes here saves you a clogged spray gun and a wasted afternoon.
What Thinning Actually Does Inside the Spray Gun
Atomization in Plain Terms
Your spray gun breaks a stream of paint into a fine mist using air pressure. That process is atomization, and it only works when the coating is thin enough to shear apart cleanly. Too thick, and the gun spits droplets or clogs.
Viscosity vs Pressure vs Nozzle Size
Viscosity is how thick a fluid resists flowing, and it has to match your equipment. A larger nozzle size passes heavier material, while more pressure can force thicker paint through, but only up to a point. Crank pressure too high and you get bounce and overspray, not a better finish.
Adjust thickness with thinner or water first, then tune pressure and nozzle to suit. Check the result with a viscosity cup, a small cup with a measured hole that times how fast paint drains out. Follow the manufacturer instructions for your specific product before you add anything.
Before You Start: Thinner, Cups, Strainers and Ventilation
Getting the setup right prevents a clogged spray gun and ruined finish. Match thinner to paint type and keep the workspace ventilated.
Gather the Right Thinner for Your Paint
Use the thinner the coating maker specifies. Water-based paint thins with water; oil-based and most automotive paints need a solvent thinner matched to their chemistry.
Safety Gear and Airflow
Solvent thinners emit fumes, so spray outdoors or with strong cross-ventilation and wear an organic-vapor respirator. Follow manufacturer and local EPA/OSHA guidance.
Measuring and Mixing Tools
You need a viscosity cup, graduated mixing container, and fine strainer. Measure dilution by volume, mix thoroughly, then strain into the gun cup.
- Thinner: water for water-based; solvent for oil-based/automotive.
- Ventilation: outdoors or cross-flow, plus organic-vapor respirator.
- Viscosity cup: confirms atomization matches nozzle size.
- Graduated container: keeps dilution ratio consistent.
- Strainer: removes lumps that clog nozzles.
- Start with up to 8 oz water per gallon for latex; adjust per label.
- Test spray on scrap before the real surface.
- Thinner choice: water for water-based, solvent thinner for oil-based and automotive coatings.
- Ventilation: spray outdoors or with cross-flow, and wear an organic-vapor respirator.
- Viscosity cup: confirms atomization matches your nozzle size before you commit.
- Mixing container: graduated so your dilution ratio stays consistent.
- Strainer: removes lumps that clog the nozzle.
- Thinner estimate: start with a small batch, roughly 10 percent thinner by volume, and adjust.
- Test spray: check flow and finish on scrap before the real surface.
Step-by-Step: Diluting and Spraying Your Paint
Stir Before You Measure
Stir paint thoroughly before measuring; settled pigment and binder throw off dilution ratio. Scrape the bottom and lift the mix until uniform.
Add Thinner in Small Increments
Add thinner or water in small increments, starting around 5-10% of paint volume. Typical starts: up to 8 oz water per gallon for latex house paint, the manufacturer's specified 1:1 or 4:1:1 ratio for automotive basecoat, a few drops flow improver for artist acrylics. Check manufacturer instructions first.
Check with the Viscosity Cup
Time how fast paint drains from a viscosity cup and compare to your spray gun and nozzle spec. Too thick: add thinner. Too thin: add unthinned paint.
Strain the Mix
Strain through a fine mesh filter into a clean container to catch lumps, skin, and grit that clog the nozzle.
Load the Gun and Set Pressure and Fluid
Set pressure and fluid flow to manufacturer starting figures, test spray on scrap, and adjust until the coat lays even. Recheck if temperature or humidity changes.
Follow these steps in order and you will thin, strain, and spray with fewer clogs and fewer redo jobs.
Special Cases: Airbrush Acrylics, Automotive Paint and Clear Coat
Thinning Artist Acrylics for Airbrush Use
Artist acrylics usually thin with water or a medium, not solvent. Aim for a milk-like consistency and filter out clumps before the spray gun sees them.
Add water a few drops at a time and stir, since acrylics thicken fast. Test on scrap at your usual pressure.
Thinning Automotive Paint and Clear Coat
Automotive paint and clear coat require the reducer named on the product sheet, measured to the exact dilution ratio. Never guess with catalyzed coatings.
Check the viscosity cup reading against the spec, and account for temperature and humidity, which shift flow.
Flow Improvers and Conditioners Instead of Water
Flow improvers beat plain water when acrylics turn gritty or separate. Dose per the label, usually a few drops per ounce.
Stir thoroughly, then run a test spray before the real surface.
Some coatings need a different approach than simply adding thinner, so match the method to the product before you touch the spray gun.
Troubleshooting Orange Peel, Runs and Clogging
Most spray problems trace back to viscosity, temperature, or dirty paint, not the gun itself. Diagnose the symptom before you touch the thinner bottle.
| Problem | Likely cause | Fix |
|---|---|---|
| Orange peel texture | Paint too thick or surface too cold | Add thinner in small increments, warm the workspace |
| Runs and sags | Over-thinned paint or coats too heavy | Add unthinned paint, apply lighter passes |
| Clogging and spitting | Straining skipped or nozzle too small | Strain paint, step up nozzle size |
| Dry, grainy finish | Thinner flashing off too fast | Use slower thinner, raise humidity |
| Thin, watery coverage | Too much thinner in the mix | Recalculate dilution ratio, add paint |
| Gun sputters mid-pass | Debris in the fluid passage | Strain again, flush the spray gun |
Orange Peel: Too Thick or Too Cold?
Orange peel usually means the paint is too thick to atomize or the surface is too cold. Add thinner in small increments and recheck with the viscosity cup. Warm the workspace toward the manufacturer’s range before spraying.
Runs and Sags: Over-Thinned?
Runs mean you crossed the line on dilution. Add unthinned paint to bring the mix back, then apply lighter passes. Check temperature and humidity before blaming your technique.
Clogging and Spitting: Strained or Not?
Skipping straining lets grit through and clogs the spray gun. Strain every batch, then match nozzle size to the mix. If clogging persists, change the nozzle instead of adding more thinner.
How Heat, Cold and Humidity Change Your Dilution
Hot Days and Fast Flash-Off
Heat thins paint on its own, so start with less thinner than the label suggests. On a hot day, solvents evaporate fast and the coating can skin over before it levels, leaving a rough, dry finish. Mix a small batch, check it with your viscosity cup, and add thinner in tiny amounts.
Cold Shop, Thick Paint
Cold raises viscosity, so the same mix that sprayed fine yesterday may clog today. Let paint and thinner sit at room temperature for a few hours before mixing, and never heat them directly. If your shop stays cold, thin slightly more and confirm with a test spray on scrap before touching the project.
Humidity and Blush
High humidity slows solvent escape and can trap moisture, causing a cloudy haze called blush on clear coats and some paints. Watch the dew point, keep your air supply dry, and avoid spraying in damp, cool conditions. Recheck your dilution ratio as conditions shift, and always follow the manufacturer instructions for your specific product.
After the Job: Cleaning the Gun and Storing Thinned Paint
Flush the Gun the Right Way
Clean the spray gun immediately after spraying, before paint dries in the nozzle and passages. Flush with the thinner or water recommended by the manufacturer, then disassemble and clean the nozzle and needle with a soft brush. Never soak the entire gun in solvent, as it can damage seals and internal parts.
Label and Store Leftovers
Leftover thinned paint should be stored in a clean, airtight container labeled with the paint type, dilution ratio, and date. Keep it in a cool, dry place away from direct sunlight and out of reach of children. If the paint has thickened, you may need to re-thin it before the next use.
Dispose of Thinner Safely
Used thinner and paint waste must be disposed of according to local regulations, not poured down drains or into the trash. Check with your local waste management authority or the EPA for household hazardous waste collection days. Store waste in sealed containers until you can dispose of it properly.
What It Costs: DIY Thinning vs Paying a Pro
Thinning paint yourself costs a few dollars in thinner and cups; paying a pro costs real money per job. The gap widens fast if you over-thin.
| Option | Upfront cost | Ongoing cost | Notes |
|---|---|---|---|
| DIY: water-based paint | $5 to $25 (thinner, cups, strainers) | Paint you already own | Water is cheap; flow improver adds a little |
| DIY: solvent or auto paint | $15 to $60 (thinner, viscosity cup, filters) | Thinner per job, $10 to $40 | Buy the reducer your manufacturer specifies |
| DIY: mixing and straining gear | $10 to $40 one time | Near zero | Strainers and cups are consumables |
| Pro shop: spray-out and match | $50 to $150 per batch | Varies by volume | Good when color matching matters |
| Pro painter: small room or panel | $200 to $800 per job | Hourly or day rate | Includes labor, masking, cleanup |
| Pro auto refinish: per panel | $300 to $900 per panel | Materials billed separately | Booth time and prep drive the price |
Ranges are typical US homeowner and DIY figures, not quotes. Actual costs depend on paint type, volume, local labor rates, and whether you already own a spray gun and compressor.
DIY Assumptions and Ranges
Expect $5 to $60 upfront for thinner, a viscosity cup, and strainers, assuming you own the spray gun. Water-based paint usually needs only water or flow improver.
Pro Shop or Painter Rates
A shop spray-out runs $50 to $150 per batch; a painter charges $200 to $800 for a small room or panel. You pay for labor, masking, and cleanup.
The Hidden Cost of Over-Thinning
Too much thinner means wasted paint, extra coats, and a ruined finish, easily doubling material costs. Estimate thinner in small increments against your dilution ratio, then test spray before committing a full batch.
Common Mistakes: Over-Thinning, Under-Thinning and Ignoring the Label
Pouring Thinner by Eye
Eyeballing thinner ruins batches, too much drops viscosity below spray gun limits, causing runs and weak coverage. Always use a viscosity cup.
Trusting Generic Ratios Over the Can
Follow the can label over online charts; manufacturer instructions match the product’s chemistry, while generic ratios cause over- or under-thinning. Adjust in small increments.
Skipping the Test Spray
Test on scrap first to catch clogging, spitting, or sagging cheaply. Check temperature and humidity too.
- Over-thinning: runs, sags, poor hiding.
- Under-thinning: clogs and spatters.
- Mixing: stir thoroughly, then strain.
- Flow improver: use for artist acrylics instead of water.
- Test spray: adjust gun, spray scrap first.
When to Ask the Paint Store, the Manufacturer or a Local Pro
Questions Worth Asking the Counter Staff
Ask the store expert when your paint is factory-tinted or a finish you haven’t sprayed. Bring the can, label, and your nozzle size to match advice to your spray gun.
- Ask what thinner or water the maker approves, and request the data sheet with the recommended dilution ratio.
- Ask how temperature and humidity change the mix, since a cool-garage ratio may run thin on a hot day.
- Ask about safe handling and ventilation; follow the label plus OSHA guidance for thinners.
When Automotive Clear Coat is Best Left to a Pro
Hand automotive clear coat and two-part paints to a local pro when you lack a ventilated booth or spray experience. Hardeners carry serious health risks, and a bad mix ruins the panel.
A pro can confirm the correct thinner, mixing schedule, and straining steps, then run a test spray. Ask them to check your viscosity cup reading and atomization against the manufacturer instructions.
When to ask for help:
- Ask the counter staff for the manufacturer's data sheet when your paint can carries no thinning guidance.
- Call the manufacturer when your product is a two-part automotive system or a specialty coating.
- Hire a local pro when you need a ventilated booth or lack spray experience for clear coat.
- Ask a pro to verify your viscosity cup reading and test spray before you coat a full panel.
How to Dilute Paint for Spraying: Frequently Asked Questions
?How to Dilute Paint for Spraying: Can You Use Tap Water, or Does It Have to Be Distilled?
Tap water works for most water-based paint, but distilled water is the safer choice for spraying. Tap water carries minerals that can react with the paint and leave a mottled finish on careful work. For automotive paint and clear coat, never use water at all; use the thinner the manufacturer specifies. When in doubt, match the thinner to the can rather than whatever is handy.
?How Do I Know When Paint is Diluted Enough for Spraying Without a Viscosity Cup?
You can't reliably, so get a viscosity cup. A viscosity cup is a small funnel that measures how fast paint flows out; the drain time tells you if the paint is thin enough to atomize. Without one, you're guessing, and guessing leads to clogged nozzles or runs. The cup costs less than a wasted quart of paint, so buy one before you dilute anything.
?What Dilution Ratio Should I Use When Spraying Paint, and Why Does It Vary so Much?
Follow the manufacturer instructions first, because dilution ratio is a change in concentration when you mix two liquids, and every product has its own spec. Typical starting points run roughly 10 to 20 percent thinner by volume for house paint, but automotive systems often call for exact ratios you shouldn't eyeball. Mix small batches, log what you used, and adjust from there.
?How to Dilute Paint for Spraying Safely When the Label Gives No Guidance?
Start with the thinnest recommended thinner for that product line and add it in small increments, stirring thoroughly between additions. If the label is silent, call the manufacturer before you guess. Never substitute solvents across paint types; the wrong thinner can curdle the paint or create a finish that never cures. Ventilate the area and keep ignition sources away from solvent-based products.
?When Should I Use a Flow Improver Instead of Thinner to Dilute Paint for Spraying?
Use flow improver when the paint is already thin enough but still levels poorly or dries too fast, especially with acrylics in dry air. Flow improver extends open time without cutting viscosity the way thinner does. Thinner lowers viscosity; flow improver changes how the paint behaves after it lands. Adding thinner to fix a flow problem usually just creates runs, so reach for the right product.
?Does Temperature and Humidity Change How to Dilute Paint for Spraying?
Yes, and ignoring it causes most seasonal spraying failures. Heat thins paint and speeds drying, which can cause orange peel; cold thickens it and slows cure. High humidity traps solvent and dulls the finish. Check conditions before mixing, adjust your dilution ratio in small steps, and always run a test spray on scrap before committing to the panel.
?is Straining Paint After Dilution Worth the Extra Step When Spraying?
Yes, always strain after mixing. Straining separates liquid from solids, catching undissolved pigment, skin and debris that would otherwise clog the spray gun and ruin the finish. A cheap paper strainer and a clean bucket take a minute and save a whole repaint. Strain again if the diluted paint sits for a while before you spray.
Conclusion
Get the viscosity right and your spray gun rewards you with even atomization and a finish that holds up. Overdo the thinner or water and you lose coverage and adhesion, which is why small increments and a viscosity cup beat guessing every time. Follow the manufacturer instructions for your dilution ratio, then confirm with a test spray on scrap before you commit.
Your next step: write down the exact dilution ratio, nozzle size, and temperature and humidity for the batch that sprayed well. That record turns a one-time success into a repeatable process for every future project.