
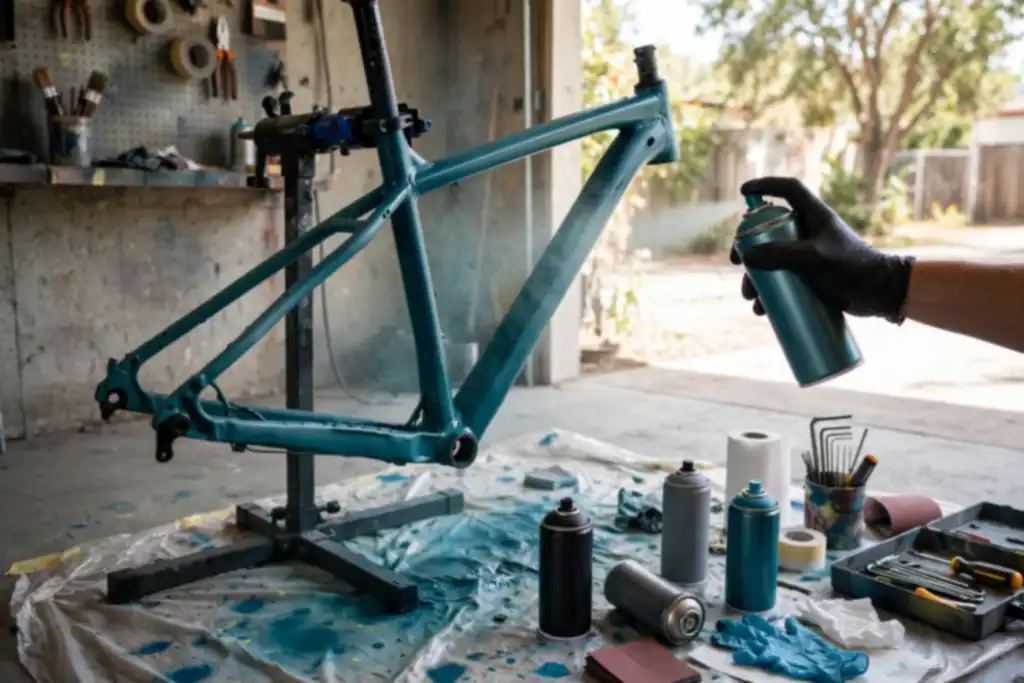
Yes, you can paint a bike with spray paint, but only if you commit to proper preparation and use the right products, because skipping steps like sanding, primer, and clear coat leads to peeling, poor adhesion, and early rust.
Here is a clear, practical look at can you paint a bike with spray paint.
Myth: spray painting a bike is a quick weekend hack that just involves pointing and spraying. The truth is that a durable finish depends almost entirely on preparation, not the paint itself, so if you cut corners on sanding and primer, the paint will fail. Knowing whether you can you paint a bike with spray paint is less about the can and more about the process.
You’ll get a clear, safety-first walkthrough: how to strip and degrease the frame, when to use a respirator, how to build adhesion with primer, and how to apply thin coats for a finish that resists chips and rust. Expect realistic time and cost ranges, plus the mistakes that force a do-over.
Can You Paint a Bike with Spray Paint? Yes, Here’s How to Do It Right
Yes, you can spray paint a bike, but a lasting finish comes down to preparation and product choice, not luck.
| Situation | What it means | What to do |
|---|---|---|
| Frame still greasy | Spray paint won't stick | Wash with degreaser, rinse, dry |
| Chipped or scratched paint | Rough surface under new coats | Sand edges smooth, feather the chips |
| Bare metal spots | Poor adhesion and rust risk | Apply a metal-ready primer first |
| Windy or dusty workspace | Debris lands in wet paint | Move indoors or build a spray booth |
| Thick coats applied quickly | Runs, drips, uneven finish | Apply several thin coats, keep moving |
| Skipping clear coat | Fast wear and fading | Add clear coat after color cures |
| Riding too soon | Soft paint chips easily | Wait full drying time, then cure |
Recommended for this job
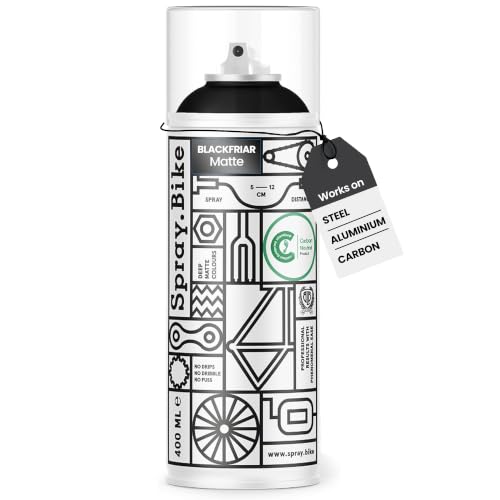
Spray.Bike Acrylic Bike Spray Paint
Matte black bike-specific spray gives even, no-drip coverage on frame tubes.
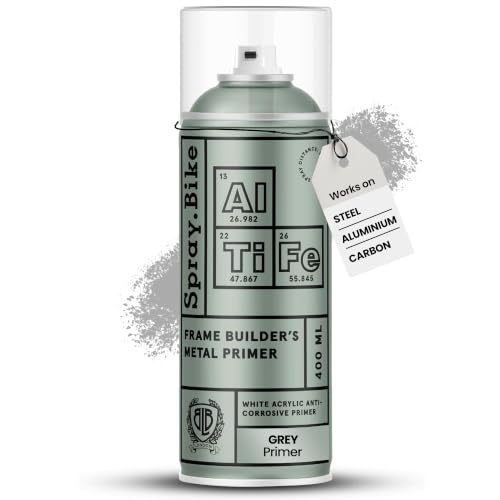
Spray.Bike Frame Builder's Metal Primer
Light gray metal primer prepares bare bike frame for durable paint adhesion.

Rust-Oleum Painter's Touch 2X Ultra Cover
Gloss clear topcoat seals and protects the finished bike paint job.
The Short Answer: Yes, with the Right Prep and Products
You can spray paint a bike successfully, but only if you treat preparation as the main job. Skipping steps like cleaning and sanding is the most common reason a finish peels or chips. Get those right and the paint will hold.
What Spray Painting Can (and Can’t) Achieve on a Bike Frame
Spray paint delivers a solid cosmetic refresh and basic protection against rust on a steel frame. It will not hide deep dents, repair cracked welds, or match a factory powder coat for durability. Expect a good-looking result, not a professional refinish.
Key Factors for a Successful Spray Paint Job
Three things decide the outcome: surface prep, product choice, and patience between coats.
- Preparation: Clean the frame with a degreaser, then sand to dull the old finish and create a surface for adhesion. Mask bearings, threads, and brake surfaces with masking tape.
- Product: Use a primer made for metal, a quality spray paint, and a compatible clear coat. Check the labels match.
- Application: Wear a respirator in a ventilated space, apply thin coats, and respect drying time before curing.
Spray Paint vs. Powder Coat vs. Professional Paint: When to Choose Each
Decision Rule: When Spray Paint is Enough
If the bike frame is structurally sound and you want a color change or rust touch-up, spray paint works. Sand with 220 to 400 grit until the surface is dull, wipe with a degreaser, then apply a metal primer for adhesion. Skip spray paint on carbon fiber or frames with deep pitting.
When Powder Coating or Pro Paint is Worth the Extra Cost
Choose powder coating for daily commuters facing road salt, since the baked finish resists chips for 5 to 10 years. Professional paint suits complex frames with tight welds and decals. Both take 3 to 7 days at a shop and cost $150 to $400 or more.
Cost and Durability Comparison
DIY spray paint runs $30 to $80 in materials: primer, color coats, clear coat, masking tape, and a respirator rated for organic vapors. Expect 1 to 3 years of finish with proper curing at 60 to 90 minutes between coats.
- Spray paint: $30 to $80, 1 to 3 years.
- Powder coat: $150 to $300, 5 to 10 years.
- Pro paint: $400 and up, 5+ years.
Match the finish to real use: a salt-exposed commuter justifies the tougher coating.
3 Myths About Spray Painting a Bike (and the Real Facts)
Myth: Spray Paint Never Lasts on a Bike
It can last years if finished properly. A quality clear coat over color coats protects against UV, fuel spills, and scuffs while adding durability. Without it, the finish chips and fades fast. Apply two to three light coats within the manufacturer’s recoat window, then let the frame cure undisturbed for several days to a week.
Myth: You Don’t Need to Sand Before Spraying
Sanding is not optional, paint bonds only as well as the surface allows, and adhesion fails on glossy or dirty metal. Clean with a degreaser, then sand with 320 to 400 grit until the old finish is dull and even. Wipe off dust and spot-prime bare metal or rusted areas.
Myth: Any Spray Paint Works for Bike Frames
Not all formulas hold up to road abuse. Acrylic sprays dry fast but stay softer; enamel cures harder and resists chips better; lacquer levels smoothly but demands careful recoat timing. Follow the can’s instructions and wear a respirator plus eye protection. Preparation and patience beat product hype every time.
Primer: Necessary or Not? (and How to Apply It)
When Primer is Essential
Primer is a preparatory coating put on the bike frame before paint, and it is essential whenever bare metal is showing. If you sanded through the original finish or stripped the frame, primer gives the spray paint something to grip. Skipping it on bare steel invites rust and flaking.
On an intact factory finish that you only scuffed, a primer is optional. Still, a thin primer coat improves adhesion, the bond that keeps paint stuck to the surface. For a durable result, use it.
Choosing the Right Primer for Your Bike Frame
Match the primer to the frame material and topcoat. Steel and aluminum take a self-etching or epoxy primer; carbon fiber needs a flexible primer made for composites. Check the spray paint can for compatibility, because some topcoats require a specific primer.
Application Tips for a Smooth Base
Apply two or three light coats, not one heavy pass, and let each flash off per the label. Hold the can 8 to 12 inches away and keep moving to avoid runs.
- Wear a respirator rated for organic vapors, and work outdoors or in a ventilated space.
- Wipe the frame with a degreaser, a solvent that cuts oils, then let it dry fully.
- Use masking tape to protect threads, brake mounts, and cable guides.
- Respect drying time and full curing, the hardening process, before topcoating.
When Spray Painting a Bike Doesn’t Work (and What to Do Instead)
Carbon Fiber Frames: Why Spray Paint is Risky
Skip spray paint on carbon fiber. Aerosol solvents can soften the resin holding the fibers together, and sanding can cut into structural layers you cannot see. If the finish is damaged, talk to the frame manufacturer or a carbon repair specialist before touching it.
Steel and aluminum are far more forgiving: scuff, prime, and coat. Just match your primer to the metal so adhesion holds.
High-End or Collectible Bikes: When to Preserve the Original Finish
Leave the original paint alone if the bike is rare, vintage, or valuable. A respray usually lowers resale value, and original decals and patina cannot be recreated once they are gone. Clean and protect the finish instead, and reserve paint work for frames that are already compromised.
Severe Rust or Structural Damage: When to Repair or Replace
Do not paint over deep rust or cracks. Surface rust is fine to sand back and treat, but pitting, flaking metal, or bent tubes mean the frame needs repair or replacement first. Paint only hides problems, and a compromised frame is a safety risk no clear coat can fix.
Your Step-by-Step Action Plan for Spray Painting a Bike
Yes, you can spray paint a bike frame yourself, and it holds up well if you respect the prep and the cure. Skip either and you get peeling paint, poor adhesion, or rust within a season.
| Action | Why it helps | How to start |
|---|---|---|
| Tools and supplies list | Prevents mid-job substitutions | Buy paint, primer, clear coat first |
| Degreasing the frame | Removes oils that block adhesion | Wipe with degreaser, then rinse |
| Sanding the surface | Creates a mechanical key for paint | Scuff with 320 to 400 grit |
| Masking areas to protect | Keeps paint off moving parts | Tape bearings, threads, brake mounts |
| Primer application | Boosts adhesion and blocks rust | Two thin coats, 10 to 15 minutes apart |
| Color coats | Builds even, opaque finish | Three light passes, not one heavy |
| Clear coat for durability | Adds gloss and chip resistance | Two coats within the recoat window |
| Drying and curing times | Prevents soft paint and smudges | Handle after a day, assemble after several |
Gather Tools and Supplies
Buy everything before you start so you never pause mid-job with a half-coated frame. You need spray paint, primer, clear coat, degreaser, sanding paper in 320 to 400 grit, masking tape, and a respirator.
Work outdoors or in a garage with cross-ventilation. A respirator rated for organic vapors matters here; solvent aerosols are not something to breathe casually.
Prep, Mask, and Prime
Preparation decides whether the paint stays put. Strip components, degrease the frame, then sand until the surface is uniformly dull.
- Mask bearing surfaces, threads, and brake mounts with tape.
- Wipe down again with degreaser and let it dry fully.
- Apply two thin primer coats, 10 to 15 minutes apart.
Apply Color and Clear Coat
Light, overlapping passes beat one heavy coat every time. Hold the can 8 to 12 inches away and keep it moving.
Build three thin color coats, letting each flash off per the label. Follow with two clear coats inside the recoat window for adhesion and durability.
Cure and Reassemble
Fresh paint feels dry long before it is cured, which is the hardening process that gives real durability. Wait roughly a day before handling and several days before assembly.
Reassemble carefully, checking that tape residue and overspray are gone from threads and mounts. Rushing this stage is how good paint jobs get scratched.
When Spray Painting a Bike Works Best
Ideal Conditions: Temperature, Humidity, and Ventilation
Spray paint bonds best at 60 to 80°F with humidity under 60%. Below 60°F, adhesion drops and drying time stretches well beyond normal cure times; above 85°F, the finish skins over too fast and looks gritty. Set up outdoors or in an open garage with cross-ventilation and wear an organic-vapor respirator, a fitted mask that filters solvent fumes. Skip windy days and direct sun on the frame.
Best Bike Types and Finishes for Spray Paint
Clean steel and aluminum frames accept spray paint well once you scuff the surface. Factory powder coat needs sanding with 320-grit until dull, then a primer coat for grip. Carbon fiber and rust-pitted frames are poor candidates; wire-brush rust to bare metal first or it creeps back under the paint.
Touch-Up vs. Full Repaint: When Each Makes Sense
Chips smaller than a quarter call for touch-up; peeling or faded finishes justify a full repaint. Touch-up means masking tape, light sanding, and thin blended coats. A full job means stripping components, degreaser wipe-down, primer, 2 to 3 color coats, and clear coat. Wait 10 to 20 minutes between coats and let curing run 48 to 72 hours before reassembly.
How Weather and Season Affect Spray Painting a Bike
Temperature and Humidity: the Sweet Spot
Optimal spray paint performance occurs at 60â80°F with humidity under 60%.
Indoor vs. Outdoor Painting: Ventilation and Safety
Outdoors is safer because overspray and fumes disperse. Indoors requires strong airflow and a fitted respirator rated for organic vapors, a dust mask won’t protect you. Mask windows, tires, and bearings, and keep ignition sources away. Never spray in a closed garage.
Seasonal Considerations for Curing and Durability
Curing takes longer in cool or damp seasons. Most aerosols feel dry in 30-60 minutes and accept recoats within an hour, but true hardening takes days to a week. Apply thin coats, add clear coat, and let the bike frame sit dry and warm until fully cured. Rushing causes runs, soft paint, and early rust.
How to Spray Paint a Bike: Step-by-Step Instructions
Clean and Sand the Frame
Wash the bike frame with a degreaser to remove oil and grime, then rinse and let it dry fully. Scuff every painted surface with 400-grit sandpaper until the gloss is gone; that texture is what gives you adhesion.
Mask off Parts You Don’t Want Painted
Cover bearings, threads, brake mounts and cable guides with masking tape before you spray anything. Skip this and you will spend hours scraping paint out of places it never belonged.
Apply Primer (If Needed)
Primer is a preparatory coating that helps paint bond to bare metal or old finishes. Bare steel, aluminum and any sanded-through spots need a thin primer coat; sound factory paint usually does not.
Spray in Thin, Even Coats
Hold the can 8 to 12 inches from the frame and keep it moving in steady passes. Build three light coats with 10 to 15 minutes between them, because heavy coats run and trap solvent.
Let It Dry and Cure
Drying time is hours; curing is the slower hardening that reaches full strength over 5 to 7 days. Apply clear coat within the recoat window, then let the finished frame sit a week before assembly.
Follow these steps in order and you will get a finish that sticks, instead of one that peels off within a season.
Is It Okay to Spray Paint a Bicycle? What You Need to Know
Legal and Warranty Considerations
Yes, you can spray paint a bike frame yourself, but check your warranty first. Many manufacturers void frame coverage once you sand or repaint, so read the fine print before you touch a wrench.
Local rules rarely ban aerosol paint, but some areas restrict solvent-based products. Store and spray away from ignition sources, and follow the label and any EPA or OSHA guidance that applies to your workspace.
Resale Value and Originality
A respray usually lowers resale value on collectible or high-end bikes. Original finishes and decals prove authenticity, and buyers pay for that.
On a commuter or beater, a clean, even finish with proper clear coat can help a sale. Keep receipts and photos of your preparation so a buyer sees the work was done right.
Safety and Structural Integrity
Paint does not weaken a sound frame, but hidden damage does. Inspect for cracks, dents, and rust before you start, since fresh spray paint can mask problems you should fix first.
Skip painting over deep corrosion or compromised welds. Have a shop check anything questionable, because a cosmetic fix is never worth a structural failure.
Common Mistakes to Avoid When Spray Painting a Bike
Skipping Prep and Sanding
Rushing straight to paint is the fastest way to watch it flake off. You need to strip the old finish and scuff the frame with sanding so the new layers have something to grip. Clean the bare frame with a degreaser, then wipe it dry before any primer goes on.
Spraying Too Thick or Too Close
Heavy passes cause runs, drips, and weak adhesion. Hold the can about 8 to 12 inches away and apply thin, even coats, letting each one flash off. Two or three light passes beat one wet blast every time.
Not Using Clear Coat
Skipping clear coat leaves the finish exposed to chips, sun, and rust. Once your color coats are fully dry, add two or three clear layers to seal the frame. That top film is what makes the job last.
Painting in Poor Conditions
Cold, damp, or windy air ruins adhesion and curing. Spray outdoors or in a ventilated space when humidity is low and temps stay in the 60 to 80 F range. Wear a respirator, and respect the listed drying time between coats.
- Prep first: sand and degrease the frame before primer.
- Keep the can 8 to 12 inches away and use thin coats.
- Apply two or three clear coats for durability.
- Spray in low humidity and mild temperatures.
- Wear a respirator and respect drying time.
- Let each coat flash off before the next.
When to Call a Pro for Bike Painting
Carbon Fiber or Exotic Materials
Stop if your frame is carbon fiber or another composite. Aerosol solvents can attack the resin binder, causing failure without warning. Steel and aluminum tolerate spray paint well; carbon needs a specialist.
Structural Damage or Extensive Rust
Walk away if you find cracks, deep pitting, or rust eaten through the frame. Paint hides problems; a weakened tube can fail at speed. Treat surface rust with converter, then prime; heavy rust needs pro inspection.
High-Value or Warranty-Covered Bikes
Check the warranty first. Many manufacturers void coverage once the finish is altered, and repainting a valuable frame yourself can cost more than it saves. A professional refinisher documents work and preserves resale value.
Desired Show-Quality Finish
Hire out for a flawless, show-quality result. Aerosol cans struggle with metallic flake uniformity and dust-free curing, and bad clear coat is hard to undo. Pros use spray guns, controlled booths, and proper drying time.
- Stop if the frame is carbon fiber or composite.
- Stop if you see cracks, deep pitting, or rust thinning the metal.
- Stop if the bike is high-value or under warranty.
- Stop if you want a flawless show-quality finish.
- Stop if you cannot set up safe ventilation and a proper respirator.
Stop and call a professional if:
- Stop if you find cracks, deep pitting, or rust that has eaten through the frame.
- Stop if you cannot set up safe ventilation and wear a proper respirator.
Can You Paint a Bike with Spray Paint: Frequently Asked Questions
?Can You Paint a Bike with Spray Paint Without Removing the Components First?
No, don't skip teardown. Strip the bike down to the bare bike frame before you spray paint anything. Handlebars, cables, chain, and drivetrain block coverage and cause runs and missed spots. Masking tape works for small fixed areas, but removing parts is faster and cleaner. Bag and label every bolt so reassembly is simple, and you get full adhesion on the frame instead of paint bridging over gaps.
?Can You Paint a Bike with Spray Paint and Expect It to Last?
Yes, if the preparation and clear coat are done right. Durability comes from three things: thorough sanding, a proper primer for adhesion, and a quality clear coat over your color coats. Rushed jobs chip fast. Give each stage its full drying time and let the final clear coat cure fully before riding. A careful weekend job can hold up for years of normal use.
?How Much Spray Paint Does It Take to Paint a Bike Frame?
Plan on two to three cans of color, one to two cans of primer, and one to two cans of clear coat for a typical bike frame. Light coats beat heavy ones every time. Heavy passes cause runs and drips that mean sanding back and starting over. Buy one extra can of your color so a mid-project shortage doesn't force a color mismatch.
?Does Spray Painting a Bike Require a Respirator?
Yes, wear a respirator rated for organic vapors, plus eye protection and gloves. A respirator is a device that provides mechanical ventilation to a patient's lungs; in spray painting terms, it filters the airborne paint and solvent particles before they reach your lungs. Spray outdoors or in a well-ventilated garage, never in a closed room. Solvent fumes are the biggest safety risk in this job.
?Why Does Spray Paint Peel off a Bike Frame?
Peeling almost always traces back to bad preparation. Grease, wax, and old polish stop adhesion, which is the interaction in which dissimilar surfaces stick together. Clean the bike frame with a degreaser, a group of organic-chemical solvents that cut oils, then sand and prime. Skipping the degreaser is the number one reason spray paint lifts, blisters, or flakes off within weeks.
?What is the Biggest Mistake When You Paint a Bike with Spray Paint?
Rushing the coats and the drying time. Most failures come from spraying too heavy, too close, or recoating before the previous coat flashes off. Follow the can's recoat window exactly. Also resist riding until the clear coat finishes curing, the process of hardening into a durable film. That can take days, not hours, and riding early means soft paint and fingerprints.
?Can You Paint a Bike with Spray Paint Over Rust?
No, deal with rust first. Sand it down to bare metal, treat any pitting, and prime those spots before color. Spray paint over rust traps moisture and the rust keeps spreading under the film, so your new finish fails from underneath. If the rust is structural, deep, or widespread on the bike frame, stop and get it inspected before you paint anything.
Our Thoughts
Spray painting a bike frame works, and the finish holds up when you treat preparation as the job and paint as the reward. Sanding removes surface imperfections so the primer can bond, and that primer is the preparatory coating that gives your color something to grip. Masking tape keeps overspray off bearings, and a degreaser clears the oils that quietly kill adhesion.
Your next step is to plan drying time and curing before you spray anything. Read the can for recoat windows, because most aerosols want several light coats rather than one wet pass, and curing fully can take days to weeks depending on humidity. Wear a respirator rated for solvents, work outdoors or in strong ventilation, and let the frame sit undisturbed until it is truly hard.