
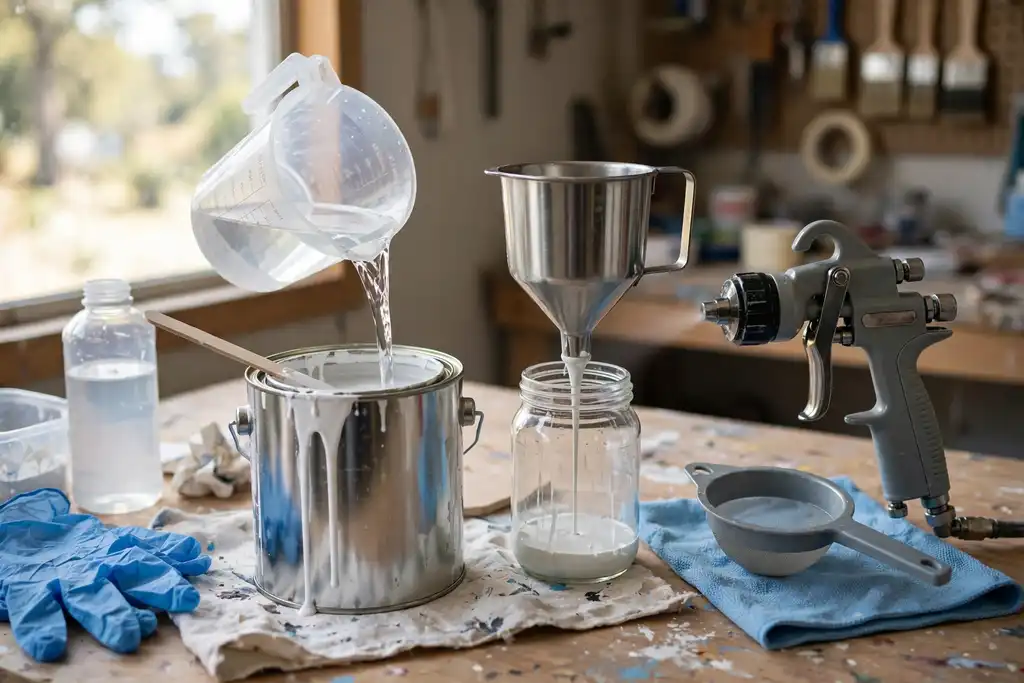
Thin water-based paint for a sprayer by adding small amounts of water (or a flow enhancer) and stirring thoroughly, then testing the viscosity with a strainer or test spray. The key condition: add water gradually and never exceed the manufacturer's recommended ratio.
Here is a clear, practical look at how to thin water based paint for sprayer.
You have a can of water-based paint, a sprayer, and a wall that needs a smooth coat. You pour the paint into the cup, fire a test spray, and get spitting, uneven coverage, or a clogged nozzle. The fix is thinning, but doing it wrong can ruin the paint and the finish.
Here is how to thin water based paint for sprayer work safely and correctly. You will learn the right water ratio, how to mix and strain, and how to test viscosity before you commit. This is about avoiding mistakes that cost time, money, and a good finish.
- Add water in small increments, stirring constantly.
- Check viscosity with a test spray on scrap material.
- Never exceed the manufacturer's recommended ratio.
- Strain thinned paint to remove lumps and debris.
- Wear eye protection and work in a ventilated area.
How to Thin Water Based Paint for Sprayer: the Quick Decision Before You Start
Decide before you pour: most water-based paint fails in a sprayer because it was thinned wrong, not because it was thin. Get the basics straight first, then adjust.
| Your situation | What to do | Why |
|---|---|---|
| Paint looks thick in the can | Add water in small increments | Water lowers viscosity, the fluid's resistance to flow |
| Sprayer clogs or spits | Strain paint, then recheck ratio | Straining removes lumps before they hit the nozzle size |
| Finish looks grainy or dry | Add flow enhancer, not more water | Too much water breaks down the binder |
| Not sure paint is sprayable | Run a test spray on scrap | Confirms flow before you commit a whole panel |
| Using an HVLP unit | Thin slightly, keep coats light | HVLP moves less material per pass |
| Using an airless sprayer | Thin less, check nozzle size | Airless handles thicker coatings |
| Mixing a full batch | Measure ratio, stir, record it | Repeatable results on the next coat |
Recommended for this job

BAOSHISHAN No.2 Zahn Viscosity Cup
Measures paint viscosity in seconds so you add thinner precisely without overshooting.

TCP Global
Strains thinned paint before spraying to remove lumps that clog sprayer nozzles.
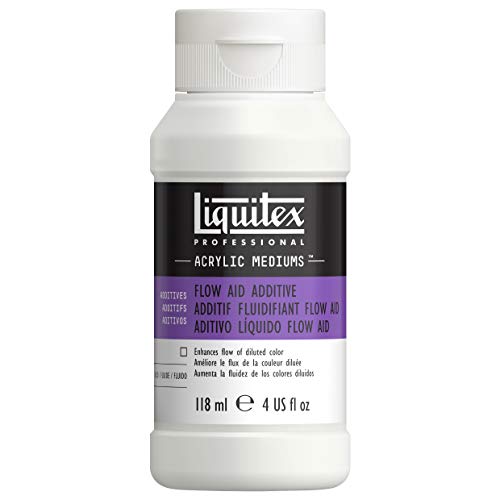
Liquitex Professional Effects Medium
Breaks water tension so thinned paint flows smoothly and sprays evenly without beading.
Why Thin Water-Based Paint for Spraying?
Thinning lowers viscosity, the fluid’s resistance to flow, so your sprayer can atomize paint into an even mist. Skip it and a 1.5 mm HVLP nozzle will clog, spit, or lay down a textured finish on trim.
Water-based paint is pigment suspended in water, so water is the natural thinner. Past roughly 10 to 15 percent by volume, the binder can separate and leave a chalky coat that fails within a season or two.
Water vs. Commercial Thinner: Which One to Use?
Start with water for most latex and acrylic paints. Switch to a flow enhancer when water alone thins the paint but the finish still looks dry.
Check the label’s ratio range, typically 5 to 10 percent by volume, and never exceed it. Mix slowly for 2 to 3 minutes, then strain through a 190-micron bag before pouring into the cup.
Quick Check: is Your Paint Already Sprayable?
Pull the stir stick out and watch the drip. A steady stream that breaks into drops means it is close; a slow glob means thin it.
Confirm with a test spray on scrap cardboard at your real nozzle size, then adjust the ratio before the first coat. Flush the gun within 20 minutes and follow local VOC rules for cleanup.
Cleanup means flushing the sprayer and tools with water right after spraying so dried paint does not clog or damage them.
5-Minute Diagnostic: Check Paint, Sprayer, and Viscosity Before Thinning
Spend five minutes checking paint, sprayer, and viscosity before thinning; a wrong guess causes clogged nozzles, spitting, or an unfixable batch.
How to Measure Viscosity with a Viscosity Cup
Viscosity is a fluid’s resistance to flow, measured by drain time in seconds. Fill the cup, lift it, and time the steady stream until it breaks.
- Stir water-based paint 60 seconds to suspend pigment.
- Submerge the cup fully, lift, and start timing when it clears the surface.
- Stop when flow breaks into drips; record seconds.
- Repeat and average both readings.
Does Your Sprayer Need Thinned Paint?
Check the manufacturer’s viscosity range first. Airless sprayers handle thicker paint than HVLP guns. Match nozzle size to coating and note the maximum reduction allowed. Thin only if your reading exceeds the range.
What’s the Current Viscosity of Your Paint?
Record actual drain time so thinning rests on a number, not a guess. Cold paint reads thicker, let it reach room temperature. Strain through fine mesh, then thin in small increments and test-spray scrap before committing the batch.
Run this quick check before you add a single drop of water, so you thin once and spray right.
How Thinning Works: Viscosity, Flow, and Spray Pattern
What Thinning Does to Paint
Lowering viscosity, the measure of how easily a fluid flows, is achieved by thinning so water-based paint passes through the sprayer instead of clogging the nozzle. Start by adding water in small increments, roughly 5 to 10 percent by volume, and stir thoroughly with a mixing stick. Most acrylics reach sprayable viscosity around 20 to 30 seconds in a standard viscosity cup.
Thin for one reason: a smooth, even coat that atomizes cleanly. Too thick and the sprayer spits or clogs; too thin and it runs, sags, or hides poorly.
How Thinning Affects Atomization and Finish
Correct viscosity lets the sprayer break paint into fine droplets so the coating lands evenly and levels out. Over-thinning shrinks droplets and drops coverage fast.
- Too thick: clogging, spitting, orange-peel texture.
- Too thin: runs, sagging, weak hiding.
- Just right: even pattern, smooth flow-out.
Match your ratio to nozzle size (commonly 1.3 to 1.8 mm for HVLP) and the label, strain the mix through a 190-micron filter, then run a test spray on cardboard before committing.
Before You Start: Tools, Materials, and Safety Gear
Gather These Tools and Materials
Have everything ready before opening the can.
- Measuring cups and mixing stick: Use dedicated containers, not kitchen gear.
- Clean water in a squeeze bottle: Add small amounts to control the ratio.
- Strainer or mesh filter: Catches skin and lumps that clog sprayers.
- Viscosity cup: Tells you when the mix is ready.
- Test board and rags: Test spray before touching the real surface.
- Gloves and safety glasses: Water-based paint still splashes and stains.
Safety and Ventilation When Spraying
Spray in a well-ventilated space and wear a paint-mist respirator. Mask nearby surfaces and keep ignition sources away. Open windows, run an outward-pulling fan, follow the safety data sheet, and keep pets and kids out until dry.
Choosing the Right Sprayer for Water-Based Paint
Use HVLP for small projects and fine finishes, airless for large walls and fences. Check nozzle size against paint thickness, thicker latex needs a larger opening and more thinning. Confirm the sprayer is rated for water-based coatings and clean with warm water right after.
- Measuring cups and mixing stick: Use dedicated containers, not kitchen gear, so residue stays out of food.
- Clean water in a squeeze bottle: Add water in small amounts so you control the ratio instead of dumping and guessing.
- Strainer or mesh filter: Straining catches skin and lumps that clog a sprayer.
- Viscosity cup: A cheap flow cup tells you when the mix is ready, not your eyeball.
- Test board and rags: A scrap of cardboard or drywall lets you do a test spray before touching the real surface.
- Gloves and safety glasses: Water-based paint still splashes and stains.
- Respirator and fan: Spray in a well-ventilated space and wear a respirator rated for paint mist; overspray travels farther than you think.
Step-by-Step Thinning Process: from Measuring to Straining
Measure the Right Amount of Thinner
Start with the smallest amount the paint maker recommends, usually a ratio of about 1 part water to 10 parts paint for latex. Measure into a marked mixing cup so you can repeat the batch exactly.
Add Thinner Gradually and Mix Thoroughly
Pour the thinner in slowly while stirring, then keep mixing for at least two minutes with a flat stick. Scrape the bottom and sides so no thick pockets survive.
Check Viscosity with a Viscosity Cup
Viscosity is how thick a fluid is and how freely it flows. Fill a viscosity cup, time the drain, and compare the seconds to your sprayer maker’s target, often 20 to 30 seconds for HVLP.
Strain the Thinned Paint
Straining removes lumps that clog a nozzle, so pour the batch through a fine mesh filter bag or cone strainer into a clean container. Rinse the strainer right away before residue sets.
Adjust Sprayer Settings for Thinned Paint
Thinner paint needs less fluid flow and lower pressure, so open the fluid knob slightly and drop the pressure a turn. Run a test spray on scrap, then confirm the nozzle size matches the label before cleanup.
Follow these steps in order and check your work at each one, because a single skipped check can mean a clogged sprayer or a ruined finish.
After Thinning: Testing Spray Pattern and Special Cases
Testing Spray Pattern Before Painting
Test spray on scrap cardboard first. An even, wet fan with no spitting or dry edges means correct viscosity. If grainy or clogged, add water a few drops at a time and retest.
Thinning Paint for Car Spray Guns
Use 5-10% water by volume, mixed slowly per manufacturer’s spec. Strain through fine mesh into the cup, test on a spare panel, and confirm nozzle size matches your coating.
Thinning Paint for Artists’ Airbrushes
Aim for milk-like consistency to prevent clogging. Add water or compatible medium drop by drop, strain before filling, and test on paper until lines are smooth.
Using Flow Enhancers and Retarders
These slow drying and improve leveling but won’t fix overthinned paint. Follow label ratios exactly, overdosing causes runs and poor adhesion. Add after water adjustment, then retest.
Thinning Primer and Sealer
Use less water than topcoats, just enough to spray cleanly. Overthinning weakens bond and causes sanding defects. Mix small batches, strain, and test spray pattern first.
Once your water-based paint is mixed, do these checks and adjustments so the coating sprays clean and cures right.
Troubleshooting Clogging, Spitting, and Other Spray Problems
Most spray problems trace back to viscosity, dirt, or too much water. Fix the cause, not the symptom, and you will stop chasing clogs all afternoon.
| Problem | Likely cause | Fix |
|---|---|---|
| Sprayer clogs repeatedly | Thinning too little or dried paint bits | Add water in small amounts, then strain |
| Spitting or sputtering | Nozzle loose or partially blocked | Clean nozzle, tighten, run a test spray |
| Uneven fan pattern | Viscosity too high for nozzle size | Thin slightly or step up nozzle size |
| Runs and sags on surface | Paint thinned too far | Add unthinned paint to bring ratio back |
| Weak, watery coverage | Too much water in the mix | Reduce water, check ratio, retest |
| Paint dries too fast | Over-thinning or hot, dry conditions | Thin less, work in shade, add flow enhancer |
| Clogging after sitting | Paint skinning in cup or line | Strain before each refill, flush at cleanup |
Why is My Sprayer Clogging or Spitting?
Clogs and spitting usually mean the paint is too thick or contains dried bits. Strain it first, then check viscosity, which is how freely the fluid flows.
How to Fix Common Spray Issues
Match the mix to your nozzle size and equipment. An HVLP gun, which sprays coating through air, needs thinner paint than an airless sprayer. Run a test spray on scrap before touching the wall.
How Much Water is Too Much?
Stop when the paint runs like thin cream, not water. Past roughly 10 to 15 percent water by volume, adhesion and coverage suffer, so add water in small increments during mixing.
Drying Time Changes After Thinning
More water means longer dry times, often adding 1 to 3 hours depending on humidity. Thin only what you will spray that day, and expect recoats to need extra time.
Cleanup and Storage: Keep Your Sprayer and Thinned Paint Fresh
Flush the Sprayer Immediately After Use
Rinse the sprayer the moment you finish spraying, before paint dries inside the gun and nozzle. Dried water-based paint is stubborn and can cost you a replacement part.
Run clean water through the cup and gun until the spray runs clear, then flush again with a few ounces of water. A soft brush helps clear the nozzle and air cap.
Store Thinned Paint Properly
Seal leftover thinned paint in a clean container with a tight lid, and label it with the date and the ratio you used. Thinned paint has a shorter shelf life, so plan to use it within a few weeks.
Keep containers out of freezing temperatures and direct sun. Stir gently before reuse, and strain it again if a skin has formed.
Cleanup Tips for Water-Based Paint
Clean tools with warm water and a little dish soap before residue sets. Never pour rinse water down a storm drain; let solids settle, then dispose of the sludge per your local rules.
Wipe nozzles and needles dry, store the gun loosely assembled, and check the manufacturer’s manual for any parts that need light lubrication.
How Weather, Season, and Climate Affect Thinning
Humidity and Temperature Effects on Thinning
Warm air speeds evaporation while humid air slows it, so check conditions before adjusting your ratio. Cold air thickens it fast. Check the label’s recommended spray temperature before you open the can, then adjust your ratio to match the day.
Adjusting Thinning for Dry vs. Humid Climates
In dry climates, add water carefully because the paint already dries quickly and extra thinning invites runs. In humid climates, a slightly wetter mix helps the sprayer atomize evenly. Add water in small amounts, stir, and check viscosity with a test spray on scrap before committing.
Seasonal Considerations for Spray Painting
Season shifts drying time after thinning, so a summer mix may sag while a winter mix clogs an HVLP or airless sprayer. Keep a flow enhancer on hand for cold snaps and strain the paint before every session. Plan spray days around moderate temperatures and low humidity for predictable results, and clean up promptly so residue never hardens in the nozzle.
Cost: DIY Thinning vs. Professional Spraying
Thinning water-based paint yourself costs far less than hiring a pro, but only if you avoid the mistakes that waste paint and time.
| Option | Upfront cost | Ongoing cost | Notes |
|---|---|---|---|
| DIY thinning (1 gallon) | $0 to $10 | $0 to $5 per gallon | Tap water is usually free; distilled water costs a few dollars. |
| Flow enhancer additive | $8 to $20 per bottle | $2 to $5 per gallon | Improves leveling without over-thinning. |
| Straining supplies | $5 to $15 | $2 to $5 per job | Prevents clogs from undissolved pigment. |
| Test spray materials | $0 to $10 | $1 to $3 per job | Scrap board or cardboard for nozzle checks. |
| HVLP sprayer (DIY grade) | $80 to $300 | $10 to $30 per project | Cleanup and replacement parts add up. |
| Airless sprayer (DIY grade) | $200 to $600 | $15 to $40 per project | Higher upfront but faster on large jobs. |
| Professional spraying (interior room) | $300 to $800 | $0 | Includes labor, prep, and materials; varies by region. |
| Professional spraying (car panel) | $500 to $1,500 | $0 | Depends on coating type and shop rates. |
Costs are typical US ranges for DIY homeowners, artists, and car painters as of 2024. They assume you already own basic safety gear and a sprayer for the DIY rows; professional quotes vary by region, surface size, and coating type. No exact prices are guaranteed.
DIY Thinning: Costs and Savings
You can thin water-based paint with tap water for almost nothing, but distilled water or a flow enhancer adds a few dollars per gallon. Expect $0 to $20 upfront for additives and straining supplies. Savings come from avoiding pro labor, typically $300 to $800 per room.
Professional Spraying: What to Expect
A pro charges $300 to $1,500 depending on the job, covering labor, prep, and materials. You pay for their experience with viscosity and nozzle size, which reduces the risk of over-thinning. For small projects, DIY usually wins on cost.
The Cost of Over-Thinning: Wasted Paint and Extra Coats
Adding too much water can force extra coats, wasting $30 to $60 per gallon in paint and doubling your time. It also risks poor adhesion and clogged sprayer parts. Stick to the manufacturer’s ratio and run a test spray before committing.
Eco-friendly thinning options: Use distilled water or a low-VOC flow enhancer, and strain paint to avoid waste. Check the manufacturer’s guidance and follow EPA recommendations for cleanup.
Common Mistakes: Over-Thinning, Under-Thinning, and More
Over-Thinning: Signs and Consequences
Too much water is the most common way to ruin a batch. When viscosity drops too far, paint runs, sags, and covers poorly. Watch for a watery, translucent film and thin coverage. Over-thinned paint also cures slower and may not bond well.
Under-Thinning: When Paint is Too Thick
Thick paint clogs the sprayer and spits uneven globs. If the gun surges or the pattern looks splotchy, the mix is too heavy. Add water in small increments and stir thoroughly before checking again.
Using the Wrong Thinner
Water-based paint takes water or a compatible flow enhancer, never solvent. Solvent thinner curdles acrylic and wrecks the batch. Check the manufacturer’s label first.
Skipping Viscosity Checks
Guessing leads to inconsistent results. Use a viscosity cup and time the flow, or test spray on scrap. Straining the mix and matching nozzle size to the paint prevent most clogs.
- Over-thinning: runs, sags, thin color, slow cure.
- Under-thinning: clogs, spitting, splotchy pattern.
- Wrong thinner: solvent curdles water-based paint.
- No viscosity check: inconsistent ratio, uneven finish.
- Fix: add water slowly, stir, test spray, strain before loading.
When to Ask for Help: Store Experts, Manufacturers, and Pros
Consulting a Paint Store Expert
A paint counter employee can match your paint to the right sprayer and suggest a starting ratio. Bring your sprayer manual and a paint sample. Ask for recommended thinning ratios by sprayer type, since HVLP, airless, and conventional guns each want different viscosity. Request a flow enhancer if paint is thick, and confirm nozzle size.
Contacting the Manufacturer
The paint maker knows its formula best, so call or check the label before adding anything. Ask what thinner is compatible with water-based paint and what ratio keeps the coating intact. Get guidance in writing if possible, and ask whether thinning affects warranty or color.
When to Call a Local Pro
Bring in a pro when stakes are high or paint is expensive. Ask a local painter or auto body shop to check your mixing and straining setup. Call them if your test spray still spits, the paint is specialty or automotive, or you are spraying a large or visible surface.
When to ask for help:
- You have a specialty or automotive coating and are unsure which thinner is safe.
- Your test spray still spits or clogs after adjusting the ratio and nozzle size.
- You are spraying a large or highly visible surface where a failed coat would be costly.
- The manufacturer's label does not list a thinning ratio for your sprayer type.
How to Thin Water Based Paint for Sprayer: Frequently Asked Questions
?Can You Thin Water Based Paint for a Sprayer with Just Tap Water, or Does It Need a Special Thinner?
Tap water is usually enough to thin water based paint for sprayer work. Add it in small amounts and stir thoroughly; you are lowering viscosity, which is how thick the fluid is and how easily it flows, so the sprayer can atomize it. Skip solvent thinners, they can curdle acrylic. If the coating still resists thinning, use a flow enhancer made for water based paint.
?How Much Water Should I Add When I Thin Water Based Paint for Sprayer Use?
Start with about 10 percent water by volume when you thin water based paint for sprayer use, and never exceed the manufacturer's maximum, often around 20 percent. Measure the ratio precisely rather than eyeballing it; over-thinning breaks down the binder and ruins adhesion. Add water in stages, stir, and recheck viscosity before adding more. Thin only the batch you will spray that day.
?Why Does My Water Based Paint Clog the Sprayer Even After I Thin Water Based Paint for Sprayer Work?
Clogging usually means the water based paint was not strained or the nozzle size is too small for the coating. Strain the thinned paint through a fine mesh filter to catch skins and lumps, then match nozzle size to the material. For HVLP, a device that sprays coating through air onto a surface, check that your setup handles the viscosity you mixed.
?is It Safe to Thin Water Based Paint for Sprayer Work Indoors Without Extra Ventilation?
No, always ventilate. Even water-based paint gives off mist and additives you should not breathe, so open windows, run a fan, and wear a respirator rated for spray work. Keep ignition sources away and cover floors and furniture. Safety gear costs little compared with redoing a job or a health problem.
?What Happens If I Thin Water Based Paint for Sprayer Use and Get the Ratio Wrong?
Under-thinning causes spitting, clogging, and a rough orange-peel finish; over-thinning causes runs, poor coverage, and weak adhesion. Both waste paint and time. Mix small test batches, run a test spray on scrap material, and adjust before committing the whole batch. Once you over-thin, you cannot undo it.
?When Should I Thin Water Based Paint for Sprayer Projects Instead of Brushing It on?
Thin only when the sprayer needs it. Fresh, correctly formulated paint often sprays fine straight from the can. Thin when the paint is old, thick, or the spray pattern shows it is too viscous. Always do a test spray first; if the fan is even and the finish is smooth, leave the paint alone.
?Does Thinning Water Based Paint for Sprayer Cleanup Make the Job Harder Afterward?
It can if you let thinned paint sit in the gun. Thinned paint dries faster and settles in passages, so flush the sprayer with water immediately after spraying and clean the nozzle thoroughly. Store leftover thinned paint in a sealed container and label it; use it soon, since added water shortens shelf life.
Conclusion
Getting the consistency right matters more than hitting an exact number. Add water a little at a time while stirring, then check viscosity, the fluid’s resistance to flow, with a cup until it drips like thin cream. Too much water weakens the finish, so stop as soon as it flows freely. Strain the paint before pouring it into the sprayer to catch lumps that clog the nozzle.
Your next step: run a test spray on scrap material and adjust the ratio or nozzle size before touching the real surface. Keep a written note of what worked, and clean the gun right after cleanup so dried paint does not ruin your next job.