
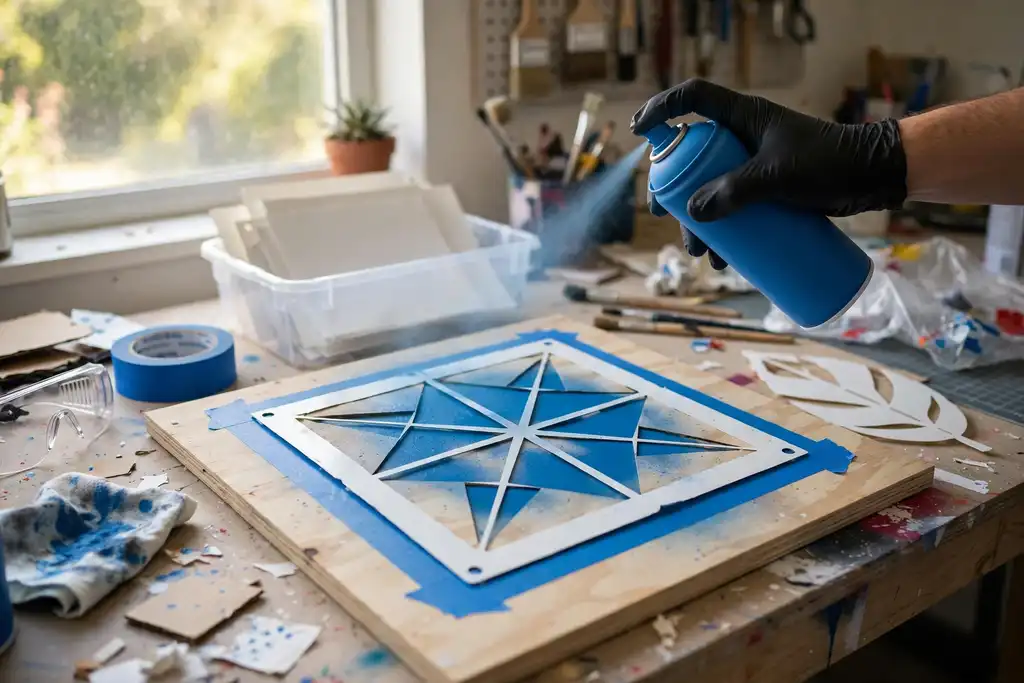

To spray paint a stencil cleanly, you need a light adhesive bond, thin coats, and patience. Rushing the prep or soaking the surface guarantees bleeding and overspray.
Here is the verdict: a clean stencil job comes down to surface preparation, proper adhesive, and light coats, not luck. Learn how to spray paint using a stencil the right way, and you will avoid the two most common failures: paint bleeding under the edges and overspray drifting onto the rest of your project.
This article gives you a straight sequence for masking a surface, applying the stencil, and building color without soaking the edges. You will also get the safety essentials for working with aerosols, including a respirator and adequate ventilation, so you can finish the job once and move on.
- Clean and dry the surface; apply primer if the material needs it.
- Use a light adhesive to seal stencil edges and stop bleeding.
- Apply light coats, waiting for dry time between passes.
- Mask surrounding areas to prevent overspray damage.
- Wear a respirator and ventilate when spraying aerosols.
How to Spray Paint Using a Stencil: the Quick Decision Before You Start
Before you shake a can, settle three quick decisions. They determine whether your stencil stays crisp or bleeds into a mess, and whether you finish safely.
| Your situation | What to do | Why |
|---|---|---|
| Painting bare wood | Sand, then apply primer | Primer grips and stops soak-in |
| Painting metal or car panels | Clean, scuff, use self-etching primer | Paint sticks and resists lifting |
| Stenciling fabric | Wash, dry, insert cardboard backing | Backing stops bleed-through |
| Using thin paper stencil | Switch to mylar or adhesive film | Paper tears and lifts easily |
| Spraying indoors | Move outdoors or force cross-ventilation | Overspray and fumes build fast |
| No respirator on hand | Get a NIOSH-rated respirator before spraying | Filters paint particles and vapors |
| Stencil lifts at edges | Apply light adhesive or repositionable spray | Seals edges against bleeding |
| Uneven first coat | Build several light coats, let each flash off | Heavy coats run and bleed |
Recommended for this job
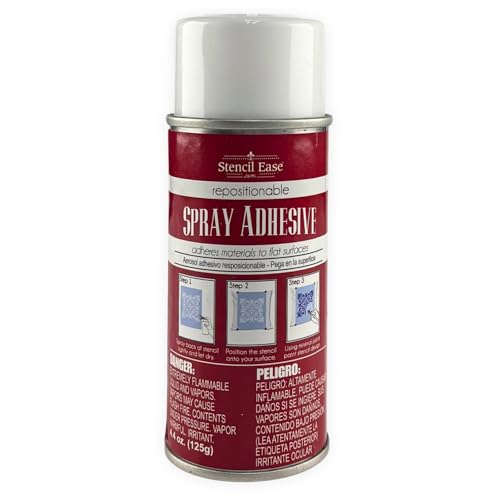
Stencil Ease Stencil Adhesive Spray
Keeps stencil edges flat and secure so spray paint cannot bleed underneath.
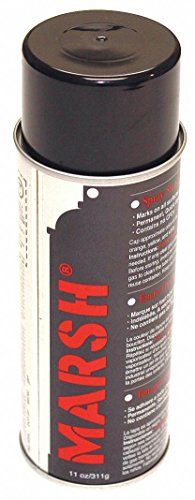
MARSH Stencil Ink 14 fl oz
Delivers controlled black stencil ink spray for crisp, sharp markings through templates.
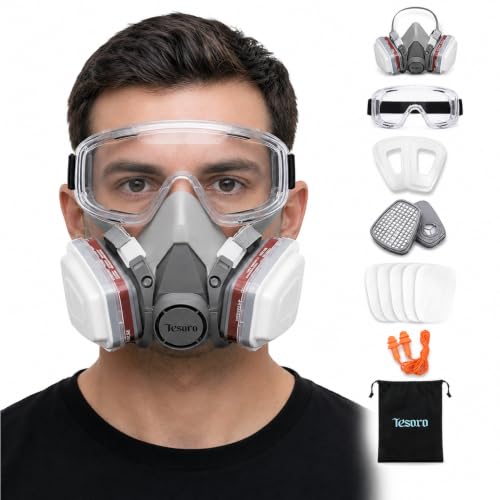
Tesoro Moda Respirator Mask
Protects lungs and eyes from overspray fumes and particles while stencil spraying.
What Surface Are You Stenciling on?
Match your prep to the material before any paint touches it. Wood needs sanding and a primer coat so paint does not soak in and blur edges. Metal and car panels need cleaning, light scuffing, and a primer made for bare metal. Fabric needs a wash, full dry time, and a stiff insert behind the stencil so spray paint cannot bleed through.
Is Your Stencil Material Suited for Spray Paint?
Use mylar or adhesive film, not thin paper. Paper curls, lifts, and lets paint creep under the edges. A stencil with light adhesive backing holds tight and gives you clean registration marks for repeats. If you are reusing a stencil, clean and dry it fully between passes.
Do You Have Proper Ventilation and a Respirator?
Spray outdoors or in a space with strong cross-ventilation, and wear a NIOSH-rated respirator. A respirator is a device that filters airborne particles and vapors from your lungs, and spray paint produces both. Keep the can at the distance the label states, use light coats, and mask nearby surfaces to control overspray, which is airborne paint landing where you did not intend.
5-Minute Diagnostic: Checks Before Any Work
Is the Surface Clean and Dry?
Wipe the surface with a degreaser and let it dry 10 to 15 minutes before anything else. Sand glossy spots with 220-grit paper, then tack off all dust. Surface preparation decides whether your primer and spray paint bond or peel.
Does the Stencil Lie Flat Without Gaps?
Press every edge of the stencil down and tape any corner that curls. a 1/16 inch lifted corner lets spray paint creep under the edge, and that is how bleeding starts. A light stencil adhesive holds the mask flat without tearing the paint when you lift it.
Is the Spray Paint Compatible with the Surface?
Match the can to your material: wood, metal, plastic, or cured car paint. Spray a test patch on scrap of the same material and check the dry time on the label. The wrong formula means wrinkling or poor adhesion within 24 hours.
Are You Wearing the Right Safety Gear?
Wear a respirator rated for paint vapors, plus gloves and eye protection. Spray outdoors or with the garage door open, because overspray drifts several feet and settles on nearby surfaces. Check the EPA or OSHA guidance on the can for solvent-based products.
Run these four checks before you mask anything, because fixing a flaw after the paint lands costs you a full redo.
How Stencil Spray Painting Works: Mask, Coat, Reveal
The Masking Principle
A stencil is a graphic design sheet whose cut-outs let spray paint through while the solid areas block it. That masking only holds if the stencil sits flush, so press every edge down before you spray. A 1/16 inch lifted corner is enough for paint to creep under and blur your lines.
Why Light Coats Prevent Bleeding
Build color in 3 to 4 thin passes rather than one wet blast. Heavy paint seeps under edges and causes bleeding, the fuzzy halo that ruins crisp lines. Hold the can 8 to 12 inches away, sweep in short bursts, and let each coat flash per the label, typically 10 to 15 minutes.
How Adhesive Controls Overspray
Overspray is airborne paint landing where you did not aim, and a low-tack stencil adhesive keeps it from slipping under the edges. Burn edges down with your thumb, add registration marks for repeats, and mask surrounding areas with painter’s tape and paper. Wear a respirator, and apply primer first so the topcoat grips.
Before You Start: Tools, Materials, and Safety
Gather Your Stencil, Spray Paint, and Adhesive
Pick a stencil made for your surface and a spray paint labeled for the material you’re coating. A repositionable adhesive keeps the stencil flat so paint can’t creep underneath.
Set up Ventilation and Wear a Respirator
Work outdoors or in a garage with the door open, and wear a respirator rated for paint vapors. Overspray is airborne paint landing where you don’t want it, so keep the area clear and the air moving.
Mask off Surrounding Areas
Masking means covering everything the paint shouldn’t touch. Tape off edges and lay drop cloths before you shake a single can.
- Choose the right paint: use a spray paint made for stenciling on your surface, and apply primer first on bare wood or metal so the paint grips.
- Check dry time: read the can’s recoat window, typically 1 to 2 hours, and stick to it.
- Keep a stencil brush handy: it cleans edges and fixes small mistakes without more overspray.
- Plan registration marks: mark alignment points so repeat patterns line up.
- Finish with clear coat: seal the design once it’s fully dry.
- Choose the right paint: use a spray paint made for stenciling on your surface, and apply primer first on bare wood or metal so the paint grips.
- Check dry time: read the can's recoat window, typically 1 to 2 hours, and stick to it.
- Keep a stencil brush handy: it cleans edges and fixes small mistakes without more overspray.
- Plan registration marks: mark alignment points so repeat patterns line up.
- Finish with clear coat: seal the design once it's fully dry.
Step-by-Step: How to Spray Paint Using a Stencil
Prepare and Clean the Surface
Degreaser should be wiped on and dried fully. Lightly sand glossy areas, then dust off. Bare metal or raw wood needs a primer coat first, cured per label.
Secure the Stencil with Adhesive or Tape
Mist spray adhesive on the back, wait until tacky, then press evenly to keep edges sharp. Add painter’s tape around edges for extra masking.
Apply Light Coats at the Right Distance and Angle
Hold the can 8 to 10 inches away, perpendicular. Spray short, overlapping passes, starting and stopping off the stencil. Two or three light coats beat one heavy pass.
Wait for Proper Drying Times Between Coats
Let each coat tack up 10 to 15 minutes. Rushing causes runs and smeared edges. Check the can’s recoat window.
Remove the Stencil Carefully
Pull straight up while paint is still slightly soft, usually within 30 to 60 minutes. Peel at a low angle to avoid lifting fresh edges. Let cure fully before clear coat.
Follow these steps in order and your stencil work will come out crisp the first time, without bleed or overspray.
Advanced Path: Layering Multiple Colors and Custom Stencils
Plan Your Color Layers and Drying Times
Sketch the color order before you touch a can. Work lightest to darkest so a dark layer can cover a mistake underneath. Write the dry time from each label next to its color.
Align and Secure Each Stencil Layer
Registration marks keep every layer in the same spot. Draw small alignment ticks on the surface, then match the stencil edges to them each time.
- Apply a light coat of adhesive to the stencil back, let it get tacky, then press flat to prevent bleeding.
- Spray light coats and keep the can moving to limit overspray on finished areas.
- Wait the full recoat window, usually 1 to 2 hours for aerosol enamel, before the next color.
- Lift the stencil straight up while the paint is still slightly wet.
Create Your Own Stencils from Acetate or Cardstock
Custom designs are simple to cut yourself. Trace onto acetate for repeated use or cardstock for one-off projects, then cut with a sharp hobby knife on a cutting mat. Seal paper stencils with a thin clear coat and let them dry before spraying.
Layering colors and cutting your own designs takes the same discipline as a single-color job, just with more checkpoints between coats.
Real-Life Scenario: Stenciling a Wooden Sign for a Front Porch
Choosing Materials for Outdoor Durability
Use exterior-grade spray paint labeled for wood and UV exposure, plus a bonding primer to slow peeling in sun and rain.
Use a reusable mylar or vinyl stencil held down with light delicate-surface adhesive to prevent paint bleeding under edges.
Step-By-Step Application on Wood
Sand smooth, wipe dust, apply primer, and cure fully before stenciling. Tape stencil flat and mark registration marks for repeat patterns.
- Shake the can for the label’s stated time, usually one to two minutes.
- Mist several light coats from 8 to 12 inches away, letting each tack up.
- Peel the stencil while paint is still slightly wet to avoid tearing edges.
Wear an organic-vapor respirator and work outside or in strong ventilation. Mask nearby surfaces against overspray.
Finishing with a Clear Coat
Apply two or three thin coats of exterior clear coat after the paint’s stated dry time, usually 24 to 48 hours for a full cure. Keep coats light so the finish does not run or cloud stencil edges. Once cured, the sign is ready to hang.
Troubleshooting: Fixing Bleeding, Drips, and Smudges
Most spray paint stencil failures trace back to wet paint, weak adhesion, or pulling the stencil too early. Match the symptom to the cause, then correct it before the next coat.
| Problem | Likely cause | Fix |
|---|---|---|
| Paint bleeding under edges | Stencil lifting or too much spray | Press down edges, add adhesive, lighter coats |
| Drips and runs | Heavy coat sprayed too close | Hold can farther, use light coats, let dry |
| Smudged design on removal | Stencil pulled while paint wet | Wait for dry time, lift straight up slowly |
| Fuzzy or soft lines | Overspray drifting under stencil | Reduce spray distance, mask surrounding area |
| Stencil shifting mid-job | Weak adhesive or no registration marks | Reapply adhesive, align with registration marks |
| Paint flaking off later | No primer or unclean surface | Sand, clean, apply primer before spraying |
Why is Paint Bleeding Under the Stencil?
Bleeding happens when spray paint seeps under an edge that isn’t sealed down. Press the stencil flat, add adhesive, and spray light coats from a proper distance.
How to Fix Drips and Runs
Drips come from spraying too heavy and too close. Let the coat flash off, then switch to light coats and keep the can moving.
What to Do If the Stencil Smudges on Removal
Smudging means you pulled the stencil while paint was still wet. Respect the dry time, then peel it straight up slowly to protect the lines.
Quick Checklist: Before You Spray
Surface Prepped and Dry
Clean and dry beats fast: wipe away dust and grease, then apply primer and let it cure fully.
- Clean first: Remove dust, oil, and fingerprints so paint and adhesive grip.
- Prime bare surfaces: Bare wood, metal, or plastic needs primer for even color and hold.
- Respect dry time: Let primer and base coat cure per label, typically 1 to 2 hours.
Stencil Secured and Aligned
A stencil only works if flat and fixed. Tape or spray adhesive holds edges down; registration marks keep patterns aligned.
- Press it flat: Smooth from center out so no edges lift.
- Mark alignment: Use registration marks for repeating designs.
- Protect the rest: Tape surrounding areas to control overspray.
Safety Gear on and Area Ventilated
Ventilation and a respirator are non-negotiable indoors. Work outside or with fans; keep sparks away.
- Wear protection: A respirator, eye protection, and gloves.
- Ventilate: Spray outdoors or open windows; check OSHA limits.
- Plan light coats: Thin passes prevent bleeding and drips.
- Clean the surface of dust and grease, then apply primer and let it cure fully.
- Tape or spray adhesive the stencil flat so no edges lift.
- Use registration marks to line up multi-part or repeating designs.
- Tape off surrounding areas to control overspray.
- Wear a paint-rated respirator, gloves, and eye protection.
- Spray outdoors or ventilate the space well.
- Apply light coats instead of one heavy pass to avoid bleeding.
Cost: DIY vs Pro Stencil Spray Painting
Stencil spray painting costs little to start and scales with your surface area, so plan the budget before you buy paint.
| Option | Upfront cost | Ongoing cost | Notes |
|---|---|---|---|
| DIY starter kit (film stencil, one can, tape) | $20 to $50 | $10 to $25 per project | Small decor pieces and signs |
| Reusable mylar stencils | $8 to $30 each | Near zero after first buy | Clean and store flat to reuse |
| Spray paint cans | $6 to $15 each | $6 to $15 per project | Buy one extra can for touch-ups |
| Repositionable spray adhesive | $10 to $20 | Lasts many projects | Prevents bleeding at edges |
| Primer and clear coat | $8 to $20 each | $8 to $20 per project | Improves adhesion and durability |
| Custom stencil cutting (shop service) | $15 to $60 | Varies by design | Cheaper than buying a cutter |
| Pro stencil job (single room or panel) | $150 to $600 | Quoted per job | Includes prep, masking, cleanup |
Ranges assume US retail prices for a small to medium project (roughly 10 to 50 square feet), one color, and standard cans. Pro estimates assume a single-color design on a prepared wall or panel; multi-color work, vehicle panels, and large murals run higher. No exact quotes are implied.
DIY Cost Breakdown (Stencils, Paint, Adhesive)
Expect $40 to $120 for a typical small project once you add stencil, spray paint, adhesive, primer, and masking supplies. Reusable film stencils cut repeat costs to near zero.
When to Make Your Own Stencils to Save Money
Cut your own stencil when the design is simple and you will use it once or twice. A craft knife and mylar sheet cost less than a custom cut and let you fix registration marks yourself.
Professional Service Estimates
A pro typically charges $150 to $600 for a single-color stencil job on a wall or panel, covering surface preparation, masking, and cleanup. Get a written quote that lists dry time between coats.
Common Mistakes to Avoid When Spray Painting with Stencils
Using Too Much Adhesive or Not Enough
Spray adhesive holds the stencil flat so paint can’t creep under the edges. Too little and the edges lift, causing bleeding; too much leaves gummy residue that can pull up the design or mar the surface.
Spraying Too Close or at the Wrong Angle
Hold the can 8 to 10 inches away and keep it perpendicular to the surface. Angling the nozzle sends overspray, which is airborne paint landing where you don’t want it, under the stencil and across your project.
Skipping Light Coats and Causing Drips
Build color in several thin passes rather than one heavy coat. Wait the manufacturer’s dry time between coats so the paint sets instead of running under the stencil.
- Test your adhesive: press the stencil down firmly, then lift a corner to check for full contact before spraying.
- Use registration marks to line up repeat patterns and avoid misaligned edges.
- Wear a respirator rated for paint vapors and work in a ventilated area.
- Apply primer first on bare or porous surfaces so paint grips evenly.
- Seal the finished design with a clear coat to protect it from wear.
- Test your adhesive: press the stencil down firmly, then lift a corner to check for full contact before spraying.
- Use registration marks to line up repeat patterns and avoid misaligned edges.
- Wear a respirator rated for paint vapors and work in a ventilated area.
- Apply primer first on bare or porous surfaces so paint grips evenly.
- Seal the finished design with a clear coat to protect it from wear.
When to Call a Pro: Safety and Complexity Red Flags
Large-Scale or High-Detail Stenciling
If the design spans a wall, a floor, or a vehicle panel larger than you can comfortably reach, stop and hire a pro. Big layouts need precise registration marks and controlled overspray, which is airborne paint landing where you did not intend it, and mistakes get expensive fast.
Stenciling on Difficult Surfaces Like Metal or Fabric
Metal and fabric rarely hold a crisp edge without the right primer, a preparatory coating applied before paint, and the correct adhesive to bond the stencil flat. Call a professional if the surface flexes, curves, or has a finish you cannot identify.
Car Detailing and Automotive Stenciling
Automotive work raises the stakes: the wrong solvent can damage clear coat, the protective top layer on modern paint. Bring in a pro for any stenciling on a vehicle’s body, glass, or trim, especially if you lack a proper respirator, a device that supplies filtered air for breathing.
- Stop if you cannot test the paint and adhesive on a hidden area first.
- Stop if the surface is unknown, damaged, or freshly coated.
- Stop if ventilation is poor or you have no respirator.
- Stop if the project involves a vehicle’s finish or safety glass.
How to Spray Paint Using a Stencil: Frequently Asked Questions
?Can I Spray Paint Using a Stencil Without Adhesive, or Will It Bleed?
No, skipping adhesive usually causes bleeding. Bleeding is paint seeping under the stencil edges and blurring your design. A light spray adhesive holds the stencil flat against the surface so paint can't creep underneath. Spray the adhesive on the back of the stencil, let it get tacky, then press it down firmly. Repositionable adhesive lets you lift the stencil cleanly without tearing the surface.
?How Do I Spray Paint Using a Stencil so the Edges Stay Sharp?
Use light coats and keep the can moving. Light coats mean short, thin passes rather than one wet blast; heavy coats pool and creep under the stencil. Hold the can about 8 to 10 inches away, spray in short bursts, and let each coat flash off before the next. Build coverage gradually. Sharp edges come from patience, not pressure.
?Does Surface Preparation Matter When Spray Painting Using a Stencil?
Yes, it's the difference between a clean result and a redo. Surface preparation means cleaning off dirt and grease, sanding rough spots, and applying primer, a preparatory coating that helps paint bond and blocks the base color. Let the primer hit its dry time before stenciling. On bare wood, metal, or car panels, skipping prep causes peeling and uneven color.
?How Do I Spray Paint Using a Stencil Without Overspray Ruining the Rest of the Project?
Mask off everything you don't want painted. Overspray is airborne paint landing where you didn't intend, and it travels farther than most people expect. Use masking tape and paper around the stencil area, cover nearby surfaces, and spray in a ventilated space away from cars and windows. A cardboard backdrop behind the piece catches the drift.
?What Safety Gear Do I Need When I Spray Paint Using a Stencil?
Wear a respirator rated for paint vapors, plus gloves and eye protection. A respirator is a device that filters the air you breathe; a dust mask won't cut it with solvent-based spray paint. Spray outdoors or in a garage with the door open, and keep flames and pilot lights away. If you feel dizzy, stop and get fresh air.
?When Should I Pull the Stencil off After I Spray Paint Using a Stencil?
Pull it while the paint is still tacky, not fully cured. Lifting the stencil immediately after the final light coat prevents the paint film from bridging and tearing along the edges. Peel straight up and slow. If you used registration marks, a clear coat over the finished design seals it and protects the edges from wear.
?is It Worth Using a Stencil Brush Instead of Spray Paint Using a Stencil on Detailed Designs?
Sometimes, yes. A stencil brush gives you control on tight details and indoor jobs where overspray is a problem, but spray paint is faster and lays down more even color on large areas. For fine lines, stipple with the brush; for big patterns, spray in light coats. Match the tool to the job.
Conclusion
Clean results come down to the basics: a flat, prepared surface, a stencil held tight with adhesive, and several light coats sprayed from 6 to 12 inches. Rushing with a heavy pass is what causes bleeding and drips, so build the color gradually and let dry time work for you.
Your best next step: test the full process on scrap material first, including primer and clear coat, to confirm adhesion and coverage before touching the real piece. Wear a respirator, mask off nearby areas to control overspray, and keep registration marks visible for repeat patterns.