
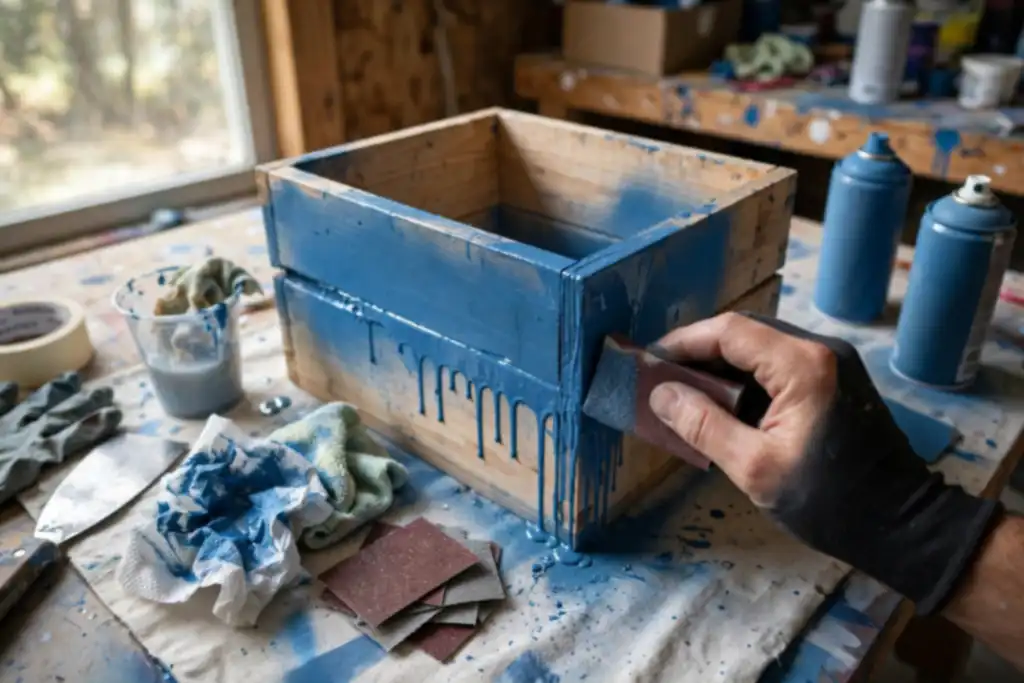
The most likely cause of runny spray paint is applying coats too wet and too thick, so the first fix is to let it fully cure, then sand the sagging and drips flat before you recoat with thinner, faster passes.
Here is a clear, practical look at how to fix runny spray paint.
You just sprayed a cabinet door or a car panel, and a curtain of paint sags toward the floor. That is runny spray paint, and it happens when the coating goes on too wet or too thick for the conditions. Here is how to fix runny spray paint without making the mess worse: stop spraying, let it cure, then sand and recoat correctly.
You will get the exact order of operations for sagging and drips, the sanding grits that level a defect without gouging, and the spray distance, pass speed, and flash time that keep the next coat flat. Safety comes first with aerosols and sanding dust, so the steps include ventilation and respiratory protection before you touch the surface.
- Let the coat cure fully before you touch any sagging or drips.
- Sand the defect flat with 400 to 800 grit, then clean the dust.
- Recoat in thin passes at 8 to 10 inches with steady speed.
- Respect flash time between coats to avoid trapping solvent.
- Wear a respirator and ventilate when sanding or spraying.
How to Fix Runny Spray Paint: What's Happening and What to Do
A run means the coating went on too wet, too close, or too slow, and gravity won. Fix it by removing the sag completely, then recoating with thinner passes.
| What's happening | Likely cause | What to do |
|---|---|---|
| Paint sags in a curtain | Too much material per pass | Sand the sag flat, then recoat thinner |
| Drips form at edges | Spray distance too close | Hold 6 to 10 inches away and keep moving |
| Wet film looks glassy | Pass speed too slow | Speed up passes, overlap about half |
| Runs keep reappearing | Paint thickness too heavy | Build thin coats with proper flash time |
| Blush or milky haze | Humidity too high | Wait for drier conditions before recoating |
| Paint skins over soft | Temperature too cold | Spray within the label's temperature range |
| Sag under clear coat | Clear applied too wet | Sand level, then apply lighter clear coats |
Recommended for this job

Rust-Oleum Painter's Touch 2X Ultra Cover
Reapply thin coats with this fast-drying spray to avoid runs and sags.
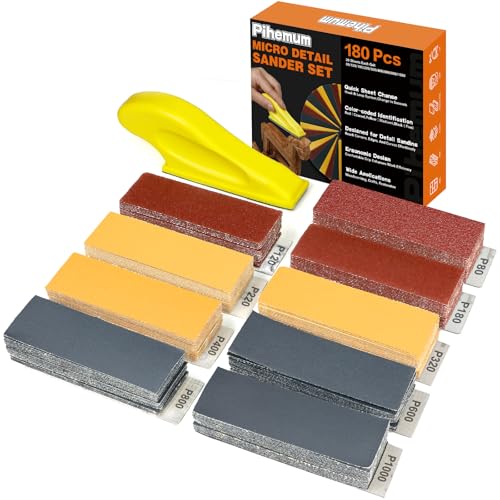
Mini Detail Sanding Kit
Sand down the runny areas with fine grit before applying a fresh coat.

Aheroi Tack Cloth
Wipe the surface clean of dust and debris before repainting to prevent unevenness.
Runny spray paint means the coating sagged or dripped because it went on too wet or too thick. Remove the sag completely, then recoat with thinner, faster passes.
Why Spray Paint Runs: Too Much Material, Too Close, Too Slow
Excess paint thickness is the root cause. Spray distance under 8 to 12 inches, pass speed slower than about 12 inches per second, or holding the can still dumps too much material in one spot. Surface preparation matters too: a slick or unprimed panel gives paint nowhere to grip.
What a Run Looks Like at Each Stage (Wet, Tacky, Cured)
Wet sags look glossy and mobile, so stop spraying immediately. Tacky runs feel stringy and smear if touched. Cured drips are hard bumps you can level with 400 to 600 grit paper.
The Fix in One Sentence: Remove the Sag, Then Recoat Thinner
Let the coat cure 24 to 48 hours, then use sanding (an abrasive process that levels surface imperfections) with 600 grit to flatten the sag without cutting through to primer. Wipe dust with a tack cloth, then recoat with faster passes at 8 to 12 inches. Keep humidity under 60 percent and temperature between 65 and 80 F to slow flash time.
The 5-Minute Diagnostic: is It Still Wet, Tacky or Cured?
Before you touch sandpaper, confirm the cure stage and measure the damage. Rushing this step is how a small sag turns into a full panel strip.
Touch Test and Solvent Test: How to Tell the Cure Stage
Press a fingertip into the sag for 3 seconds. If paint transfers or feels sticky, it is still wet. For a cured check, rub a mineral-spirits-soaked cotton swab on an inconspicuous spot for 10 seconds; if the paint softens, it is not ready for sanding.
Run Depth Check: Surface Sag vs Full Drip vs Curtain
Drag a plastic card edge across the drip. A surface sag measures under 1 mm, a full drip runs 1 to 3 mm, and a curtain is a continuous sheet. That measurement decides spot repair versus full strip.
Paint Compatibility and Recoating: Will Your Next Coat Bite or Lift?
Read the can label for the recoat window, typically 1 hour while fresh or 24 to 48 hours once fully cured, and note the product type. Spray a light test coat on a scrap panel with the same primer and substrate, then wait the full flash time to see if it wrinkles or lifts.
Decision Rule: Sand and Recoat or Strip the Whole Panel
Check humidity with a hygrometer and temperature with a thermometer; above 60% relative humidity or below 65 degrees F, stop and wait. If the sag is shallow and the paint is cured, sand and recoat. If the drip is deep or the paint lifts, strip the whole panel.
Before you touch sandpaper, run these quick checks to confirm the cure stage, measure the damage, and avoid a recoat that lifts or wrinkles.
Why Runs Form: Wet Mil Thickness, Flash Time and Gravity
Wet Mil Thickness and Dry Film Thickness Explained Simply
Wet mil thickness is how thick the coating sits when it is still liquid; dry film thickness is what remains after solvents leave. Spray too much wet film and the excess has nowhere to go but down.
Follow the manufacturer’s wet and dry film specs on the can. A cheap wet film gauge takes the guesswork out of paint thickness before gravity gets a vote.
Flash Time Between Coats: the Window That Prevents Sags
Flash time is the wait that lets solvents escape before the next pass. Recoating too soon traps solvent under fresh paint, and the whole layer slides.
Typical flash windows run 10 to 30 minutes depending on temperature, humidity and product. Tacky is not ready: the surface should be set, not wet, before you recoat.
Why Vertical Surfaces Sag Faster Than Horizontal Ones
Gravity pulls wet coating straight down on a wall or panel, while a flat surface holds it in place. That is why the same paint thickness that looks fine on a table can drip on a door.
On vertical work, keep spray distance at the far end of the spec, ease pass speed up slightly, and build thin coats. Surface preparation and a proper primer give the coating something to grip, which resists sagging.
Before You Start: Tools, Materials and Safety Setup
What You Need: Sanding Grits, Blocks, Solvents, Polishing Compound
Gather a sanding block, 320 to 600 grit wet/dry paper, a solvent-matched thinner, and polishing compound. Sanding means using an abrasive medium to level and remove surface imperfections, so start coarse only on heavy sags.
- Leveling grits: 320 to 400 grit knocks down a cured sag fast, then 600 to 800 grit refines the repair zone before you recoat.
- Solvents and compound: Use the thinner the manufacturer specifies for cleanup and a fine polishing compound to blend the repair.
Safety: Respirator and Ventilation
Wear a respirator rated for organic vapors and work with cross-ventilation, or outdoors in still air. Solvent vapors and sanding dust are the real hazards, so protect your lungs and eyes before any sanding or recoating.
Surface Prep to Prevent Runs
Clean, degrease, and scuff the surface so the next coat grips evenly. Surface preparation is your best defense: wipe with a compatible solvent, let it flash off fully, and keep the work area free of dust.
Primer and Sealer Coats: How Much is Enough
Apply primer as a thin, even coat, not a wet blanket. A primer is a preparatory coating under paint, and two light passes beat one heavy one. Keep paint thickness modest and check temperature and humidity before spraying.
- Leveling grits: 320 to 400 grit for heavy sags, then 600 to 800 grit to refine before recoat.
- Solvents and compound: use the manufacturer-specified thinner for cleanup and a fine polishing compound to blend.
- Respirator: wear an organic-vapor rated mask and ventilate the workspace or spray outdoors.
- Surface preparation: degrease and scuff so the next coat grips evenly.
- Primer and sealer: apply thin, even coats; two light passes beat one heavy one.
- Paint thickness: keep coats modest and check temperature and humidity before spraying.
Step-by-Step: Fix a Run While It's Still Wet
Stop Spraying Immediately and Let the Coat Flash
Pull the gun or can away the second a drip starts to hang. Give the coat 5 to 10 minutes of flash time so the film firms up before you touch it.
Wick or Wipe the Sag with a Lint-Free Cloth on a Block
Wrap a lint-free cloth around a flat sanding block and touch it to the bottom of the sag. Let the cloth wick the wet paint up rather than smearing it sideways, and swap to a clean spot after each pass.
Feather the Edge, Then Recoat with Lighter Passes
Once tacky, feather the edge with 600 to 800 grit paper so the repair blends. Recoat in thin passes, keeping paint thickness low, and check the surface between coats.
Correct Spray Distance and Pass Speed
Hold the gun 8 to 12 inches from the panel and move at a steady, moderate speed. Overlap each pass by about 50 percent, and keep the gun parallel so the spray distance stays constant.
Spray Can Technique: Shake, Distance, Trigger Control
Shake the can for a full minute, spray from 8 to 12 inches, and press the trigger before the pass starts. Release after the pass ends, and avoid tilting the can, which spits solvent and causes runs.
Set fluid and air so the pattern is even, then open the fan to about 6 to 8 inches wide. Check temperature and humidity against the label, and confirm your primer and surface preparation are dry before you spray.
Catch a sag early and you can save the coat, so work fast and keep your hands clean.
Step-by-Step: Sand, Level and Recoat a Dried Run
Block-Sand the Run Flat with 400 to 600 Grit, Then Refine
Sand the high spot with 400 grit on a firm block until level, then feather with 600 grit. Keep paper wet and wipe often.
Level Check with a Guide Coat or Raking Light
A guide coat or low-angle raking light reveals low spots. Keep sanding if a shadow remains; stop before cutting through.
Recoat Thin, Fast Passes and Respect Flash Time
Use thin coats, consistent spray distance, brisk passes, and full flash time between layers. Cool, damp air slows curing and invites drips.
Buffing and Polishing After Repair
Let recoat cure fully (often overnight), buff with fine compound on a soft pad at low speed, polish, and check sheen in daylight.
Clear Coat Runs and How to Fix Them Without Burning Through
Color sits just beneath clear. Sand runs with 800-1000 grit, inspecting constantly. If color shows on paper, stop and recoat clear.
Once the paint has skinned over, you cannot blend a run away; you have to cut it back to a flat surface and rebuild the finish in thin layers.
Troubleshooting: Orange Peel, Solvent Pop and Lifted Edges
Most finish defects trace back to application, not the can. Match the symptom to the cause, fix the surface, and only then decide whether to recoat or strip.
| Problem | Likely cause | Fix |
|---|---|---|
| Run keeps coming back on the same panel | Too much paint per pass or too little spray distance | Thinner coats, consistent spray distance |
| Temperature too cold or too hot | Slow or fast flash time, uneven cure | Work within the label range |
| High humidity | Trapped moisture, blushing, poor cure | Wait for drier conditions |
| Recoating too soon | Solvent still trapped under the new coat | Extend flash time between passes |
| Wrinkling or lifted edges | Incompatible coats or wet-on-wet recoating | Test compatibility, strip if severe |
| Sagging on one area | Heavy overlap passes and slow pass speed | Speed up passes, reduce overlap |
| Deep drips that cured hard | Paint thickness too high to sand level | Strip and start over |
Run Keeps Coming Back on the Same Panel
Repeat sagging usually means your spray distance is too close or your pass speed too slow, so paint piles up in one spot. Hold the can or gun at a steady distance and keep passes moving. Fix the technique, not just the finish.
Temperature and Humidity Effects on Cure and Sag
Temperature, the measure of how hot or cold the air is, changes how fast solvents flash off. Cold slows cure and invites runs, while high humidity traps moisture and dulls the finish. Check the label range and avoid spraying in damp air.
Recoating Too Soon: Wrinkling and Lifting
Wrinkling and lifted edges mean the new coat softened a layer that had not fully flashed. Give each coat proper flash time and confirm compatibility with a test card. If lifting is widespread, sanding back is safer than adding more paint.
When to Strip and Start Over
Strip when drips are deep, the coat is wrinkled, or paint thickness is too high to sand level without cutting through. Sanding, the process of removing surface imperfections with an abrasive, works for light sags only. Then reapply primer and recoat thin.
Myths vs Facts About Runny Spray Paint
Myth: More Coats Always Means More Durability
More coats only help if each one is thin. Piling on wet layers traps solvent and turns a good job into runny spray paint. Aim for two or three light passes, letting flash time (the wait before the next coat) do its job.
Paint thickness builds fast. Stop while the film still looks slightly uneven, then judge after it cures.
Myth: You Can Spray as Close as You Want If You Move Fast
Close spraying and fast passes still dump too much material in one spot. Hold the can 8 to 12 inches from the surface and keep pass speed steady, overlapping about half each stroke. Check your spray distance before you commit, and watch temperature and humidity; heat thins paint and cold slows flash time.
Myth: Sanding Alone Fixes a Run Without a Recoat
Sanding levels the sag, but it leaves a dull patch that needs fresh paint. Once the drip is hard, sand it flat, feather the edges, then recoat in thin passes. Skip the recoat and the repair shows through the clear coat.
- Common mistakes: heavy coats, close distance, rushing flash time, skipping primer or surface preparation.
- Fix order: let it dry, sand level, clean, recoat thin.
After the Repair: Care, Cure Time and Prevention Checklist
Full Cure Time Before Washing, Waxing or Polishing
Wait until the coating is fully hard, not just dry to the touch. Air-dry alkyds and enamels need 7 to 14 days at 70°F before washing; catalyzed products and clear coat often need 30 days before waxing or polishing. Rushing traps solvents and softens the film. Test a hidden spot first; if your thumbnail leaves a mark, keep waiting.
Prevention Checklist Tying Distance, Pass Speed and Flash Time to Temperature and Humidity
Hold the can 8 to 12 inches away and keep passes moving at a steady, brisk pace. Stop each coat when it looks slightly wet, not glossy, this prevents most sagging.
- Check temperature and humidity against the label; cool or damp air slows flash time.
- Add 5 to 10 minutes of flash time in humidity; never recoat while tacky.
- Degrease and lightly sand so paint grips evenly.
Preventing Runs on Vertical Surfaces Long Term
Apply several thin coats rather than one heavy pass. Start your stroke off the edge and release the trigger before stopping. Use a quality primer, keep thickness modest, and repaint only after full cure.
Cost: DIY Fix vs Pro Repair
Fixing runny spray paint costs less than a full repaint if you catch it early, but the DIY vs pro choice depends on panel size and finish type.
| Option | Upfront cost | Ongoing cost | Notes |
|---|---|---|---|
| DIY sag removal on one panel | $10 to $40 | $0 | Sandpaper, compound, respirator |
| DIY recoat with extra paint | $20 to $80 | $0 | Includes primer and clear coat |
| Pro spot repair | $150 to $400 | $0 | Panel prep, blend, clear coat |
| Pro full panel repaint | $400 to $900 | $0 | Better for metallic or pearl |
| Pro full vehicle respray | $2,000 to $8,000 | $0 | Only if drips cover many panels |
| Buffing and polishing kit | $15 to $50 | $0 | Foam pads, polish, microfiber |
Ranges assume a typical DIY homeowner or artist working on one to two panels with mid-grade materials, US pricing, and no hidden rust or body damage. Pro costs assume a shop rate of $60 to $120 per hour and standard base coat plus clear coat. Humidity and temperature affect flash time and paint thickness, so costs rise if you need extra coats.
DIY Assumptions: Sandpaper, Compound, Extra Paint, Respirator
Doing it yourself means buying sandpaper for leveling sagging, rubbing compound for buffing, extra paint for the recoat, and a respirator for safety. Budget $30 to $120 total on one panel.
Pro Assumptions: Panel Prep, Blend and Clear Coat
A pro charges for surface preparation, blending the repair into adjacent panels, and clear coat to match sheen. Expect $150 to $900 per panel depending on color and finish.
Typical Ranges and When the Math Favors a Pro
DIY wins on small drips and solid colors. Go pro for metallic, pearl, or large areas where spray distance and recoat control are harder to master.
Common Mistakes That Cause Runs (and How to Avoid Them)
Holding the Can Too Close or Moving Too Slow
Keep the nozzle 8 to 12 inches from the surface and keep the can moving. Shake it for a full minute after the mixing ball rattles, then use steady, overlapping passes with a light trigger pull.
Skipping Flash Time Between Coats
Give each coat time to flash, typically 5 to 15 minutes depending on temperature and humidity. Tacky paint plus a wet new coat equals sagging and drips, so wait until the surface is set but not fully cured.
Over-Priming and Over-Sealing Before Color
Heavy primer and clear coat layers trap solvent and soften the finish underneath. Apply thin, even coats, let them dry fully, and keep total paint thickness modest so the topcoat can bond instead of slide.
- Shake first: a poorly mixed can sprays uneven, wetter coats.
- Trigger control: press fully and release at the end of each pass, never hold mid-pass.
- Pass speed: move at a consistent pace, roughly one foot per second.
- Spray distance: too close floods the surface and causes runs fast.
- Flash time: rushing recoat is the most common cause of sagging.
- Surface preparation: dust and oils stop adhesion and encourage pooling.
- Weather check: high humidity and cold temperature slow drying and invite drips.
- Shake first: a poorly mixed can sprays uneven, wetter coats.
- Trigger control: press fully and release at the end of each pass, never hold mid-pass.
- Pass speed: move at a consistent pace, roughly one foot per second.
- Spray distance: too close floods the surface and causes runs fast.
- Flash time: rushing recoat is the most common cause of sagging.
- Surface preparation: dust and oils stop adhesion and encourage pooling.
- Weather check: high humidity and cold temperature slow drying and invite drips.
When to Ask for Help: Store Expert, Manufacturer or Local Pro
Questions to Ask at the Paint Counter
Ask before buying a second can. Confirm compatibility between existing coats and new product.
- Is new paint compatible with old primer and clear coat? Do you need to scuff before recoating?
- What spray distance, pass speed, and flash time between coats for your temperature and humidity?
- Touch-up product for small drips and curtains?
When the Manufacturer’s Tech Line is the Tech Line
Call when label and counter disagree, or recoating an unknown product. Have batch code, prep steps, and temp/humidity readings ready. Ask about clear coat runs and fixing them without lifting base coat.
Signs a Panel Needs a Pro (Clear Coat Burn-Through Risk, Large Curtains)
Stop sanding if you see color on paper while leveling clear coat, burn-through means repaint. Large curtains or drips on a full panel justify a pro. Get a body shop quote for sanding and recoating, and confirm they’ll match factory paint thickness.
When to ask for help:
- Ask the paint counter expert whether your new paint is compatible with the existing primer and clear coat before recoating.
- Call the manufacturer's tech line with the batch code when you need clear coat run guidance or compatibility confirmation.
- Consult a local pro when sanding clear coat risks burn-through or when large curtains cover a full panel.
How to Fix Runny Spray Paint: Frequently Asked Questions
?How to Fix Runny Spray Paint When the Coat is Already Dry?
Sand it level, then recoat thin. Sanding is the process of shaping and removing surface imperfections with an abrasive, so start with 400-grit wet paper on the sagging and drips, wipe clean, and let it dry fully. Recoat with light passes at the correct spray distance and keep paint thickness low.
?How to Fix Runny Spray Paint Without Stripping the Whole Panel?
Yes, in most cases you can fix runny spray paint without stripping the whole panel. Localized sagging and drips can be leveled by sanding just the affected area, feathering the edges, then recoating with thin passes. Full stripping is only needed when the run is deep, the paint is incompatible, or surface preparation failed underneath, such as contamination or a missing primer.
?How Do I Fix Runny Spray Paint Without Making the Mess Worse?
Stop adding paint and let it flash. Flash time is the short wait between coats while solvents evaporate. Trying to spray over a wet run pushes more material down and creates bigger sags. If it is still wet, dab the drip with a clean brush or cloth, then let it cure before sanding and recoating.
?What Causes Runny Spray Paint, and How Do Spray Distance and Pass Speed Prevent It?
Too much paint applied too wet is the usual cause. Spray distance that is too close and pass speed that is too slow both pile on paint thickness faster than it can set, so gravity wins. Hold a consistent distance, keep passes moving, and respect flash time between coats.
?Does Humidity or Temperature Affect How to Fix Runny Spray Paint?
Yes. Temperature is the physical property expressing hot and cold, and it changes how fast solvents flash. Cold or humid conditions slow curing, so runs stay wet longer and sagging gets worse. Fix in a stable, moderate environment, and avoid recoating until the previous coat has properly flashed.
?When Should I Sand Versus Wipe a Runny Spray Paint Drip?
Wipe only while it is still wet; sand once it has set. A drip is a falling drop of liquid, and once it cures it becomes a raised ridge that must be leveled. Wet paint smears if you wipe hard, so blot gently, then sand and recoat after full cure.
?is It Safe to Fix Runny Spray Paint Over Primer or Clear Coat?
Yes, if the layers are compatible and fully cured. Primer is a preparatory coating applied before painting, and it gives the topcoat something to bite. Sand the run down to a smooth transition, avoid cutting through to bare substrate, then recoat thin. If edges lift, stop and reseal before continuing.
Conclusion
Fixing a runny finish comes down to patience and control, not panic. The opening advice holds: let it dry fully, level the sagging and drips with sanding using 400 to 800 grit, clean the dust, then recoat with thinner, faster passes. Skipping the dry time or sanding too aggressively is how careful planners turn a small drip into a repaint.
Your most useful next step is to test your spray distance, pass speed, and flash time on scrap material before touching the real piece. Watch humidity and temperature too, since both affect how paint settles. Proper primer and surface preparation give you a stable base, and thin clear coat layers keep the finish even.