
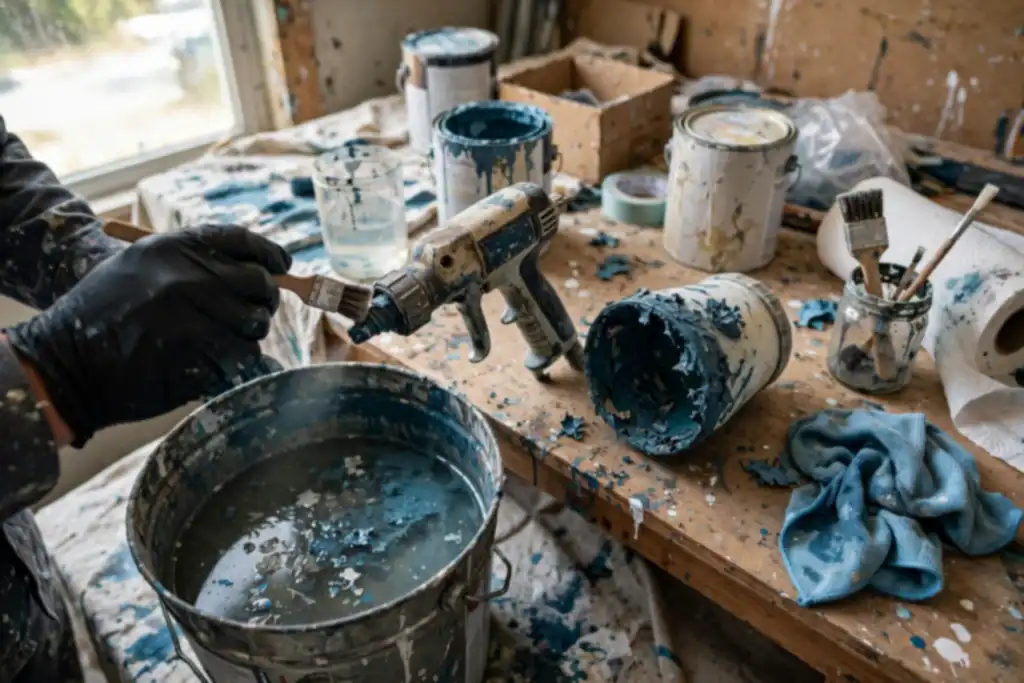
Dried paint in a sprayer is not a death sentence, but you must act before the hardened film bonds permanently to the nozzle, fluid needle, and pump. The fix is careful disassembly, targeted solvent soaking, and flushing every passage clean.
Dried paint doesn’t just clog a sprayer; it can permanently score the fluid needle and ruin the air cap if you force the trigger. Knowing how to clean a paint sprayer with dried paint starts with understanding that hardened latex or solvent-based paint behaves like glue inside narrow passages. You’ll learn the exact order of disassembly, which solvent actually dissolves the dried film, and how to flush without pushing debris into the pump.
This matters because most sprayer damage comes from rushing the job or skipping the filter. A careful planner like you wants to salvage the equipment once, correctly. Below you’ll get the safety steps, the soaking times that actually work, and the reassembly checks that prevent a repeat clog. Expect to spend 30 to 90 minutes depending on how long the paint has cured and how thoroughly you soak.
- Soak the nozzle and air cap in the correct solvent before any scrubbing.
- Never use a wire brush on the fluid needle or nozzle tip.
- Flush the pump and hose with solvent until the spray runs clear.
- Wear solvent-resistant gloves and work in a ventilated space.
- Reassemble dry, check the filter, and test with solvent first.
How to Clean a Paint Sprayer with Dried Paint: the Quick Decision Before You Start
Dried paint does not automatically mean a dead sprayer. Decide whether to clean or replace before you touch a wrench, because the wrong call wastes hours or ruins parts.
| Your situation | What to do | Why |
|---|---|---|
| Latex paint, dried days | Soak and flush | Water softens most latex |
| Oil paint, dried hard | Solvent soak first | Solvent breaks the bond |
| Airless pump clogged | Flush before disassembly | Protects pump internals |
| HVLP gun dried out | Disassemble, soak parts | Small passages clog easily |
| Replacement parts under $30 | Replace and clean rest | Faster than salvage |
| Sprayer near replacement cost | Replace whole unit | Repair labor adds up |
Recommended for this job

Spray Gun Cleaning Kit
Brush set reaches inside gun passages to loosen and lift dried paint residue.
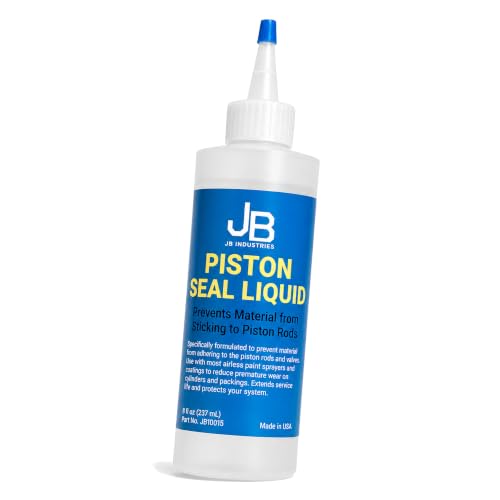
JB Industries Piston Seal Liquid
Lubricant helps seals move freely so dried paint debris can be flushed out.

Multi-Purpose Spray Gun Cleaning Kit
Mini brushes and needles clear dried paint from nozzles and tight spray gun ports.
Is It Worth Cleaning or Cheaper to Replace the Parts?
Clean first if the pump and hose still move freely. Price the wear items before you decide: a replacement filter, nozzle, and air cap typically run $15 to $40 total, while a seized pump means replacement is the smarter call.
The 60-Second Clean-vs-Replace Rule
Set a one-minute timer and compare part cost to your hourly time. If new seals and a fluid needle cost under $30, swap them. If dried paint has locked the pump piston, stop and buy a new unit.
What Changes If the Paint is Oil-Based vs. Latex?
Latex softens in warm water after 20 to 30 minutes of soaking. Oil-based paint needs a solvent matched to the label, since water will not dissolve it. Check the manufacturer’s instructions before soaking any part.
The 5-Minute Diagnostic: What Kind of Dried Paint Are You Actually Dealing with?
The 5-Minute Diagnostic: What Kind of Dried Paint Are You Actually Dealing with?
Match the solvent to the paint before you soak anything. Warm soapy water lifts latex; oil, enamel, and lacquer need a solvent matched to their chemistry, so check the can label or the manufacturer’s chart.
Work from the outside in. Pull the nozzle, air cap, and filter first, then check the fluid needle and hose. If the pump turns freely by hand, you are cleaning parts, not rebuilding the machine.
Know when to stop. Pitted metal, cracked plastic, or paint fused into threads means replacement, not soaking. A new nozzle or filter usually costs $8 to $25, far less than a ruined pump.
Run this five-minute check before you touch a wrench, because the solvent and the parts you need depend on what is actually dried inside.
How Solvents and Soaking Actually Break Down Dried Paint
Why Dried Latex Softens in Warm Water and Ammonia
Warm water rehydrates cured latex, and ammonia helps break the pigment-resin bond. Mix one part ammonia to four parts warm water, soak parts 30-60 minutes, keeping nozzle and filter submerged.
Why Oil-Based Paint Needs Mineral Spirits or Lacquer Thinner
Oil-based paint resists water, so use solvent: mineral spirits for most alkyds, lacquer thinner for epoxies and automotive paints. Work outdoors with nitrile gloves and eye protection. Soak air cap, fluid needle, and nozzle in a sealed container 20-40 minutes, then scrub with a soft brush.
How Mechanical Action Frees the Tight Spots
A cleaning needle clears pinholes solvents cannot reach; never use hardened wire, which scratches the nozzle. Pull the air cap and fluid needle before flushing, backflush hose and pump with clean solvent, follow torque specs on reassembly, and run a final flush.
Reassembly is the step of putting the cleaned sprayer parts back together in the correct order and torque so the tool seals and sprays properly.
Before You Start: Safety Gear, Solvents, and the Parts You'll Remove
Safety Precautions and Protective Gear You Shouldn’t Skip
Wear nitrile gloves and splash goggles before touching anything. Solvent burns skin and eyes fast; dried paint chips fly when scraped. Work outside or in a garage with the door open.
Flammable Solvents and Ventilation: the Indoor Warning
Most paint solvents are flammable, keep flames, pilot lights, and sparks away. OSHA treats solvent vapors as a real hazard in closed rooms. If you smell fumes, stop and ventilate or move outdoors.
Disassembling the Sprayer: Which Parts to Remove
Remove the air cap, nozzle, and fluid needle first, then the filter and hose. Check your manual for exact order. Keep small parts in a tray.
Tools and Materials Checklist: Brushes, Needles, Soaking
Gather a soft brush, cleaning needle, solvent, and shallow soaking tray. A cleaning needle clears tiny nozzle holes without drilling them out. Skip wire brushes on soft parts; they gouge metal and plastic.
- Protective gear: nitrile gloves, splash goggles, solvent-rated respirator.
- Ventilation: work outdoors or with cross-flow air, never sealed rooms.
- Disassembly order: air cap, nozzle, fluid needle, filter, hose, per manual.
- Cleaning needle: frees dried paint without enlarging nozzle openings.
- Soft brush: loosens dried paint on threads and air cap.
- Soaking tray: holds solvent and small parts submerged.
- Solvent: match to paint type, water- or oil-based.
Step-by-Step: How to Clean a Paint Sprayer with Dried Paint
Dried paint can ruin a sprayer, but the fix is mostly patience and the right solvent, done in order to avoid damaging seals or bending the fluid needle.
Step 1: Disassemble and Separate the Wet-From-Dry Parts
Remove the air cap, nozzle, and fluid needle, and sort parts on a tray. Keep gaskets and seals out of harsh solvent, as they swell or crack.
Step 2: Match the Solvent to the Dried Paint
Water-based latex softens in warm soapy water or approved solvent; oil and enamel need mineral spirits or lacquer thinner. Check the manual to avoid damaging the pump housing.
Step 3: Soak Components to Soften the Crust
Submerge metal parts in solvent for 20-60 minutes, longer for thick crust, so a brush can remove paint without scraping.
Step 4: Work a Cleaning Needle or Brush Through Small Openings
Push a cleaning needle through the nozzle and air cap passages, then scrub threads with a stiff brush. Never use hardened wire, which scratches the nozzle.
Step 5: Flush the Pump and Hose
Run clean solvent through the pump and hose until clear, catching waste in a bucket. Clean the filter and screen separately, then reassemble and test spray on cardboard.
Dried paint turns a sprayer into a paperweight, but the fix is mostly patience and the right solvent, done in this order so you don't wreck seals or bend the fluid needle.
Two Special Cases: Oil-Based Paint and HVLP vs. Airless Dried Paint
Cleaning a Sprayer Used with Oil-Based Paint
Mineral spirits or a manufacturer-approved solvent dissolves oil-based residue. Soak the nozzle, air cap, and fluid needle for 20 to 30 minutes, then scrub with a soft brush. Work outdoors or in strong ventilation and keep solvents away from ignition sources.
Cleaning a Sprayer Used with Latex Paint
Warm soapy water handles fresh latex, but hardened latex needs a longer soak. Soak parts 30 to 60 minutes, then flush the pump and hose until the spray runs clear. Never let latex dry inside the pump.
Dried Paint in an Airless Sprayer vs. an HVLP
Airless units hide dried paint in the pump and hose, so flushing matters most. HVLP guns collect it in the air cap and fluid needle, which need careful hand cleaning. Use a cleaning needle on tiny passages and skip drill bits.
Using an Ultrasonic Cleaner for Small Parts
An ultrasonic cleaner lifts dried paint from nozzle and filter crevices that brushes miss. Run small parts 3 to 10 minutes in solvent, then rinse and dry fully. Check the nozzle before reassembly.
Match your cleaning method to the paint chemistry and sprayer type, and the job gets simpler and safer.
Quick Checklist: Confirm You're Ready Before You Loosen a Single Screw
Ventilation, PPE, and Solvent Safety Confirmed
Open the garage door and set a fan to pull fumes away from you before you open any solvent. Wear nitrile gloves, splash goggles, and a respirator rated for the solvent you’re using.
Paint Type Identified and Solvent Matched
Check the label on the paint can so you pick a solvent that actually dissolves the dried paint. Water-based latex usually softens with warm water and dish soap; oil-based and automotive paints need mineral spirits, lacquer thinner, or the manufacturer’s recommended cleaner.
Replacement Parts Priced and on Hand
Price a new nozzle, air cap, filter, and fluid needle before you start soaking anything. Parts typically run $8 to $25 each depending on the sprayer model, and having them ready means a cracked or worn piece won’t stall your reassembly.
Cleaning vs. Replacing Decision Made
Replace instead of clean when a nozzle or fluid needle is bent, chipped, or clogged solid after one honest soaking attempt. Those parts control spray pattern and flow, so a damaged one wastes paint and time no amount of flushing will fix.
- Ventilation and PPE: open the garage door, run a fan, and wear nitrile gloves, splash goggles, and a solvent-rated respirator.
- Solvent match: confirm whether the dried paint is water-based or oil-based before choosing water and dish soap or mineral spirits and lacquer thinner.
- Parts pricing: check the cost of a nozzle, air cap, filter, and fluid needle for your model, typically $8 to $40 each.
- Spare parts on hand: buy replacements before disassembly so a worn or cracked component doesn't stall reassembly.
- Replace, don't clean: swap out any bent, chipped, or permanently clogged nozzle or fluid needle instead of soaking it again.
- Manufacturer guidance: follow the sprayer maker's cleaning instructions for your specific pump and hose.
Troubleshooting: When the Dried Paint Won't Budge
When hardened paint resists your first pass, diagnose before you attack it with force. Most failures trace to skipped disassembly, weak solvent, or a part that should have been replaced.
| Problem | Likely cause | Fix |
|---|---|---|
| Paint still hard after a long soak | Wrong or spent solvent | Switch solvent, soak again |
| Sputtering after cleaning | Loose nozzle or air cap | Reseat and tighten both |
| Uneven fan pattern | Clogged nozzle or filter | Clean needle, replace filter |
| Cracked plastic or swollen rubber | Harsh solvent attack | Replace part, use milder solvent |
| Pump won't move | Dried paint in pump | Soak, then rebuild kit |
| Fluid leaks at fittings | Worn seals or loose hose | Tighten, then replace seals |
| Trigger sticks or drags | Gummed fluid needle | Clean or replace needle |
Soaking softens most dried paint, but stubborn clogs need diagnosis, not force. Check the table, then match your symptom to the fix below.
Paint Still Hard After Soaking?
Your solvent is too weak or already saturated. Soak longer in fresh solvent matched to the coating, and agitate parts periodically.
Sprayer Sputters or Sprays Unevenly After Cleaning
Air is entering or the nozzle is partly blocked. Reseat the air cap, tighten the nozzle, and clear the filter.
Solvent Damaged a Plastic or Rubber Part?
Harsh solvents eat seals and housings. Replace the part and switch to a manufacturer-approved solvent.
Pump Seized: Clean, Rebuild, or Replace?
Try soaking first. If it stays frozen, a rebuild kit beats a new pump; cracked housings mean replacement. Test after reassembly.
Doing It on a Budget Without Cutting Corners
Cheap Solvent Alternatives That Still Work
Hot soapy water handles latex, but dried paint from oil-based coatings needs a real solvent, a liquid that dissolves the hardened film. Mineral spirits or lacquer thinner from a hardware store usually runs less than specialty branded cleaners. Skip gasoline and acetone substitutes unless your manufacturer approves them.
DIY Cleaning Needles and Brushes
A cleaning needle or stiff brush clears small openings like the nozzle, the device that controls fluid flow, and the air cap. Use a wooden toothpick on soft parts and a wire brush on metal only. Never poke a drill bit through the fluid needle seat, since scratches cause permanent leaks.
Eco-Friendly Cleaning Alternatives
Water-based paint residue often softens in warm water with a few drops of dish soap. For light dried paint, a vinegar soak works on some parts, though check the manufacturer’s guidance first. The EPA recommends proper disposal of solvent-soaked rags, so seal them in a metal can.
Why Skipping PPE Isn’t a Real Saving
Solvent fumes and spray mist damage lungs and skin, and OSHA treats them as real hazards. Wear nitrile gloves, safety glasses, and a respirator rated for organic vapors. A solvent-rated respirator costs far less than a clinic visit.
Cost: DIY Cleaning vs. Pro Service vs. Buying New
Cleaning dried paint from a sprayer yourself usually costs less than $30 in supplies, while a pro service runs $75 to $150 and a new mid-range unit starts around $100. The math changes fast if parts are damaged.
| Option | Upfront cost | Ongoing cost | Notes |
|---|---|---|---|
| DIY solvent and brushes | $10 to $30 | None | Assumes you already own basic tools |
| Replacement nozzle or filter | $8 to $25 each | None | Only if clogged beyond cleaning |
| Replacement pump or hose | $30 to $80 | None | Compare to new unit price |
| Pro cleaning service | $75 to $150 | None | Drop-off, 2 to 5 day turnaround |
| Mobile service call | $100 to $200 | None | Convenience premium |
| New mid-range sprayer | $100 to $250 | None | Warranty resets, old unit discarded |
| New pro-grade sprayer | $300 to $800 | None | Only if you spray regularly |
Ranges reflect typical US DIY and small-shop pricing for a standard airless or HVLP paint sprayer. Pro service assumes a local shop, not emergency or specialty restoration. Replacement costs assume you can source parts for your model; discontinued units may force a new purchase.
Solvent, brushes, and a cleaning needle typically run $10 to $30 if you already own basic tools. Add $8 to $25 per replacement nozzle or filter, but only when soaking and disassembly can’t clear the clog.
What a Pro Cleaning or Service Call Runs
A shop cleaning usually costs $75 to $150, with a mobile call at $100 to $200. You pay for convenience and turnaround time, not better results than a careful DIY job.
Break-Even: When Replacement Beats Cleaning
If parts and labor exceed half a new unit’s price, replace it. A damaged pump or hose on a low-cost sprayer rarely justifies repair.
Common Mistakes That Damage Sprayer Components
Most sprayer damage happens after the paint dries. Avoid these five errors to keep your equipment running.
Using the Wrong Solvent on Plastic and Rubber
Strong solvents melt seals and cloud plastic. Use water and mild detergent for latex, mineral spirits for oil-based paint, and lacquer thinner only on metal.
Poking Nozzles with the Wrong Tool
Nozzle openings scratch easily. Use a soft cleaning needle or toothpick, never wire or drill bits, and soak instead of forcing debris through.
Skipping the Filter and Screen
A clogged filter starves the pump. Rinse the filter and gun screen in the correct solvent every cleaning, and replace if stiff or torn.
Reassembling Wet or Dirty Parts
Moisture and grit cause corrosion and poor seals. Dry all parts fully, clean threads, and apply compatible lubricant before reassembly.
Storing the Sprayer Without a Final Rinse
Residue hardens into clogs. Finish with a clean solvent flush, drain the hose, and store with a few drops of light oil in the pump.
When to Call a Pro (and When to Just Buy New)
Real Warning Signs: Seized Pumps, Cracked Housings, Damaged Seals
Stop cleaning and get professional help when hardened paint has caused structural damage, not just clogging, solvent and soaking won’t fix broken metal or rubber.
- Stop if the pump won’t turn by hand or grinds after soaking.
- Call a pro for cracks in the housing or air cap.
- Replace damaged seals and the fluid needle instead of cleaning them.
- Don’t power on a sprayer that smells like burning or trips a breaker.
Wear nitrile gloves and eye protection, and work near ventilation.
Preventing Future Dried Paint Clogs with Proper After-Use Cleaning
Flush immediately after every job. Run the correct solvent through pump, hose, and nozzle until clear, then clean the filter and air cap with a cleaning needle.
A Preventive Maintenance Schedule That Avoids Dried Paint Buildup
Fully disassemble and soak every few projects. After each use, flush and wipe down; monthly, inspect the filter and air cap.
Storing the Sprayer Properly After Cleaning
Store clean and dry with a light coat of lubricant on seals in a temperature-controlled space. Leave the fluid needle and air cap loose to prevent sticking.
How to Clean a Paint Sprayer with Dried Paint: Frequently Asked Questions
?Can Dried Paint Inside a Paint Sprayer Ruin It If I Wait Too Long to Clean a Paint Sprayer with Dried Paint?
Yes, waiting too long to clean a paint sprayer with dried paint can ruin it permanently. Dried paint hardens into a rock-like blockage that can crack plastic parts, seize the fluid needle, and score the pump piston. The longer it sits, the more solvent and soaking time you need. If the paint fully cures, some components may not be salvageable, so clean within a day of use whenever possible.
?How Do I Clean a Paint Sprayer with Dried Paint Without Damaging the Nozzle or Air Cap?
Soak the nozzle and air cap in the correct solvent, then clear them with a soft cleaning needle, never a drill bit or wire. Metal tools scratch the precision passages and ruin the spray pattern. Keep the cleaning needle matched to the nozzle size, and never poke the fluid needle tip. Patience beats force when you clean a paint sprayer with dried paint on these delicate parts.
?What Solvent Should I Use to Clean a Paint Sprayer with Dried Paint?
Match the solvent to the paint when you clean a paint sprayer with dried paint: warm soapy water for latex, mineral spirits or lacquer thinner for oil-based, and the manufacturer's recommended thinner for automotive coatings. Check your manual first, because some solvents attack seals and plastic. When in doubt, start with the mildest option and soak longer rather than reaching for the harshest chemical.
?Why Does Soaking Fail to Clean a Paint Sprayer with Dried Paint Sometimes?
Because solvent only dissolves what it can reach growth. Thick paint plugs, sealed caps, and packed filters block penetration, so the outer layer softens while the core stays hard. Change the solvent once it gets cloudy, agitate parts, and disassemble further so liquid contacts every surface. Soaking is a first step, not the whole job.
?is It Safe to Flush a Paint Sprayer with Dried Paint Still in the Hose?
No. Flushing a hose full of hardened paint pushes debris into the pump and gun, causing bigger clogs. Soak the hose or replace it if paint has cured solid. For light residue, flush with clean solvent after soaking. Never run a dry pump or force solvent through a blocked line under high pressure.
?What Mistakes Should I Avoid When I Clean a Paint Sprayer with Dried Paint?
Don't skip disassembly, don't soak seals or electronics in solvent, and don't reassemble wet parts. Forcing stuck components, using the wrong solvent, and ignoring the filter are the top damage causes. Label parts as you remove them, and let everything dry fully before reassembly so solvent doesn't contaminate fresh paint.
?When Should I Give up on Cleaning a Paint Sprayer with Dried Paint and Buy a New One?
Give up when the pump piston is seized, plastic housings are cracked, or the repair cost approaches half the price of a new unit. For inexpensive homeowner sprayers, a full day of soaking and parts often isn't worth it. For pro-grade equipment, a service center is usually the smarter call.
Conclusion
Getting hardened paint out of a sprayer comes down to two habits: match the solvent to the paint and start the soaking before seals and the nozzle suffer permanent damage. Skip the shortcuts, wear gloves and eye protection, and work in a ventilated space, since most solvents are harsh. A careful disassembly and full flush of the pump, hose, and filter will save you a replacement unit.
Your best next step: once the parts are clean and dry, inspect the air cap, fluid needle, and filter for residue, then do a full reassembly and run a quick test spray with water or the appropriate thinner.