
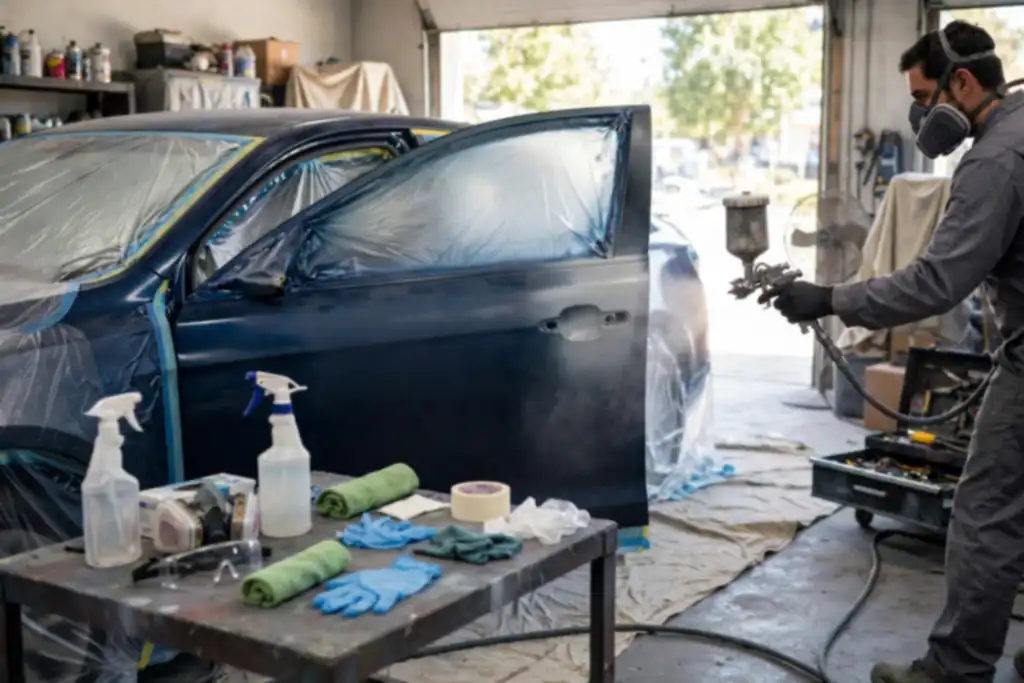

Yes, you can spray paint a car without sanding, but only if the existing finish is already clean, intact, and dull enough for proper adhesion. Skip sanding on a glossy or peeling surface and the new paint will fail.
Choose between a shortcut that might last a season and a proper job that lasts years. The question can you spray paint a car without sanding comes down to one thing: adhesion, which is how well the new paint sticks to the old surface. Without sanding, you remove the mechanical grip that keeps paint from peeling, so you must rely on a chemical bonding agent or a very clean, dull surface.
You will learn when skipping sanding is acceptable, what surface preparation still matters, and how to avoid the mistakes that cause peeling, uneven texture, and wasted spray cans. The goal is a smooth finish that holds up, not a quick coat that fails in months.
Can You Spray Paint a Car Without Sanding? the Short Answer
Yes, you can spray paint a car without sanding, but only in a narrow set of situations. Skip the prep on the wrong surface and you will watch your work peel within months.
| Situation | What it means | What to do |
|---|---|---|
| Fresh primer, clean and cured | Paint has a grippy base to bond to | Scuff lightly, then spray |
| Glossy factory clear coat | Slick surface, poor adhesion | Sanding is required |
| Small rock chip touch-up | Tiny area, factory paint intact | Clean, then use spray cans |
| Peeling or flaking paint | Old layers are failing | Sand back to solid paint |
| Rust spots | Corrosion under the surface | Remove rust, apply primer |
| Trim, wheels, or accents | Small parts, easy to redo | Clean and scuff first |
| Full panel respray | Large area, high stakes | Surface preparation is mandatory |
Recommended for this job
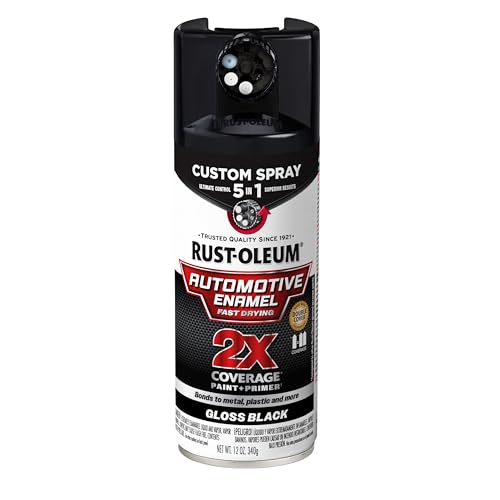
Rust-Oleum 2X Automotive Enamel 5-in-1 Spray
Enamel topcoat bonds directly over prepared surfaces, reducing need for bare-metal sanding.
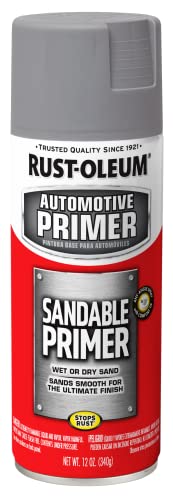
Rust-Oleum Automotive Sandable Primer Spray
Sandable primer fills imperfections and creates a paintable base without full stripping.

Rust-Oleum Automotive Adhesion Promoter Spray
Adhesion promoter helps paint stick to unsanded plastics and existing finishes.
Sometimes, but almost never across a full car. Sanding is the process of shaping and removing surface imperfections with an abrasive medium, and it does two jobs: it creates a mechanical grip for adhesion (how dissimilar surfaces stick together) and it flattens the panel so spray paint lays down evenly.
What ‘Sanding’ Really Means in Car Painting
It is not just roughening a panel. Real surface preparation removes old wax, loose car paint, and peeling edges, then leaves a consistent scratch pattern. That pattern is what fresh primer and topcoat lock onto.
The One Condition That Makes It Possible
You can skip sanding only when the existing finish is sound, clean, and already dull or freshly primed. Even then, a light scuff with 600 to 800 grit costs 10 to 15 minutes per panel and protects your work.
Why Most Painters Say ‘It Depends’
Glossy clear coat and slick panels reject paint. Without tooth, spray cans or a paint gun deposit a film that chips and lifts within 6 to 12 months outdoors. Add masking, correct drying time, and a dust-free space, and you get a smooth finish that lasts.
Masking means covering glass, trim, and gaps with tape and sheeting so spray paint does not drift onto surfaces you want to protect.
The Hidden Costs of Skipping Sanding: Why Saving Time Now Costs More Later
Premature Failure: When Peeling Starts
Adhesion, the grip that holds coating to panel, fails on glossy or wax-contaminated surfaces. Without sanding to create a mechanical tooth with 320 to 400 grit, spray paint can start lifting at edges and chips within 6 to 12 months. That is a repaint, not a touch-up.
A skipped sanding step also leaves orange-peel texture and sanding scratches visible under the color coat. No polish removes texture buried under cured car paint.
Rework Expenses You Didn’t Budget for
Stripping a failed coat means chemical stripper, 80 grit paper, primer, and fresh base plus clear coat, roughly 2 to 3 times the cost of the original materials. A full sanding prep runs about $40 to $80 in paper and blocks for a panel, plus one weekend of labor.
Add masking tape, tack cloths, and 24 to 48 hours of drying time between coats, and the shortcut loses its appeal.
Resale Value: What Buyers See (and Don’t)
Buyers run a hand over panels and check door jambs for overspray and lifting edges. Peeling signals neglect and drops offers by hundreds. A smooth finish from proper surface preparation protects value.
With a paint gun or spray cans, treat prep as the job. Do it once with the right grit, and you skip the second round.
Your No-Sanding Action Plan: Step-by-Step Spray Painting
Skip the sandpaper and you must replace what it does: clean the surface, give the paint something to grab, and build thin layers that cure hard. Do these five steps in order and a no-sanding respray can hold up. Cut a corner and you get peeling, blotches, or a finish that never hardens.
| Action | Why it helps | How to start |
|---|---|---|
| Clean and degrease | Removes oils that block adhesion | Wash, then wipe with wax remover |
| Mask and protect | Keeps overspray off glass and trim | Use painter's tape and plastic sheeting |
| Apply primer or adhesion promoter | Gives spray paint a bonding layer | Two or three thin coats, follow label |
| Spray thin, even coats | Prevents runs and uneven color | Several light passes, not one wet coat |
| Apply clear coat | Adds gloss and protects car paint | Two or three coats within the window |
| Let it cure fully | Prevents soft paint and early peeling | Wait days, not hours, before washing |
Start with a full wash, then wipe every panel with a wax and grease remover. Dirt and oil kill adhesion, so this step is not optional.
Mask glass, trim, and gaps with tape and sheeting. Spray drifts, so protect more than you think you need.
Use primer or an adhesion promoter made for car paint. Two or three thin coats beat one heavy pass.
Keep spray cans or a paint gun moving in light, even coats. Rushing gives runs and a rough surface.
Finish with clear coat, then respect the label’s drying time. Full cure takes days, not hours.
Tools and Materials You'll Need for a No-Sanding Paint Job
Spray Paint Options: Cans vs. Gun
Aerosol cans suit small panels and touch-ups ($15, $30 each); a paint gun with compressor gives control and consistent coverage on full-body work (basic setup $100, $300). Automotive-labeled cans cure harder than general-purpose; a gun lets you mix primer and clear coat to manufacturer’s ratio.
Essential Safety Gear
Respiratory protection is mandatory, even outdoors. Car paint and clear coat contain isocyanates and solvents that harm lungs, wear an organic-vapor respirator, not a dust mask. OSHA expects supplied-air or cartridge respirators.
- Organic-vapor respirator with fresh cartridges
- Nitrile gloves and safety glasses
- Coveralls to keep overspray off skin and clothes
Spray in a ventilated space away from flames and pilot lights; windy outdoor spraying wastes product and risks contamination.
Prep and Finishing Supplies
Wax and grease remover is non-negotiable, adhesion fails on oily panels. Masking tape and paper keep overspray off glass, trim, and tires. A tack cloth lifts dust between coats; follow the label for drying time, typically 15-30 minutes between coats and 24 hours before handling.
When You Can't Skip Sanding: Exceptions and Limits
Peeling, Chalky, or Cracked Paint
If the existing finish is peeling, chalky, or cracked, you must sand. A failing layer cannot support new spray paint, and adhesion (how well surfaces stick together) will be poor. Scuff and feather the edges until the surface is sound, or the new coat will fail with the old one.
Rust and Body Damage
Rust and body damage always require sanding. Abrasion is the process of removing surface imperfections with an abrasive medium, and it’s the only way to get down to bare metal. Treat rust, apply primer (a preparatory coating that helps paint bond), then sand smooth before topcoat. Skipping this step traps moisture and guarantees peeling.
Previously Repainted Surfaces with Unknown History
When you don’t know what’s under the current finish, sand a test spot first. Unknown layers may be incompatible with your spray paint, causing wrinkling or lifting. A light pass with fine grit reveals the truth and gives the new car paint a mechanical bite. If it reacts badly, stop and strip it properly.
When It Works: Conditions for a Successful No-Sanding Job
Sound, Adhesion-Ready Existing Paint
You can skip sanding only when the current finish is intact, chalky-free, and still gripping the panel. Sanding normally creates a scratched profile so fresh spray paint can bite into the surface; that mechanical grip is what adhesion depends on. If the old car paint is glossy, cracked, or lifting, no shortcut will hold.
Test a hidden spot first: press tape down, pull it off, and check for chalky residue or flaking. Clean the panel with a wax and grease remover, then let it dry fully before you spray.
Small Areas and Touch-Ups
Spot repairs and trim pieces are the safest candidates for a no-sand approach. A small scuff or mirror cap holds less stress than a full panel, so a light scuff with fine grit followed by a quality primer is often enough. Keep the repair area masked tight with masking tape to limit overspray.
Using High-Quality Adhesion Promoters
A dedicated adhesion promoter can substitute for some of the mechanical tooth sanding provides, but only on sound substrates. Apply it per the manufacturer’s directions and respect the stated drying time before spray cans or a paint gun go on. Finish with a clear coat for a smooth finish, and watch for peeling within the first weeks as your early warning sign.
How to Tell If Your Car's Paint is Ready for No-Sanding Spray Painting
Three checks tell you whether spray painting over the existing finish will hold or fail.
Do the Tape Test
Press masking tape onto a clean, dry panel, then peel it off at a sharp angle. Flakes on the tape mean adhesion is weak and sanding is not optional.
Check for Chalkiness and Peeling
Rub a gloved fingertip across the panel. A chalky residue or lifting edges around chips means the old car paint is breaking down, so sand those areas before any spray paint goes on.
Assess the Gloss and Texture
Mist water on the panel and watch how it beads, then compare gloss between panels. Dull or textured spots need a light scuff with 600 grit to give primer and clear coat something to grip.
Run these three quick checks before you commit to a no-sand shortcut, because skipping surface prep on the wrong panel is how peeling starts.
Is It Possible to Spray Paint a Car Without Sanding It First?
What the Experts Say
Yes, it is possible, but professionals call it a shortcut with consequences. Sanding creates the mechanical grip that adhesion depends on. Without it, even quality spray paint struggles to bond to old car paint. Manufacturers of spray cans and paint gun systems specify a scuffed surface; skipping it voids durability. A primer helps but needs a sound base.
Real-World Success Stories (and Failures)
Some DIYers report decent results on small touch-ups over clean, intact paint, usually involving light scuffing with fine grit. Failures are more common: paint over glossy panels chips at edges and lifts near trim. Poor surface preparation shows imperfections, so you rarely get a smooth finish. Peeling and flaking often appear within months, especially on sun-exposed horizontal panels.
The Verdict: Possible but Not Always Advisable
Expect a shorter lifespan than a properly prepped panel and budget for rework. To do it right once, scuff the surface, apply primer, plan masking, and respect drying time between coats. A clear coat adds protection. The extra prep is cheaper than stripping a failed finish later.
A Real-Life Scenario: Spray Painting a 10-Year-Old Sedan Without Sanding
Assessing the Paint Condition
Washing the sedan and running your hand over the panels is the first step. If the existing car paint is chalky, cracked, or already peeling, skipping the abrasive step is a mistake that will cost you later. A quick wipe with a tack cloth tells you how much dust and wax you are dealing with.
The Prep Process
You still need masking and a degreaser, even without the abrasive pass. Tape off trim, glass, and badges, then wipe every panel with a wax and grease remover so the spray paint can bond. Without that cleaning step, adhesion, the ability of the new coating to stick to the old surface, fails fast.
Painting and Curing
Lay down a thin coat of primer first, then build light passes of spray paint rather than one wet coat. Keep the spray cans or paint gun moving to avoid runs, and respect the drying time on the label between coats. A clear coat on top seals the job and adds UV protection.
The Final Result: What to Expect
Expect a decent look at five feet and a shorter lifespan than a sanded job. Without a scuffed surface, the new layer sits on top rather than locking in, so peeling and chips show up sooner, often within a year or two of outdoor parking.
Doing It on a Budget Without Cutting Corners
Where to Save (and Where Not to)
Trimming costs on masking supplies and shop rags is possible, but skimping on preparation will cost you more later. Skipping sanding saves a few hours up front, yet poor adhesion means the spray paint may lift within months.
Spend your money on a quality primer and clear coat. Those two layers protect the car paint and give you a smooth finish that lasts.
- Save on: generic masking tape, drop cloths, extra spray cans
- Don’t skip: sanding supplies, primer, clear coat, proper respirator
DIY vs. Professional Costs
A DIY job with sanding typically runs $150 to $400 in materials, including grit paper, primer, spray cans or a basic paint gun setup. Skipping sanding might shave $30 to $60 off supplies but risks a redo.
Professional resprays usually start around $1,000 and climb from there, so careful surface preparation protects your investment either way.
Long-Term Savings from Proper Prep
Proper sanding and priming prevent peeling, which means you won’t repaint the same panel next season. That saved labor and material adds up fast.
Treat drying time and adhesion as non-negotiables. A finish that sticks the first time is the cheapest finish you’ll ever apply.
Common Mistakes That Ruin a No-Sanding Paint Job
Skipping Degreasing
Wipe every panel with a proper wax and grease remover before you touch a spray can or paint gun. Oils, silicone, and road film block adhesion, which is simply how well the new paint sticks to the old surface.
Spraying Too Thick
Lay down light, even coats and let each one flash off. Heavy passes trap solvent, cause runs, and set you up for peeling later.
Ignoring Weather Conditions
Paint in mild temperatures with low humidity and no wind. Cold or damp air slows drying time and dulls the finish.
Using the Wrong Primer
Match the primer to the existing car paint and the topcoat. A primer is a preparatory coating that gives the color something to bite into, so the wrong one means poor adhesion and peeling.
- Clean first: degrease, then wipe dry with clean lint-free cloths.
- Mask trim, glass, and gaps before any spray paint goes on.
- Scuff lightly with fine grit where you can, even on a no-sanding job.
- Test your primer and color on a hidden panel first.
- Keep coats thin and respect drying time between passes.
- Finish with clear coat for a smooth finish and protection.
- Clean first: degrease, then wipe dry with clean lint-free cloths.
- Mask trim, glass, and gaps before any spray paint goes on.
- Scuff lightly with fine grit where you can, even on a no-sanding job.
- Test your primer and color on a hidden panel first.
- Keep coats thin and respect drying time between passes.
- Finish with clear coat for a smooth finish and protection.
When to Call a Pro: Warning Signs You Shouldn't Ignore
Extensive Rust or Body Damage
Stop and call a pro if rust has eaten through panels or the body is bent. Sanding alone won’t fix structural damage, and spray paint over rot will bubble and flake within months. A shop can weld, straighten, and prime before any car paint goes on.
Previous Poor Paint Jobs
If the current finish is cracking, lifting, or peeling, a pro needs to strip it first. Fresh spray paint over failing layers traps solvents and causes adhesion failure, so your new coat fails too. Proper surface preparation here means removing the old film, not scuffing it.
Lack of Safe Ventilation
Walk away if you can’t spray in a well-ventilated space away from flames and pilot lights. Car paint and spray cans release fumes that harm lungs and are flammable, so OSHA-style airflow matters. Call a booth-equipped shop if your garage has no fan or open airflow.
- Stop if rust has gone through a panel or the frame is bent.
- Stop if the existing finish is cracking, lifting, or peeling.
- Stop if you have no safe, ventilated space to spray.
- Stop if you cannot mask glass, trim, and lights properly.
Can You Spray Paint a Car Without Sanding: Frequently Asked Questions
?Can You Spray Paint a Car Without Sanding If the Existing Paint is Already Smooth and Intact?
Yes, in that narrow case you can. If the current car paint is glossy, unbroken, and free of chips, a thorough chemical cleaning and a scuff pad may give enough adhesion for spray paint to hold. But any peeling, cracking, or exposed primer means sanding is not optional. Inspect first, then decide.
?Can You Spray Paint a Car Without Sanding and Still Get a Smooth Finish?
Yes, you can spray paint a car without sanding and still get a decent finish if you prepare carefully. Clean the surface aggressively with a degreaser, apply a bonding primer, and keep your coats thin. Without sanding, you rely on primer to fill minor texture and on light, even passes with the spray gun or quality cans. Respect drying times between coats and work in a dust-free space.
?Why Does Skipping Sanding Cause Peeling and Poor Adhesion on a Spray Painted Car?
Because spray paint needs a textured, clean surface to grip. Sanding creates that mechanical bite; without it, paint sits on top of contaminants and gloss instead of bonding. Adhesion fails first at edges and chips, then peeling spreads. Once that starts, the only fix is stripping and doing the surface preparation correctly.
?What Grit Should You Use If You Decide to Sand Before You Spray Paint a Car Without Sanding the Whole Panel?
Use 320 to 400 grit for scuffing intact paint before primer, and 600 to 800 grit for blending edges. You do not need to strip the whole panel; the goal is a uniform dull surface, not bare metal. Keep the grit consistent, wipe off dust, and spot-prime any bare areas before car paint goes on.
?is It Safe to Spray Paint a Car Without Sanding in a Garage or Driveway?
It can be done, but safety comes first. Spray cans and paint gun overspray are flammable and toxic, so work outdoors or in a ventilated space, wear a respirator rated for solvents, and mask glass, trim, and lights. Keep ignition sources away and let each coat flash off fully to avoid trapping solvent.
?When Does a No-Sanding Spray Paint Job on a Car Actually Hold up?
It holds up when the base is sound, clean, and dulled just enough for adhesion, and when you use a proper primer and clear coat. It fails when the old paint is chalky, cracked, or greasy. Treat no-sanding as a shortcut for solid surfaces only, not a universal fix.
?Can You Spray Paint a Car Without Sanding and Skip the Primer and Clear Coat Too?
No, that combination is where most DIY jobs fail. Primer gives spray paint something to bond to, and clear coat protects the color from sun and washing. Skipping both saves an hour but costs you durability, gloss, and resistance to peeling. Do the surface preparation, prime, paint, then clear.
Our Thoughts
So yes, you can skip the abrasive step and still spray paint a car, provided the current finish is clean, intact, and dull enough for adhesion, which is simply how well the new coat sticks to the old surface. Glossy, peeling, or contaminated panels will reject car paint no matter how carefully you apply it. If the surface fails any of those checks, sanding, the process of abrading the surface for grip and smoothness, stops being optional.
Your most useful next step is a simple adhesion test: clean a small hidden spot, apply a light coat of spray paint, let it cure for the stated drying time, then try to lift the edge with tape or a fingernail. If it flakes, plan on sanding with the right grit before you touch the rest of the car.