
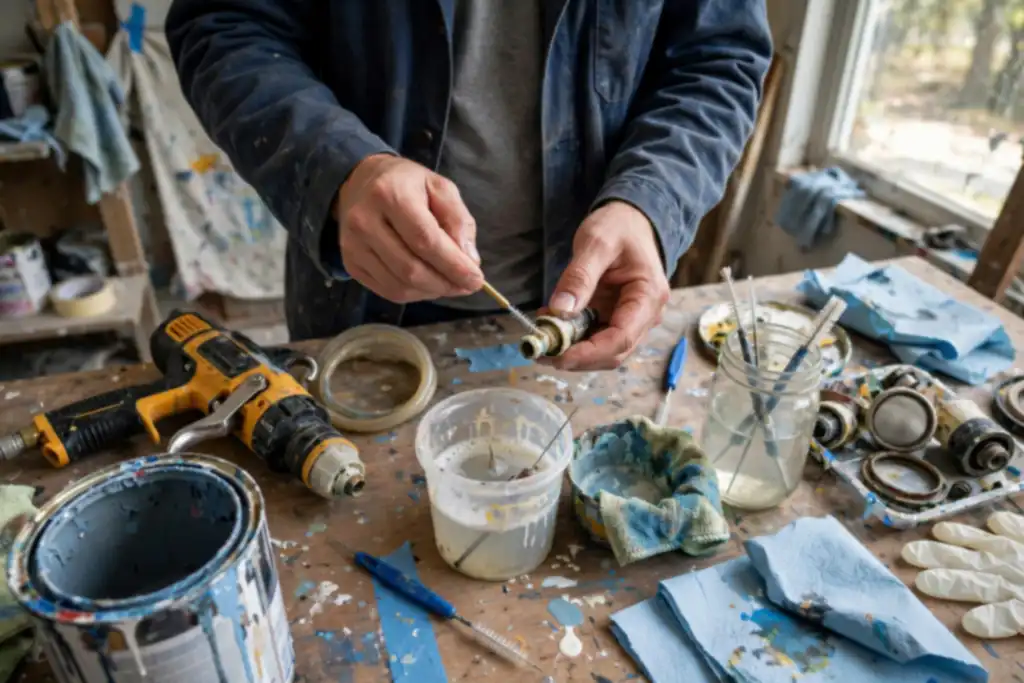

To unclog a paint sprayer, stop spraying, relieve pressure, then remove and soak the tip and filter and flush the hose with the right solvent. Most clogs come from dried paint or unstrained paint blocking the nozzle and filter screen.
Paint left in a sprayer for even a day can harden into a clog that stops your project cold. Knowing how to unclog a paint sprayer starts with safety: always wear safety glasses and relieve pressure before touching the spray tip or filter screen. You will learn the step-by-step for airless, HVLP, and handheld models, including flushing the system and soaking parts.
Most clogs come from skipping strain paint and using the wrong nozzle size. Follow these steps once and you will avoid common mistakes that turn a five-minute fix into a costly repair.
- Shut off the pump, trigger the gun, and lock the safety to release pressure.
- Backflush the system before soaking parts or replacing the spray tip.
- Clean the filter screen and pickup tube; strain paint before every refill.
- Match nozzle size to coating and use paint thinner only for solvent-based paints.
- Wear safety glasses; never point the gun at skin or test with fingers.
How to Unclog a Paint Sprayer: the Quick Decision Before You Start
Before you touch a wrench or a solvent, figure out what's actually blocked and what kind of machine you're holding. That 60-second call prevents most ruined tips, cracked pump parts, and messy cleanups.
| Your situation | What to do | Why |
|---|---|---|
| Sprayer won't prime at all | Check pickup tube and filter screen first | Starvation mimics a clog |
| Weak, spitting spray pattern | Clean or swap the spray tip | Partial tip clog is common |
| Trigger feels stiff or dead | Stop, relieve pressure, inspect | Pressurized paint is dangerous |
| Paint sat in unit for days | Soak parts, then flush the system | Dried paint bonds hard |
| Using thick or old paint | Strain paint, then thin slightly | Debris clogs filters fast |
| Water-based paint in airless sprayer | Flush with warm water, then thin | Cheapest, safest first pass |
| Oil-based or car paint clog | Use matching paint thinner | Solvent must match the paint |
| Repeated clogs after cleaning | Replace worn filter screen or tip | Worn parts pass debris |
Recommended for this job


3/ Female NPT in-Line Strainer
Inline strainer filters debris before it enters the sprayer, preventing nozzle clogs.

Spray Can Nozzle
Replacement nozzles restore spray flow when the original tip is clogged or damaged.
Start by naming your machine and your clog. A paint sprayer clog usually lives in one of three places: the spray tip, the filter screen, or the internal passage between the pickup tube and the pump. Find it before you fix it.
A pickup tube is the tube that draws paint from the cup or container up into the pump.
Soak, Flush, or Replace? a 60-Second Decision Rule
If the sprayer sat with paint inside for more than a day, soak the tip and screen in paint thinner, a solvent that dissolves paint, for 15 to 30 minutes, then flush. If it clogged mid-job with fresh paint, clean the tip and screen first. Replace any part still blocked after one soak.
Which Sprayer Are You Holding: Airless, HVLP, or Handheld?
Identify the type before choosing a method. An airless sprayer pushes paint at 1,500 to 3,000 psi, so release pressure and backflush before opening anything. An HVLP sprayer runs 4 to 10 psi and clogs most at the nozzle size and needle. A handheld unit usually needs only the tip and cup screen cleaned.
Backflush means running solvent backward through the sprayer to push loosened paint out the way it came.
Wear safety glasses every step. Never point a tip at skin, and keep paint thinner away from ignition sources, matched to your coating. Strain paint through a 190-micron bag before refilling to stop repeat clogs.
The 5-Minute Diagnostic: is It Really a Clog?
Four Signs Paint Flow is Blocked
A clogged nozzle shows as spitting, pulsating, a one-sided fan, or no spray at all, meaning paint isn’t passing cleanly through the spray tip. Watch your pressure gauge: a spike above the normal setting or a sudden drop signals a restriction, not a pump failure.
- Sputtering or an uneven fan pattern at the spray tip
- Spray quits after 3 to 5 seconds of trigger pull
- Gauge pressure spikes or drops 200 to 500 PSI off normal
- Paint weeping from the tip with the trigger released
Check the Tip, Filter, and Hose in That Order
Start at the spray tip, then the filter screen, then the hose, since most blockages sit in the first two. Work in this order and you’ll skip unnecessary teardown on an airless sprayer or HVLP sprayer.
- Soak the spray tip in paint thinner, a solvent that dissolves paint, for 10 to 15 minutes.
- Rinse the filter screen under warm water until light passes through.
- Disconnect the hose and probe both ends for hardened paint.
- Wipe the pickup tube to confirm it’s clear.
When the Problem is the Paint, Not the Sprayer
Old, thick, or poorly mixed paint mimics a clog, so rule it out before you tear anything apart. Strain paint through a 190-micron mesh bag before every fill, thin only to the manufacturer’s ratio, and match nozzle size to coating. Wear safety glasses, and never point a gun at skin.
Run these quick checks before you disassemble anything, so you fix the real problem once.
How Paint Actually Moves Through a Sprayer
The Path from Cup to Nozzle
Paint leaves the cup or hopper, passes through a pickup tube, gets pulled by the pump, hits a filter screen, then reaches the spray tip. Any weak link stops flow. Know your sprayer: airless pushes fluid at high pressure, HVLP uses high-volume low-pressure air, handhelds combine a small pump with a compact cup.
Each design routes paint differently. Airless units rely on a fine filter screen and reversible tip. HVLP guns clog at the fluid needle or nozzle opening. Handhelds block inside the pickup tube.
Where Clogs Like to Hide
Most blockages sit in three spots: the spray tip, filter screen, and internal passages between pump and gun. A clogged tip causes sputtering or a lopsided fan; a dirty screen cuts pressure everywhere.
Dried paint is the usual culprit, hardening inside the pickup tube and pump, then breaking loose mid-job. Strain paint before every fill and flush after each use.
Before You Start: Safety Gear, Ventilation, and the Right Solvent
Safety Gear and Ventilation You Should Not Skip
Put on safety glasses before you loosen anything, because trapped solvent and paint spray back at pressure. Work outside or open two windows and run a fan pulling air out, since solvent vapors build fast in a garage.
Match the Solvent to Latex vs Oil-Based Paint
Latex cleans up with warm water and a little dish soap; oil-based paint needs paint thinner, a solvent that dissolves paint. Keep the right one in a labeled cup so you do not cross-contaminate parts.
Tools to Have Within Arm’s Reach
Set out your tools before you touch the unit so you are not hunting mid-job with solvent on your hands.
- Wrench for the spray tip and clogged nozzle: the manufacturer’s tool fits best.
- Soft brush and toothpicks: clear the spray tip and filter screen without scratching.
- Catch pan and rags: contain drips from the pickup tube and pump.
- Gloves rated for your solvent: thin latex gloves fail against thinner.
- Replacement filter screen in the correct nozzle size: a spare saves a second trip.
- Put on safety glasses before loosening any fitting.
- Ventilate with outside air or a fan pulling fumes out.
- Use warm soapy water for latex, paint thinner for oil-based.
- Keep the correct wrench for the spray tip and clogged nozzle.
- Add a soft brush and toothpicks for the spray tip and filter screen.
- Have a catch pan, rags, and solvent-rated gloves ready.
- Keep a spare filter screen matched to your nozzle size.
Step-by-Step
Begin with the simplest fixes and escalate only if paint still won’t flow. Pressure first, parts second, flush last.
- Relieve the pressure. Wear safety glasses and trigger the gun into a waste bucket until no paint sprays. Never open a fitting on a pressurized airless sprayer.
- Clear the tip. Remove the spray tip and soak it in paint thinner for 10-15 minutes, then poke the orifice clear with a soft brush or tip pick.
- Rinse the filter screen. Pull the screen and rinse it under solvent until light passes through evenly. Replace it if the mesh stays matted.
- Check the pickup tube. Loosen the tube and look for dried paint or debris at the inlet. Flush with clean solvent before refitting.
- Backflush the pump. Run solvent backward through the system for 30-60 seconds to push loosened material out.
- Reassemble and test. Match the nozzle size to your coating, strain paint through a mesh bag, and spray scrap material to confirm steady flow.
Work through these steps in order, from the least invasive fix to a full flush, so you clear the blockage without damaging seals or skipping a safety check.
If Flushing Fails: Replace the Tip or Part Instead of Fighting It
When to Replace vs. Repair Parts
Replace the spray tip or filter screen once it shows wear, cracks, or paint that soaking will not dissolve. Repair kits and cleaning are fine for soft clogs, but a damaged tip or torn screen will keep failing.
Pick the Correct Nozzle Size for Your Paint
Match the nozzle size to the coating thickness so the pump is not strained. Thin stains and sealers take a small tip, while thick latex needs a larger opening. Check the manufacturer’s chart before you spray.
Thin the Paint for Proper Flow Before You Spray Again
Thin the paint only as much as the label allows, adding paint thinner in small amounts and stirring well. Strain paint through a mesh bag first, then test the pattern on scrap cardboard.
- Wear safety glasses when handling thinner or backflushing.
- Flush the system with the right solvent after every job.
When clearing a clog stops working, swap the worn part instead of forcing it, then set up the sprayer so the blockage does not come back.
Still Spitting, Sputtering, or Dry? Troubleshooting Persistent Clogs
A clog that keeps returning means debris is still upstream of the spray tip, so clean the whole path, not just the nozzle.
| Problem | Likely cause | Fix |
|---|---|---|
| Clog keeps returning | Debris in the pickup tube or filter screen | Clean the screen and tube, then strain paint |
| Spray pattern uneven | Partially blocked spray tip | Soak the tip, then backflush the system |
| Sprayer pulsing | Clogged filter screen or worn nozzle size | Swap the screen, check the tip size |
| Dry, spitting spray | Air leak at the nozzle or loose tip | Tighten the tip and check seals |
| Paint drips from tip | Worn nozzle or too-thin paint | Replace the tip, thin per the label |
| Nothing sprays at all | Dried paint inside the pump or valve | Soak parts in paint thinner, flush |
| Hard, crusted residue | Paint left sitting in passages | Soak parts, then flush the system |
Clog Keeps Coming Back After Cleaning?
Debris is still hiding in the pickup tube or filter screen. Pull the screen, rinse it, and strain paint before refilling. On an airless sprayer, a dirty screen pushes grit straight to the spray tip.
Spray Pattern Uneven or Pulsing?
A partly blocked spray tip or a tired filter screen causes both. Soak the tip in paint thinner (a solvent that dissolves paint), then backflush. Replace the screen if it stays gummed.
Dried Paint Inside the Pump: Now What?
Soak the affected parts, then flush the system before you run it again. Never poke a clogged nozzle with wire, and wear safety glasses. For an HVLP sprayer, check the nozzle size matches your coating.
A Real Weekend Rescue: Latex Clog in a Handheld Sprayer
What Went Wrong Mid-Fence
Mid-pass, a handheld sprayer quit because a clogged nozzle was packed with dried latex skin, and the filter screen was coated too. Latex dries fast, so any pause lets it set inside the spray tip and pickup tube. A smaller-than-needed nozzle made it worse by forcing thick paint through a tight opening.
The Fix in Under 20 Minutes
Stop, unplug, and relieve pressure first. Clear the clogged nozzle with a toothpick or stiff brush, not wire that can scratch the tip.
- Soak the spray tip in warm water with a few drops of dish soap.
- Rinse the filter screen and pickup tube.
- Flush the system with clean water.
- Reassemble and test on scrap cardboard.
Wear safety glasses throughout.
How Straining Paint and the Right Tip Would Have Prevented It
Strain paint through a mesh bag before every fill, and match nozzle size to the coating. These habits stop most blockages. Check your manual for the correct size and keep a spare tip on hand.
What a Clog Really Costs: Wasted Paint vs a Cheap Replacement Tip
A clogged nozzle rarely means a dead sprayer, but the wrong fix can cost you a pump or a finish. Here is what repairs and replacements typically run, so you can decide fast.
| Option | Upfront cost | Ongoing cost | Notes |
|---|---|---|---|
| Replacement spray tip | $5 to $30 | None | Cheapest fix for a clogged nozzle; match nozzle size to coating |
| Filter screen | $3 to $15 | None | Swap when paint flow drops or screen tears |
| Paint thinner and cleaning solvent | $10 to $40 | Per project | Cost scales with how often you flush the system |
| Soaking parts kit | $0 to $20 | None | Solvent plus a sealed container; reuse solvent |
| DIY flush and backflush | $0 to $40 | Your time | Try this before buying anything |
| Pro service call | $75 to $200 | Per visit | Often a flat diagnostic plus labor |
| Shop replacement of pump or tip assembly | $150 to $500+ | None | Compare to sprayer replacement cost before approving |
Ranges reflect typical US retail and service pricing for homeowner-grade airless and HVLP sprayers; labor rates and part costs vary by region and brand, so confirm with your local dealer or the manufacturer.
Assumptions Behind the Numbers
These are typical US ranges, not quotes. Parts cost more for pro-grade airless sprayer models, and service labor varies by region. Confirm prices with your dealer or the manufacturer before you commit.
DIY Cost: Solvent, Tips, and Filters
Expect $15 to $60 for solvent, a spare tip, and a filter screen, assuming you already own basic tools. A paint thinner is any solvent that dissolves paint, so match it to your coating. Strain paint first and keep safety glasses on.
Pro Cost: Service Call vs Replacement
A service call typically runs $75 to $200, which often exceeds a new tip or filter. Replace the part when it is worn or cracked; repair when a good flush clears the blockage.
Fixing a Clogged Sprayer on a Budget Without Cutting Corners
Cheap Solvent Alternatives That Still Work
Match the solvent to the paint, not the price tag. Warm soapy water handles latex residue for pennies, while mineral spirits or a dedicated paint thinner is required for oil-based coatings. Soaking dried parts in the wrong liquid wastes hours and can swell seals.
For latex, soak the spray tip and filter screen in warm water with a few drops of dish soap for 20 to 30 minutes. For oil-based paint, mineral spirits in a sealed jar works fine and costs less than specialty cleaners.
Reusable Filter Screens and Toothpick Tricks
Clean the filter screen before you buy a new one, since most clogs sit right there. Rinse it under running water or swish it in solvent, then backflush from the clean side.
A toothpick clears a clogged nozzle without scratching the tip. Poke gently from the front, never with wire or a drill bit, because a scratched tip sprays a crooked pattern forever.
Skip These False Savings
Reusing dirty solvent and skipping strained paint are the two mistakes that cost the most. Strained paint and clean thinner protect the pump and pickup tube, so spend the extra few dollars.
Also skip cheap replacement tips in the wrong nozzle size. Wear safety glasses during every flush, and never soak the whole airless sprayer or HVLP sprayer body in solvent, only the removable parts.
Five Mistakes That Turn a Small Clog into a Dead Sprayer
Skipping the Strain and Wrong Nozzle Habit
Strain paint before it hits the sprayer to keep grit and skin out of the nozzle. A clogged nozzle often starts with debris you could have filtered out in seconds.
Match nozzle size to the coating. Too small a tip forces the pump to push harder and clogs faster.
Skipping After-Use Cleaning and Proper Storage
Clean the spray tip, filter screen, and pickup tube right after every project. Dried paint is the number one cause of a stuck airless sprayer.
Store the unit with a little paint thinner in the passages for solvent-based coatings. This keeps seals from drying out between jobs.
Forcing Parts Instead of Soaking Them
Soak clogged parts in the right solvent instead of cranking on them with tools. Forcing a stuck tip or valve can crack the housing or strip threads.
Wear safety glasses during any backflush, and let soaking parts sit for 20 to 30 minutes before you try again.
Soaking parts means leaving removable pieces like the tip and screen submerged in solvent so dried paint softens.
- Strain paint before spraying: filter out grit and skins so they never reach the spray tip.
- Match nozzle size to the coating: an undersized tip raises pump pressure and invites clogs.
- Clean the spray tip, filter screen, and pickup tube immediately after use.
- Store the sprayer with paint thinner in the passages for solvent coatings to prevent drying.
- Soak clogged parts in solvent rather than forcing them with tools.
- Wear safety glasses during backflush and pressure work.
- Let soaking parts sit 20 to 30 minutes before retrying.
When to Ask a Store Expert, the Manufacturer, or a Local Pro
Signs It is Time to Stop DIYing
If you have cleared the clogged nozzle and filter screen twice and the paint still sputters, stop. Repeated blockages usually mean dried paint inside the pump or a worn part, and guessing wastes both paint and time.
Call the manufacturer’s support line when the unit is under warranty or you cannot find the correct spray tip size in the manual. They can confirm whether a repair is covered or a replacement part is the right move.
What to Have Ready Before You Call
- Write down your sprayer model and serial number so the store expert or manufacturer can look up the exact spray tip and filter screen.
- Note what you already tried, including soaking parts, backflush steps, and how long the clog persisted.
- Ask the manufacturer directly: repair or replace? Get the part number and a typical cost range before deciding.
- For stubborn clogs on an airless sprayer or HVLP sprayer, ask a local pro to inspect the pump and pickup tube.
When to ask for help:
- You have cleared the clogged nozzle and filter screen twice and paint still sputters.
- The sprayer is under warranty or you cannot find the correct spray tip size in the manual.
- You have soaked parts and tried backflush but the clog returns within minutes.
- You need a firm answer on repairing versus replacing a worn pump or spray tip.
- You want a local pro to inspect the pump and pickup tube on an airless or HVLP sprayer.
How to Unclog a Paint Sprayer: Frequently Asked Questions
?Can I Unclog a Paint Sprayer Without Taking It Apart?
Yes, minor clogs often clear by flushing with the right solvent and clearing the spray tip first. Remove the tip, soak it in paint thinner or warm soapy water, then run solvent through the system. If flow stays weak afterward, open the unit and check the filter screen and pickup tube.
?How to Unclog a Paint Sprayer Safely Without Damaging the Pump?
Work with the sprayer off and pressure fully released before you touch anything. Wear safety glasses, ventilate the area, and use the solvent matched to your paint. Never poke a clogged nozzle with wire or a paperclip; that scratches the tip and ruins the spray pattern. Soak parts and flush the system gently instead of forcing pressure through a blockage.
?What Solvent Should I Use to Unclog a Paint Sprayer for Latex Versus Oil Paint?
Match the solvent to the paint: warm soapy water for latex and paint thinner for oil-based coatings. Paint thinner is any of several solvents used to dissolve paint, so confirm the right one on your coating label. Flush with the correct solvent, then follow with a clean rinse. The wrong solvent can harden the clog or damage seals.
?How Does a Clogged Nozzle Differ from a Clogged Filter Screen on a Paint Sprayer?
A clogged nozzle causes a crooked fan, spitting, or no spray at all, while a clogged filter screen usually drops pressure and flow across the whole system. Check the spray tip first because it is quick to remove and soak. If the tip is clean but flow stays weak, inspect the filter screen and pickup tube next.
?How to Unclog a Paint Sprayer When the Clog is in the Hose or Pump?
Backflush the system instead of soaking only the removable parts. Backflushing pushes solvent backward through the hose and pump to break up dried paint, which soaking alone cannot reach. Release pressure, remove the tip, and set a bucket to catch the flush. If backflushing fails, replace the tip or filter rather than fighting the clog further.
?How to Unclog a Paint Sprayer That Keeps Clogging Even After Cleaning?
Strain the paint through a mesh filter before every fill, because most repeat clogs come from unstrained coating. Thin the paint to the maker's spec and match the nozzle size to the coating. Flush the system right after each session so leftover paint cannot dry inside passages and turn a small clog into a dead sprayer.
?is It Worth Paying a Pro to Unclog a Paint Sprayer, or Can I Do It Myself?
Do it yourself in almost every case. Unclogging is routine maintenance, and the steps are simple: release pressure, pull the spray tip, soak parts, flush the system, and check the filter screen. Call a pro only if the pump itself fails or a part is cracked. A cheap replacement tip beats a repair bill.
Conclusion
Clearing a blockage safely comes down to three habits: kill the pressure first, soak the spray tip and filter screen before you force anything, and flush the system with the correct paint thinner (a solvent that dissolves paint) for your coating. Skip the pressure relief and you risk injection injury; skip soaking and you risk damaging the tip.
The most useful next step: strain your paint through a fine mesh before the next refill. Clean paint keeps the clogged nozzle, pickup tube, and pump clear, so you finish the job instead of troubleshooting it again.