
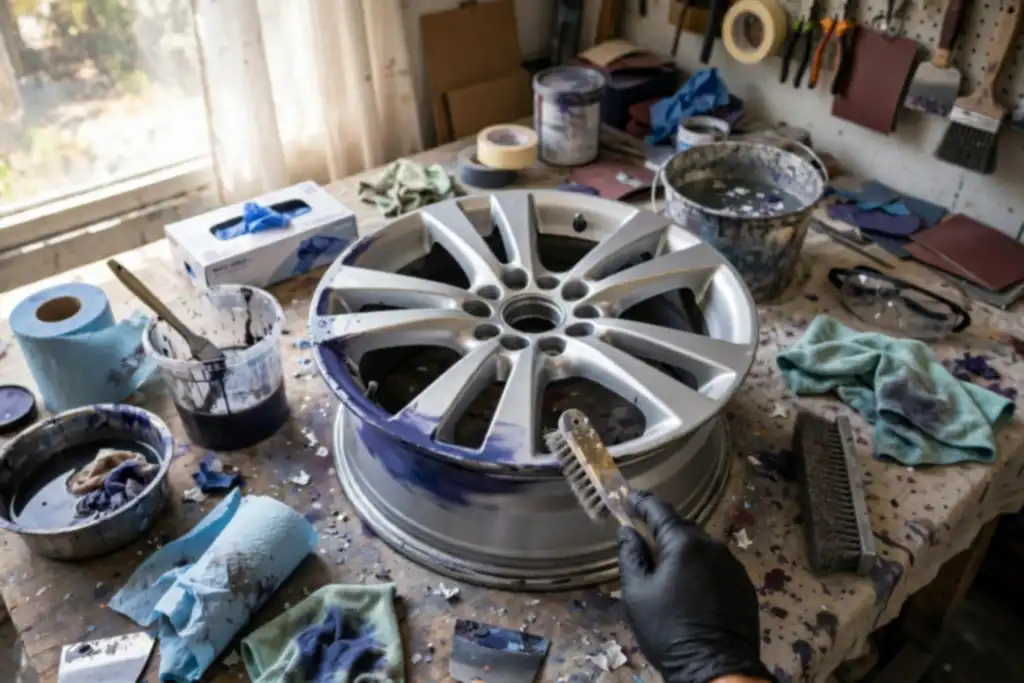
Removing spray paint from wheels safely means matching the solvent to the paint and the rim finish, then lifting the overspray without touching the clear coat. Skip that match and you risk dulling or stripping the wheel.
Getting your wheel rim back to a clean, factory finish after an accidental spray paint hit is entirely doable if you work from the mildest method up. How to remove spray paint from wheels comes down to three things: identifying the wheel finish, choosing a solvent that dissolves the paint but not the clear coat, and keeping the tire sidewall masked off.
You will learn which products to try in order, from mineral spirits (a mild chemical substance) to lacquer thinner (solvents able to dissolve lacquer) only as a last resort, plus how to use a plastic scraper, microfiber cloth, and pressure washer without gouging the surface. Expect 30 to 90 minutes per wheel depending on how long the overspray has cured.
- Test any solvent on a hidden spot of the wheel first.
- Start with mineral spirits, not lacquer thinner.
- Mask the tire sidewall so solvent does not soak the rubber.
- Use a plastic scraper, never metal, to lift softened paint.
- Wear gloves and work outside or with ventilation.
How to Remove Spray Paint from Wheels: the Quick Decision Before You Start
Before you touch a rag or a can of solvent, make two quick calls: what kind of paint is on the wheel, and what finish is under it. Get either wrong and you will trade a little overspray for a ruined rim.
| Your situation | What to do | Why |
|---|---|---|
| Light overspray on one or two wheels | Start with clay bar and lubricant | Lifts fresh paint particles without solvent |
| Paint has cured for days or weeks | Try mineral spirits on a hidden spot | Mild solvent, low risk to most finishes |
| Wheel has factory clear coat | Avoid lacquer thinner entirely | It can eat through clear coat fast |
| Bare alloy or polished wheel | Use the mildest solvent and test first | No clear coat means no safety layer |
| Chrome wheel with paint speckles | Plastic scraper plus mineral spirits | Chrome resists solvent but scratches easily |
| Paint on the tire sidewall | Wipe with mineral spirits on a microfiber cloth | Rubber tolerates it better than rims do |
| Paint is thick, baked on, or everywhere | Stop and call a wheel refinisher | DIY risk outweighs the savings |
Recommended for this job

Nanoskin Lacquer Thinner
Lacquer thinner dissolves spray paint residue so it can be wiped from wheel surfaces.

Plastic Razor Blade Scraper and Blades
Plastic scraper lifts softened paint and decals without scratching wheel finishes.

Turtle Wax T230A Rubbing Compound Heavy
Rubbing compound buffs away stubborn paint overspray and restores wheel shine.
Identify the paint type and the finish beneath it before you touch a rag or solvent. Getting either wrong can dull or strip a wheel rim in seconds.
Is the Paint Overspray or a Full Repaint?
Overspray is a thin mist on top of the finish, and a clay bar (a resin tool that pulls contaminants off paint) plus lubricant often lifts it in 10 to 15 minutes per wheel. A full repaint is a thick bonded coat needing solvent and 30 to 60 minutes per wheel.
Match the Solvent to Your Wheel Finish First
Painted and powder-coated wheel rims carry a clear coat that lacquer thinner (a solvent that dissolves lacquer) can strip in under 30 seconds. Start with mineral spirits, a milder solvent, on a hidden spoke, wait 5 minutes, then check for dulling. Work up only if the finish stays intact.
When This Job is Too Risky for DIY
Stop if paint covers most of the wheel, has baked on through heat cycles, or sits on bare polished alloy; those need a wheel refinisher. Also stop if your test wipe softens the clear coat. A pressure washer rinses residue but will not undo a solvent mistake.
The 5-Minute Wheel Check That Saves Your Finish
Five minutes with a bright LED work light in open shade shows whether spray paint sits on top or has bonded. Check the wheel rim, tire sidewall, and inner spokes before touching any solvent.
The tire sidewall is the rubber outer face of the tire beside the rim, which solvent can soften, so mask it before work.
Fingernail Test: is the Paint Sitting on Top or Bitten in?
Press a fingernail into the spot at a 45 degree angle. Overspray that lifts or flakes in 1 to 2 seconds sits on top and comes off with mineral spirits, a chemical substance that softens fresh paint. Paint that stays smooth and bonded needs a gentler pass.
Find the Clear Coat Edge and Any Chips
Trace the clear coat line around the affected area with a finger. Tape off chips and scratches within 1 inch using painter’s tape so solvent cannot wick into exposed edges, where damage spreads fastest.
Test Solvent in an Inconspicuous Area
Dab lacquer thinner, a solvent that dissolves lacquer, on a hidden inner spoke. Wait 60 seconds, wipe with a microfiber cloth, and check for dulling. If the finish softens, stop and switch to mineral spirits.
Check Lug Nuts and Center Caps for Paint
Inspect all 4 to 6 lug nuts and each center cap for overspray. Confirm whether caps are plastic or metal before solvent touches them. Plastic can cloud permanently, so pop caps off first.
Before you touch a rag or a bottle, spend five minutes confirming what you're actually dealing with so you don't trade overspray for a wrecked finish.
How Solvents Lift Overspray Without Eating Your Clear Coat
Why Fresh Overspray Comes off Easy and Cured Paint Doesn’t
Overspray is airborne paint that landed where you didn’t want it. Fresh overspray sits mostly on top of the finish, so a mild solvent lifts it fast. Once it cures, usually after a few days, it bonds harder and needs more patience.
What Lacquer Thinner Does to Powder Coat and Clear Coat
Lacquer thinner is a strong solvent, meaning it dissolves other coatings, and it can soften your wheel’s clear coat if you leave it on too long. Dampen a microfiber cloth, wipe briefly, then rinse. Never pour it on or let it pool. Test a hidden spot first, and keep it off the tire sidewall.
Why Pressure and Heat Beat Aggressive Chemicals
A pressure washer, a machine that sends out a strong stream of water, removes loosened paint with far less chemical risk. Stay at or below 1,500 to 2,000 PSI, keep the nozzle moving, and hold it 6 to 12 inches away. Finish with a clay bar or light polishing to clean the surface without cutting into the clear coat.
Before You Start: Solvents, Scrapers, and Skin Protection
Pick solvent by finish, then gear up. A plastic scraper and fine steel wool handle most overspray; lacquer thinner is aggressive, test a hidden spot. Mask the tire sidewall and calipers before solvent touches the wheel rim.
Safety-First Solvent Selection by Wheel Finish
Match solvent to finish; the wrong one dulls or strips clear coat. Start with mineral spirits on painted or clear-coated rims; reserve lacquer thinner for bare metal or stubborn spots.
Gloves, Respirator, and Ventilation You Actually Need
Wear nitrile gloves, eye protection, and a solvent-rated respirator; work outdoors or with strong airflow. OSHA treats these vapors as a real exposure risk, keep the garage door open.
Tools That Won’t Scratch: Plastic Scrapers and Fine Steel Wool
Use a plastic scraper to lift paint without gouging, then 0000 fine steel wool with light pressure. Skip metal blades and coarse pads; they cut clear coat fast.
Masking Tires and Brake Calipers Before You Touch Solvent
Tape off tire sidewalls and brake calipers. For tire overspray, scrub with soap and a stiff brush, not thinner; wipe rims with a microfiber cloth between passes.
- Solvent: mineral spirits first; lacquer thinner last resort on bare metal.
- Test a hidden rim spot first.
- Gear: nitrile gloves, eye protection, respirator, ventilation.
- Tools: plastic scraper plus 0000 steel wool.
- Tire overspray: soap and stiff brush.
- Mask wheel wells and calipers.
- Low-VOC citrus/water-based removers for light overspray.
- Finish with rubbing compound, clay bar, polishing.
Step-by-Step: Removing Spray Paint from Rims Without Ruining Them
Work from the least aggressive method up, checking progress after each step.
Wash and Degrease the Wheel
Wash the rim with car soap and a microfiber cloth, then degrease and rinse thoroughly so solvent reaches paint, not road film.
Tape off Tires, Calipers, and Wheel Wells
Cover the tire sidewall, brake calipers, and wheel wells with plastic sheeting and painter’s tape before opening any solvent.
Test Your Solvent on a Hidden Spot
Apply a drop of lacquer thinner to a hidden area like the inner barrel, wait 60 seconds, and confirm the clear coat stays glossy.
Apply Solvent and Let It Soften the Paint
Wet a microfiber cloth with lacquer thinner, press it onto the overspray, and let it sit 2 to 5 minutes. Work outdoors or with ventilation; wear nitrile gloves and eye protection per OSHA guidance.
Lift Paint with a Plastic Scraper
Hold a plastic scraper at a low angle to lift softened paint; use 0000 steel wool only on stubborn spots. Rinse with a pressure washer at or below 1,500 to 2,000 PSI, 6 to 12 inches away.
Scrub tire sidewalls with mineral spirits on a stiff brush. Wipe wheel wells and calipers last, keeping liquid off brake lines. Finish with rubbing compound, a clay bar, and polishing to restore gloss.
Work from the least aggressive method up, and you will strip the paint without taking the finish with it.
Stubborn Spots: Rubbing Compound, Clay Bar, and Safe Buffing
When to Switch from Solvent to Rubbing Compound
Switch when two passes with lacquer thinner, a solvent that dissolves lacquer, leave paint still bonded. Rubbing compound is a mild abrasive paste that cuts the film mechanically instead of chemically.
Clay Bar for Light Overspray and Texture
A clay bar is a resin tool that pulls contaminants off the surface. Use it for overspray, airborne paint that landed where you did not intend, only when the specks are tiny and the paint feels gritty rather than spotted.
Buffing Wheels Without Burning the Clear Coat
Keep the buffer moving and the pad flat to protect the clear coat, the thin protective layer over the color. Hold at a low, controlled buffer speed, work small sections, and stop at the first sign of dulling. Follow with polishing to restore gloss.
Chrome and Bare Alloy: Different Rules
Chrome and bare alloy show scratches fast, so skip aggressive compound and start with a plastic scraper and mineral spirits. Move to a fine compound only if needed, then polish by hand.
When solvent alone stops lifting the paint, switch to mechanical methods, but match the tool to your wheel rim finish first.
Myths vs Facts: Three Things People Get Wrong About Wheel Overspray
Myth: Lacquer Thinner is Safe on Every Wheel
Lacquer thinner, a solvent that dissolves lacquer, can attack some wheel finishes and factory clear coat. Test it on a hidden spot first, then wipe quickly with a microfiber cloth and rinse.
Keep it off the tire sidewall and wear gloves. Solvent on bare aluminum or powder coat can dull the surface fast.
Myth: Steel Wool Always Ruins Rims
Fine steel wool used gently with a plastic scraper lifts stubborn spots without deep scratches. Start with the scraper to knock off thick paint, then switch to fine grade.
Skip coarse pads on gloss finishes and stay light over clear coat. Follow with rubbing compound and polishing to blend the area.
Myth: Pressure Washing Alone Will Strip Cured Paint
A pressure washer, a machine that sends a strong stream of water, removes loose overspray and dirt but not cured paint. Keep pressure at or below 1,500 to 2,000 PSI and hold the nozzle 6 to 12 inches away.
Too much force chips clear coat and pushes water past seals. Treat it as a rinse step, then finish with mineral spirits, a clay bar, and a microfiber cloth.
DIY vs Professional Removal: What the Job Really Costs
Budget the job before you buy a single solvent, because the wrong purchase can cost more than a pro detailer's labor.
| Option | Upfront cost | Ongoing cost | Notes |
|---|---|---|---|
| DIY solvent and supplies | $15 to $60 | Replacement as used | lacquer thinner, mineral spirits, cloths, scraper |
| Pressure washer rental | $20 to $50 per day | Per rental | Use low pressure near the wheel rim |
| Clay bar and lubricant kit | $20 to $40 | Reusable bar | For light overspray only |
| Rubbing compound and polish | $15 to $35 | Replacement as used | Follow with polishing to restore shine |
| Professional detailer | $75 to $200 | Per visit | Overspray removal on one to four wheels |
| Wheel repair shop refinish | $150 to $400 per wheel | None | Includes clear coat and color match |
| Mobile solvent service | $100 to $250 | Per call | Convenient, varies by region |
Ranges reflect typical US pricing for one vehicle with light to moderate overspray; heavy paint buildup, specialty finishes, or four wheels needing full refinish push costs higher.
DIY Solvent and Tool Costs (Assumptions Stated)
Expect $50 to $150 in supplies for one vehicle with light to moderate overspray. A quart of lacquer thinner, a bottle of mineral spirits, microfiber cloths, and a plastic scraper cover most jobs.
Detailer and Wheel Repair Shop Rates
Most detailers charge $75 to $200 to remove overspray from a set of wheels. A full refinish at a wheel repair shop runs $150 to $400 per wheel, which includes clear coat.
When the DIY Cost Approaches a Refinish
Stop buying solvents once your total passes roughly $150. If the paint has etched the clear coat or covers all four wheels, a pro refinish is the cheaper path.
Troubleshooting: When the Paint Won't Budge or the Finish Hazes
When the paint fights back, stop guessing and diagnose the finish first. Most wheel damage happens in this phase, not the first wipe.
| Problem | Likely cause | Fix |
|---|---|---|
| Paint smears instead of lifting | Solvent too hot or dwell too long | Switch to mineral spirits, wipe sooner |
| Clear coat turns cloudy | Lacquer thinner etched the top layer | Rinse, then polish with rubbing compound |
| Powder coat dulls | Abrasive pad or harsh solvent | Stop, clean, apply non-abrasive polish |
| Paint stuck in spoke corners | Thin solvent on a cloth misses edges | Use a plastic scraper wrapped in microfiber cloth |
| Overspray feels gritty, not painted | Contaminants bonded to clear coat | Clay bar with lubricant, light pressure |
| Chrome pits or spots | Solvent sat too long on bare chrome | Neutralize, rinse, dry immediately |
| Tire sidewall softening | Solvent soaked the rubber | Rinse with water, keep solvent off rubber |
When the paint fights back, stop guessing and diagnose the finish first. Most wheel damage happens in this phase, not the first wipe.
Paint Softened but Smears Instead of Lifting
Your solvent is too hot or sat too long. Switch to mineral spirits, a gentler solvent, and wipe with a microfiber cloth before the paint rehardens.
Clear Coat Looks Cloudy After Solvent
Lacquer thinner, a solvent that dissolves lacquer, etched the top layer. Rinse thoroughly, then polish with rubbing compound to level the haze.
Powder Coat Started to Dull
You used an abrasive pad or a harsh solvent on powder coat. Stop, clean the area, and work in a non-abrasive polishing step only.
Paint Left in Tight Spoke Corners
Cloth alone misses edges. Wrap a plastic scraper in microfiber cloth, dampen with solvent, and work the corner slowly.
For stubborn spots, a clay bar pulls bonded overspray without cutting the clear coat.
After the Removal: Sealing Wheels so Future Overspray Wipes off
Wax or Ceramic Sealant on Clean Rims
Once the wheel rim is dry and bare, apply a coat of wax or a ceramic sealant. This barrier keeps fresh overspray from bonding to the finish, so a later wipe-down with a microfiber cloth takes seconds instead of hours.
Work on a cool surface in the shade. Skip this step and any new solvent you reach for will attack unprotected paint faster.
Reinstall Center Caps and Torque Lug Nuts
Seat the center caps by hand, then torque the lug nuts to the spec in your owner’s manual with a calibrated wrench. Never guess the number or lean on a breaker bar to tighten them.
- Snug nuts in a star pattern, then torque in two passes.
- Recheck torque after roughly 50 miles of driving.
Prevent Future Overspray with Masking
Mask the wheels before your next rattle can project. A pressure washer, a machine that sends out a strong stream of water, will not lift cured paint from an unprotected rim, so prevention beats cleanup.
Slide plastic sheeting behind the wheel and tape the edges to the tire sidewall. Pull the tape within an hour of finishing to avoid a sticky residue.
Common Mistakes That Turn Overspray Removal into a Repaint
Skipping the Solvent Test
Always test your solvent in an inconspicuous area first. A hidden spot on the wheel rim or behind a spoke tells you how the finish reacts before you commit.
Using Wire Brushes or Coarse Abrasives
Wire brushes and coarse abrasives scratch the clear coat, the thin protective layer over your wheel’s finish. Once that layer is gone, the rim corrodes and dulls fast.
Letting Solvent Dry on the Finish
Solvents left to evaporate on the surface can haze or etch the clear coat. Wipe residue with a microfiber cloth while the solvent is still wet.
Tossing Contaminated Rags in the Trash
Paint-soaked rags can self-ignite, so never toss them in a regular trash can. Lay them flat outside to dry completely, then seal them in a metal container.
Ignoring Local Solvent Disposal Rules
Check your local regulations for solvent disposal before you pour anything down a drain. Many municipalities run household hazardous waste days, and the EPA offers guidance on safe handling.
- Test solvent in an inconspicuous area: a hidden spot on the wheel rim or behind a spoke shows how the finish reacts before you commit.
- Avoid damaging clear coat: wire brushes and coarse abrasives scratch the protective layer, leaving the rim open to corrosion and dulling.
- Wipe wet, don't wait: letting solvent dry on the finish can haze or etch the clear coat, so remove residue with a microfiber cloth while it's still wet.
- Dispose of paint-contaminated rags safely: paint-soaked rags can self-ignite, so dry them flat outside and seal them in a metal container.
- Check local regulations for solvent disposal: never pour solvent down a drain, and use household hazardous waste days where available.
When to Call a Professional Detailer Instead
Powder-Coated or Chrome Wheels with Cured Paint
Stop if you cannot confidently identify the wheel rim finish. Powder coat and chrome react badly to aggressive solvents, and a wrong guess can cost you a full wheel. Check the inside of the rim or ask the manufacturer before touching anything.
Clear Coat Already Compromised
Call a pro when the clear coat is peeling, cloudy, or scratched through. Solvent will wick under failing clear coat and lift it across the whole wheel. A detailer can assess whether spot repair or refinishing is the honest answer.
Large Multi-Panel Overspray Events
Bring in a professional detailer when overspray covers multiple wheels plus body panels. That volume points to a spray event beyond a simple spot fix, and a clay bar and polishing pass on paint is a job for someone with a polisher and a paint gauge.
No Safe Ventilation or Disposal Options
Hire out the job if you lack cross-ventilation, a respirator rated for organic vapors, or a legal way to dispose of used lacquer thinner and mineral spirits. Check local regulations first; many municipalities run household hazardous waste days, and dumping solvent down a drain is illegal under EPA rules.
Stop and call a professional if:
- The wheel rim finish is powder-coated, chrome, or bare polished alloy and you cannot confirm it.
- The clear coat is already peeling, cloudy, or scratched through.
- Overspray covers multiple wheels and body panels, not just one spot.
- You have no cross-ventilation or respirator rated for organic vapors.
- You have no legal way to dispose of used lacquer thinner or mineral spirits.
- A test spot with mineral spirits starts lifting or dulling the finish.
How to Remove Spray Paint from Wheels: Frequently Asked Questions
?Can You Remove Spray Paint from Wheels Without Hurting the Clear Coat?
Yes, you can remove spray paint from wheels without damaging clear coat if you start with the mildest method and test first. Clear coat is a thin protective layer, and harsh solvents left too long can soften or haze it. Begin with mineral spirits on a small hidden spot, then move up to lacquer thinner only if needed, keeping it off the tire sidewall.
?How Do I Remove Spray Paint from Wheels When the Overspray is Already Dry and Hard?
To remove spray paint from wheels when dry and hard, soften it first, then scrape gently. Dry overspray bonds tighter, so apply mineral spirits or a dedicated solvent, wait a few minutes, and work a plastic scraper along the edge. Never use a metal blade on a rim. If the film is thick, repeat in passes rather than pressing harder.
?What is the Safest Solvent to Remove Spray Paint from Wheels?
Mineral spirits is the safest starting point for most wheel rims. It is a solvent, meaning it dissolves the paint film so you can wipe it away, but it acts slowly enough to test safely. Lacquer thinner, a stronger solvent that dissolves lacquer, works faster but attacks clear coat and rubber if you are careless. Always test on an inconspicuous area first.
?Why Does Spray Paint Stick so Hard to Wheels Compared to Other Surfaces?
Because wheel rims live in heat, brake dust, and road grit, and paint bonds to that textured surface fast. Overspray, which is airborne paint landing where you did not intend, also cures quicker in sun and heat. That is why you remove spray paint from wheels sooner rather than later; fresh overspray wipes off, while cured paint needs solvent and patience.
?When Should I Use a Pressure Washer to Remove Spray Paint from Wheels?
Only after softening the paint, and never as the first step. A pressure washer, a machine that sends out a strong stream of water for cleaning, can strip loose paint and rinse solvent residue, but it can also force water past seals and blast chipped clear coat. Keep the nozzle moving, stay back from the tire sidewall, and never aim at the valve stem.
?How to Remove Spray Paint from Wheels Without Damaging the Tire Sidewall?
Mask the tire sidewall before you touch any solvent. Rubber absorbs lacquer thinner and mineral spirits and can dry, crack, or discolor. Tape plastic sheeting over the tire and work only on the wheel rim. If solvent does hit rubber, rinse it off with water right away. Wipe residue with a microfiber cloth, not a rag that sheds lint.
?What Do I Do After I Remove Spray Paint from Wheels to Protect the Finish?
Clean, decontaminate, then seal. After removal, wash the wheel rim, pull embedded grit with a clay bar (a tool that removes contaminants from paint), and wipe with a microfiber cloth. Apply a wheel sealant or wax so future overspray wipes off instead of bonding. Skip polishing unless the finish is hazy; polishing removes clear coat you cannot put back.
Conclusion
Matching the solvent to the paint and the wheel rim finish is the whole job. Get that wrong and you strip or dull the clear coat, which is a far more expensive fix than the overspray you started with. Work in the shade, test any solvent on a hidden spot first, and keep lacquer thinner away from painted surfaces unless you know the finish can take it.
Your next step: start with the mildest option, mineral spirits on a microfiber cloth, and step up only if the paint refuses to budge. Finish with a clay bar and polishing to restore a smooth surface.
Sources and further reading: guidance from EPA, OSHA.