
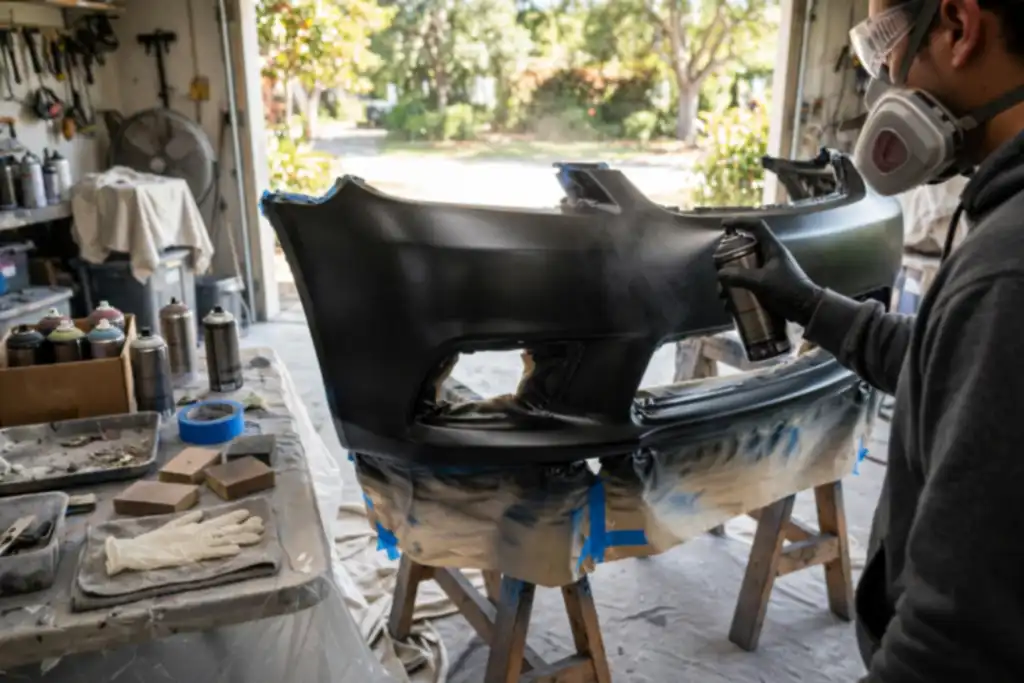
You can paint a car bumper with spray paint, but only if you treat it as a multi-stage refinishing job, not a quick touch-up. Skip the prep and correct products, and the finish will peel or look uneven within months.
Many DIY bumper paint jobs fail within a year, and the culprit is almost always skipped prep, not the spray paint itself. Learning how to paint a car bumper with spray paint the right way means controlling every layer from bare plastic to clear coat, so the finish sticks and survives UV, road salt, and car washes.
You will get a step-by-step process built around safety and mistake avoidance: choosing automotive paint and adhesion promoter for your bumper’s plastic, sanding and masking without cutting corners, managing flash time between coats, and letting curing finish before you reassemble. The goal is a finish that looks factory and holds up, done once.
- Clean and sand the bumper first; paint won't hide poor prep.
- Use adhesion promoter on plastic, then primer before color.
- Apply light coats, respect flash time, and finish with clear coat.
- Wear a respirator and spray outdoors or in a ventilated space.
- Let the bumper cure fully; early handling ruins the finish.
How to Paint a Car Bumper with Spray Paint: Quick Decision Before You Start
Decide the finish path before you buy a single can, because the wrong choice here wastes money and time. A bumper is a flexible plastic part, so it punishes shortcuts harder than a metal panel does.
| Your situation | What to do | Why |
|---|---|---|
| Bumper has deep cracks or missing chunks | Do bumper repair first, then paint | Paint bridges nothing; cracks return fast |
| Bumper is bare or aftermarket plastic | Use adhesion promoter before primer | Promoter helps paint grip slick plastic |
| Paint code is a factory color | Order matched automotive paint in cans | Off-the-shelf cans rarely match |
| Whole bumper needs color | Plan full panel prep and masking | Overspray lands on trim, glass, tires |
| You own a compressor and gun | Spray gun gives better control | Cans lay thinner, less even coats |
| Small scuff or one corner | Spot repair with rattle cans | Blending a small area is realistic |
| You want a factory-perfect match | Have a pro spray and blend it | Camera and blend work beats cans |
Recommended for this job
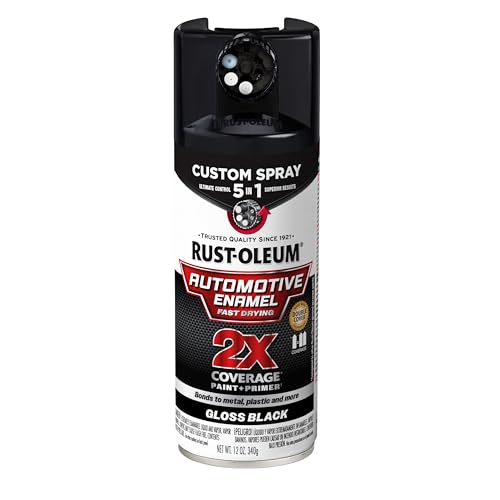
Rust-Oleum 2X Automotive Enamel 5-in-1 Spray
Provides durable gloss black topcoat for a smooth, professional-looking bumper finish.

Rust-Oleum Automotive Stops Rust Filler & Sandable
High-build sandable primer fills scratches and preps bumper surface for paint adhesion.

Rust-Oleum Painter's Touch 2X Ultra Cover
Clear gloss topcoat seals and protects the finished bumper paint from wear.
Two questions settle it: is the bumper structurally sound, and how large is the repair area? A 6 inch crack or a palm-sized scuff points to different paths, so inspect before buying any spray paint.
Is Your Bumper a Good Candidate for Spray Paint?
Yes, if the plastic is intact and you accept a multi-hour, multi-step job. Cracks longer than 2 inches, peeling clear coat, or a textured surface mean bumper repair or replacement comes first.
Bumper repair means filling cracks, gouges, or missing chunks and sanding smooth before any paint is applied.
Clear coat is the transparent top layer sprayed over color to add gloss and protect the paint from UV and wear.
Flex the bumper by hand and check the back side for impact damage. Then sand a 2 inch test patch with 400 grit paper on a hidden corner to see whether old paint lifts or holds.
Spray Can vs Spray Gun vs Pro: a Simple Decision Rule
Use aerosol cans for areas under 1 square foot, a spray gun when you own a compressor rated 10 CFM or higher, and a body shop when color match must be invisible.
Cans suit spot repairs and trim; guns lay more even paint layers faster. Either way, order color match by the paint code on the door jamb sticker, and plan to blend into adjacent panels.
Paint layers are the stacked coats of promoter, primer, color, and clear coat applied in sequence for durability.
- Wear an organic-vapor respirator and eye protection; work outdoors or in a ventilated garage.
- Respect 10 to 15 minute flash time between coats and 24 to 48 hours of curing before assembly.
- Keep primer, paint layers, and clear coat thin, 2 to 3 coats each.
- Apply adhesion promoter to bare plastic before primer.
5-Minute Bumper Check: What to Look for Before Any Work
Assess Damage: Cracks, Scratches, or Just Faded Paint?
Separate cosmetic scratches from structural cracks first. A crack that flexes open under thumb pressure means bumper repair before any spray paint; surface scuffs only need sanding.
Check for Flexibility: Does Your Bumper Need a Flex Agent?
Modern bumpers are flexible plastic, so rigid paint will crack. Bend the edge gently; if it moves, plan on an elastomeric additive or flexible automotive paint.
Automotive paint is vehicle-grade coating matched to your color code that bonds to primer and resists flexing.
Test for Adhesion: Will Paint Stick to This Plastic?
Scuff a hidden area with 400-grit, clean it, and tape-test after 10 minutes. Lifting paint means you need sanding back to bare plastic plus adhesion promoter before primer.
- Clean and degrease before judging any damage.
- Peeling edges signal poor adhesion that will spread.
Run these five checks with a rag, a flashlight, and five minutes before you touch a can.
How Spray Painting a Bumper Actually Works (and Why Prep Matters)
The Science of Adhesion: Why Plastic Bumpers Are Different
Spray paint sticks through mechanical grip and chemical bonding, and plastic bumpers fight you on both. Most modern covers are TPO or polypropylene, slick materials with low surface energy that repel ordinary coatings. Skip proper prep and your first coat will lift or peel within months.
Wash the bumper with soap and water, then wipe with wax and grease remover. Scuff with 400 to 600 grit until the gloss is gone, then clean again.
Flex Agents and Adhesion Promoters: the Overlooked Heroes
Bumpers flex, so rigid paint cracks. Adhesion promoter, a chemical tie coat, bonds plastic to primer and prevents edge lifting; apply thin and let it flash per the label.
Primer builds a uniform base and fills scratches. Add a flex agent to primer and clear coat so layers move with the plastic. Spray color in light passes, respecting flash time; rushing causes runs, solvent pop, and poor adhesion. Curing takes days, not hours.
Before You Start: Tools, Materials, and Safety Gear You'll Need
Safety Gear and Ventilation: Don’t Skip This
You need a respirator, meaning a device that filters what you breathe, rated for organic vapors, plus eye protection and nitrile gloves. Spray in a well-ventilated space, ideally outdoors or in a garage with the door open and a fan pulling air out.
Choosing the Right Spray Paint for Bumpers
Buy aerosol automotive paint matched to your vehicle’s color code, not general-purpose hardware store spray paint. Flexible bumpers also need an adhesion promoter, a chemical that helps paint bond to plastic, or the finish will peel at the first flex.
Tools and Materials Checklist
Gather everything before you mask a single inch, so you’re not hunting for supplies mid-job.
- Grit range for sanding: 400, 600, and 800 grit wet-or-dry paper.
- Cleaners: wax and grease remover plus lint-free cloths.
- Masking supplies: painter’s tape and plastic sheeting for trim and glass.
- Layers in order: adhesion promoter, primer, spray paint, then clear coat.
- Bumper repair filler for cracks or deep scuffs.
- Tack cloth to lift dust between coats.
- Respirator rated for organic vapors, plus eye protection and nitrile gloves
- Aerosol automotive paint matched to your vehicle's color code
- Adhesion promoter for flexible plastic bumpers
- 400, 600, and 800 grit sanding paper
- Wax and grease remover with lint-free cloths
- Painter's tape and plastic sheeting for masking
- Primer, spray paint, and clear coat
- Bumper repair filler and a tack cloth
Step-by-Step: How to Paint a Car Bumper with Spray Paint
Remove the Bumper for Easier Painting (Optional but Recommended)
Removing the bumper gives full access to edges and curves. Most come off with bolts and plastic clips in 15-30 minutes. Label fasteners for easy reassembly.
Clean and Degrease the Surface
Wash with soapy water, rinse, and dry completely. Wipe with wax and grease remover on a lint-free cloth; let it flash off about 10 minutes. Leftover oil causes fisheyes.
Sanding and Feathering Edges
Scuff the whole bumper with 400-600 grit wet paper, then feather chips and scratches until edges feel flush. Wipe off dust and check in raking light.
Mask Surrounding Areas
Use painter’s tape and masking paper, pressing edges firmly, covering at least 2 feet beyond the bumper. Leave a 1/8 inch tape edge if painting on the car.
Apply Adhesion Promoter and Primer
Spray one thin coat of adhesion promoter, let it flash 10-15 minutes, then apply two or three light primer coats from 8-10 inches away. Cure 30-60 minutes, then sand smooth with 600 grit.
Follow these steps in order, and give each stage enough time to dry before moving on.
After the Paint: Polishing, Finishing, and Long-Term Care
Polishing and Finishing Touches
Polishing removes clear coat texture and adds gloss. Wait until curing is complete (typically 30 days) before buffing.
- Wet sand cured clear coat with 1500-grit, then 2000-grit paper, keeping surface wet.
- Buff with a foam pad and fine polishing compound at low speed to remove sanding haze.
- Seal with automotive wax or paint sealant after 30 days of curing.
Maintenance and Care After Painting
Gentle washing keeps fresh paint intact. Skip harsh brushes and automatic washes for the first month.
- Wash with pH-neutral car soap and a microfiber mitt.
- Reapply wax every 3-4 months, or sooner if water stops beading.
- Touch up chips promptly with color-match paint to stop corrosion and peeling.
Legal and Environmental Disposal of Spray Cans
Empty aerosol cans are not regular trash in most areas. Follow federal and local hazardous waste rules.
- Check with your local waste authority for household hazardous waste drop-off rules.
- Confirm the spray paint label for disposal instructions and keep cans out of household trash.
Once the last coat of clear coat has flashed off, finishing and upkeep decide whether your work looks factory or amateur.
Cost: DIY Spray Paint vs Professional Bumper Painting
A DIY respray usually costs a fraction of a body shop bill, but only if you budget for the right materials and avoid rework.
| Option | Upfront cost | Ongoing cost | Notes |
|---|---|---|---|
| DIY aerosol kit (paint, primer, clear coat) | $80 to $200 | Replacement cans if you run out | Assumes 1 bumper, 2 to 3 cans of color |
| Sanding and masking supplies | $20 to $50 | Low, consumables only | Includes sandpaper, tape, masking film |
| Safety gear (respirator, gloves, eyewear) | $30 to $80 | Filter replacements | OSHA recommends a respirator rated for isocyanates if using 2K products |
| Bumper repair filler and adhesion promoter | $25 to $60 | None after repair | Needed for cracks or flexible plastic |
| Professional single-stage respray | $300 to $600 | Warranty may cover defects | Independent shop, standard color |
| Professional base coat/clear coat | $500 to $900 | Warranty may cover defects | Better color match and durability |
| Full bumper replacement and paint | $800 to $1,500 | None if new part | When repair is not cost-effective |
Ranges reflect typical US DIY and independent body shop pricing for one standard car bumper. Costs vary by paint brand, color (reds and pearls cost more), and local labor rates. Assumes you already own basic tools like a spray gun or are using aerosol cans.
DIY Cost Breakdown (Including Hidden Costs)
Expect $150 to $400 in materials for a careful DIY job. That covers spray paint, primer, clear coat, sanding supplies, masking tape, adhesion promoter, and a proper respirator. Hidden costs show up when you need extra cans for full coverage or redo a panel because of poor prep.
Professional Cost: What You Get for the Money
A shop charges $300 to $900 for a bumper respray, depending on whether they use single-stage or base coat/clear coat. You pay for color match, a controlled spray booth, and a warranty. That price buys fewer mistakes and a finish that holds up to sun and road debris.
Troubleshooting Common Spray Paint Problems on Bumpers
Most bumper paint failures trace back to prep, temperature, or timing. Here is how to diagnose and fix the usual suspects.
| Problem | Likely cause | Fix |
|---|---|---|
| Runs or sags | Heavy coat or can too close | Sand smooth after curing, recoat thinner |
| Orange peel texture | Paint too thick or cold | Wet sand with fine grit, polish |
| Fish eyes (craters) | Silicone or oil contamination | Clean with prep solvent, reshoot |
| Peeling edges | Weak adhesion promoter layer | Sand back, reapply promoter, repaint |
| Color mismatch | Wrong variant or faded bumper | Test spray card, blend adjacent panels |
| Blushing (cloudy finish) | High humidity during spraying | Wait for drier conditions, add retarder |
| Dust nibs in finish | Dirty booth or tack cloth missed | Sand nibs flat, polish after curing |
Fixing Common Spray Paint Mistakes
Wait until the paint is fully cured, then sand out runs or orange peel with fine grit before polishing. Rushing this step just traps texture under the clear coat.
Dust nibs come out with light sanding and polish. Keep your workspace clean and use a tack cloth between coats.
Troubleshooting Adhesion and Peeling
Peeling means the base was contaminated or the adhesion promoter layer was too thin. Sand back to solid paint, clean with prep solvent, and reapply promoter before recoating.
Always wear a respirator when sanding cured automotive paint. Skipping it exposes you to fine dust.
Color Matching and Blending Issues
Exact color match is rare with aerosol cans, so test on a spray card first. If the shade is off, blend into adjacent panels rather than painting the bumper alone.
Faded bumpers may need a slightly different variant. Check the door jamb code and ask the manufacturer for the right formula.
Doing It on a Budget Without Cutting Corners
Where to Save and Where to Spend
Buy 400, 800, and 1500 grit sandpaper in bulk to save, but spend on a flexible primer and a 2K clear coat. These products determine whether the finish survives UV and car washes.
Material costs for a DIY aerosol job run $150 to $400 for a standard bumper, while a body shop refinish typically costs $300 to $900. The savings are real if you follow proper sanding and masking steps.
DIY vs Professional: When Spray Cans Are Enough
Spray cans work for a single bumper with minor scuffs and solid or factory-matched color. For pearl tri-coats or major bumper repair, step up to professional help.
Choose automotive paint formulated for flexible plastic bumpers, not hardware-store enamel. Verify the color match against your door jamb code and buy one extra can for touch-ups.
Wear a respirator rated for organic vapors during every coat, per OSHA guidance. Allow proper flash time between paint layers and full curing to protect both the finish and your lungs.
Quick Checklist: Are You Ready to Paint Your Bumper?
Weather and Temperature Considerations
For spray paint to flow and bond, the right conditions are needed. Aim for 60 to 80°F with low humidity, and skip windy or rainy days since dust and moisture ruin fresh paint. Cool air slows curing and traps solvents, while direct sun makes paint dry too fast and dull.
Final Prep Check Before Spraying
Verify these before you shake a single can:
- Surface clean: Wash and degrease the car bumper, then let it dry fully.
- Sanding done: Scuff the whole area with 400 to 800 grit so primer and paint grip.
- Bumper repair finished: Fill cracks and dents, then sand smooth.
- Masking set: Tape off trim, lights, and gaps you don’t want painted.
- Primer and adhesion promoter ready: Bare plastic needs the promoter first, then primer.
- Safety gear on: Wear a respirator rated for organic vapors and work in a ventilated space.
- Supplies staged: spray paint matched to your color code, clear coat, tack cloth, and a test panel.
Common Mistakes That Ruin a DIY Bumper Paint Job
Most ruined bumper jobs fail before the color coat touches plastic. Get these three steps right and the finish holds up.
Skipping Adhesion Promoter
Bare bumper plastic needs an adhesion promoter, a chemical tie coat that helps paint grip a slick surface. Skip it and your primer lifts at the first pressure wash. Clean with a prep wipe, then apply a thin promoter coat before primer.
Overlooking Flex Agents
Bumpers flex, and rigid paint cracks. Add a flex agent to primer and clear coat, or buy paint formulated for plastic. Check your color match can for flex additive before spraying.
Rushing the Drying Process
Respect flash time between coats and full curing, which continues for days. Recoating too soon traps solvent and causes wrinkling. Allow 24 to 48 hours before reassembly.
- Primer first: adhesion promoter, primer, sanding, then color.
- Thin coats: build layers slowly, never flood one pass.
- Masking matters: cover trim and sensors fully.
- Safety gear: wear an organic-vapor respirator; spray outdoors or in a ventilated booth.
- Skipping Adhesion Promoter: bare plastic needs a chemical tie coat or paint lifts.
- Overlooking Flex Agents: rigid paint cracks when the bumper flexes.
- Rushing the Drying Process: trapped solvent causes wrinkling and poor curing.
- Primer first: adhesion promoter, then primer, then sanding.
- Thin coats: build paint layers slowly to avoid runs.
- Masking matters: cover trim and sensors before spraying.
- Safety gear: use an organic vapor respirator and ventilated space.
When to Call a Pro: Real Warning Signs You Shouldn't Ignore
Structural Damage or Deep Cracks
Stop if the bumper is bent, torn, or cracked through the plastic. Spray paint hides color, not structure, and a compromised bumper won’t protect you in a crash. Have a body shop inspect it first.
High-End or Custom Paint Jobs
Walk away from tri-coats, pearls, and factory-matched metallics if you’re working with cans. Those finishes demand a spray gun, controlled booth conditions, and precise color match that aerosols can’t reliably deliver. A pro will get it right the first time.
Lack of Safe Ventilation
Don’t spray in a closed garage. Automotive paint and primer release fumes that build fast, and a paper mask won’t cut it. Use a proper respirator rated for organic vapors, and follow OSHA guidance on ventilation.
- Stop if you see deep cracks, tears, or a bent mounting structure.
- Stop if the finish requires a custom or tri-coat color match.
- Stop if you can’t spray outdoors or in a ventilated booth with a respirator.
- Stop if you lack the gear to switch from spray cans to a spray gun setup.
How to Paint a Car Bumper with Spray Paint: Frequently Asked Questions
?Can You Really Paint a Car Bumper with Spray Paint and Have It Last?
Yes, a spray paint car bumper job can last for years when you prep properly and use automotive-grade products. Rattle-can finishes fail mainly when people skip sanding, primer, adhesion promoter, and clear coat. On plastic bumpers, adhesion promoter is essential, and several clear coat layers protect the color from sun and road spray.
?How to Paint a Car Bumper with Spray Paint and Match the Color?
Use your vehicle's paint code, found on the door jamb or under the hood, and order a matched aerosol can. Avoid shelf colors that only look close. Spray a test card and compare it in daylight before touching the bumper.
?What Safety Gear Do I Need When I Paint a Car Bumper with Spray Paint?
Wear a respirator rated for organic vapors, not a dust mask, so you don't inhale paint fumes and solvent vapors. Add nitrile gloves, eye protection, and long sleeves. Spray outdoors or in a well-ventilated space and keep away from ignition sources. Good ventilation and the right respirator matter most when you spray paint a car bumper.
?Why Does Spray Paint Peel off a Car Bumper?
Peeling almost always means bad prep or missing adhesion promoter. Bare plastic needs an adhesion promoter, a chemical substance that helps paint bond to the surface, or the paint will lift. Grease, silicone, and skipped sanding cause the same failure. Clean with a proper prep wipe, sand, prime, and let each layer flash before the next.
?How Long Should I Wait Between Spray Paint Layers on a Car Bumper?
Follow the can's flash time, usually 10 to 30 minutes between coats. Flash time is how long the paint needs to set before the next layer. Don't rush it and don't wait too long either. After the final color coat, give the clear coat its full curing window, which means letting the material harden fully, often days before washing or waxing.
?When Should I Skip Spray Paint and Take the Car Bumper to a Pro?
Skip DIY if the bumper is cracked, deeply gouged, or has failing factory paint over large areas. Structural damage needs bumper repair before any paint goes on. Also go pro if you need a perfect metallic match on a curved panel or don't have a dust-free place to work. Bad conditions ruin good paint.
?is It Cheaper to Paint a Car Bumper with Spray Paint Yourself?
Yes, usually far cheaper than a body shop, but only if you count your time honestly. Materials like primer, automotive paint, clear coat, sanding supplies, and masking tape add up. The real savings come from doing the prep right the first time, so you don't repaint after a failed spray paint car bumper attempt.
Conclusion
Getting a durable result comes down to patience and safety, not luck. Wear a respirator, a device that supplies filtered air so you are not breathing aerosol fumes, and keep your work area ventilated. Thin paint layers with proper flash time, the wait between coats, beat heavy passes every time.
Before you spray anything, confirm your color match on a test card and lay down an adhesion promoter so the paint bonds to the plastic. From there, follow the primer, color, and clear coat sequence and let curing finish fully before reassembly.