
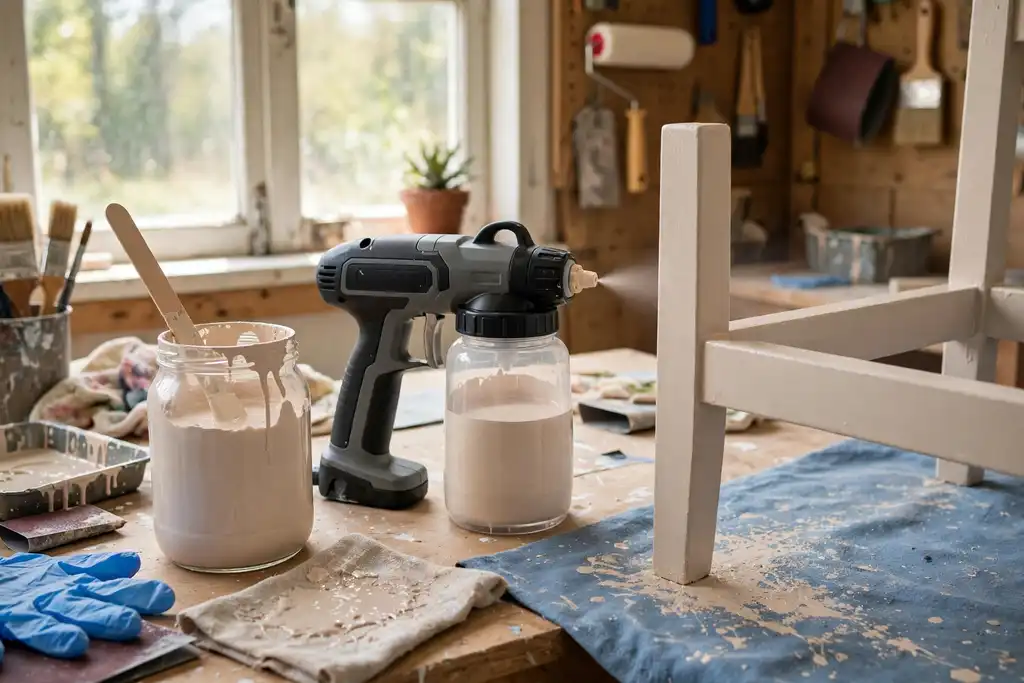

Yes, you can use chalk paint in a paint sprayer, but only if you thin it to the right viscosity and choose the correct nozzle; otherwise, clogging and a ruined finish are almost guaranteed.
Chalk paint is thicker than most paints, so spraying it without thinning is the fastest way to clog your sprayer. Can you use chalk paint in a paint sprayer? Yes, but only if you respect its viscosity, which is a fluid’s resistance to flow, and thin it properly. This article gives you the straight facts on safety, preparation, and cleaning so you avoid common mistakes.
You will learn how to match chalk paint to the right sprayer, whether HVLP or airless, and how to test for the correct consistency. We cover nozzle selection, thinning ratios, and the cleanup steps that protect your equipment. Expect practical guidance on coverage and cost, plus safety measures that keep your project on track. Follow these steps and you will get a smooth, even finish without the frustration of clogging or rework.
Can You Use Chalk Paint in a Paint Sprayer? the Straight Answer
Yes, you can spray chalk paint, but only if you treat it like the thick, fussy coating it is. Skip the prep and you will spend more time unclogging than painting.
| Situation | What it means | What to do |
|---|---|---|
| Thinning ratio | Add water in small amounts | Mix 10 to 20 percent water by volume, stir well |
| Viscosity check | Consistency should be like whole milk | Test with a viscosity cup or stir stick |
| Nozzle size | Too small causes clogging | Use a 1.5 to 2.0 mm nozzle for most sprayers |
| Sprayer type | HVLP sprayer works for small jobs | Airless sprayer handles larger projects faster |
| Preparation | Strain paint before pouring | Strain through a mesh filter to remove lumps |
| Cleaning | Chalk paint dries hard and fast | Flush sprayer immediately after use with warm water |
| Safety | Mist and fumes irritate lungs | Wear a respirator and ventilate the area |
| Coverage and cost | Thin coats need multiple passes | Plan for 2 to 3 coats and extra paint |
Recommended for this job
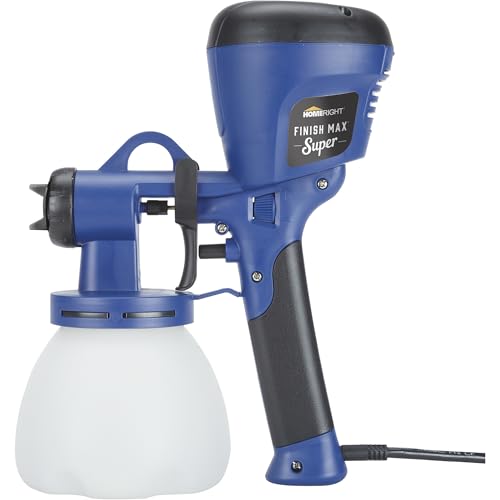
HomeRight Super Finish Max HVLP Paint
Its brass tips and adjustable patterns help spray thinned chalk paint smoothly.
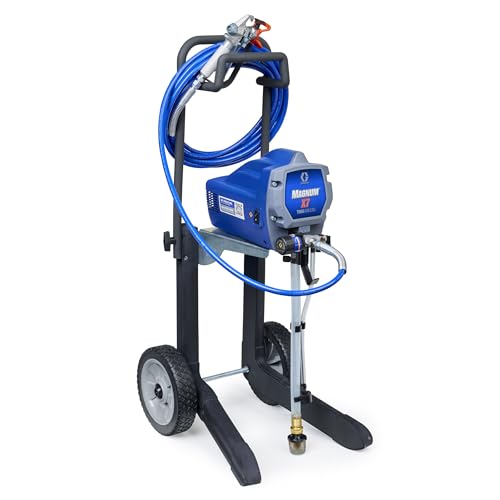
Graco Magnum X7 Cart Airless Paint
Adjustable pressure airless spraying can handle properly thinned chalk paint on large projects.

TCP Global
Straining thinned chalk paint removes lumps that could clog a sprayer nozzle.
What Chalk Paint Actually is and Why It Sprays Differently
Chalk paint is a decorative coating with a matte, chalky finish, thickened with calcium carbonate to roughly the consistency of pudding. Those large pigment particles give brush coverage in one to two coats but resist passing through a small nozzle, so clogging is a real risk.
The Short Answer: Yes, with the Right Prep
You can spray chalk paint if you thin it to a workable viscosity, meaning how readily the fluid flows, adding water in 1 to 2 tablespoon increments per quart until it drips off a stir stick like whole milk. Strain it through a 190-micron mesh bag, then fit a 1.5 to 2.0 mm nozzle for most HVLP sprayer and airless sprayer setups. Test on scrap plywood before touching furniture.
What Happens If You Skip Preparation
Skipping preparation means lumps, spitting, and a blotchy finish you sand back by hand. Clogging stops the spray mid-pass, and cleaning dried chalk paint from a gun can take an hour or more with warm water and a brush. Wear an N95 respirator, ventilate the room, and flush the gun within 15 minutes of the last pass.
When Spraying Chalk Paint Doesn't Work (and Brushing Wins)
Tiny Projects Where a Brush is Faster
Small pieces rarely justify setup. A chair, frame, or drawer pulls takes 10-20 minutes with a brush and no masking. Sprayer cleanup costs more time than brushing.
Heavily Textured or Carved Surfaces
Carved legs, deep grain, and lattice defeat spray patterns, air pushes paint unevenly into recesses while raised areas soak up extra, leaving blotchy finish. A brush controls coverage; expect 2-3 coats either way.
Paint That’s Too Thick to Thin Safely
Some chalk paints turn gritty or separate when thinned. If thinning past ~20% still leaves high viscosity, stop, over-thinning risks poor coverage and a dusty finish that rubs off. Check manufacturer spray guidance first.
Projects with No Space for Overspray
Overspray travels onto floors, tools, and unmasked items; cleanup costs more than time saved. Brush or roll indoors, or spray outside on a calm day with drop cloths and a respirator. Follow OSHA ventilation guidance.
How Weather, Season and Climate Change the Answer
Cold Garages and Slow Drying
Below 50°F, chalk paint can stay tacky overnight instead of the usual 2 to 4 hours. Cold thickens the paint and raises viscosity (a fluid’s resistance to flow), so the nozzle (the part that shapes the spray) clogs faster. Keep the space at 60 to 75°F before you fill the cup.
Humidity and Spray Pattern Changes
Above 60 percent relative humidity, moisture distorts the spray pattern and the finish (the surface treatment you see and touch) stays soft. Check with a $10 hygrometer and run a dehumidifier until you read 40 to 60 percent. Skip the second coat until the first passes the thumb test.
Hot, Windy Outdoor Spraying
Droplets dry mid-air above 85°F or in wind over 10 mph, leaving grit and thin coverage. Spray only in mild, still conditions and out of direct sun. Overspray travels 10 to 15 feet onto cars and siding, so mask them and follow the manufacturer’s ventilation and safety directions.
Indoor Climate Control Basics
Steady indoor conditions give the most predictable results with a chalk paint sprayer. Hold temperature and humidity constant, ventilate per OSHA guidance, and let each coat dry fully. Clean the HVLP sprayer or airless sprayer right after use, because preparation and cleaning decide how the next coat sets.
Can You Spray Chalk Paint with an Airless Sprayer?
Why Airless Sprayers Handle Chalk Paint Well
Yes, an airless sprayer can push chalk paint, and it handles thicker coatings better than most other sprayers. An airless sprayer uses high pressure to force paint through a small nozzle, a device that controls fluid flow, so heavy pigment and filler particles get through without constant stalling.
That pressure also helps you avoid heavy thinning, which matters because adding too much water weakens the matte finish you bought chalk paint for. Keep the coating at its intended viscosity, the fluid’s resistance to flow, and let the machine do the work.
When an Airless Sprayer is Overkill
For a single chair or a small cabinet, an airless sprayer is more machine than the job needs. Setup, cleaning, and paint waste can eat the time you saved, and a fine-tip unit can cost several hundred dollars, which is hard to justify on one piece.
Brush or roller application wins on small projects. Save the sprayer for full rooms of furniture, doors, or repeated jobs where coverage speed pays off.
HVLP vs Airless for Chalk Paint
An HVLP sprayer, a lower-pressure unit that atomizes paint with high air volume, needs more thinning than airless and clogs more easily with gritty chalk paint. Airless is the safer pick for unthinned product.
Whichever you choose, strain the paint first, test on scrap, and follow the manufacturer’s safety guidance, including a respirator and ventilation. Proper preparation and a clean nozzle prevent most clogging and uneven finish problems.
When It Works: Conditions Where Spraying Chalk Paint Holds up
Large Flat Surfaces Like Cabinet Doors
Spraying pays off most on broad, flat pieces such as cabinet doors, drawer fronts, and table tops. A sprayer lays down an even coat fast, avoiding brush marks and lap lines that show on matte finishes. Curved, detailed, or small pieces waste more material in overspray than they save in time.
Thinned Paint at the Right Viscosity
Most chalk paint is too thick to spray straight from the can, so thin it with water until it flows like whole milk. Viscosity, how thick or runny a fluid is, makes the difference between a smooth coat and a sputtering mess. Add water in small amounts, stir well, and test on scrap first.
Correct Nozzle and Pressure Combo
Match your nozzle, which controls fluid flow, to the thinned paint and set pressure per the manufacturer’s chart. An HVLP sprayer usually needs a larger nozzle for chalk paint, while an airless sprayer uses high pressure to push thick paint through without clogging. Too small a nozzle or too little pressure causes spitting and uneven coverage.
Well-Prepped, Dust-Free Surfaces
Preparation decides whether the coating sticks, so sand lightly, wipe off dust, and let the piece dry fully before spraying. Chalk paint hides flaws but not grit or grease, and debris becomes bumps under the finish. Keep the spray area clean and ventilated, and wear a respirator.
How to Thin, Strain and Spray Chalk Paint Step by Step
Thin Chalk Paint to a Sprayable Consistency
Thin chalk paint with water in small increments, adding roughly 10 to 20 percent by volume, until it drips off a stir stick like whole milk. Check viscosity by spraying a quick pass on scrap; thick mix means more water.
Strain Out Lumps Before They Hit the Nozzle
Strain the thinned chalk paint through a fine mesh filter or nylon stocking into a clean container. This catches lumps and grit that cause clogging mid-job.
Set Nozzle Size and Pressure
Match the nozzle to the job: a 1.5 to 2.0 mm tip suits most HVLP sprayers, while airless sprayers typically want a 0.013 to 0.015 inch tip. Set airless pressure around 1,500 to 2,000 PSI, or dial the HVLP sprayer to 20 to 30 PSI, then check the spray pattern on cardboard.
Test on Scrap First
Test on scrap wood or a spare panel, adjusting thinning and pressure until the finish lays flat without runs or orange peel. Fix problems here, not on your furniture.
Spray in Overlapping Passes
Spray in overlapping passes, keeping the gun 6 to 8 inches from the surface and moving at a steady speed to build even coverage. Wear a respirator and vent the area for safety.
Get the mix and the machine right before you spray, and chalk paint goes on fast and even.
Clogging, Spitting and Spray Pattern Troubleshooting
Why Chalk Paint Clogs Sprayers
Because its thick, powdery body fights narrow fluid passages, chalk paint clogs sprayers. Pigment and calcium carbonate particles settle fast and pack into nozzles, stopping flow. Thin only as much as the manufacturer allows, usually 10â20% water by volume for water-based brands. Stir often, strain through fine mesh, and check viscosity with a cup.
Fixing Uneven Spray Patterns
Uneven patterns usually mean a partly blocked nozzle or mismatched air pressure and fluid flow. Clean the nozzle and air cap with the manufacturer’s solvent, test on scrap, adjust screws in small steps, and keep the gun parallel 6-8 inches from the surface. An HVLP sprayer handles thinned chalk paint better than a detail gun; airless needs a finer tip and steady pressure.
Clearing a Blocked Nozzle Mid-Project
Stop spraying the moment the pattern breaks and clear the nozzle before paint dries. Release pressure, remove the air cap and nozzle, and soak them in warm water for water-based paint. Never poke a wire through the tip. Flush the gun, wipe the needle, and test on scrap before resuming.
Your Action Plan Before You Fill the Sprayer
Before you pour a drop of chalk paint into any sprayer, run this checklist. It separates a fast, even coat from a clogged nozzle and a wasted afternoon.
| Action | Why it helps | How to start |
|---|---|---|
| Check project size | Spraying wins on large or detailed pieces | Measure square footage and count spindles |
| Confirm sprayer type | HVLP sprayer suits small jobs; airless sprayer handles big runs | Match sprayer to project within its manual limits |
| Test viscosity | Thinning to a milk-like flow prevents clogging | Add water in small increments, stir, test with a viscosity cup |
| Strain the paint | Removes lumps that block the nozzle | Pour through a fine mesh strainer into a clean cup |
| Prep and mask | Smooth surface and protected edges mean fewer fixes | Sand lightly, wipe dust, tape trim and cover floors |
| Plan recoat windows | Chalk paint dries fast but needs full cure between coats | Check manufacturer times, typically 1 to 4 hours between coats |
| Set up safety gear | Respirator and ventilation keep overspray out of your lungs | Wear an N95 or better, open windows, use a fan |
On big or detailed pieces, spraying chalk paint saves time, but only if you set up right. Start by deciding spray versus brush by project size: small crafts are faster by hand, while large furniture or cabinets justify the setup and cleaning time of a sprayer.
Decide Spray vs Brush by Project Size
Match the tool to the job. An HVLP sprayer suits small to medium pieces; an airless sprayer handles large runs. DIY spraying works for most homeowners, but complex or high-value pieces may warrant a professional.
Gather Thinning, Straining and Safety Gear
Thinning chalk paint to a milk-like viscosity keeps the nozzle clear. Strain out lumps, and wear a respirator with good ventilation to manage overspray.
Prep the Surface and Mask the Area
Sand lightly, wipe dust, and tape off edges. Proper preparation prevents finish defects and makes cleanup easier.
Plan Drying and Recoating Windows
Chalk paint dries fast, often 2 to 4 hours between coats depending on humidity. Follow the manufacturer’s recoat times to avoid lifting.
Safety and Hidden Costs of Spraying Chalk Paint
Ventilation and Respiratory Costs vs Time Saved
Since spraying chalk paint creates a fine mist you should never breathe, set up airflow first. Work in a garage or shop with doors open and a box fan pushing air out, and wear an N95 or better respirator rated for paint aerosols. OSHA guidance on solvent and pigment exposure applies. Skip the mask and you risk headaches, dizziness, and long-term lung irritationâa bad trade for a faster finish.
Sprayer Setup and Cleaning Costs vs Time Saved
Chalk paint is thick, so you must thin it to sprayable viscosity, adding extra product, mixing time, and coats. Expect 10-20% water by volume for an HVLP sprayer, less for airless with a larger nozzle. Budget 20-45 minutes for setup and cleaning per session. A quart costs $15, $40, and wasted thinner and rinse water add up. Spraying saves brush time on big pieces but rarely saves money.
Topcoat and Sealer Choices After Spraying
Sprayed chalk paint dries matte and porous, so plan your topcoat first. Water-based polyurethane in satin or flat keeps the look and sprays cleanly. Wax gives a softer sheen but needs hand buffing. Test sealer on a scrap panel first, as some finishes react badly with fresh chalk paint.
Real-Life Walkthrough: Spraying Chalk Paint on Kitchen Cabinets
Assessing the Cabinets and Choosing a Sprayer
Decide if cabinets justify the effort. Degrease and lightly sand greasy surfaces, since chalk paint grips best on clean, dull surfaces.
For doors and frames, an HVLP sprayer gives the most control. Airless sprayers suit large runs but lay material fast, so practice on scrap first.
Thinning, Straining and Testing
Most chalk paint needs thinning. Add water gradually until paint drips in a steady stream, then strain through fine mesh to remove grit that clogs.
Viscosity changes as paint sits, so test on cardboard with your nozzle until you get an even coat with no spitting.
Spraying Doors and Frames
Work in thin passes, overlapping strokes by half. Spray doors flat on sawhorses, then flip and coat edges. Use a smaller nozzle and careful masking for frames; watch for runs at inside corners.
Drying, Recoating and Sealing
Allow 1-2 hours between coats, longer with humidity or thickness. Recoat when dry to the touch; plan two to three coats. Finish with a clear topcoat, ventilate, follow safety instructions, and clean the sprayer immediately.
Common Mistakes to Avoid When Spraying Chalk Paint
Most chalk paint failures in a sprayer trace back to four avoidable errors. Fix these before you load the cup and you save yourself a full repaint.
Skipping Thinning and Straining
Chalk paint is thick by design, so thin it to a milk-like viscosity and strain out lumps first. Skip this and the nozzle clogs mid-pass, leaving spatters instead of an even finish.
Wrong Nozzle or Pressure
Match your nozzle size and pressure to the thinned paint, not the can. Too small a tip or too little pressure causes clogging and a gritty texture; test on scrap before committing.
Spraying in Poor Ventilation
Spray chalk paint outdoors or in a garage with cross-flow air and wear a respirator. Overspray hangs in still air, so poor ventilation risks both your safety and a dusty finish.
Neglecting Sprayer Cleaning
Flush the sprayer immediately after use, because chalk paint dries fast and hardens inside passages. Skip cleaning and your next project starts with a clogged gun and a costly rebuild.
- Thin and strain: match viscosity before spraying.
- Test nozzle and pressure: dial in on scrap first.
- Ventilate: cross-flow air plus a respirator.
- Clean right away: flush every passage after each session.
When to Ask a Store Expert, the Manufacturer or a Local Pro
Paint and Sprayer Compatibility Questions
Ask before you buy when the label doesn’t list sprayer guidance or your unit’s manual is vague on abrasive pigments. A store expert can match your chalk paint to the right nozzle size and confirm whether thinning is needed for your HVLP sprayer.
Call the manufacturer when you need the exact viscosity target and pressure settings. Get their recommendation in writing so a failed batch isn’t your word against theirs.
Large or High-Value Furniture Projects
Bring in a local pro when a piece is an heirloom, a built-in, or anything you can’t easily strip and redo. Their experience with coverage and finish on big surfaces saves you a costly redo.
Ask them to quote spraying versus hand application, and confirm who handles preparation and cleanup.
When Results Matter and Time is Short
Hire help when a deadline or a client’s expectations leave no room for trial and error. A pro can advise on the best sprayers for chalk paint and dial in settings before your first coat.
Ask for a test panel and a firm schedule, then compare it to your own timeline.
When to ask for help:
- Ask the manufacturer for the exact viscosity target and pressure settings for your specific chalk paint and sprayer model.
- Ask a store expert to confirm the correct nozzle size and whether thinning is required for your HVLP sprayer.
- Ask a local pro to quote spraying versus hand application on large or high-value furniture, including preparation and cleaning.
- Ask a pro which sprayers work best with chalk paint and to run a test panel before you commit.
Can You Use Chalk Paint in a Paint Sprayer: Frequently Asked Questions
?Can You Use Chalk Paint in a Paint Sprayer Without Ruining the Finish?
Yes, but only if you thin and strain it first. Chalk paint is thick by design, and its high viscosity means it won't flow through a nozzle straight from the can. Thin it in small batches, strain out grit, then test the spray pattern on scrap. Skip preparation and you'll get spitting, clogging, and a rough finish that defeats the whole point.
?Can You Use Chalk Paint in a Paint Sprayer, and Does It Need Thinning First?
Yes, you can use chalk paint in a paint sprayer, but it almost always needs thinning first. Chalk paint's viscosity is too high for most sprayers straight from the can. Add water or the manufacturer's thinner a little at a time until it coats the back of a spoon in a thin, even film. Over-thinning causes runs and weak coverage, so sneak up on the right consistency instead of dumping in water.
?How Do You Use Chalk Paint in a Paint Sprayer Without Clogging the Nozzle?
Strain the paint through a fine mesh filter right before spraying, and keep the nozzle clean between coats. Clogging usually comes from undissolved pigment, dried bits, or paint that's too thick. Match your nozzle size to the thinned paint, keep the sprayer moving, and flush the gun the moment you pause. A five-minute cleaning habit saves an hour of frustration.
?Why Does Spraying Chalk Paint Go Wrong for so Many People?
Most failures trace back to skipping preparation. People pour thick chalk paint into a paint sprayer, skip thinning, and skip a test panel. The result: clogging, uneven coverage, and a gritty finish. Chalk paint also dries fast, so overlapping passes matter. Do the boring steps first and spraying works; rush it and you'll be sanding back a mess.
?is an HVLP Sprayer a Good Match for Chalk Paint?
It can be, if the paint is thinned properly. An HVLP sprayer (a sprayer that uses high volume and low pressure to deliver paint) handles thinned chalk paint well on furniture and cabinets, giving a smooth, controlled finish. Keep the nozzle clean, work in thin coats, and don't overload the cup. Thick paint will defeat it fast.
?When Can You Use Chalk Paint in a Paint Sprayer and Actually Save Money?
You save when the job is big enough to justify the setup. Spraying shines on cabinet sets, doors, and large furniture, where speed and even coverage cut labor. For one small chair, the cost of thinner, filters, and cleaning time outweighs the benefit. Do the math on coverage and cost before you commit.
?What Safety Steps Matter Most When You Spray Chalk Paint?
Respect the overspray. Chalk paint dust and mist travel, so mask off surroundings, ventilate the space, and wear a respirator rated for paint particles plus eye protection. Keep the sprayer grounded and away from ignition sources. Safety here means controlling mist and fumes, not just avoiding a mess. Preparation and cleaning belong on the same checklist.
Our Thoughts
So yes, you can run chalk paint through a paint sprayer, but only after you thin it to the right viscosity and fit the correct nozzle. Skip either step and clogging or a wrecked finish is nearly certain. Treat thinning as selective removal of material from the mix, not guesswork: add water or a manufacturer-approved thinner in small amounts and stir thoroughly.
Your single most useful next step is a spray-out test on scrap material with the exact thinned batch and nozzle you plan to use. Check coverage and finish, then clean the gun immediately after. That preparation protects your safety and your cost, and it is the difference between a fast project and a repaint.