
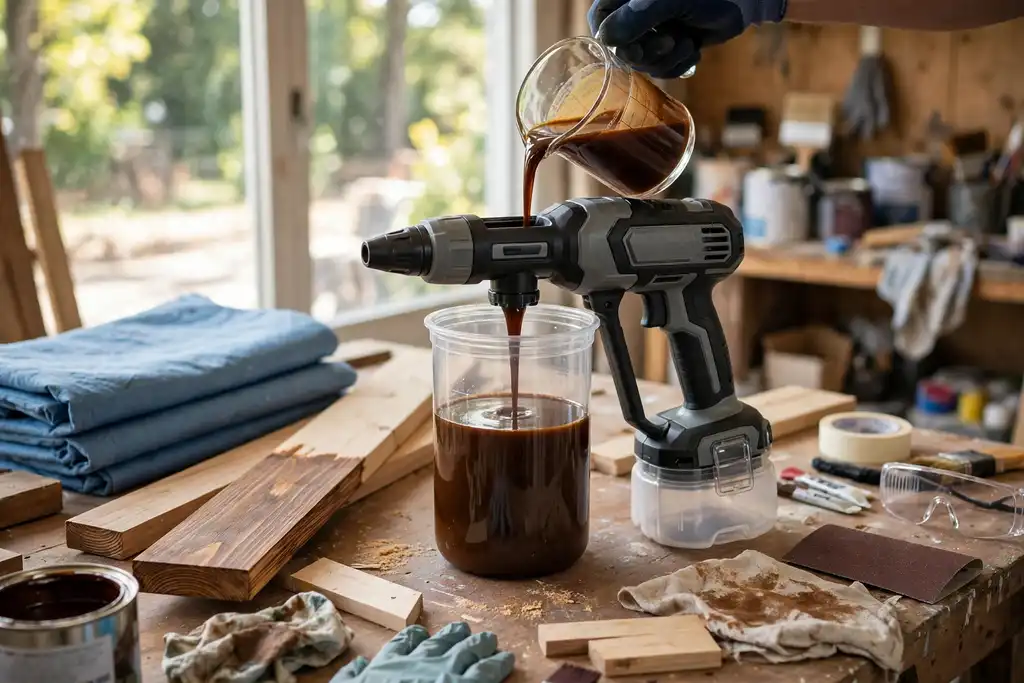
It depends on the stain and sprayer: most wood stain can go through a paint sprayer, but only if you thin it to the right viscosity and match the nozzle to the job, or you'll get clogs and overspray.
A paint sprayer can lay down wood stain faster than a brush, but one wrong move turns a $30 can of stain into a $300 cleanup. The question can you put stain in a paint sprayer has a practical answer: yes, with the right equipment and prep, but not every stain or sprayer is a match.
You’ll learn which sprayers handle wood stain, how viscosity and thinning affect flow, and the safety steps (masking, ventilation) that keep overspray off your car and siding. The goal is a even coat the first time, without clogged nozzles or a finish that never dries.
Can You Put Stain in a Paint Sprayer? the Straight Answer
Yes, you can spray stain with the right paint sprayer, but only if you match the equipment and thin the product correctly. Get it wrong and you will waste stain, clog the gun, or end up with a blotchy, uneven finish.
| Situation | What it means | What to do |
|---|---|---|
| Airless sprayer | High pressure, forgiving with thicker fluids | Use a small tip (0.009 to 0.013 in) and test on scrap |
| HVLP sprayer | Low pressure, needs thin stain | Thin stain to a watery consistency and use a 1.0 to 1.5 mm nozzle |
| Conventional sprayer | Requires very thin stain | Thin heavily and spray light coats |
| Thick gel stain | Too viscous for most sprayers | Do not spray; brush or wipe instead |
| Water-based stain | Thinner, easier to spray | Check viscosity and strain before filling |
| Oil-based stain | Needs thinning for HVLP | Thin with mineral spirits per label |
| Exterior deck stain | Thick and gritty | Use airless with a larger tip or apply by brush |
Recommended for this job
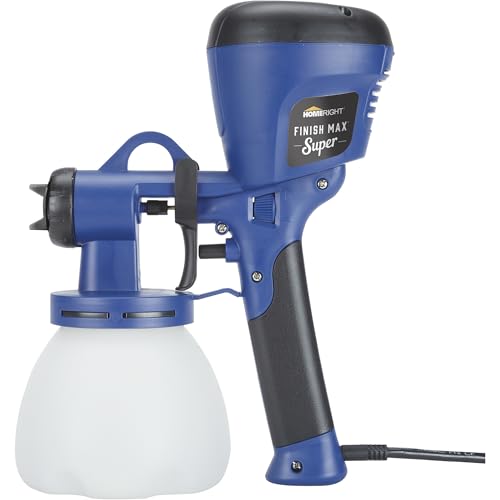
HomeRight Super Finish Max HVLP Paint
Its three brass tips and spray patterns are designed to handle stains and sealers directly.
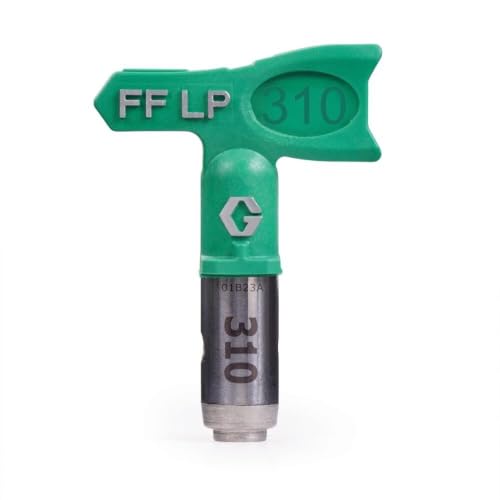
310 Graco RAC X Fine Finish
Low-pressure fine finish tip helps atomize stain for smooth, even spray results.

BEESAFETY Half Face Respirator Mask
Filters solvent fumes and paint particles while spraying stain in enclosed spaces.
Yes, you can spray wood stain, but only with equipment matched to the product. An HVLP or airless sprayer pushes coating through a nozzle that controls fluid flow, and wood stain behaves nothing like paint.
What Actually Happens When Stain Hits a Sprayer
Thin stain sprays; thick stain clogs a small nozzle, sputters, or lays down uneven coats. Overspray, airborne coating landing where you did not aim, drifts 10 to 15 feet with thin stain. Mask trim and nearby walls, and run ventilation for the full job.
Why Viscosity Decides Everything
Viscosity, how thick a fluid is, controls whether your sprayer can atomize the stain. Airless sprayer models handle thicker fluids with a 0.013 to 0.017 inch tip size. HVLP, a method that sprays coating through air onto a surface, needs thinner stain and a 1.0 to 1.5 mm nozzle. Thin per the manufacturer’s label, never guesswork.
The One-Sentence Rule to Remember
If the stain drips off a stir stick like water, it will spray; if it clings like syrup, thin it or brush it on. Test on scrap first, clean the gun within 30 minutes of finishing, and plan a sealer or finish coat over dried stain.
When It Doesn't Work: Stain Formulas and Jobs That Fight the Sprayer
Gel Stains and Heavy-Bodied Stains
Skip the sprayer for gel stains and other heavy-bodied formulas. Their thick consistency won’t atomize properly through a nozzle, so you get spitting, blotches, and clogged tips instead of an even coat.
Brush or wipe these on by hand. You’ll use less product and get far more control over the color depth, especially on porous woods that soak up stain unevenly.
Tiny Trim, Spindles, and Detailed Millwork
Small, intricate pieces are usually faster to brush than to spray. Setup time for masking, ventilation, and cleanup often exceeds the actual job on a handful of spindles or a short run of trim.
Brushing also keeps stain off adjacent surfaces, so you avoid overspray drifting onto walls, glass, or finished floors. Save the sprayer for large flat panels and long runs of board.
Thick Oil-Based Stains Straight from the Can
Yes, you can spray oil-based wood stain, but only after thinning it to a sprayable viscosity. Most cans are too thick for an HVLP or airless sprayer as sold, so check the manufacturer’s thinning ratios first.
Thin in small increments and test the pattern on scrap. Over-thinning dulls the color and can raise grain; under-thinning clogs the nozzle. Clean the sprayer with the recommended solvent right after use, since oil-based residue sets up fast.
Quick Pre-Spray Checklist: Five Things to Confirm First
Run through these checks before you pour anything into a cup gun or airless unit. Skipping one is how most stain jobs go sideways.
Stain Type and Viscosity
Confirm your wood stain is sprayable, not a wipe-on gel. Viscosity, how freely the liquid flows, must be thin enough for your paint sprayer; check the manufacturer’s spec and thin only as directed.
Sprayer Type and Tip Size
Match the machine to the job: HVLP (a spray technique that atomizes coating with high air volume and low pressure) suits small projects and fine control, while an airless sprayer covers fences and decks fast. Pick the nozzle, the part that controls fluid flow, and tip size from the stain’s data sheet, not guesswork.
Masking and Ventilation Setup
Protect everything you do not want stained. Masking (covering surfaces so coating cannot reach them) plus drop cloths contain overspray, the airborne mist that lands where you did not aim. Work with open airflow and a respirator rated for solvent or waterborne vapors per OSHA guidance.
Test Panel Before the Real Thing
Spray a scrap board first. Check color, coverage, and drying before committing, and plan your cleaning routine so stain does not set inside the gun.
- Stain type: confirm your wood stain is sprayable and thin only per the manufacturer's directions.
- Viscosity check: measure or test flow so the stain passes through the gun without clogging.
- Sprayer choice: HVLP for small, controlled work; airless for large flat areas.
- Nozzle and tip size: select from the stain's data sheet, not by guessing.
- Masking: cover adjacent surfaces and floors to contain overspray.
- Ventilation: spray with strong airflow and wear a respirator rated for the coating's vapors.
- Test panel: spray a scrap board to verify color and coverage before the real piece.
Your Spray-Stain Action Plan, Step by Step
Staining with a sprayer rewards prep and punishes shortcuts. Work through these five steps in order and you will get even color without clogged tips or stain where it does not belong.
| Action | Why it helps | How to start |
|---|---|---|
| Thin the stain | Lets it flow through the tip | Add thin coats, test spray |
| Set pressure and flow | Prevents blotchy, heavy coats | Start low, adjust in small steps |
| Mask the surroundings | Stops overspray damage | Tape and cover nearby surfaces |
| Spray overlapping passes | Builds even stain coverage | Keep gun moving at steady speed |
| Clean the sprayer right away | Stops stain drying in passages | Flush with the maker's solvent |
Thin the Stain to the Right Consistency
Most wood stain needs some thinning before a paint sprayer will move it smoothly. Check viscosity, how freely the liquid flows, against the maker’s spec and add solvent in small amounts until it passes a test spray.
Dial in Pressure and Flow
Set pressure and fluid flow low, then raise them until the spray lays down a wet, even coat. An HVLP unit runs at lower pressure than an airless sprayer, so match settings and nozzle tip size to your machine.
Mask and Protect the Surroundings
Overspray, airborne stain landing where you did not aim, is the biggest risk here. Tape off edges and cover floors and nearby items, and run ventilation before you pull the trigger.
Spray in Overlapping Passes
Keep the gun a steady distance away and move in even, overlapping passes to avoid lap marks. Build thin coats rather than one heavy pass, and let each dry before adding the next.
Clean the Sprayer Immediately
Flush the gun and nozzle as soon as you finish, before stain sets inside the passages. Follow the manufacturer’s cleaning steps, then apply a sealer and finish once the stain is fully dry.
Real Scenario: Staining a 12-Foot Privacy Fence with an Airless Sprayer
Day One: Prep, Mask, and Test
Plan a full prep day. Wood stain is a liquid that colors wood and travels wherever air carries it, so mask siding, windows, plants, and concrete with plastic and tape. Overspray is airborne coating landing where you didn’t intend, on a windy day it can reach a neighbor’s car. Set up ventilation and wear a respirator rated for solvents or waterborne mists per the label and OSHA. Test your mix on scrap boards.
Day Two: Spray, Back-Brush, and Clean up
Spray in smooth, overlapping passes, keeping the nozzle a consistent distance from the wood. Back-brush each section while wet to even coverage and work stain into the grain. Two light coats beat one heavy pass. Viscosity decides whether an airless or HVLP sprayer atomizes cleanly; thin only per manufacturer directions and match tip size to the product.
What Went Right and What Got Messy
Back-brushing saved the job, and test boards caught a thinning mistake before it hit the fence. Overspray drifted 10 to 15 feet onto a walkway, and skipping a full gun cleaning clogged the tip. Clean the sprayer immediately after use, then apply sealer once the stain cures.
Can I Spray Wood Stain with a Paint Sprayer? Yes, with Caveats
HVLP vs Airless for Wood Stain
Choose HVLP for trim and furniture: it lays thin coats with less overspray (airborne stain hitting unintended surfaces). Airless sprayers suit large flat runs like a 200 sq ft deck, but an overly heavy coat can flood and drip. Check viscosity (how freely the liquid flows) first, then thin per the label and match the nozzle (fluid-control device) or tip size to the chart.
Water-Based vs Oil-Based in the Same Gun
Never run water-based stain through a gun that sprayed oil without full cleaning: residue clogs the nozzle. Flush with the specified solvent, then flush again until clear. Oil-based sprays slower and needs more thinning; water-based dries in 30 to 60 minutes, so keep moving to avoid lap marks.
What Changes on Furniture and Cabinets
Mask walls, floors, and hardware before you start; overspray drifts 10 to 15 ft. Ventilate per OSHA guidance and wear a respirator rated for the finish. Spray light coats, wipe back pools within 2 minutes, then apply sealer and finish once dry.
Stain vs Paint in a Sprayer: Why They Behave so Differently
Viscosity and Pigment Load
Wood stain is thinner than paint, and low viscosity lets many stains atomize easily, but pigment load causes trouble. Heavy-bodied gel stains and thick oil formulas often need thinning to spray evenly; over-thinning can drive pigment deep into the grain too fast. Check the product data sheet before thinning, the manufacturer’s ratio protects color and finish and keeps the sprayer in its safe range.
Clogging and Tip Wear
Pigment particles settle and clump, so expect clogging if you skip straining or let the sprayer sit between coats. A smaller nozzle passes stain better than a paint-sized one, but abrasive pigments wear tips over time. Match tip size to stain thickness and replace worn tips before the pattern turns uneven.
Cleaning Time You Didn’t Budget for
Stain dries fast and leaves sticky residue inside passages, so plan a full flush right after the job. Cleaning matters more than with paint because cured stain gums up valves. Budget 30 to 60 minutes for a thorough flush plus a solvent rinse, and store the unit dry.
How to Tell If Your Stain is Sprayable, and What to Do If It Isn't
Stir the stain thoroughly, then lift the stir stick and watch the drip: if it runs off in a thin, steady stream, it is close to sprayable. Measure a small batch, add thinner in 1-ounce increments per quart, and stir for 30 seconds between additions.
Do the Stir-And-Drip Test
Check viscosity with a viscosity cup: aim for 20 to 30 seconds for HVLP and 25 to 40 seconds for airless.
Bump Tip Size Before Thinning More
If the stain still drips thickly, switch to a larger nozzle or tip size before adding more thinner. For HVLP, start with a 1.5mm to 1.8mm nozzle; for airless, use a 0.013 to 0.015 tip size.
Thin in Small Increments
Spray a test panel and look for a smooth, even coat with no spitting or heavy overspray. Clean the paint sprayer immediately after use with the manufacturer’s recommended solvent.
Test and adjust your wood stain before you fill the cup, because most stains need thinning and the right nozzle to spray well.
When Spraying Stain Works Best: Conditions Where It Holds
Large Flat Surfaces and Thin Stains
With the right sprayer type, you can spray stain, and it pays off most on big, flat work like decking, siding, or fence panels. A thin, dye-based wood stain flows easily through an HVLP (a setup that sprays coating through air onto the surface) or a low-pressure airless sprayer. Check viscosity, the fluid’s resistance to flow, and thin only per the label.
Match the nozzle (the part that controls fluid flow) and tip size to the product. Too small a tip clogs; too large floods the wood. Test on scrap first.
Good Ventilation and Low Wind
Spray outdoors or in a open garage with cross airflow, and wear a respirator rated for solvent vapors. Overspray, airborne stain landing where you did not aim, drifts far in wind. Skip breezy days.
Do your masking (covering surfaces you want to keep clean) before the first pass. OSHA-style ventilation habits keep fumes down and your finish even.
Warm, Dry Weather Windows
Pick a warm, dry stretch, roughly 60 to 80 F, when humidity stays moderate. Stain absorbs unevenly in cold or damp air, and slow drying invites lap marks. Plan cleaning and a sealer topcoat for the same window.
Cost, Safety, and the Fumes Most DIYers Underestimate
Sprayer vs Brush: Real Cost per Project
Brushing costs little beyond a can and pads; a sprayer only pays off with lots of square footage or several projects. HVLP units run $80, $300 (airless costs more), plus masking supplies, solvent, and a spare nozzle. A brush job on one table may cost $15, $30, while sprayer setup and cleanup can take an hour or two.
- Brush: low upfront cost, slower on big surfaces.
- Sprayer: higher upfront cost, faster coverage, more prep and cleaning.
Solvent Fumes and Overspray Risk
Wood stain carries flammable solvents; spraying creates a breathable, ignitable mist, and overspray can drift onto walls, cars, and nearby surfaces. Keep ignition sources off, including pilot lights and space heaters, and mask everything within range. Check the label for solvent content and flash point.
Respirator and Ventilation Minimums
Wear an organic-vapor respirator, not a dust mask, and spray only where fresh air moves through. OSHA recommends supplied air or fitted cartridge respirators for solvent coatings; EPA advises against indoor spraying without cross ventilation. Open two windows or doors on opposite sides, add an exhaust fan, and keep the space clear until fumes fade. Change cartridges per the manufacturer’s schedule; never rely on smell alone.
Common Mistakes When Spraying Stain (and How to Avoid Them)
Over-Thinning and Blotchy Coverage
Thinning wood stain too far is the fastest way to get uneven color and drips. Add thinner in small amounts and check viscosity, the fluid’s resistance to flow, before you spray.
Skipping Back-Brushing on Decks
Spray alone rarely works stain into the grain. Back-brush or roll right after spraying so the wood absorbs the stain evenly.
Letting Stain Dry Inside the Gun
Stain left in the nozzle and passages sets up and clogs fast. Flush the paint sprayer with the manufacturer’s cleaner immediately after use, and keep a spare tip size on hand for troubleshooting.
- Wrong tip size: a tip too small for your stain clogs constantly. Match the nozzle to the product and test on scrap first.
- Ignoring overspray: airborne stain lands on siding, cars, and plants. Mask and ventilate before you pull the trigger.
- Skipping a sealer test: some stains need a sealer or finish coat. Check compatibility on a hidden board.
- Spraying in wind or heat: fast drying causes lap marks. Work in shade and manageable sections.
- Over-thinning and blotchy coverage: add thinner gradually and check viscosity before spraying.
- Skipping back-brushing on decks: brush or roll immediately after spraying for even absorption.
- Letting stain dry inside the gun: flush the sprayer with cleaner right after use.
- Wrong tip size: match the nozzle to the stain and test on scrap to stop clogging.
- Ignoring overspray: mask nearby surfaces and ventilate before spraying.
- Skipping a sealer test: confirm stain and finish compatibility on a hidden board.
- Spraying in wind or heat: work in shade and small sections to avoid lap marks.
When to Call a Pro Instead of Spraying Stain Yourself
Solvent-Based Stain Indoors or in Tight Spaces
Stop and hire a pro if you plan to spray solvent-based wood stain indoors or in a tight space. Those fumes need serious ventilation and a fit-tested respirator, and a pro knows how to set that up safely.
Brushing or wiping is often the better call in small rooms anyway. You get more control and far less airborne mist.
Large Exterior Jobs with Overspray Risk
Call a pro when the job is big and overspray, the airborne mist that lands where you don’t want it, could hit cars, siding, or a neighbor’s property. Masking every surface yourself is slow and easy to get wrong.
A professional carries the right liability coverage and equipment to contain it.
Sprayer Clogging You Can’t Resolve
Get help if your paint sprayer keeps clogging after you’ve checked viscosity, thinning, and tip size. Repeated clogging usually means a mismatch between the stain and your nozzle.
A pro can match the setup correctly before you waste material or damage the finish.
- Stop if you can’t maintain strong ventilation and a proper respirator.
- Call a pro when overspray could reach vehicles or neighboring property.
- Get help if thinning and tip changes don’t stop the clogging.
- Hire out any job where a failed sealer or finish would be costly to redo.
Can You Put Stain in a Paint Sprayer: Frequently Asked Questions
?Can You Put Stain in a Paint Sprayer If the Stain is a Thick Gel Formula?
No, not without serious problems. Gel wood stain is built to sit on the surface and be wiped back, so it will clog a nozzle and spray uneven and blotchy. Only spray stains thinned to a watery consistency. Check the label or test viscosity with a stir stick; if it clings thick, brush or wipe it on instead.
?How Do You Thin Stain Before You Put It in a Paint Sprayer?
Add the manufacturer-approved thinner in small amounts and stir thoroughly, then test spray on scrap wood. Thin only to the point the stain passes through the nozzle in a fine, even mist, because overthinned stain loses color depth and raises grain. Never guess the ratio; start thin and add more stain back if coverage is weak.
?Why Does Stain Come Out Splotchy When You Put It in a Paint Sprayer?
Splotches usually mean uneven overlap, a worn tip, or stain too thick for the nozzle. Keep the gun moving at a steady distance and overlap each pass by about half. On soft woods like pine, a pre-stain wood conditioner helps even absorption. Test your pattern on scrap first so mistakes stay off the real project.
?is It Safe to Put Stain in a Paint Sprayer Indoors?
No, not without heavy precautions. Spraying stain throws fine overspray into the air, and solvent-based formulas carry strong fumes. Work outside or in a garage with the door open, add fans for cross-ventilation, and wear a respirator rated for solvents. Mask nearby surfaces and keep ignition sources away.
?What Tip Size Should I Use When I Put Stain in a Paint Sprayer?
Use a small tip, generally in the 1.0 to 1.5 mm range for HVLP and a fine airless tip for thin stains. A large tip floods the wood and wastes material. Match the tip to your stain's viscosity, and always run a test panel. If the spray stutters or spits, the tip is too small or the stain needs thinning.
?Can You Put Stain in a Paint Sprayer to Save Time Compared with Brushing It on?
Yes on big flat surfaces like fences and siding, but not always overall. You still mask, thin, test, and clean the paint sprayer afterward, and cleaning solvent-based stain takes real effort. On small or detailed projects, brushing is faster and wastes less. Weigh setup and cleanup time before you commit.
?Can You Put Stain in a Paint Sprayer and Then Apply a Sealer Over It?
Yes, but let the stain dry fully first. Sprayed stain can lay down lighter than brushed stain, so check color depth before you lock it in. Apply a sealer or clear finish only after the stain's full dry time, and clean the paint sprayer thoroughly between products so residue doesn't contaminate the finish.
Our Thoughts
So yes, most wood stain can run through a paint sprayer, but only when you respect the limits. Thin it to a viscosity that flows without pooling, match the nozzle and tip size to the product, and you avoid clogs. Skip those steps and you get overspray, uneven color, and a mess to fix.
Before you spray anything, mask off surfaces you do not want coated, set up ventilation, and plan your cleaning routine for right after the job. Test the mix on scrap wood first. That single step tells you if your thinning ratio and tip size work before the real piece is at risk.
Sources and further reading: guidance from EPA, OSHA, manufacturers.