
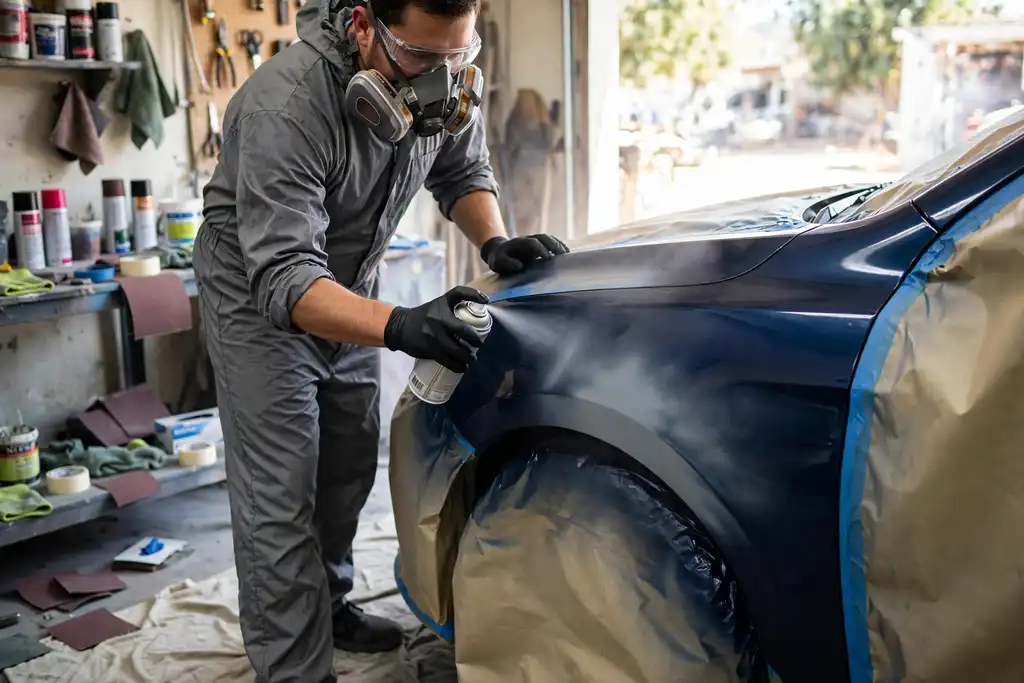
To blend spray can paint on a car, feather the edges by spraying light coats over a wider area and then clear coat and polish, but only if the existing paint is in good condition and the color matches closely.
Myth: You Can Just Spray the Repair and Buff It Smooth
That is the fastest way to a visible halo and a failed repair. Learning how to blend paint on car with spray can means accepting that blending is a controlled layering process, not a single pass. The new paint must be feathered, which here means gradually fading the edges so they melt into the existing finish, and that demands patience with flash time, the short wait between coats.
You will get the exact sequence: surface prep with sandpaper and tack cloth, primer where needed, thin coats of car paint, a clear coat to seal the blend, then buffer and polishing compound work. Safety comes first: work outdoors or in a ventilated space, wear a respirator rated for organic vapors, and keep paint thinner and spray cans away from ignition sources.
- Clean and sand the repair area, then apply primer before any color coat.
- Feather edges with fine sandpaper so new paint fades into old car paint.
- Apply thin coats with correct flash time to avoid runs and hard lines.
- Finish with clear coat, then buffer using polishing compound for a seamless look.
- Always wear a respirator and work in a ventilated space when spraying.
How to Blend Paint on Car with Spray Can: the Quick Decision Before You Start
Decide first whether blending is even the right move for your panel, because a spray-can repair that is not worth doing will cost you more time and material than a proper repaint.
| Your situation | What to do | Why |
|---|---|---|
| Small scratch or chip on one panel | Blend with spray can | Fast, cheap, and invisible if feathered well |
| Damage spans multiple panels or edges | Repaint the whole panel or seek a pro | Blending across body lines rarely hides the transition |
| Deep dent or rust under the paint | Fix the substrate first, then blend | Paint over rust or filler will fail early |
| You lack a dust-free space | Wait or book a booth | Contamination ruins the clear coat and blending |
| Clear coat is peeling or chalky | Repaint the panel | New paint will not bond to failing clear coat |
| You want a factory-match metallic | Test a spray-out card first | Metallics shift color with distance and pressure |
| Blend area is larger than a few inches | Reconsider a full panel repaint | Large blends need a buffer and steady technique |
Recommended for this job
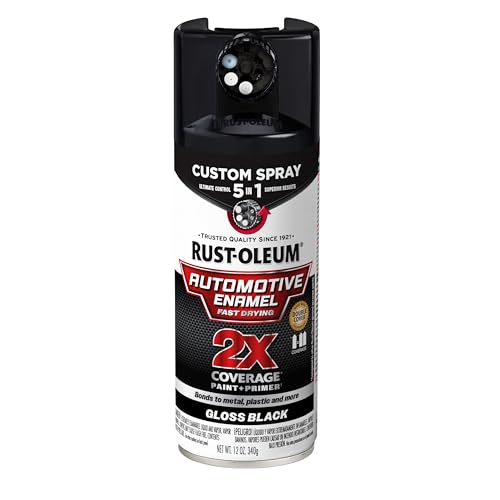
Rust-Oleum 2X Automotive Enamel 5-in-1 Spray
Adjustable spray dial lets you feather light coats for smoother color blending.

Rust-Oleum Painter's Touch 2X Ultra Cover
Clear topcoat spray blends edge transitions and unifies the repaired area.
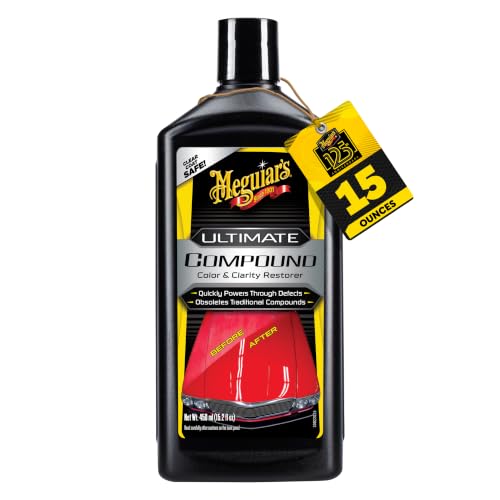
Meguiar's Ultimate Compound
Compound wet-sands and buffs spray can orange peel for seamless blending.
Start by asking one question: is the damage small enough that a blended edge will disappear into the surrounding car paint? If yes, a spray can saves you money and downtime. If no, stop and repaint the panel.
Is Blending Worth It on Your Panel, or Should You Repaint the Whole Thing?
Blending is worth it when the repair stays inside one panel and you can feather the new paint into an open area. Skip it if the damage crosses body lines or sits near an edge where the eye will catch the transition.
Blend vs. Repaint: a Simple Decision Rule
If your repair area is smaller than a few inches and the surrounding clear coat is intact, blend. If the clear coat is failing, the damage is deep, or you cannot control dust, repaint the whole panel or hand it to a pro.
What a Spray-Can Blend Can and Cannot Fix
A spray can blend fixes small scratches, chips, and scuffs on a single panel. It cannot fix rust, dents, peeling clear coat, or a color mismatch that needs a spray-out card test. When in doubt, consult a professional painter before you sand.
The 5-Minute Check: is Your Panel a Good Candidate for Blending?
Spend five minutes checking your panel before you shake a spray can. A bad candidate wastes paint, time, and patience.
Check the Damage Depth and Size
Hold a light at a low angle to judge depth. Measure any area wider than a credit card as too big for spray can repair. Press a fingernail in; if it catches firmly, you need primer and sandpaper before blending, not just color.
Check the Paint Type and Color Complexity
Find the factory paint code on the door jamb or under-hood sticker. Then confirm color complexity: tri-coat and pearl finishes are hard to blend with a spray can. Solid colors and metallics take feathering far better.
Check the Panel Edges and Adjacent Panels
Look for a clean break line at the panel edge, like a body line or trim gap. Feathering into a flat middle rarely hides. Inspect adjacent panels in daylight for fading, since aged paint won’t match fresh spray color without extra blending.
Check the Weather Window
Plan for 65 to 80°F, low humidity, and no rain for 24 hours. Cold or damp air ruins flash time and clear coat flow. Set up a wind-free spot with masking tape, tack cloth, and paint thinner for cleanup.
Masking tape is paper-backed tape used to cover trim, glass, and adjacent panels so overspray does not stick to them.
Run this five-minute diagnostic before you touch a spray can, because a bad candidate wastes paint, time, and your patience.
How Spray-Can Blending Actually Works
Why Feathering Hides the Repair Edge
Feathering fades new paint outward so the edge thins to nothing over several inches. A hard tape line leaves a visible ridge; a feathered edge lets light pass without catching a shadow. Work in thin passes, overlapping each by about half, and stop before the coat looks wet at the border, heavy paint builds a step you’ll sand for hours.
Where Blending Solvents Fit in
A blending solvent softens the old finish so fresh paint melts into it. Apply only to the feathered zone, never the whole panel, and keep it off trim and rubber. Timing matters more than quantity: most solvents need a few minutes of flash time before color. Rushing causes wrinkling, which means stripping the panel.
What Clear Coat Does to the Transition
Clear coat seals the repair and carries the gloss, so it must span the entire feathered area. Two or three light coats, each after proper flash time, give material to buff without cutting through. Once cured, wet sand with fine sandpaper, then buff with polishing compound. Keep the area ventilated and follow the spray can label and OSHA guidance for respiratory protection.
Polishing compound is a fine abrasive paste that buffs the cured clear coat to a smooth, glossy finish after wet sanding.
Before You Start: Tools, Materials and Safety Setup
Gathering Materials and Tools
Line up everything before you start: color-matched spray paint, primer, clear coat, 400-2000 grit sandpaper, masking tape, tack cloth, paint thinner, buffer, and polishing compound.
Respiratory Protection and Fire Hazards in Enclosed Spaces
Aerosol paint is flammable and its mist harmful, spray outdoors or in a forced-air booth, never a closed garage. Wear an organic vapor respirator, keep away from pilot lights and water heaters, and follow OSHA and EPA label guidance.
Practice on a Test Panel First
Spray a scrap panel to learn the can’s fan pattern, distance, and flash time before risking your car. Two or three coats show how thin color lays down and how quickly it tacks.
Preparing the Surface: Cleaning and Sanding
Paint bonds only to a clean, dull surface: wash, wipe with paint thinner, sand the repair zone and feathered edges with 400-800 grit, then wipe with a tack cloth before priming.
Masking off Adjacent Areas
Tape trim, glass, and panel gaps to block overspray. Use tape with a soft paper edge and pull it back within the flash time so the blending edge stays soft, not a hard ridge.
- Gather all supplies first: matched spray can paint, primer, clear coat, 400 to 2000 grit sandpaper, masking tape, tack cloth, paint thinner, buffer and polishing compound, so you never pause mid-coat.
- Spray outdoors or in a ventilated booth: aerosol mist is flammable and harmful, so wear an organic vapor respirator and keep the can clear of pilot lights.
- Test on a scrap panel: practice your distance and speed to learn the can's fan pattern and flash time before touching the car.
- Clean and sand the repair area: wash, wipe with paint thinner, then sand and feather edges with 400 to 800 grit sandpaper.
- Wipe with a tack cloth: remove all sanding dust right before primer, since trapped grit ruins the finish.
- Mask adjacent panels and trim: use masking tape with a paper edge, then pull tape back during the flash time window for a soft blending edge.
Step-by-Step: Blending Your Spray-Can Repair
Apply Primer to the Repaired Area
Primer gives paint grip, so never skip it over filler or bare metal. Mask surrounding panels, then spray two thin coats, waiting the label’s flash time between them. Wipe with a tack cloth before moving on.
Match and Test Your Color
Find your paint code on a door jamb or hood sticker, but age shifts the shade. Buy the closest match and test on a hidden scrap panel in daylight first.
Spray the Base Coat in Light Passes
Hold the can 6 to 8 inches away and use steady overlapping strokes, building three to four thin coats with flash time between each. Stop while the color looks slightly translucent; clear coat will finish it.
Feather the Edges with a Blending Solvent
Spray blending solvent lightly just beyond the repair, keeping the can moving, to soften the transition. Work in shade so solvents don’t flash too fast.
Apply Clear Coat Over the Blend Zone
Spray two to three medium coats over the repair and one inch past the feathered edge, respecting flash time. After curing a day or more, level with 1500 to 2000 grit sandpaper, then buff with polishing compound.
Follow these steps in order, and resist the urge to rush the flash time between them.
Finishing Path: Wet Sanding, Polishing and Buffing to Blend
Wet Sanding and Polishing
Wet sanding knocks down the texture so the repair sits level with the factory finish. Soak 1500 grit sandpaper in water with a drop of dish soap, then sand the area evenly. Check your progress under bright light every few passes.
Buffing to Blend
A buffer smooths the transition, but only if you keep it moving. Apply polishing compound to a foam pad and work in overlapping passes on low speed. Stop immediately if the clear coat looks thin.
Respecting Curing and Drying Times
Fresh car paint needs time before you touch it with abrasives. Wait 24 to 48 hours after the final clear coat before sanding or buffing. Skip washing and waxing for 30 days so solvents fully escape.
Once your spray can coats have flashed off, the finishing path turns rough overspray into a seamless repair.
Caring for the Blend After It Cures
First Wash and Wax Timing
Wait at least 30 days before washing, and 60 to 90 days before waxing, so the fresh clear coat can fully cure. Cool, humid weather stretches those ranges; warm, dry conditions shorten them.
Rinse with plain water first to lift loose grit, then wash gently with a pH-neutral car soap and a soft mitt. Skip pressure washers aimed at the repair edge, since they can lift a soft edge.
Maintaining the Repair Over Time
Inspect the blended area every few months for dulling, peeling, or a visible edge. A light pass with polishing compound on a soft pad restores gloss and keeps the transition invisible.
- Wax or seal the panel two to three times a year to protect the clear coat.
- Touch up chips early with a small amount of matching car paint before moisture creeps under the edge.
- Avoid harsh degreasers and paint thinner near the repair, which can soften fresh coatings.
Store leftover spray can paint upright and capped, and note the cure date so future touch-ups match.
Cost: DIY Spray-Can Blending vs. Professional Repair
A spot repair with spray cans usually costs far less than a body shop blend, but the gap shrinks once you add primer, clear coat, and the risk of a visible halo. Here are typical ranges with stated conditions so you can judge the trade-off.
| Option | Upfront cost | Ongoing cost | Notes |
|---|---|---|---|
| Spray can paint and primer | $20 to $60 | None | Color-matched cans plus primer for small panels |
| Sandpaper, tack cloth, masking tape | $10 to $25 | None | Assumes you already own basic hand tools |
| Clear coat and polishing compound | $15 to $40 | None | Aerosol clear and a fine compound for buffing |
| Buffer pad or rental | $0 to $30 | None | Only if you do not own a buffer |
| Professional blend and repaint | $300 to $800 | None | One panel, minor damage, single-stage or base/clear |
| Professional full panel repaint | $600 to $1,500 | None | Larger area or metallic three-stage paint |
| DIY mistake correction | $50 to $200 | None | Respray materials after poor feathering or runs |
Ranges assume a small repair area (under 12 inches), US pricing for consumer materials, and one panel. Professional figures assume minor damage with no bodywork. Metallic and three-stage paints cost more and are harder to blend invisibly.
A spot repair with spray cans usually costs far less than a body shop blend, but the gap shrinks once you add primer, clear coat, and the risk of a visible halo.
Typical DIY Material Costs
Expect $45 to $155 for color-matched spray can, primer, clear coat, sandpaper, masking tape, tack cloth, and polishing compound. That range assumes a small repair area and that you already own a buffer.
Typical Professional Blend and Repaint Ranges
A shop blend on one panel typically runs $300 to $800; a full panel repaint runs $600 to $1,500. Metallic and three-stage paints sit at the high end because feathering and color matching take more time.
When DIY Blending is Not Worth the Savings
Skip the spray can if the damage spans multiple panels, the paint is metallic or pearlescent, or you lack a dust-free space. A poor blend can cost $50 to $200 in materials to correct, erasing the savings.
Quick Checklist Before You Spray
Surface, Masking and Color Match Confirmed
Wash the panel, then wipe it with a tack cloth so dust does not land in wet paint. Test your color on a scrap card and compare it in daylight before you commit.
Safety Gear and Ventilation Ready
A respirator rated for organic vapors and eye protection are non-negotiable with spray can work. Spray outdoors or in a garage with the door open, and keep the area clear of ignition sources.
Weather and Cure Time Planned
Spray when the panel and air sit between roughly 60 and 80 degrees Fahrenheit, and skip windy or humid days. Humidity slows the flash time between coats and can dull the clear coat.
- Materials gathered: primer, sandpaper in several grits, masking tape, tack cloth, paint thinner, buffer and polishing compound.
- Masking done: tape off adjacent panels, trim and glass, leaving a soft edge where feathering will happen.
- Safety set: respirator, gloves and eye protection on before the first spray can is shaken.
- Forecast checked: temperature and humidity in range, with a dry, dust-free place to let coats cure.
Troubleshooting a Blend That Went Wrong
Even careful work can go sideways. Match the symptom to the cause, correct it before the clear coat locks it in, and you will save hours of rework.
| Problem | Likely cause | Fix |
|---|---|---|
| Visible halo or hard edge | Feathering skipped or too narrow | Wet-sand the edge with fine sandpaper, then re-feather |
| Color mismatch after curing | Wrong color code or too few coats | Confirm the code, apply additional coats after flash time |
| Orange peel or dry spray | Can held too far or moved too fast | Sand smooth with fine sandpaper, recoat closer and slower |
| Blushing or hazy clear coat | Moisture trapped under clear coat | Let it dry, sand lightly, recoat in drier conditions |
| Paint lifts at masking tape | Tape removed before paint set | Score the edge with a blade, remove tape sooner |
| Runs or sags on the panel | Heavy coats applied too close | Let it cure, sand flat, apply thinner coats |
Start with feathering the edges, then check your tools. A buffer or polishing compound hides minor texture, but it will not fix a hard edge. Wipe the panel with a tack cloth before every coat.
Visible Halo or Hard Edge
A halo means the edge was not feathered wide enough. Wet-sand with fine sandpaper and re-feather the transition.
Color Mismatch After Curing
Color often shifts after curing. Verify the code and add coats after flash time.
Orange Peel or Dry Spray
Distance and speed cause texture. Sand smooth, then recoat closer and slower.
Blushing or Hazy Clear Coat
Moisture causes blushing. Sand lightly and recoat in drier conditions.
Use blending solvents sparingly, and avoid these common mistakes: skipping primer, rushing flash time, and removing masking tape too soon.
Common Mistakes That Ruin a Spray-Can Blend
Over-Spraying the Base Coat
Lay it on too heavy and you get runs, plus a hard edge that never feathers out. Keep each pass light and let flash time do the work between coats.
Skipping the Test Panel
Always spray a scrap panel first to check color match and your technique. It saves you from wrecking a whole car panel over a five dollar piece of metal.
Blending in the Wrong Temperature
Cold or humid air slows flash time and traps solvent, so the blend looks dull or blushes. Work between roughly 65 and 80 degrees Fahrenheit and out of direct sun.
Rushing the Clear Coat
Clear coat needs proper flash time before you buff, or it stays soft and hazy. Wait the full window, then polish with a buffer and polishing compound for a clean edge.
- Over-spraying the base coat: heavy passes cause runs and hard edges that resist feathering, so keep coats light and respect flash time.
- Skipping the test panel: spray a scrap panel first to confirm color match and your distance and speed before touching the car.
- Blending in the wrong temperature: cold or humid conditions slow flash time and can trap solvent, so work in roughly 65 to 80 degrees Fahrenheit and out of direct sun.
- Rushing the clear coat: applying clear before the base flashes leaves it soft and hazy, so wait the full window before buffing.
- Ignoring masking tape and tack cloth: tape off adjacent panels and wipe dust with a tack cloth so debris does not land in wet paint.
- Skipping primer on bare spots: primer is a preparatory coating, and bare metal or filler needs it before car paint for adhesion and an even blend.
- Sanding too coarse: use fine sandpaper and keep it wet to smooth the transition zone without scratching the surrounding finish.
When to Hand It to a Pro (or Ask the Paint Counter)
Panel Size and Color Complexity Limits
Small repairs on flat, solid colors are realistic for a careful DIYer. Beyond a door or quarter panel, or with pearl or candy tones, ask the paint counter to mix an exact aerosol match. Bring your paint code and check it against a color chip in daylight before buying.
Tri-Coat and Metallic Colors
These need a controlled mid-coat and consistent overlap, hard to fake from a can. Ask the manufacturer’s technical line for the correct primer and clear coat pairing, or have a local pro spray the blend zone. Cost runs from a few hundred dollars for a spot repair up to a full panel repaint.
When a Full Repaint Makes More Sense
If damage spans multiple panels or the clear coat is failing, spot work won’t hold up. Get two or three shop quotes and compare them with your DIY material cost, typically $100 to $300. Ask for a blend-only quote first, since it’s usually cheaper than a full repaint.
When to ask for help:
- Ask the paint counter to mix an exact aerosol match when your repair covers more than a door or quarter panel, or when the finish is a pearl or candy tone.
- Call the manufacturer's technical line for the correct primer and clear coat pairing when you are working with a tri-coat or metallic color.
- Have a local pro spray the blend zone when you cannot keep consistent overlap on a metallic finish.
- Get two or three shop quotes and ask for a blend-only repair price before committing to a full repaint.
How to Blend Paint on Car with Spray Can: Frequently Asked Questions
?How to Blend Paint on Car with Spray Can Without It Looking Patchy?
You can blend paint on a car with a spray can without a patchy look by controlling overlap and keeping coats thin. Patchiness usually comes from heavy wet coats and hard masking lines. Use masking tape to create a soft edge, then feather the new paint into the old by widening your spray pattern with each pass. Keep proper flash time between coats and stop before the paint looks glossy wet.
?How to Blend Paint on Car with Spray Can Safely Around Trim and Glass?
Mask everything you are not painting, and double-layer the edges near glass and rubber. Spray can mist travels farther than you think, so cover a wider area than the repair itself. Work outdoors or in a ventilated space, wear a respirator rated for organic vapors, and keep the can away from heat and open flame.
?What Grit Sandpaper Should I Use Before Spray Can Blending on Car Paint?
Start around 800 to 1000 grit to dull and level the repair area, then finish finer near the blend zone. Sandpaper is an abrasive material used for smoothing softer materials, so let the grit do the work instead of pressing hard. Wipe with a tack cloth after sanding so dust does not get trapped under the primer or color.
?Does Spray Can Blending Need Primer and Clear Coat to Hold up?
Yes, primer and clear coat are not optional if you want the repair to last. Primer is a preparatory coating put on materials before painting, and it gives the color something to grip. Clear coat seals the color and lets you wet sand and polish the blend zone without cutting through the paint.
?How to Blend Paint on Car with Spray Can When the Color Match Looks off?
Test the color on a hidden spot first, and expect a slight mismatch with any spray can. Blend across a panel break or body line rather than in the middle of a flat surface, so the eye has a natural place to stop. If the shade is clearly wrong, stop and have the paint counter mix a closer match.
?Why Does My Spray Can Car Paint Blend Fail After Polishing?
Usually because the clear coat was too thin or you polished before it fully cured. Give the clear coat proper dry time, then wet sand lightly and use polishing compound with light pressure on a buffer, which is a device for smoothing and shining the surface. Rushing this step burns edges and exposes the color underneath.
?When Should I Skip Spray Can Blending and Let a Pro Paint the Car?
Skip it when the damage crosses multiple panels, the paint is a tri-coat or pearl, or the panel is a large vertical surface. Those situations punish beginners. A pro can match and blend car paint with spray equipment and a booth, which gives a better result than a spray can on big or complex repairs.
Conclusion
Feathering light coats over a wider area, then clear coat and polish, is the whole game. Skip the prep and the blend shows; rush the flash time and the coats lift. Work in a ventilated space, wear a respirator, and keep paint thinner and a tack cloth handy for clean edges. If the existing car paint is failing or the color is off, stop and rethink before you spray.
Your next step: test the color on a scrap panel first. Spray a few light coats, let them flash, then compare under daylight. That five-minute check saves you a repaint.