

Acrylic paint pouring is a captivating art form that involves pouring acrylic paint onto a surface and manipulating it to create stunning abstract designs.
However, the drying process can be time-consuming, especially for thicker pours. Fortunately, strategic airflow can be your ally in expediting this process. This blog post will explore the ins and outs of using a fan to speed up the drying of acrylic pour paintings.
Understanding Acrylic Pour Painting
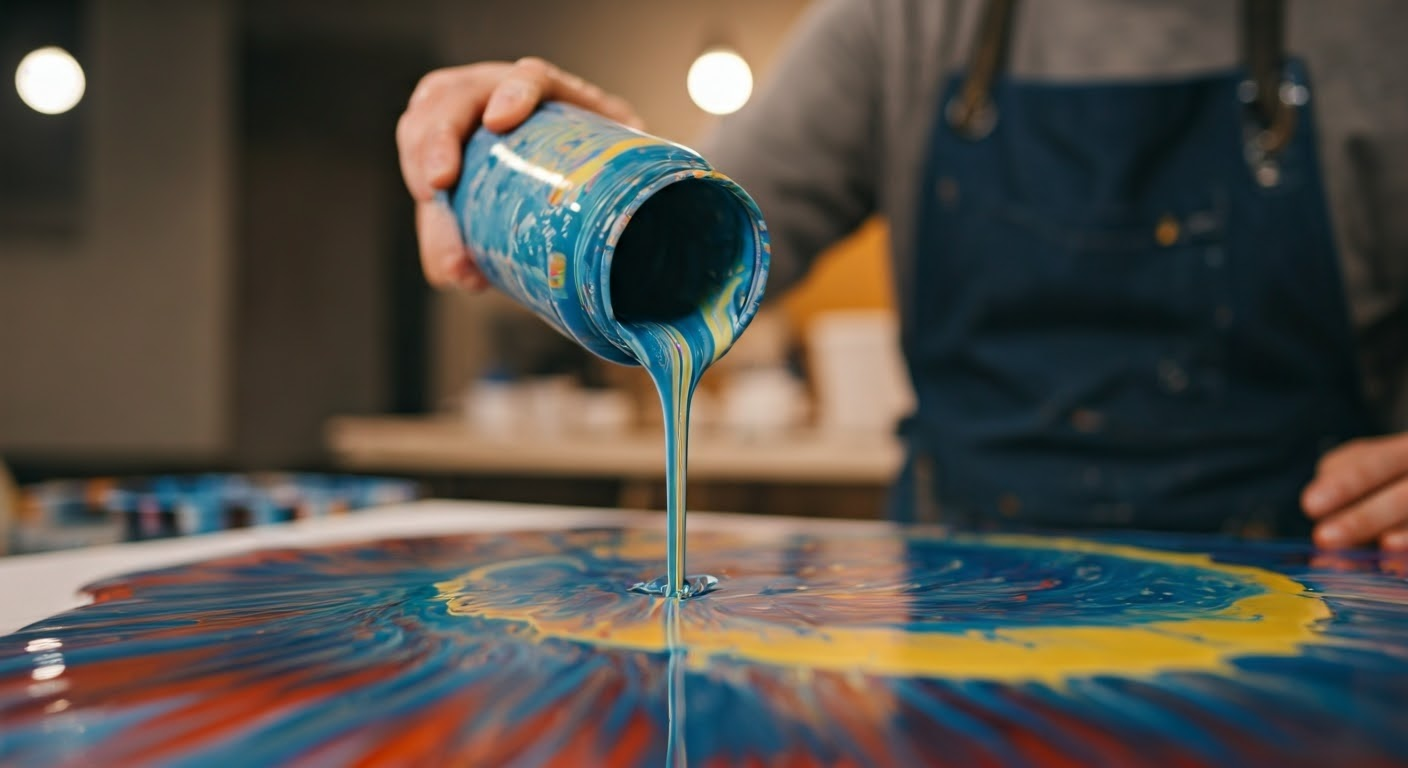
Acrylic pour painting, also known as fluid art, is a mesmerizing painting technique that has gained significant traction in recent years. As the name suggests, this captivating art form involves pouring acrylic paint, often mixed with a pouring medium, onto a canvas or other suitable surface to create breathtaking abstract compositions.
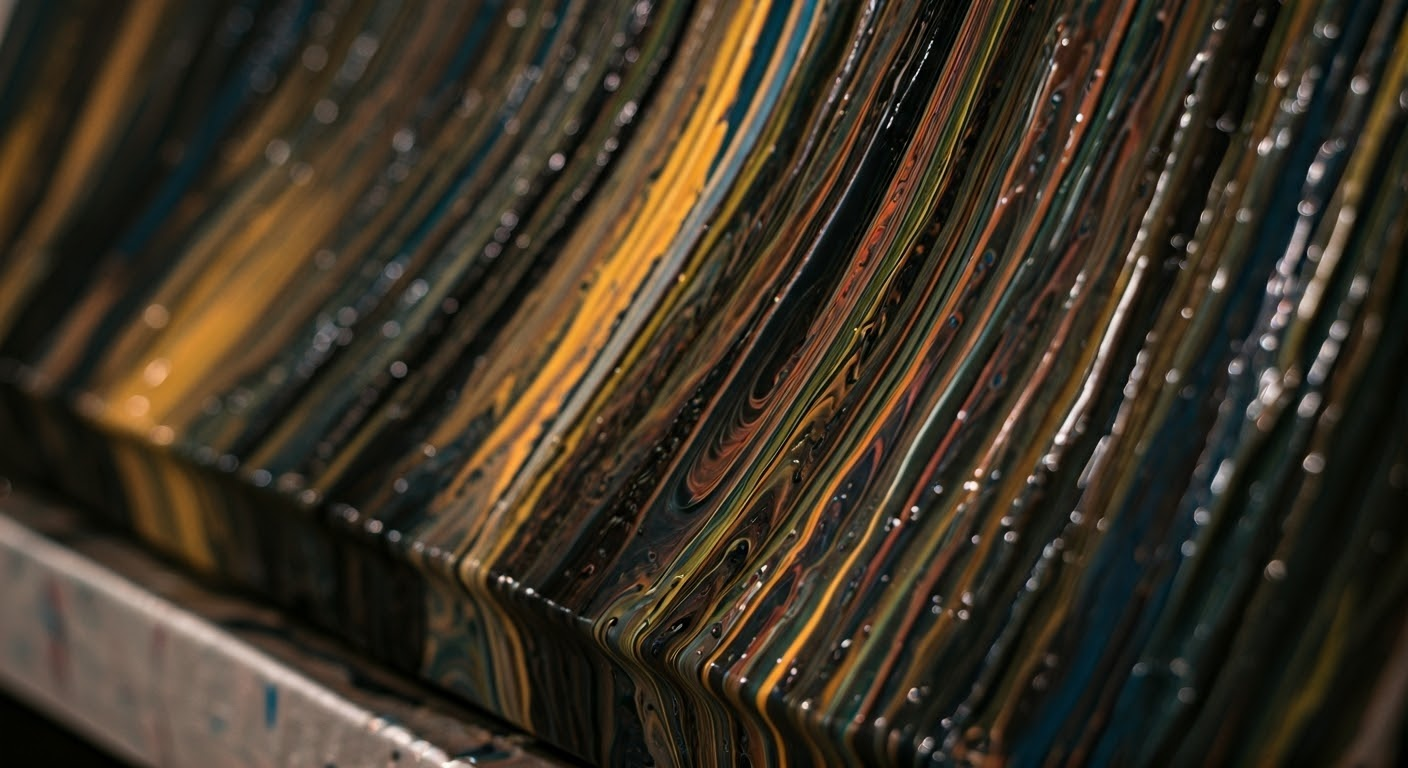
The beauty of acrylic pouring lies in its unpredictability. As the colors blend and flow together, they create organic patterns and unique textures that are impossible to replicate with traditional painting methods. The allure of acrylic pouring extends beyond its visual appeal – it’s an incredibly satisfying and therapeutic process.
The Basics of Acrylic Pouring
To create an acrylic pour painting, artists typically mix acrylic paint with a pouring medium and water to achieve the desired consistency. The pouring medium helps to improve the flow and spreadability of the paint, while water thins it out for smoother blending. Finding the perfect consistency is key to a successful pour.
The beauty of acrylic pouring is that there are no strict rules when it comes to the type of paint or the amount of water you use. Artists are encouraged to experiment with different ratios and techniques to achieve unique and personalized effects.
Once the paint mixture is ready, it’s time for the pouring! Artists can pour the paint directly onto the canvas or use various techniques like layering, tilting, or blowing to create stunning patterns and textures.
Materials Needed for Acrylic Pouring
Before you embark on your acrylic pouring adventure, you’ll need to gather some essential materials. Here’s a list to get you started:
- Acrylic Paint: Choose a variety of your favorite colors. You can opt for pre-mixed pouring acrylics or use regular acrylic paints mixed with a pouring medium.
- Pouring Medium: This magical ingredient helps to thin the acrylic paint, improve its flow, and enhance its gloss. Popular pouring mediums include PVA glue, Floetrol, and Liquitex Pouring Medium.
- Canvas: You can use stretched canvases, canvas boards, or even wood panels for your pouring creations. Prime your surface beforehand for optimal paint adhesion.
- Silicone Oil: A few drops of silicone oil added to your paint mixtures can create mesmerizing cells, adding an extra layer of intrigue to your artwork.
In addition to the essentials listed above, you may also find these items handy:
- Plastic cups for mixing your paints
- Wooden craft sticks for stirring
- A level surface for your canvas
- Gloves to protect your hands
Preparing Your Workspace for Drying
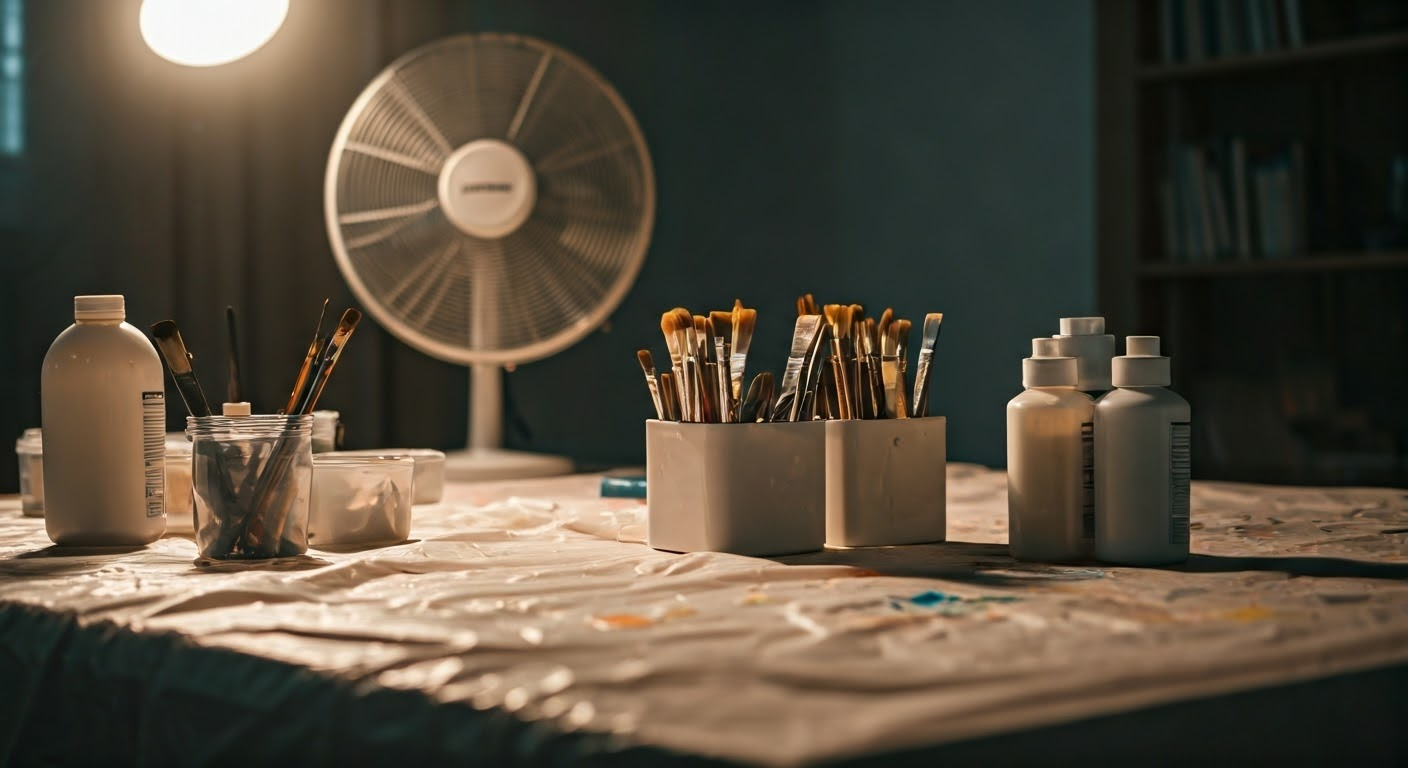
Before you start pouring, it’s crucial to prepare a dedicated drying space for your masterpieces. Acrylic pour paintings, especially those with thicker layers of paint, require ample time to cure thoroughly. A well-ventilated area is paramount to facilitate proper drying and prevent any potential issues.
Ensure your chosen drying spot is clean, dust-free, and level to allow your paintings to dry evenly. Avoid placing them in direct sunlight or near heat sources, as this can cause the paint to dry too quickly and potentially crack.
Ideal Conditions for Drying Acrylic Paint
Humidity and good air circulation are critical factors that influence the drying time of acrylic paint. High humidity levels create a moisture-laden environment, impeding the evaporation of water from the paint film. This can significantly prolong the drying process and even lead to problems like mold growth on the surface.
Ideally, aim for a relative humidity level between 40% and 50% in your drying area for optimal results. Maintain this humidity range by utilizando a dehumidifier if necessary.
Along with humidity control, facilitating good air circulation in your workspace is equally important. Good air circulation encourages the continuous movement of air, replacing moisture-saturated air with drier air. This accelerates the evaporation process, leading to faster drying times.
Setting Up Your Space for Quick Drying
Now that you recognize the importance of good airflow, let’s explore how to optimize your workspace for quick drying. One of the simplest yet effective methods involves strategic window and door positioning. If possible, open windows and doors on opposite sides of your room to create a natural cross-breeze. This will promote a constant flow of fresh air, helping to whisk away excess moisture as your paintings dry.
In addition to natural ventilation, consider incorporating fans into your drying setup. Ceiling fans, floor fans, or even small desk fans can be instrumental in creating a gentle yet consistent airflow throughout the room.
Experiment with fan placement to find the sweet spot that maximizes air circulation without directing a strong blast directly onto your wet paintings. Remember, the goal is to promote gradual and even drying.
Techniques to Accelerate Drying Times
While patience is key when it comes to drying acrylic pour paintings, there are a few tried-and-true techniques you can employ to accelerate the process. One popular method involves harnessing the power of airflow. By introducing a gentle and consistent stream of air over the surface of your paintings, you can significantly expedite the evaporation of water from the paint film.
This not only reduces overall drying times but also helps to prevent potential issues like cracking, crazing, or mold growth that can occur in stagnant air conditions.
The Role of Airflow in Drying Acrylic Paints
To truly grasp the significance of airflow in the drying of acrylic paints, it’s essential to understand the underlying science. Acrylic paints, essentially water-based pigments suspended in an acrylic polymer emulsion, dry through a process called evaporation.
When acrylic paint is applied to a surface, the water within the paint film begins to evaporate, leaving behind a solid layer of pigment and binder. The rate at which this evaporation occurs is directly influenced by factors like temperature, humidity, and most importantly, airflow.
Airflow plays a pivotal role in replenishing the air immediately surrounding the painting’s surface. As moist air, saturated with evaporated water molecules from the paint, is replaced with drier air, the drying process accelerates exponentially.
Tips for Using Fans to Speed Up Drying
It’s important to exercise caution when using fans for drying acrylic pour paintings. Excessive or improperly directed airflow can dislodge wet paint, creating unwanted textures or even blowing dust and debris onto your masterpiece.
When using a fan, always opt for the lowest setting and position it at a safe distance from your paintings. A distance of 4 to 6 feet is generally recommended.
Additionally, avoid oscillating fans as the constant change in airflow direction can lead to uneven drying. If using a hair dryer, set it to the cool setting and keep it at a safe distance to prevent heat damage to the delicate paint layers.
Common Challenges in Drying Acrylic Pour Paintings
Despite your best efforts, certain challenges may arise during the drying process of acrylic pour paintings. Understanding how to mitigate these potential issues can be the key to preserving the integrity and beauty of your artwork. From unsightly cracks and crazing to extended drying times, it’s best to be prepared for the unexpected.
By familiarizing yourself with these common challenges and their solutions, you can approach the drying phase with confidence, ensuring your acrylic pour creations turn out exactly as envisioned.
Avoiding Cracks and Crazing
Cracks and crazing are common issues encountered during the drying of acrylic pour paintings, often appearing as fine lines or fissures on the surface. Crazing, characterized by a network of fine cracks, typically occurs when the top layer of paint dries much faster than the underlying layers, creating tension within the paint film.
Excessive heat, low humidity, and applying too much paint in a single layer are some factors that can contribute to cracking and crazing. To minimize the risk, maintain a consistent temperature and moderate humidity level in your drying area.
Additionally, apply thin, even layers of paint, allowing each layer ample drying time before proceeding to the next. Patience is key to preventing these unsightly imperfections.
Managing Thickness and Drying Times
The thickness of your acrylic pour painting plays a significant role in determining its drying time. Thicker pours, often containing more layers or a higher volume of paint, inevitably take significantly longer to dry compared to their thinner counterparts. This is because the drying process of acrylic paints relies on the evaporation of water from the paint film, and thicker layers naturally have more moisture to release.
To estimate drying times accurately, consider factors like the type of acrylic paint used, the pouring medium, ambient temperature, and humidity levels. As a general guideline, thin pours may dry to the touch within a few hours, while thicker pours can take several days or even weeks to cure completely.
Monitoring the drying process closely is crucial, especially for thicker paintings. Use your fingertips to gently test the surface for tackiness or moisture.
Alternative Methods to Expedite Drying
Besides harnessing airflow, other alternative methods can assist in expediting the drying process of your acrylic pour paintings. These methods can be particularly useful for thicker pours or when environmental conditions like high humidity hinder natural drying.
However, it’s crucial to exercise caution when using these methods as excessive heat or rapid drying can negatively impact the final appearance of your artwork. Always prioritize the well-being of your masterpiece and err on the side of caution.
The Use of Heat Guns and Hair Dryers
Heat guns and hair dryers can be helpful tools for drying acrylic pour paintings quickly, especially when working on smaller pieces or needing to accelerate specific areas. However, it’s vital to use these tools cautiously to avoid damaging the delicate paint layers.
If opting for a heat gun, choose a low heat setting and maintain a safe distance from the painting’s surface, typically around 12 inches, to prevent overheating or scorching. Keep the heat gun moving continuously to distribute the heat evenly and prevent hot spots.
Similarly, when using a hair dryer, opt for the cool setting and hold the dryer at a safe distance, around 6 to 8 inches, to avoid blowing wet paint or creating ripples. Exercise patience and avoid rushing the process, as gradual drying yields better results.
When to Use Dehumidifiers
Dehumidifiers are particularly beneficial in areas with high humidity, where excess moisture in the air can significantly hinder the drying time of acrylic pour paintings. By reducing the moisture content in the air, dehumidifiers create a more favorable environment for the evaporation of water from the paint film.
When using a dehumidifier, it’s essential to maintain a safe distance from your paintings as the constant flow of dry air can cause the paint to dry too quickly, potentially leading to cracks. Place the dehumidifier in the same room as your drying paintings, ensuring adequate air circulation.
Monitor the humidity levels regularly and aim for a relative humidity range of 40% to 50% for optimal results. Adjust the dehumidifier settings accordingly to maintain a consistent humidity level throughout the drying process.
Protecting Your Artwork During the Drying Process
Protecting your artwork during the drying process is just as crucial as the creative process itself. Once you’ve poured your heart into creating a beautiful acrylic pour painting, the last thing you want is dust, pet hair, or accidental smudges to mar its surface.
Taking a few precautionary measures can help safeguard your drying masterpieces, ensuring they reach their full glory. By implementing these protective measures, you’re allowing your artwork to dry undisturbed, free from external elements that could compromise its pristine finish.
Covering and Isolating Your Work
Covering your acrylic pour paintings while they dry is crucial to protecting them from dust, debris, and accidental bumps. Use a clean, dry, and breathable material like a sheet, tablecloth, or drop cloth to create a protective barrier.
Avoid using plastic sheeting or airtight containers for covering as they can trap moisture, inhibiting proper drying and potentially promoting mold growth. When draping the covering material, ensure it doesn’t come into direct contact with the wet paint surface.
Elevate the covering slightly using supports like cups or blocks to prevent sticking and allow for air circulation. Creating an isolated drying space for your artwork further safeguards them from accidental contact.
Monitoring Humidity and Temperature
Monitoring both humidity and temperature is essential for creating an optimal drying environment for your precious acrylic pour paintings. Extreme fluctuations in either factor can disrupt the drying process, leading to issues like cracking, crazing, or uneven drying.
Investing in a hygrometer to monitor humidity levels and a thermometer to track temperature is highly recommended. Aim for a relative humidity level between 40% and 50%, adjusting as needed with a humidifier or dehumidifier.
|
Factor |
Ideal Range |
|
Temperature |
65-75°F (18-24°C) |
|
Humidity |
40-50% |
Maintaining a stable temperature within this range ensures consistent drying without excessive evaporation or prolonged curing times. Extreme temperature variations can cause the paint to dry too quickly, leading to surface imperfections.
Conclusion
In summary, using a fan for quick drying of acrylic pour paintings can be a convenient method when done correctly. Understanding the basics of acrylic pouring, ideal drying conditions, and techniques to accelerate drying times are crucial for successful results. By managing challenges like cracks and thickness, and exploring alternative methods such as heat guns or dehumidifiers, you can protect your artwork during the drying process. Remember to monitor humidity and temperature while drying. Experiment with different approaches to find what works best for your acrylic pour paintings. Enjoy the creative process and embrace the possibilities of acrylic pouring art.
Frequently Asked Questions
Can I use any fan for drying acrylic pour paintings?
While any fan can contribute to airflow, it’s best to choose one that provides a gentle and consistent breeze. Avoid fans with strong or oscillating airflow as they can disturb the wet paint surface. Opting for a fan that allows for speed adjustments is ideal for controlling the intensity of the airflow.
How long should I leave the fan on for drying?
There’s no fixed duration for fan usage during drying. The drying process depends on various factors like paint thickness, humidity, and temperature. It’s best to monitor your painting’s progress and continue using the fan until the surface is dry to the touch.
Is it better to use a fan or a hair dryer?
Generally, a fan on a low setting is gentler and safer than a hair dryer for drying acrylic pour paintings. Excessive heat from a hair dryer or a heat gun can cause the paint to dry unevenly or even bubble. If using a hair dryer, opt for the cool setting and keep a safe distance.
How can I tell when my acrylic pour painting is completely dry?
Acrylic paint pouring drying times vary depending on factors like thickness and humidity. Your painting is likely dry to the touch within a few hours to a day, but complete drying can take up to several weeks. It’s best to gently test for tackiness in an inconspicuous area before varnishing or framing.