
Key Highlights
- Paint wash is a creative technique blending parts water and part paint to achieve a raw wood effect while preserving wood grain.
- Use this tutorial to ensure the wash technique enhances the character of bare wood and softens color variations across the surface.
- Stripping the old finish and sanding to raw wood is essential for better absorption and smoother results.
- Opt for water-based paints like acrylic, mineral paint, or chalk paint for a translucent finish.
- Following precise ratios like 3:1 or 1:6 ensures control over the finish for desired transparency and effect.
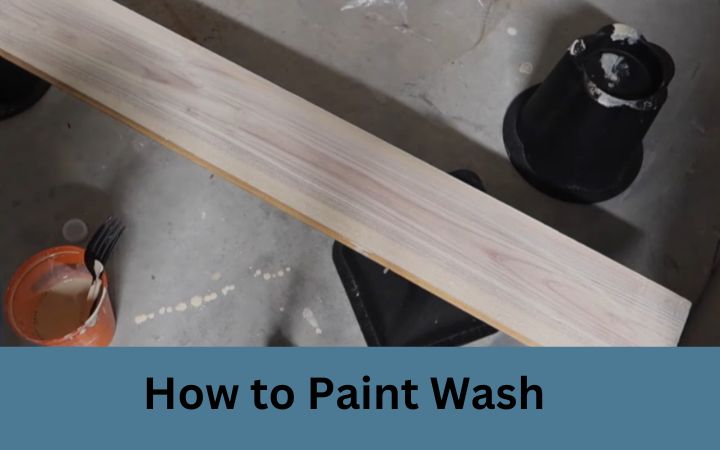
Have you ever noticed the gentle beauty of raw wood, but felt that painting over it with solid colors is just too much? That is where the paint wash method can help.
It is an easy way to give wood a soft, see-through color, so the look and feel of the wood still stand out. In this tutorial, you will find every step you need to follow to get a clean paint wash effect.
It starts with how to get the surface ready and ends with the final details. You can use this method for many projects, like a family chest of drawers or a big picture frame. With this paint wash approach, you can turn almost any item into something beautiful.
Required Tools
| Preview | Product | |
|---|---|---|

|
SKIL Corded Multi-Function Detail Sander with... | Check Price |
|
Pro Grade Paint Brushes, 5-Piece Paint Brush Set: Flat... | Check Price |

|
Bates- Paint Brushes, 6 Pack, Treated Wood Handle,... | Check Price |

|
Acrylic Paint Set, 24 Colors (2 oz/Bottle) with 12 Art... | Check Price |
the Paint Wash Technique
The paint wash technique is a good way to give your furniture a new look. It is easy to do and lets you keep the natural wood grain. Unlike other ways of painting, this style uses watered-down paint.
You do not cover the whole piece, but let it show some wood underneath. This creates a mix of color and see-through areas. The method works well if you want to update the whole piece or just a small part that needs a new shade.
Both beginners and people who have done many do-it-yourself projects can use the paint wash. It feels good to learn this skill. With the right mix of water and paint, you get the look you want. The result is a faded color that still shows off the raw wood and keeps the piece looking fresh.
What Is Paint Washing?
Paint washing is when you mix parts water and part paint to make a thin, see-through layer over surfaces like bare wood. This wash technique is good when you want a soft look that does not hide the natural wood. You can play with how much color you use and still keep the grain and lines in the wood.
To get a smoother look and have it dry quicker, use water-based paints like acrylic. This way, you get more control. You can add more water or paint to change how see-through it will be. This gives you the ability to fine-tune how the finished piece will look.
You can use paint washing on many projects, from giving old furniture a new life to creating wood accents. If you want a natural, raw wood look, or maybe just a soft touch of color, the wash technique can help make your wood look good while still being practical. This method offers both style and use again and again.
Benefits of Using a Paint Wash on Furniture and Surfaces
Using a paint wash is a great way to change up furniture and wooden surfaces. This technique is simple to do, and it comes with a lot of good points:
- Gives that nice raw wood look while still letting you see the natural grain.
- Be a less costly way to bring back an old finish instead of having to strip it all down.
- Helps to even out any mixed wood tones and can tame colors you do not like, such as red or orange.
- Water-based paints, like mineral paint, make it safe and better for the environment to use.
- Has the stain look but you can have more choice over what color you want.
This way is good to use in DIY projects. You can quickly give your wood furniture a new, classic style with little work. Once you see all the things you can do, you may want to try more techniques, too.
Essential Tools and Materials for Paint Washing
To do a perfect paint wash, you need some simple tools. You can find these online or at stores near you. Here’s what you need to get:
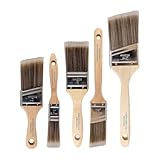
Start off by using a sander. This tool helps you take the wood down to its natural surface. Then, make sure to have a paintbrush, a rag that does not leave lint, and a few containers for mixing your paint. Choose good, water-based paints, like acrylic or mineral paint, to help you get smooth and even color.
If you want to save time, Amazon sells the things you need, like containers and brushes, at a good price. Their links can be a quick way to get all your supplies. When you have the right items, you will find it easy to put the paint on and get a nice, even finish every time.
Choosing the Right Paint and Supplies
Choosing the right supplies is key if you want to get the best results with your paint wash. Try to use water-based options like mineral paint or chalk paint. These make it easy to blend, so you can get a smooth and simple look every time. Here’s a clear table for you:
|
Paint Type |
Advantages |
|---|---|
|
Chalk Paint |
Matte finish, great for a rustic look |
|
Mineral Paint |
Lasts long, has natural colors, and gives many options |
|
Fusion Acrylic |
Blends well and has strong, bright color |
It’s a good idea to get extra items too, like wax, a sealer, and a few more containers so you can mix things easily. When you use these extras, your finish will last longer, and you won’t have to do as much work again later. These tips help both new and experienced people who want to try this paint method.
Preparing Your Workspace and Surface
Good preparation is key to a good paint wash. First, set up all your needed tools in a clean, open space where air can move well.
Here are the steps to get the surface ready:
- Use a sander or a stripping liquid to take off any old finish.
- Make sure spots like raw wood are clean and dry before you put on paint.
- Use a paintbrush and a damp rag to clean off dust so the paint goes on even.
When you get your space ready the right way, you help stop problems like areas soaking up more paint than others. This makes the final look much smoother all over.
Step-by-Step Guide: How to Paint Wash Effectively
Turning any wooden surface into a nice finished look can be done when you follow these step-by-step instructions. The paint wash process is a great way to make raw wood look even better while still keeping its natural look.
Start with cleaning and getting the area ready. Next, mix your paint wash solution at the right ratio. Then, work slowly, moving along the wood grain. This tutorial also shows how to add last touches and how to dry the wood so it looks even and smooth at the end. Let’s go through each step one by one so you get the best outcome.
Step 1: Clean and Prep the Surface
Getting the surface ready is the first and most important part of this job. Start by taking off the old finish with a sander. Sand it gently until you see the raw wood.
After you sand, use a rag to wipe away dust and other bits. This helps make sure the wood is dry and ready for the next step. For hard-to-reach spots or crevices, use a paintbrush and a damp cloth for touch-ups.
Having a clean, raw surface helps the wood soak up the product. It also keeps the pain-washing from looking uneven.
Step 2: Mix Your Paint Wash Solution
Getting the right mix is the key to the wash technique. Start by mixing parts water with part paint. You can try ratios like 3:1 or 1:6. What you pick depends on how see-through you want it to be.
- 3:1 means you get a bold look with lots of contrast. This is best if you want strong finishes.
- 1:6 gives you a softer look. It makes the paint more clear and gives you that classic raw wood look.
- 1:10 keeps it very soft. This adds just a hint of color which is good for a gentle touch.
Put both the water and paint into a cup or another small container. Mix it well, using something like a popsicle stick. You should use warm water. It is better because it mixes with both acrylic and mineral paint more easily.
Step 3: Apply the Paint Wash Evenly
This is where the paint wash technique really does its best work. To start, use a paintbrush to put the paint wash on the wood. Go in long, even strokes. Do small sections at a time, not the whole piece, so the paint does not dry too soon.
Use another dry paintbrush to brush out any excess paint. This helps get rid of lines from the brush for a smooth look. Be sure to adjust how hard you use your brush, and change your strokes when you get to edges or curves. When you use the paint wash with care, you will get a surface that looks even and lets the natural wood show through.
Step 4: Wipe Back and Adjust the Finish
One of the most important parts in using a paint wash is what you do after the paint is on. Take a lint-free rag and gently wipe back the excess paint with the grain. If you let the paint stay longer before wiping, the color will get richer.
How hard you wipe makes a difference in how the raw wood looks. You can make the hue lighter or darker this way. If you work a bit more on the edges or corners, you add character but still keep that bare wood feel.
Step 5: Allow to Dry and Add Finishing Touches
Let the paint-covered surface fully dry before you seal it. After it dries, use a sealer or wax to help protect how it looks. There are products like Fusion Mineral Paint and Polyvine Varnish that make it last longer.
Share what you make on sites like Instagram. You can also sign up for our newsletter to get helpful tips. The piece you create is more than just useful. It’s also a clear show of your creativity.
Conclusion
To sum it up, learning the paint wash technique gives you many ways to make your furniture and surfaces look new. When you know how to pick the right materials, use the wash technique, and finish your work well, you can get great results that make any room look better. Be sure to take your time at every step, since how you get ready and use the paint wash is important. If you want to get better at painting and need some help, you can get a free talk with our team. Try out the paint wash way, and you will see your work come to life.
Frequently Asked Questions
Can I paint wash over finished wood or previously painted furniture?
Yes, but the surface must be able to take in the paint wash. You need to sand or strip the old finish so you get down to raw wood. If you do not prepare it well with a sander, the paint wash may streak. It might also sit in an uneven way on acrylic or other surfaces that are sealed.
What type of paint works best for a paint wash?
Water-based kinds, like mineral paint, chalk paint, and acrylic, are the best to use. They let you blend colors easily and can look a bit see-through on the wall. Fusion Paint gives good, strong colors. Chalk paint is good for getting a matte look with a bit of a rustic style.
How do I adjust the transparency of my paint wash?
You can control how clear the color is by changing the water-to-paint mix. If you want to keep it light, use more parts water. If you like strong color, use less water. Wipe off any excess paint to show some of the bare wood. If you want a darker look, leave the paint on for more time and use the wash technique.
Should I seal my paint-washed piece afterward?
Yes, you need to put on a final sealer or wax for protection. Products like Fusion Mineral Paint wax help keep the look of raw wood. They also help the piece last, even if it has an old finish. Always make sure it is fully dry before you use the wax or sealer.